What can we help you with?
Setting up WooCommerce pages – A Complete Guide
In this article, we take a look at how you can set up the pages on your WooCommerce store.
Introduction
When you want to create a WooCommerce store, you need to have specific pages on it. To do so, you need to use short-codes to set each page. The pages you set on your store, will be visible on the store page. And also you can see links from the home page pointing to these individual pages.
You can either create the pages, using the onboarding wizard at the time of installing WooCommerce, or you can manually add pages to the store from the dashboard.
WooCommerce Pages
Whenever you install WooCommerce, you are greeted by the setup Wizard. It guides through step-by-step methods to set up the store for you.
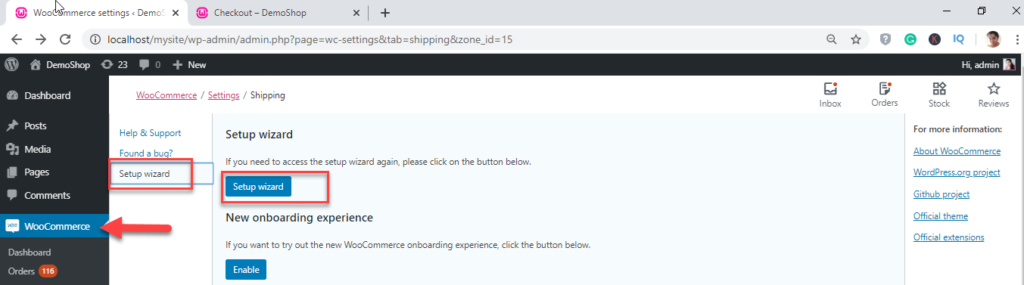
You can also opt for the set-up wizard by going to WooCommerce>>Help>>Set up Wizard.
Upon choosing this you get a WooCommerce setup wizard on the screen.
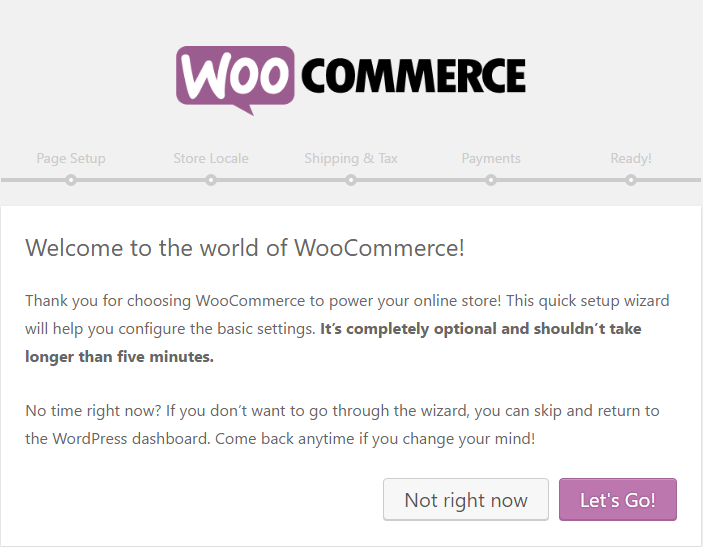
Choose “Let’s Go”. You can always skip this and set up your store manually.
Setting up the Page
As the wizard begins, you get the page setup.
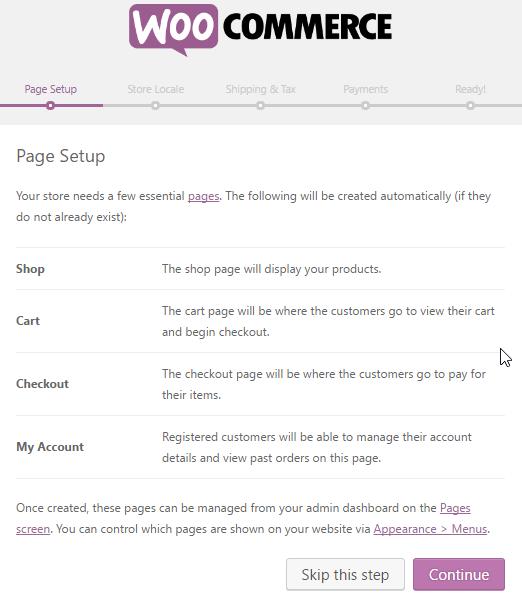
Basically it shows the important pages for your store, which is the Shop page, Cart page, Checkout Page, and My Account page. You can click on Continue to automatically set these pages in your store. You can choose which pages to appear on your front end, by going to Appearance > Menus.
Shop Locale
Setting up the address of your shop is equally important when you are setting up a store. Here in the next step, you can include the address, the currency, the unit for your product dimensions, etc.
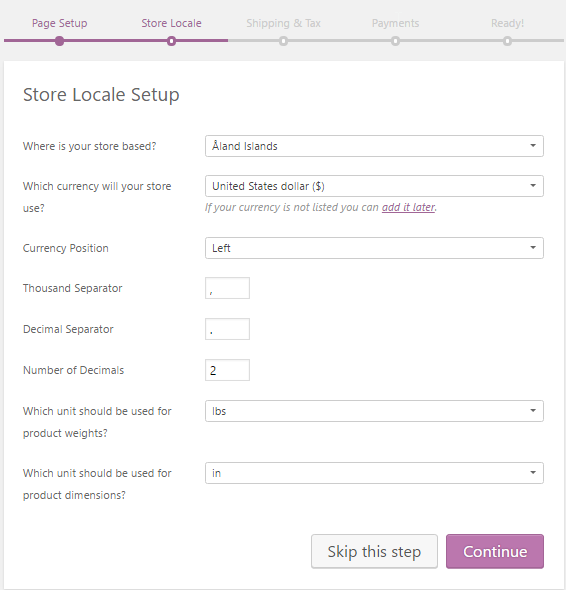
The Wizard does pick up the default location from your IP address, still you can choose to enter the data.
Shipping and Tax
An integral setting that is never to be missed is the shipping and tax configuration. You can also opt to do it later on your store , or do it in the wizard itself.
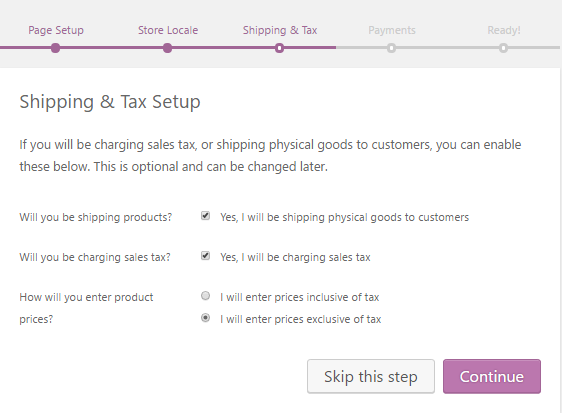
These settings are available in the WooCommerce general settings. You can choose whether you want to include tax in your product prices or not. You can set up the Tax on your WooCommerce store from the WooCommerce >> Tax settings
Payments
To successfully run a store, you need to be careful in including payment options. WooCommerce does have safe and secured payment gateway options.
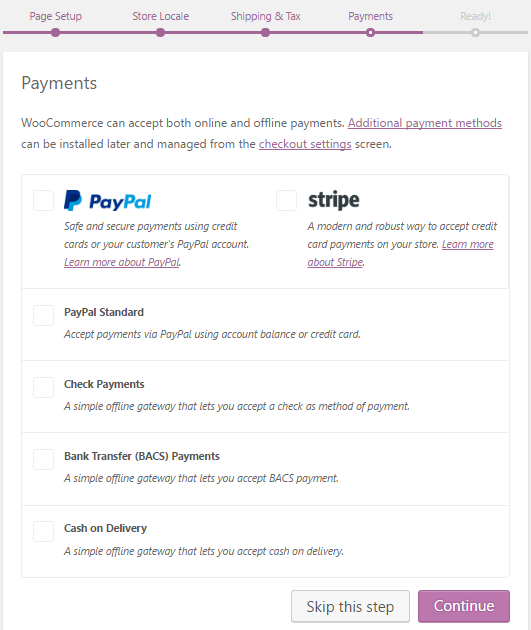
You can either choose any one of the options – PayPal powered by Braintree, Stripe, PayPal Standard. There are even offline options like Cash on Delivery, Bank Transfer Payments, and Check Payments. You can also install additional payment options like Authorize.net etc. if required.
Finally !! Store is Ready
Once you surpass these steps, you get your store ready.
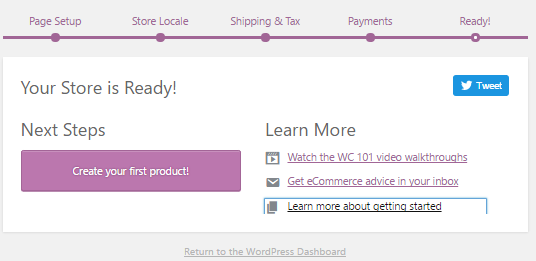
Now you can add your products to your store by going to Products>>Add New and set your store completely and start selling online. You can always rerun your Setup Wizard and set up again those skipped steps if you want to.
Setting up WooCommerce pages Manually
If you have your WooCommerce already installed and you want to set the pages manually then you can do it using the shortcodes without the help of the wizard.
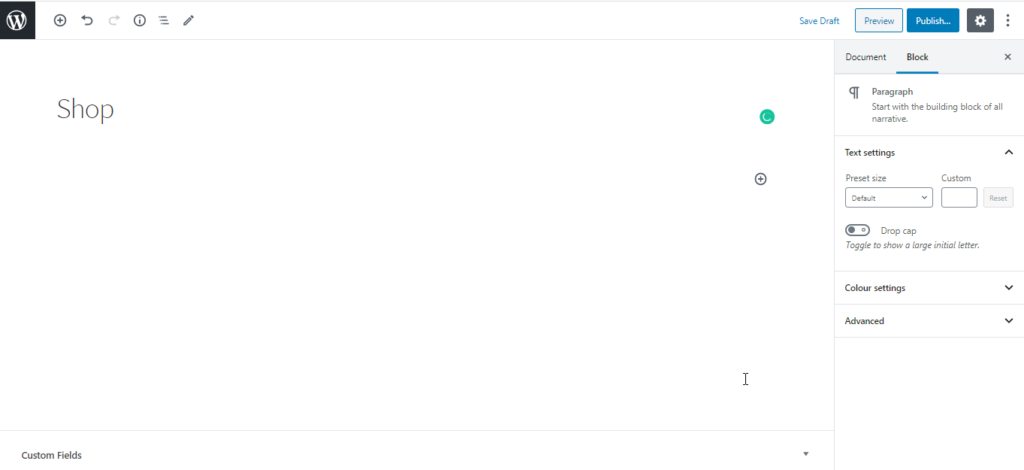
Shop Page
Just go to pages and add a new page. Give Page name as Shop.
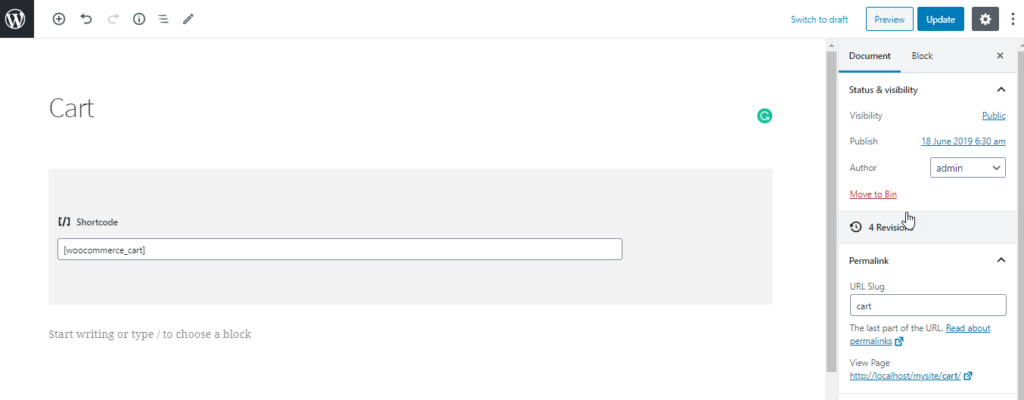
Cart Page
The cart page will show the products which are chosen by the customer. It reflects the cart contents. On clicking on the cart page, the customer is redirected to the cart page.
Here we use the shortcode"-[Woocommerce_cart]"
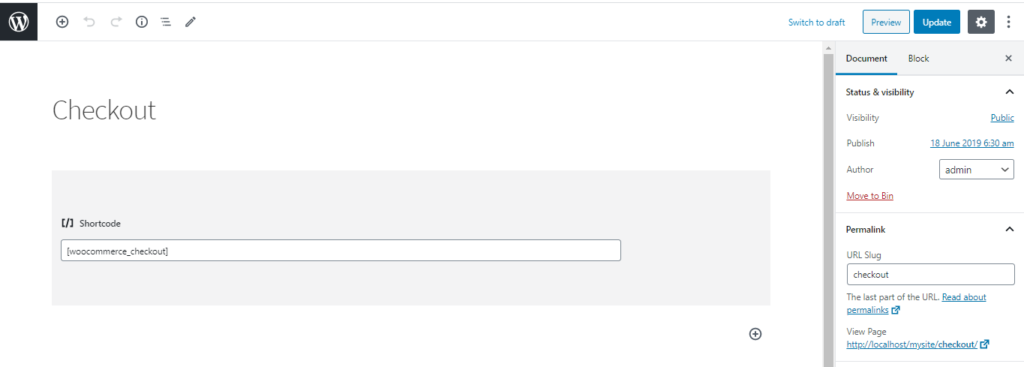
Checkout Page
Here on this page, we use the shortcode"-[Woocommerce_checkout]"
When the cart is ready, customers would want to check out from your store. Upon clicking the Checkout page, the customer is redirected to this page.
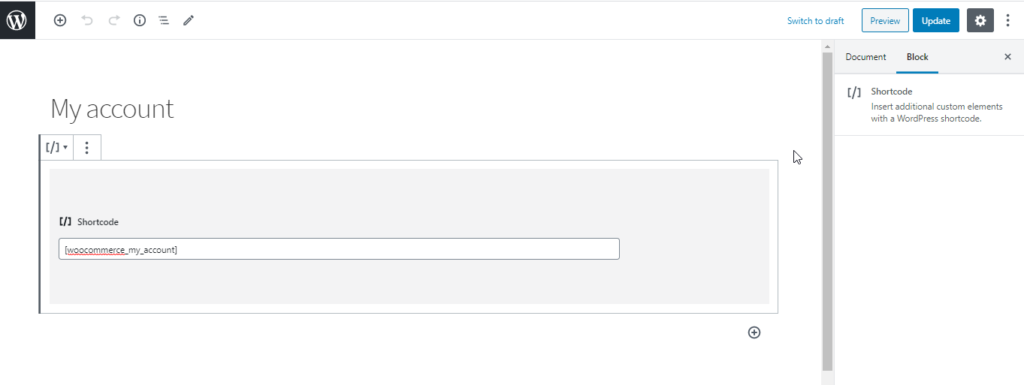
My Account Page
This page is used for displaying the information for your customers. The customer can log in and see the past orders as well as past transactions.
The shortcode used here is"-[Woocommerce_my_account] ".
Also if you are keen to add more pages you can always add more by going to Pages>> Add New.
Direct WooCommerce to Pages to Use
Not just creating the pages will help, you need to instruct WooCommerce to open specific pages upon specific selection. This is when you have not set up the pages using the Onboard wizard.
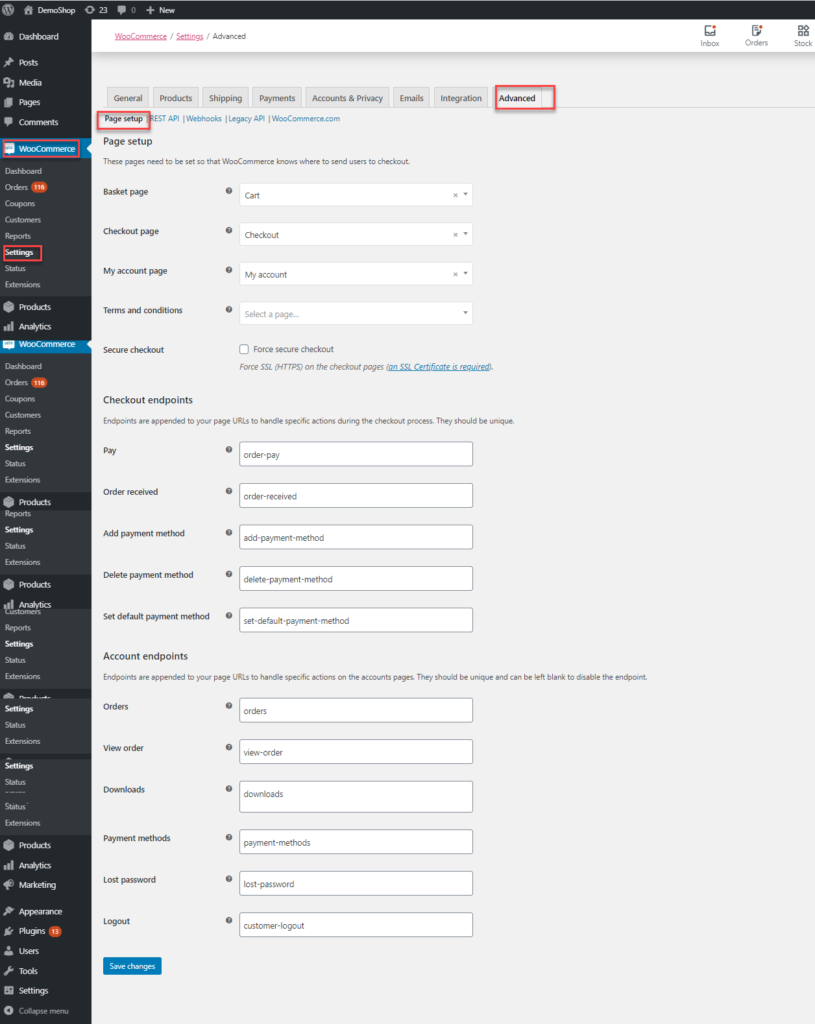
You can choose each corresponding option and set the same. Here you can set the Checkout, cart page, and the My accounts page.
To display the products, you can choose the Shop page.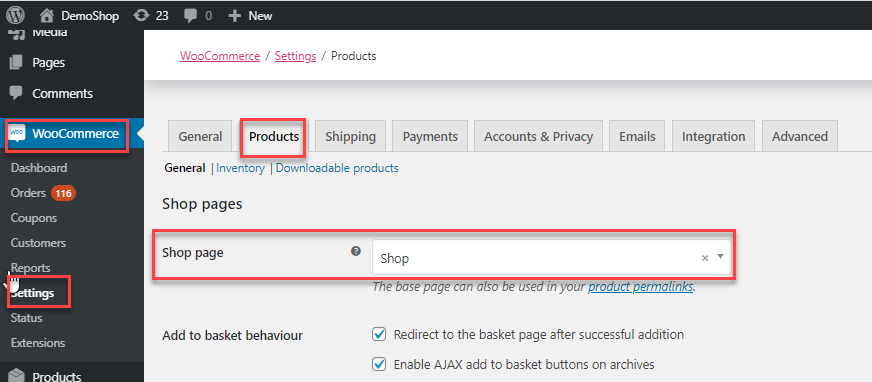
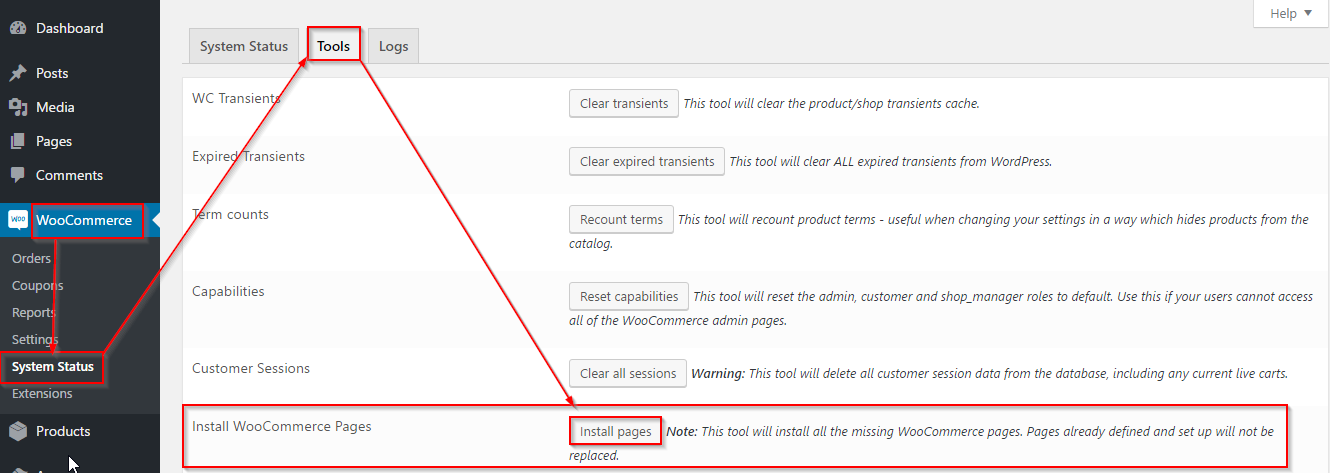
Reinstalling Pages
If you have not installed the WooCommerce pages, you can reinstall the WooCommerce pages again.
To Wrap Up
Following the above steps, you can successfully set up the pages on your WooCommerce store and start selling. If you need to look out for certain plugins to help you with the successful running of your store, you can check these plugins.
- ELEX WooCommerce DHL Express / Paket Shipping plugin
- ELEX WooCommerce USPS Shipping plugin
- ELEX WooCommerce Stamps.com USPS Shipping plugin
- ELEX WooCommerce Australia Post Shipping plugin
- ELEX EasyPost (UPS, USPS & FedEx) Shipping plugin
- ELEX Dynamic Pricing and Discounts Plugin for WooCommerce
- ELEX WooCommerce Catalog Mode, Wholesale & Role Based Pricing
- WSDesk – WordPress/WooCommerce Helpdesk Plugin
- ELEX Bulk Edit Products, Prices & Attributes for WooCommerce
- ELEX Authorize.net Payment Gateway for WooCommerce
- ELEX Amazon Payments Gateway for WooCommerce
- WSChat – ELEX WordPress Live Chat Plugin
- ELEX WooCommerce Google Shopping Plugin (Google Product Feed)