What can we help you with?
How to set up ELEX Authorize.net Payment Gateway for WooCommerce? (with Video)
This tutorial explains how to set up ELEX Authorize.net Payment Gateway for WooCommerce. Please refer to the product page to learn more about the plugin features.
Watch the complete setup video for quick understanding.
Overview
For WordPress sites, ELEX WooCommerce Authorize.net Payment Gateway Plugin allows the admin to accept credit card payments as well as eChecks through the Authorize.net payment gateway. This plugin facilitates to sell the products for which customers can make payments using credit cards (Master Card, Visa, American Express, JCB, and Diners Club), or eChecks without leaving the WordPress site.
From the Individual Order page, you can capture or refund the payment with a click. A refund can be partial or full as per the requirement. You can also see all the transaction details with Transaction ID under Order Notes. The plugin is also compatible with the WooCommerce Subscriptions plugin. Hence, providing ease of payment for your subscription products.
You can customize the text of the Order Button on the checkout page.
This tutorial will give you an excellent launch pad to kick-start the usage of Authorize.net Payment Gateway for WooCommerce. It will give you all the essential knowledge and step-by-step instructions.
Pre-requisites
- Login ID and Transaction Key of Authorize.net Account.
Getting started with ELEX WooCommerce Authorize.net Payment Gateway Plugin
Read an article to learn how to complete the checkout process on ELEX. You can also read how to download, install, and activate ELEX plugins.
After installing the plugin, you can navigate to the plugin in two ways as given below:
- Navigate to WordPress Admin Sidebar > Authorize.net > Settings.
- Navigate to Plugins > Installed Plugins > ELEX Authorize.net Payment Gateway for WooCommerce > Settings.
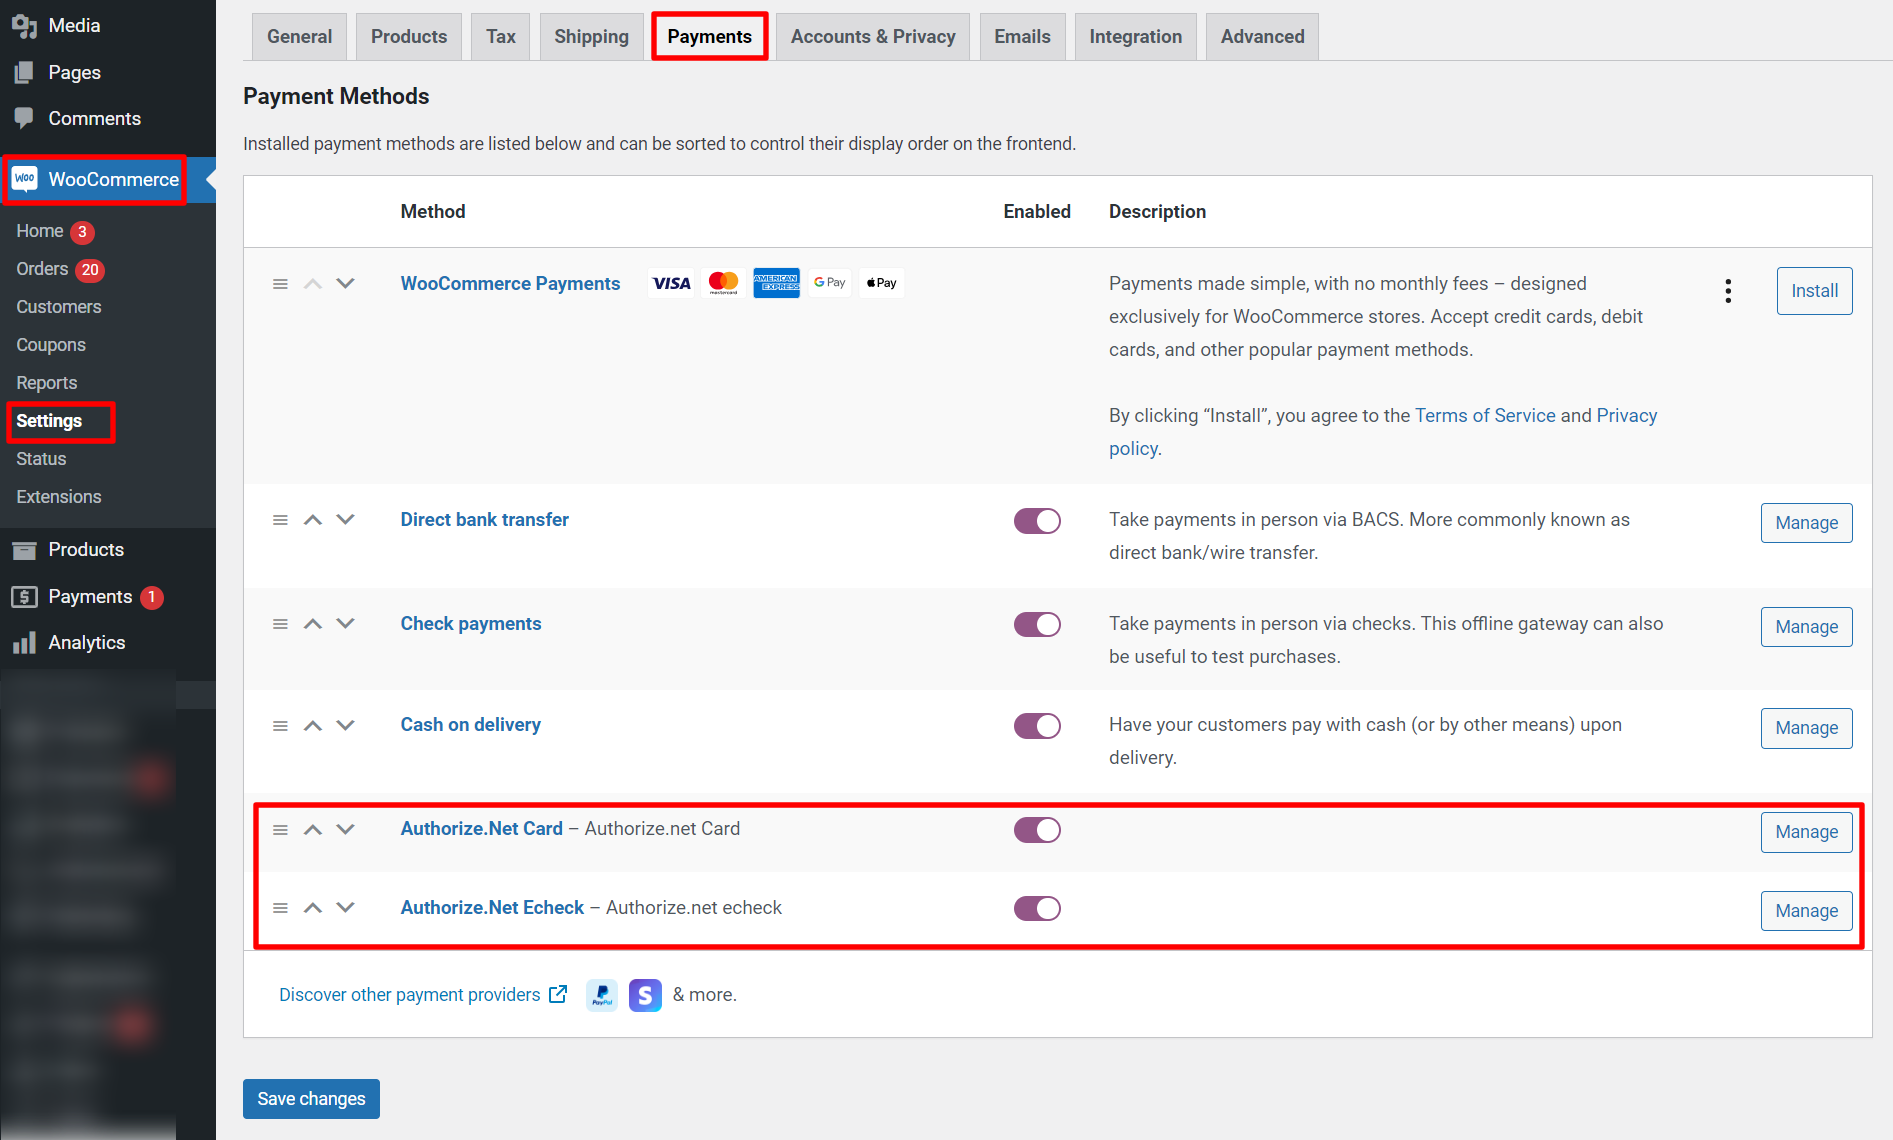
Before diving into the plugin settings, you need to enable the Authorize.Net Card and Echeck options as payment methods by navigating to the WordPress Dashboard > WooCommerce > Settings > Payments.
The plugin consists of two main sections – Settings and Dashboard. We will begin with the settings menu and start configuring the plugin. The plugin settings are divided into three tabs – API Key Setup, Payment Settings, and License Activation.
API Key Setup
To use the Authorize.net Payment Gateway for WooCommerce, you must have an Authorize.net account. You can create Live or Test API accounts. Authorize.net API Key Details settings are as shown below:
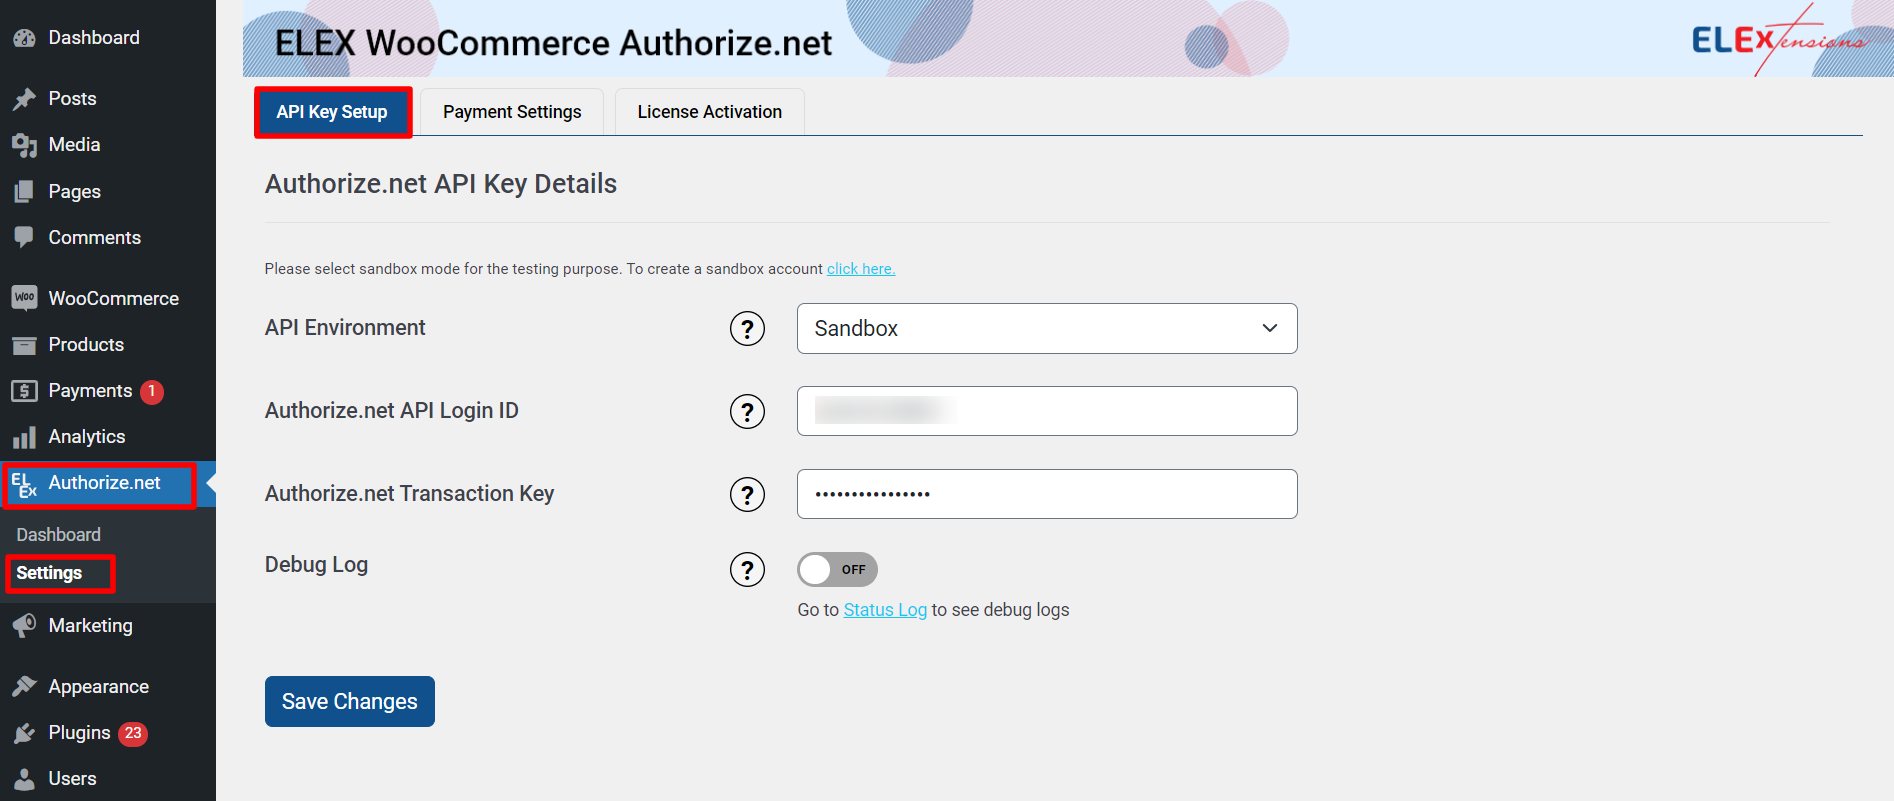
API Environment: Choose the environment for your API interactions. The options include “Live” for live transactions and “Sandbox” for testing. Be sure to select the appropriate environment based on your current needs.
Authorize.net API Login ID: Your API Login ID is a unique identifier provided by Authorize.net, the payment gateway provider. It’s required for securely connecting your website to the payment gateway. You can find this ID in your Authorize.net account settings.
Authorize.net Transaction Key: The Transaction Key, also provided by Authorize.net, is a confidential key used to authenticate and secure your payment transactions. Like the API Login ID, you’ll find this key in your Authorize.net account settings.
Debug Log: If you are not getting the payment options or facing any other issues, you can enable the debug log to find the error(s). You will be redirected to the Authorize.Net Card tab where can check the Status log using the link available on the tab for finding the errors.
Click Save Changes to save and update the plugin settings.
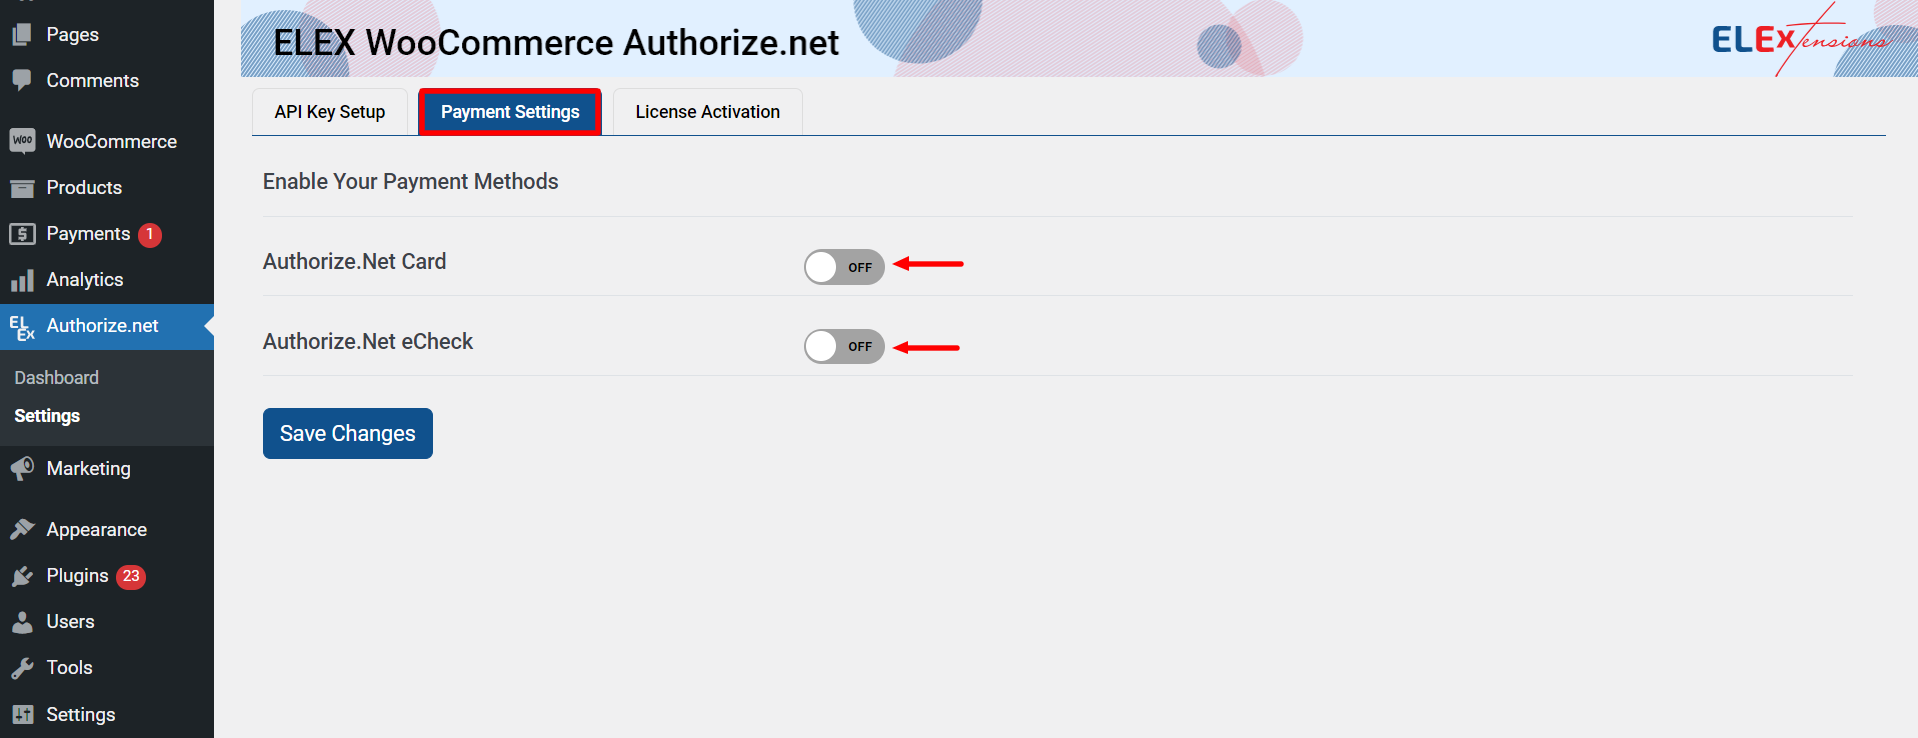
Payment Settings
The next tab under the plugin settings, Payment Settings enables you to enable and customize the Authorize.Net Cards and eCheck payment methods.
Authorize.Net Card
This section makes your website ready to use the Authorize.net payment gateway to accept credit/debit cards on your online store in a safe way.
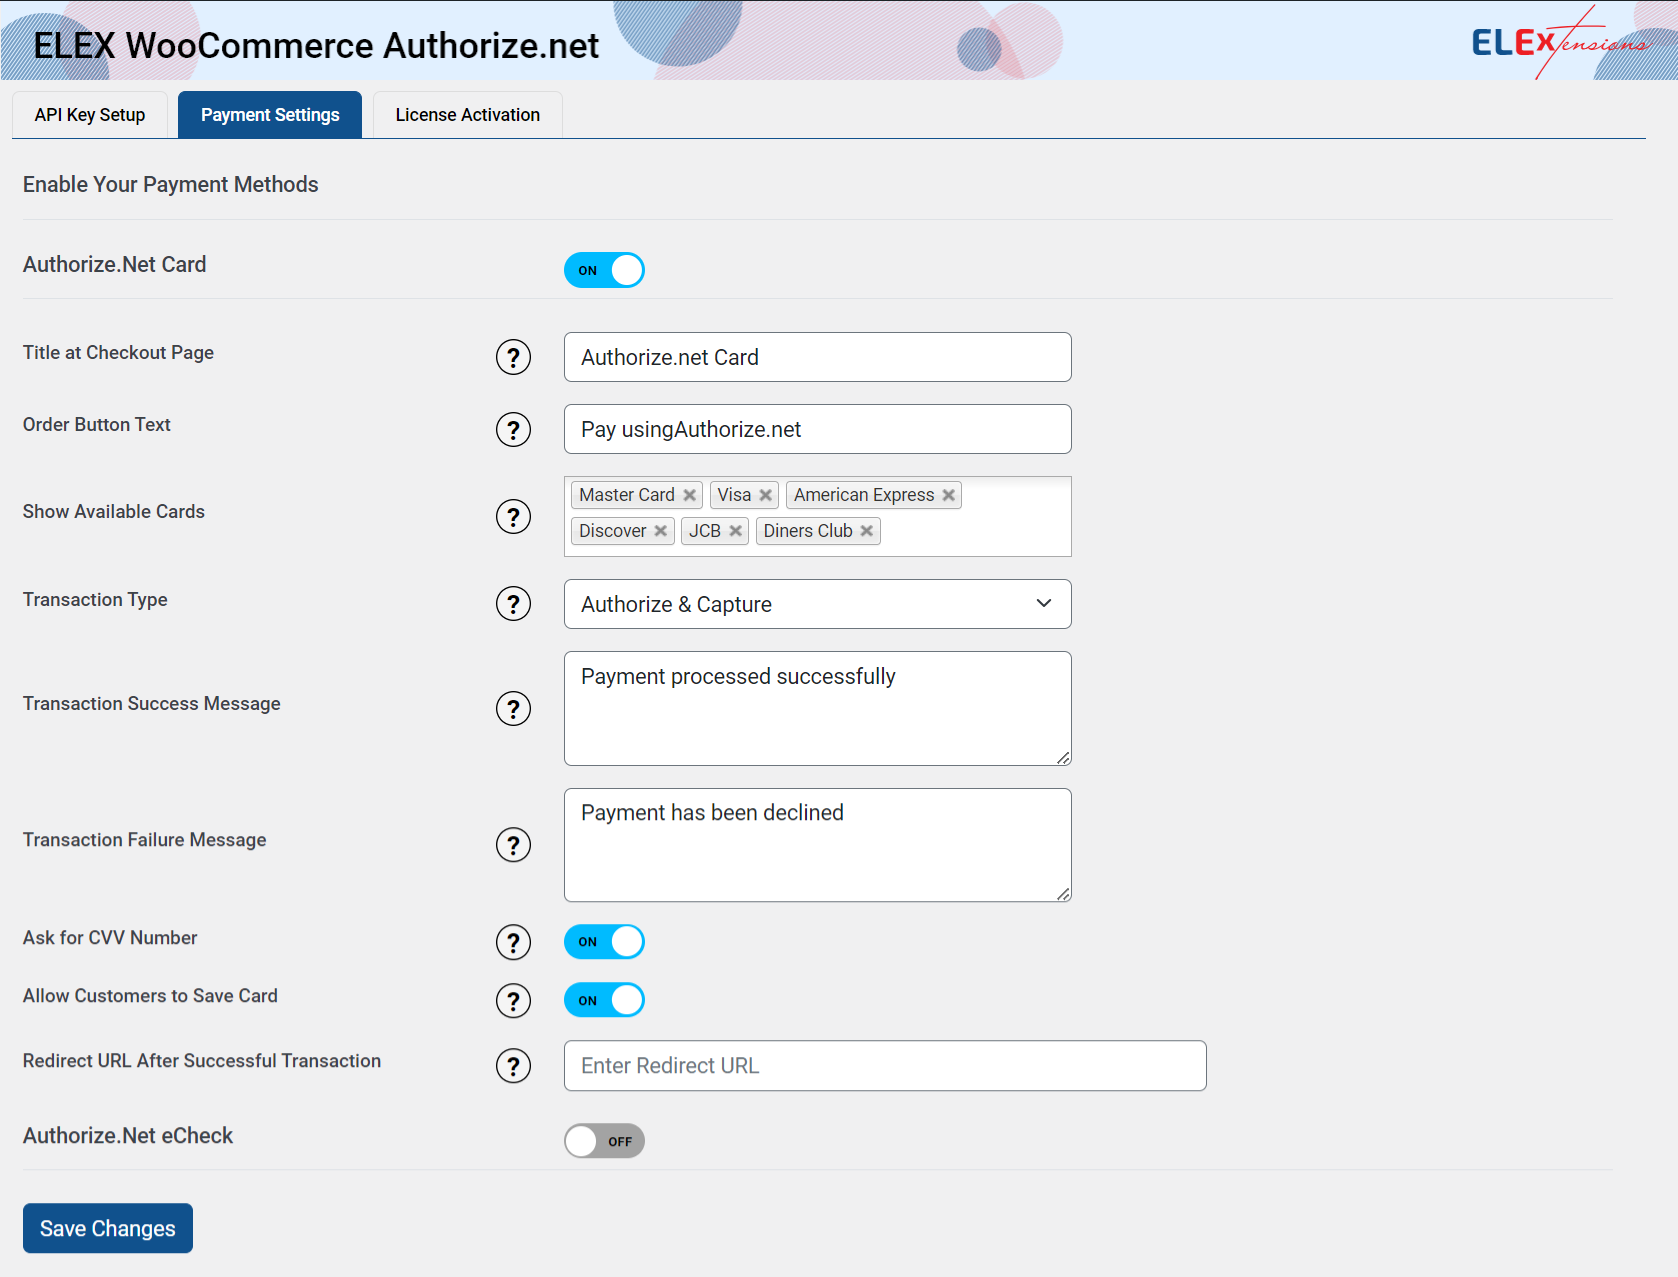
Title at Checkout Page: The custom title is visible on the Checkout page under the payment modes.

Order Button Text: Specify the required description in this text box. The Customer can see this description on the Checkout page under the Authorize.net payment method.
Show Available Cards: Select the desired cards from the multi-select box. The logo of the selected cards will be displayed on the checkout page. The available cards include Master Card, Visa, American Express, Discover, JCB, and Diners Club.
Transaction Type: Select the option to choose when to capture the payment available options are as given below:
- Authorize & Capture: This option allows the shop owner to get the payment immediately after the order is placed. Authorizing and Capturing the payment happens automatically.
- Authorize only: With this option, the shop owner needs to authorize charges and then capture the payment. The shop owner needs to navigate to the individual order page to capture the payment. Under the Order Action box, the Admin can capture the payment.
Please refer, to How to Capture and Refund Authorized Payment from the Order Page.
Transaction Success Message: Enter the message that will be displayed in Order Notes on successful transaction completion.
Transaction Failure Message: Enter the message that will be displayed in Order Notes on a failure of a transaction.
Ask for CVV Number: Card Verification Value on your credit card is a 3-digit number on VISA® and MasterCard® credit cards. On your American Express® branded credit card, it is a 4-digit numeric code.
Select the checkbox so that the customer must fill in the CVV number at checkout. This ensures that your transactions are processed securely.
Allow Customers to Save Card: Enable to give customers the option to save card information on your store. The registered customers can also view the card details in the Payment section on their account page. The plugin provides an option to delete the card details as well.
Redirect URL After Successful Transaction: Once the payment is successful with the Authorize.Net card, you can redirect the payment success page to a custom page, instead of redirecting to the WooCommerce default payment successful page. You can provide the URL for the same in this textbox option.
Authorize.Net eCheck
Enabling Authorize.Net eCheck makes your website ready to use the Authorize.net payment gateway to accept eCheck (accept and process payments from bank accounts directly through your website or the Authorize.Net Virtual Terminal) on your online store in a safe way. If you have chosen Authorize.net eCheck and clicked on the Manage button, you will be directed to the page to set up the details.
You can accept electronic checks in addition to credit cards, or choose only eCheck.
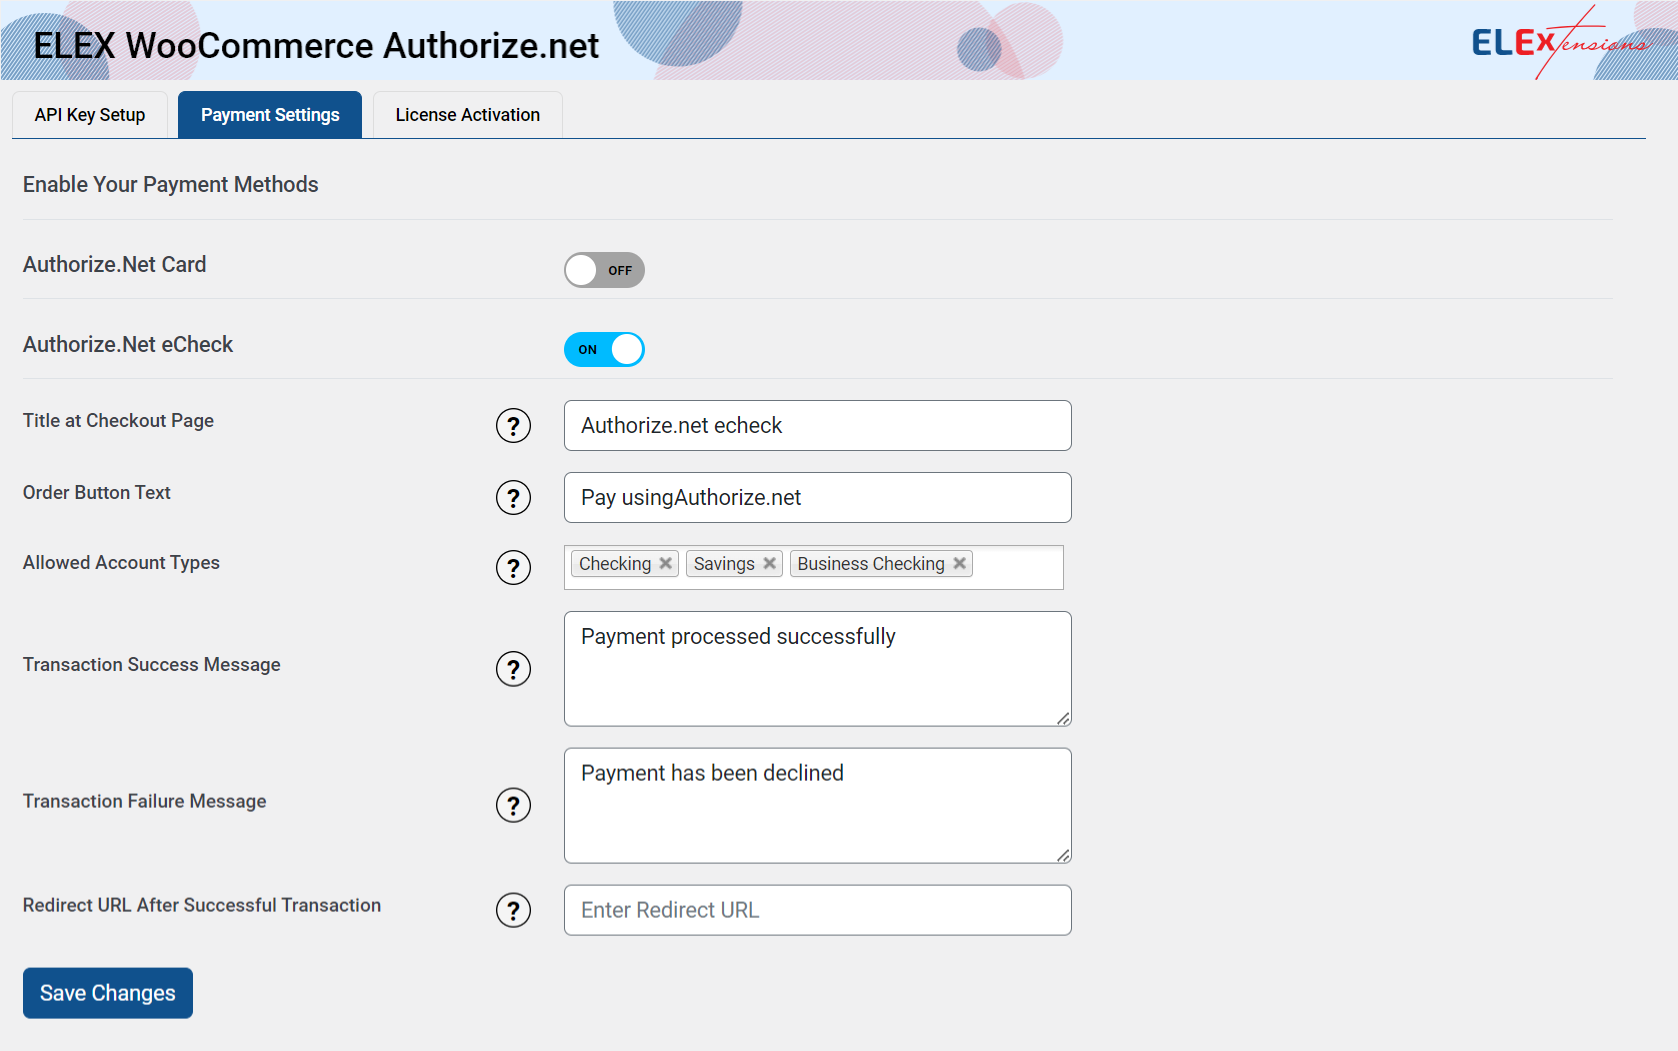
Title at Checkout Page: It is visible on the Checkout page under the payment modes. Specify the Title as required (defined by you).
Order Button Text: Specify the required description in this text box. The Customer can see this description on the Checkout page under the Authorize.net payment method.
Allowed Account Types: Select the account type to process for eCheck payment and available options are as given below:
- Checking: Allows eCheck payment through a current account.
- Business Checking: Allows eCheck payment through a business account used for business finance.
- Saving: Allows eCheck payment through a savings account.
Transaction Success Message: Enter the message that will be displayed in Order Notes on successful transaction completion.
Transaction Failure Message: Enter the message that will be displayed in Order Notes on a failure of a transaction.
Redirect URL After Successful Transaction: Once the payment is successful with Authorize.Net eCheck, you can redirect the payment success page to a custom page, instead of redirecting to the WooCommerce default payment successful page. You can provide the URL for the same in this textbox option.
Click Save Changes to update the plugin settings.
Checkout Demonstration
Checkout with Authorize.net Card
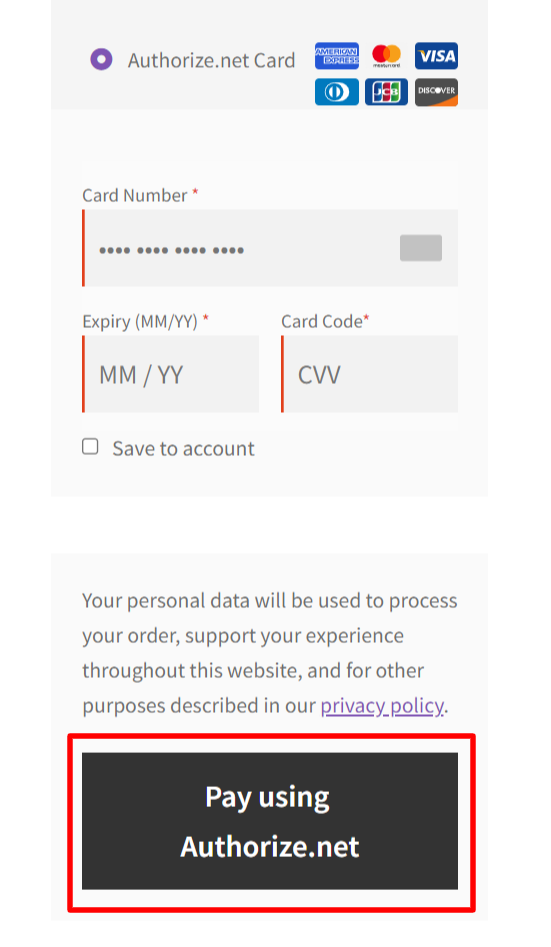
- Once the customer adds the required products to the cart and comes to the checkout page, this is what it looks like:
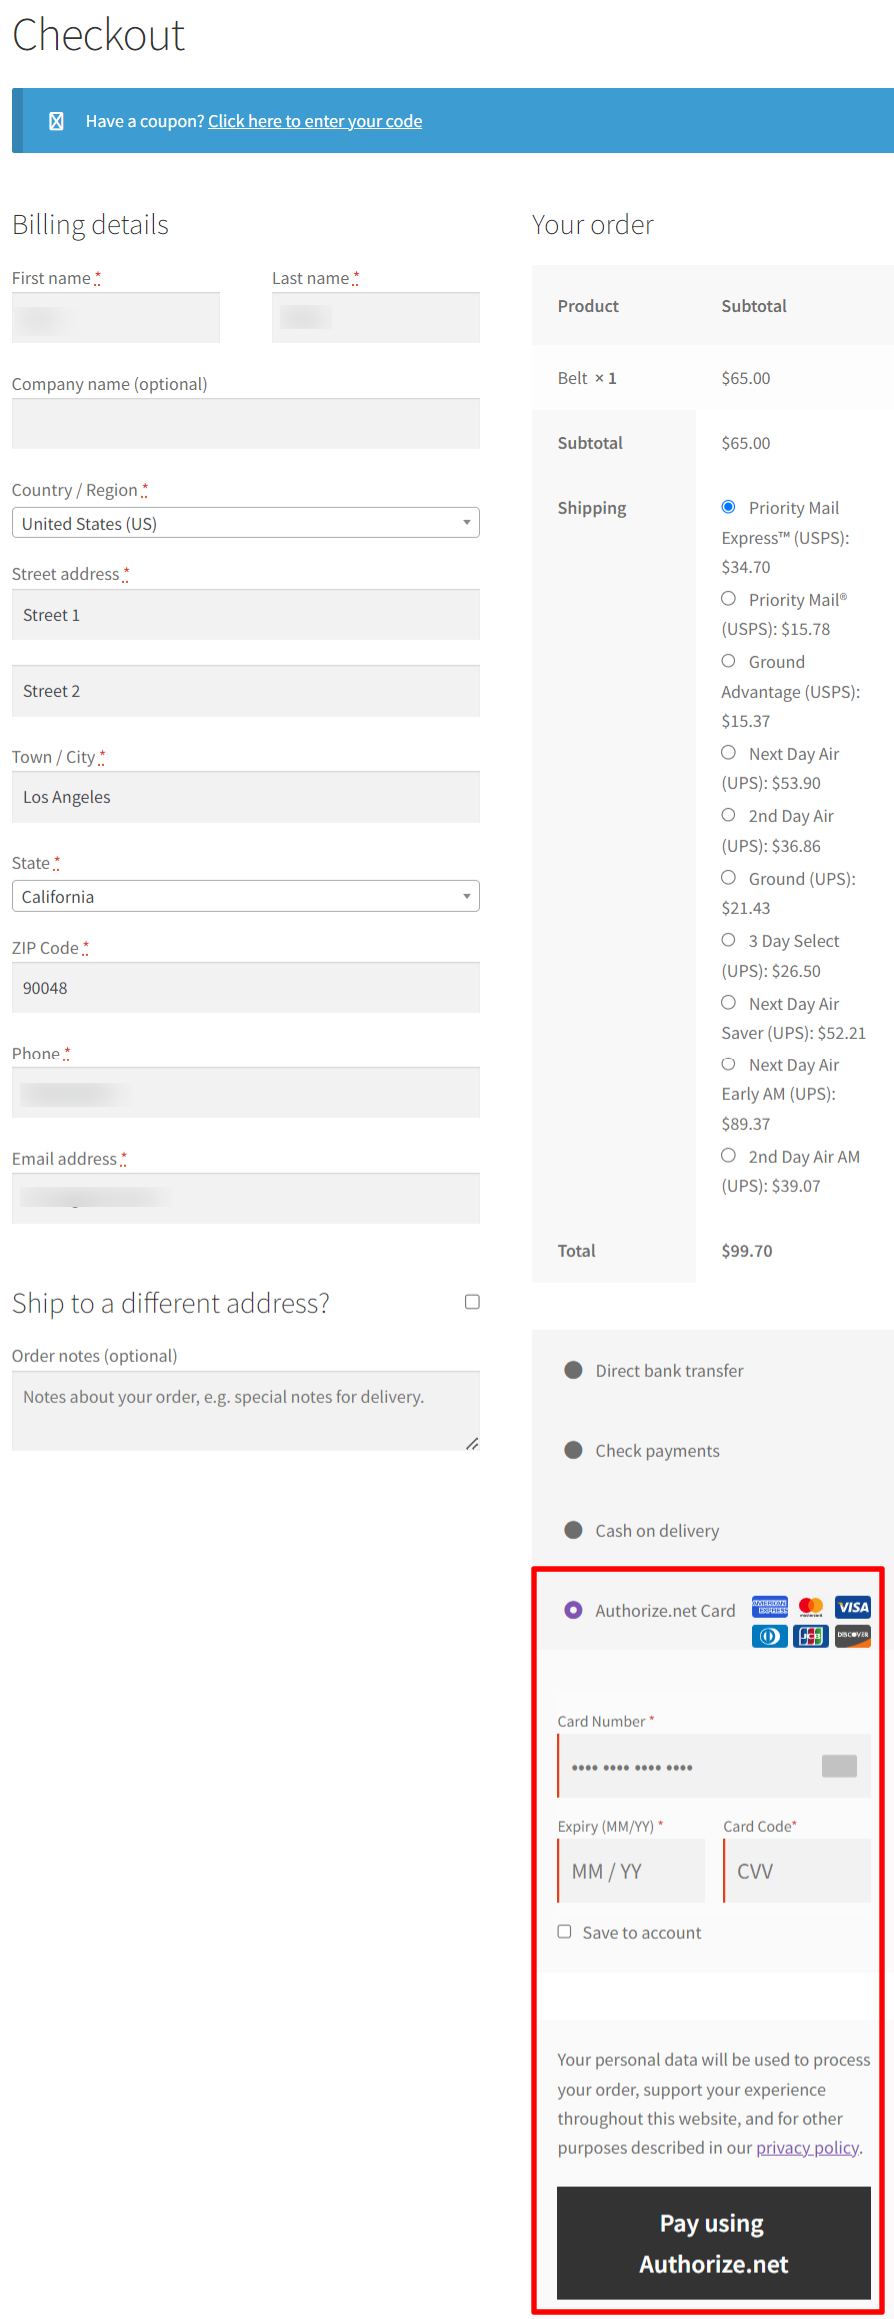
- Select Authorize.net Card as a payment option.
- Enter the Card Number of the Credit card.
- Enter the Expiry date of the Credit card.
- Click Pay using Authorize.Net (customized text) to the checkout.
This way the customer can place the order by Paying through Authorize.net securely.
Checkout with Authorize.net eCheck
- Once the customer adds the required products to the cart and comes to the checkout page, it appears as given below:
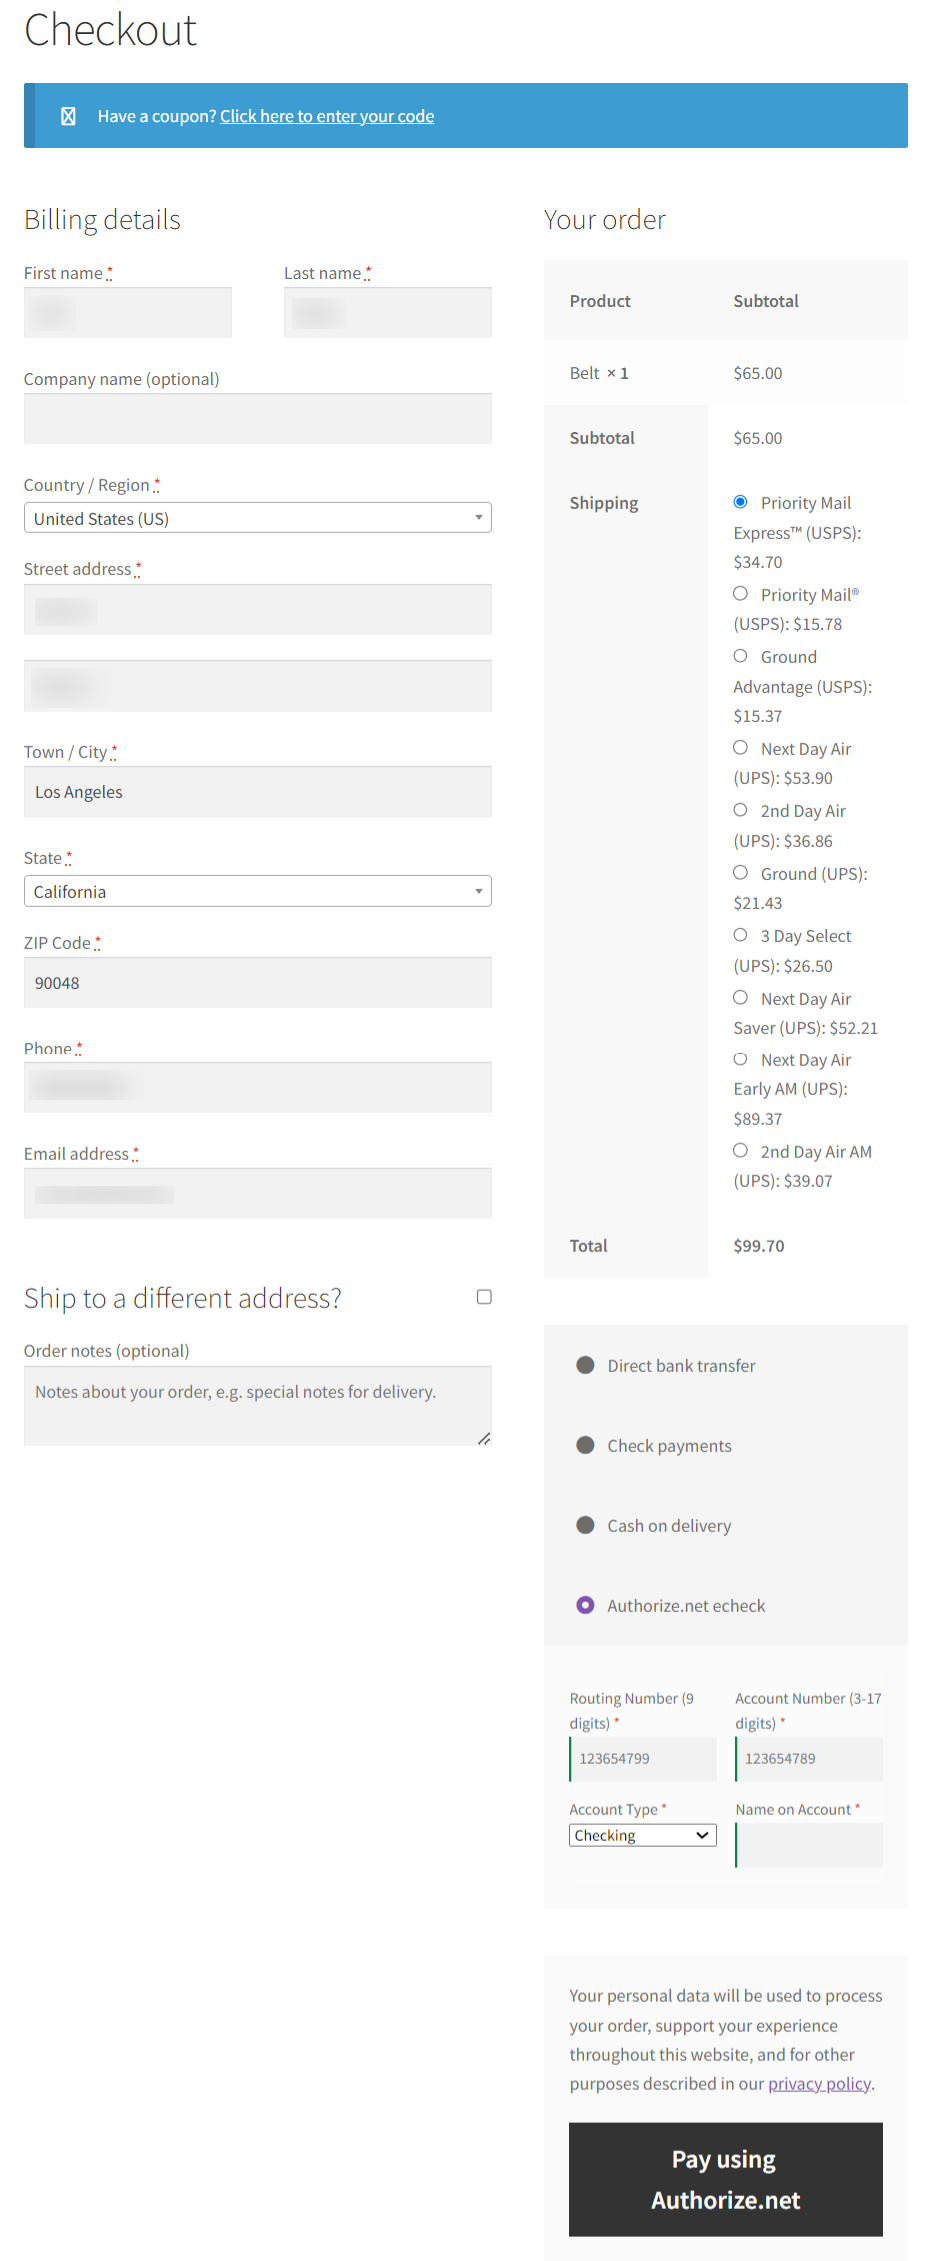
- Select Authorize.net eCheck as a payment option.
- Enter 9-digit Routing Number.
- Enter a 17-digit account number.
- Select the required account type from the Account Type dropdown list.
- Click Pay using Authorize.Net (customized text) to the checkout.
This way the customer can place the order by Paying through Authorize.net eCheck securely.
How to Capture and Refund Authorized Payment from the Order Page?
If the Authorize Only option is chosen under Transaction Type in the Settings, then the Capture option becomes available. To capture the payment, Admin needs to navigate to Dashboard > WooCommerce > Orders > Individual Order. The Order page appears as shown below:
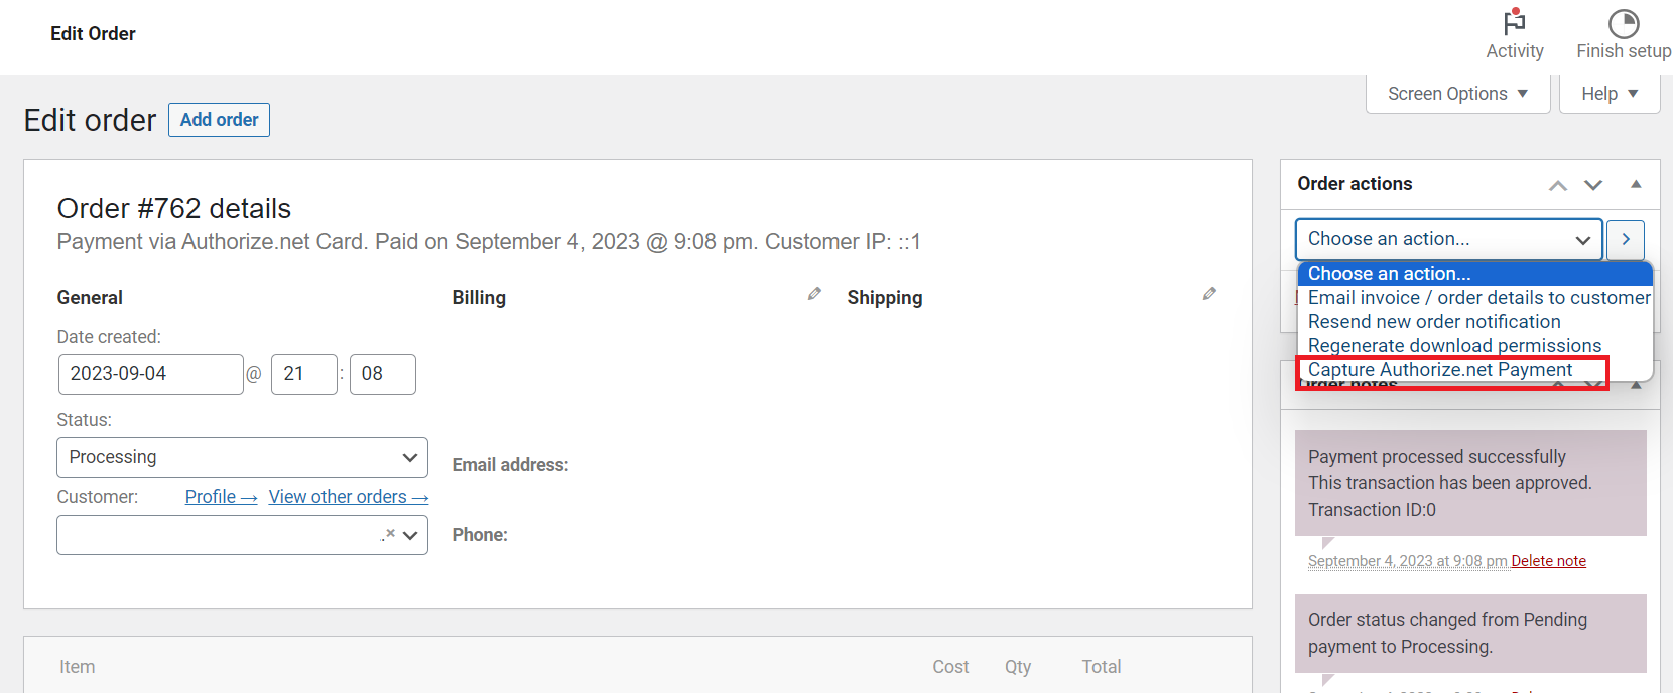
Under the Order Action box, select the Capture Authorized Payment option and click the arrow button to capture the order payment. You can see all the transaction details under Order Notes.
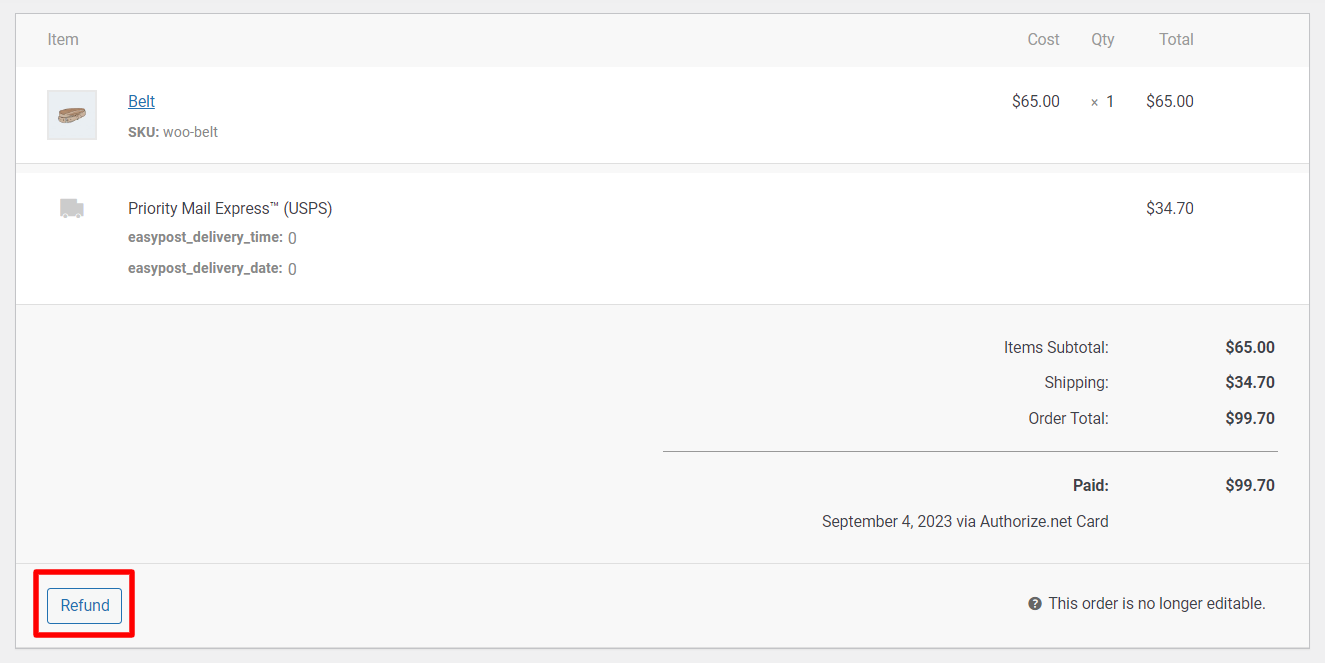
Once you capture the payment, you can refund the payment if needed. Click the Refund button as shown below:
After clicking on Refund, the Order Page appears as shown below:
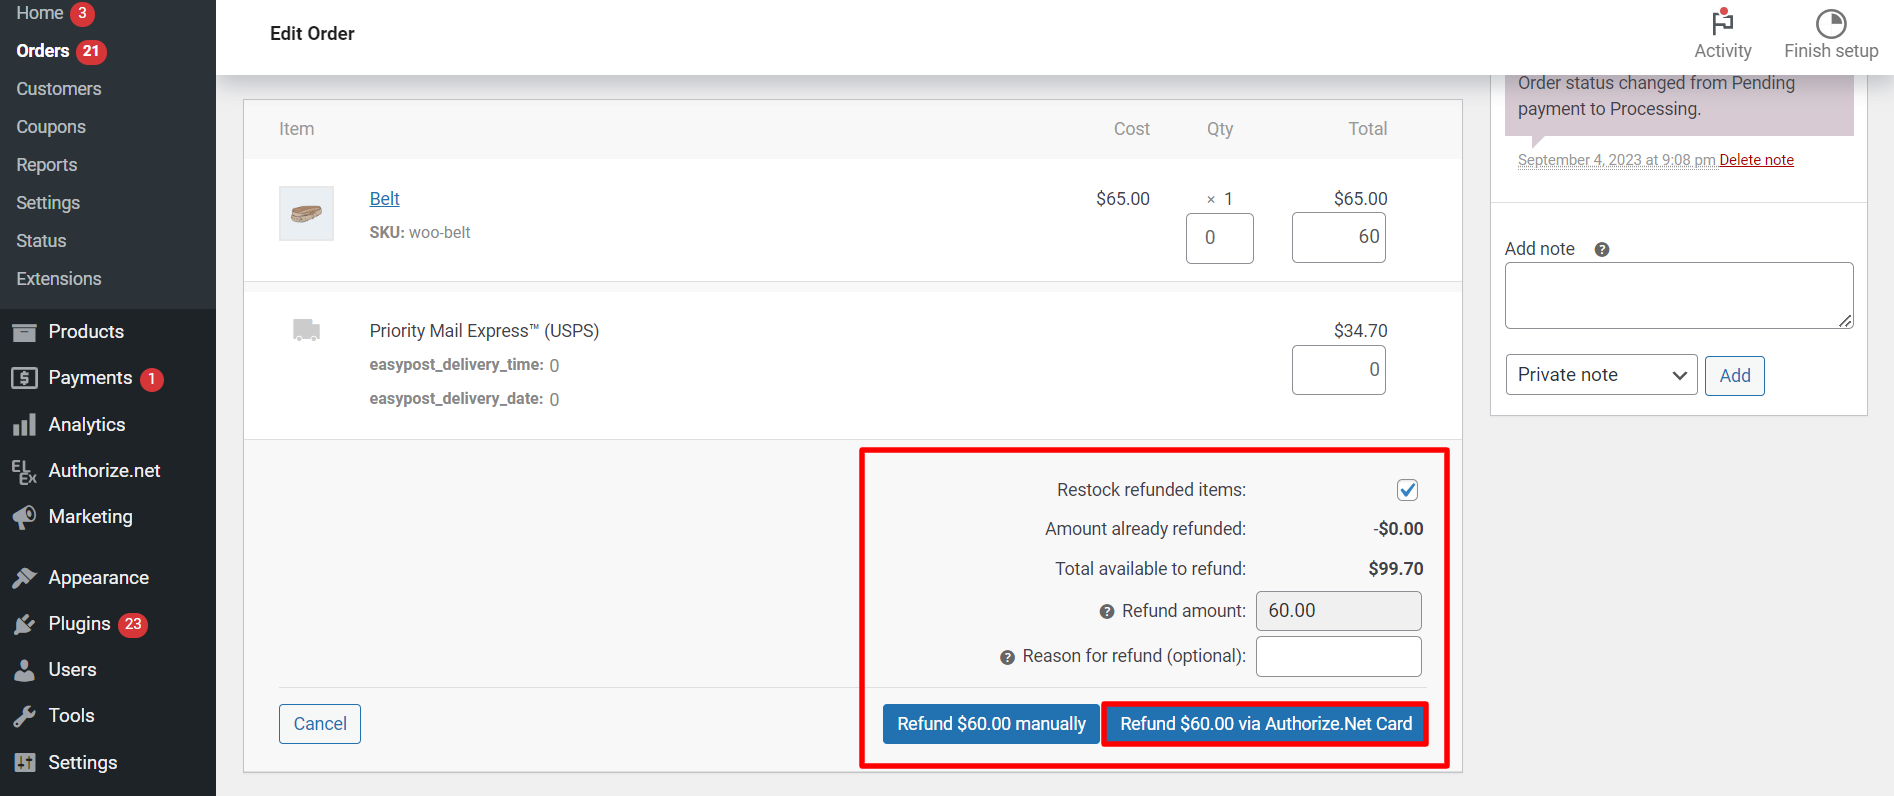
To Proceed with the refund, you can choose if you want to restock the refunded items, check the amount already refunded (if any), enter the refund amount you want to go ahead with, and finally click Refund via Authorize.Net Card. You will get a confirmation notification asking if you wish to proceed with the refund and it cannot be undone, Click OK to proceed. After the refund is processed, the refunded amount will be displayed on the Order Page itself.
This way the Admin can capture and refund the order amount through Authorize.net securely.
Dashboard
Navigate to the WordPress Dashboard > Authorize.net > Dashboard.
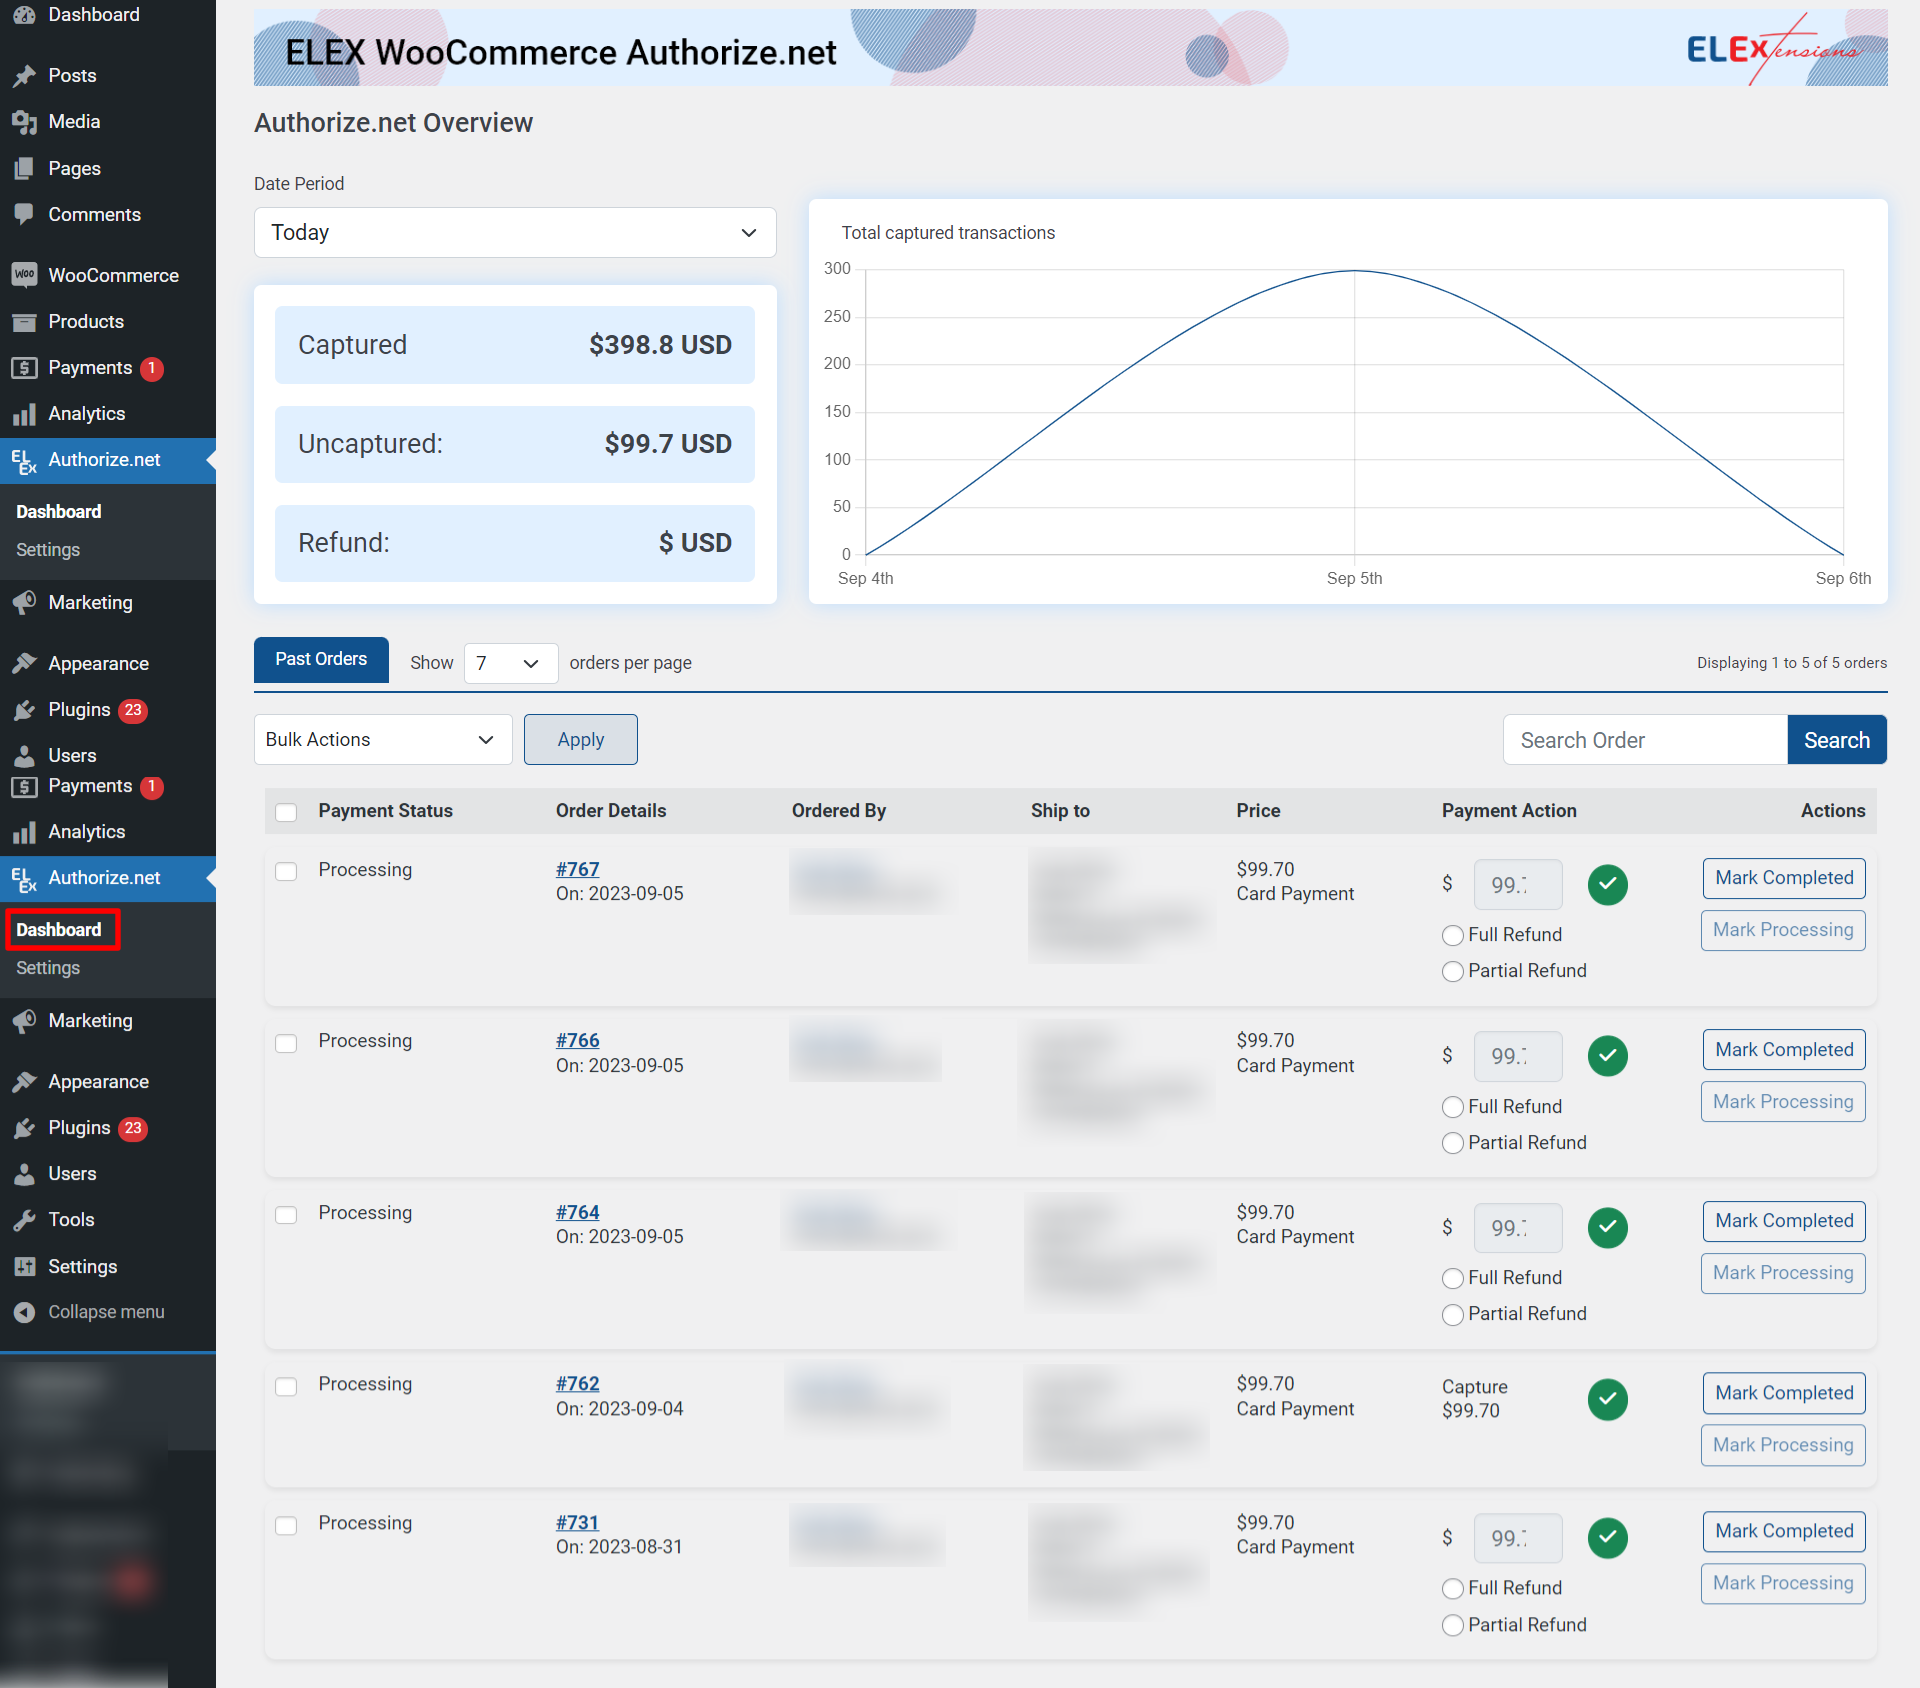
The Authorize.net payments dashboard provides a detailed overview of the total Captured, Uncaptured, and Refunded amount by the Authorize.net Payment Gateway in a given period. As per your requirements, you can refund the Full or Partial amount from the list of past orders.
The Plugin provides you the option to show the required number of rows under order details by using the Table Row option. Also, you can search for the required order by using the search option. You can also change the order statuses in bulk from here if required.
WooCommerce Subscription Support
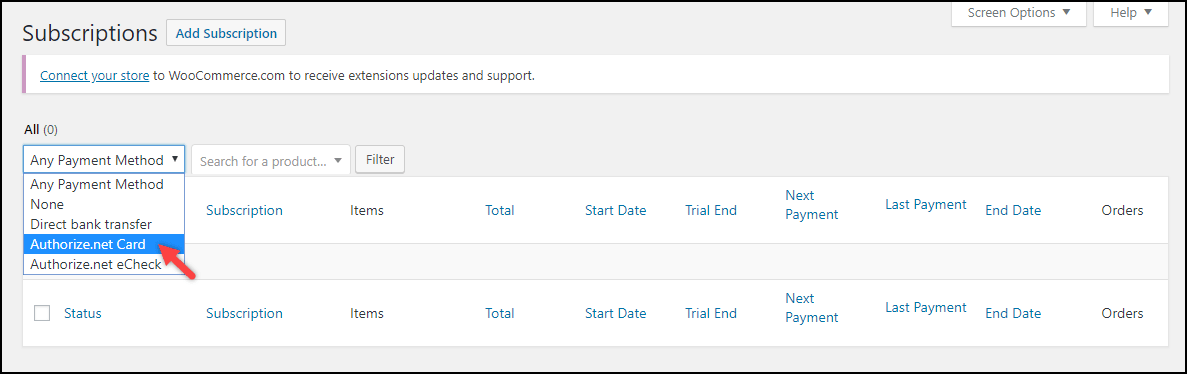
The ELEX Authorize.net Payment Gateway for WooCommerce plugin supports subscription payments and is compatible with the WooCommerce Subscription plugin.
In the Subscriptions dashboard of the WooCommerce Subscription plugin, you can filter all the payments made using Authorize.Net Card and Authorize.Net eCheck.
To explore more details about the plugin, go check out ELEX Authorize.net Payment Gateway for WooCommerce.
You can also check out other WooCommerce and WordPress plugins in ELEX.
2 Comments. Leave new
Hi, Sir or Madam,
I just subscribed for a year of service for your PAYMENT SERVICE.
Do you have any test ID for customers to test if it works on my e-commerce web?
Gina@onelande.com
I appreciate any help you can provide.
Gina
Hello Gina,
Thanks for reaching out to us. You can create an Authorize.net developer/Sandbox account for doing testing using our plugin on your website.
https://developer.authorize.net/hello_world/sandbox.html
Hope it helps! Please feel free to contact us.