Displaying stock status on a product page helps customers to know about the availability of a product, when they are about to purchase it. You need to update the stock status of your products according to the current inventory status of your store.
Hence, from the shop owner’s perspective, you must display the stock quantity of each and every product if those products are nearly running out of stock. Also, you can even display a message regarding the stock quantity for the customers to make quick purchase decisions. For example, you can display ‘only 2 items left in stock, order now!’. When a customer sees a message like this, they would have a feeling of urgency in grabbing the product. Also, you have to remove the message when the product is restocked. So, stock status has a major role in increasing sales in an online store.
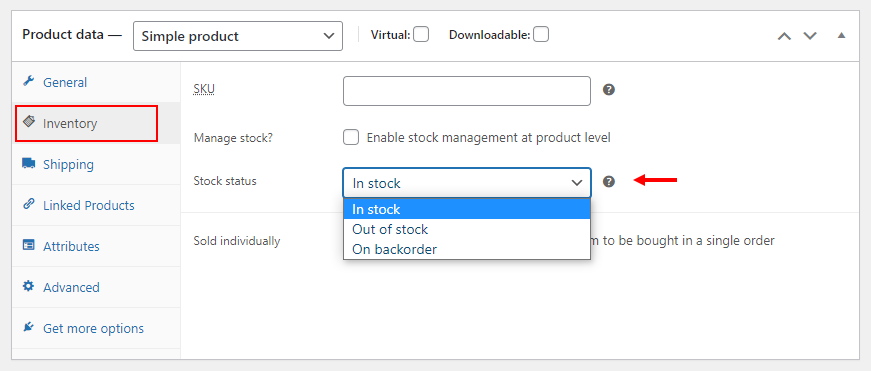
Sometimes, one product might be running out of stock, or a number of products might be running out of stock at the same time. We can easily edit the stock status of a single product by editing the status from the dashboard of the specific product page. Check the screenshot below:
You can go to the product page dashboard > Product data meta box > Inventory.
There you can change the stock status by choosing a status from the drop-down pickup list.
But, if you want to edit more than 5 or 6 products’ stock status, it would take a long time and it will be like a waste of your time since WooCommerce itself has an option to bulk edit stock status.
In this article, we will be discussing how to bulk edit stock status in a WooCommerce store using WooCommerce’s default option as well as using an advanced bulk edit plugin.
Let us begin with the default option.
Bulk Edit Stock Status Using Default Option of WooCommerce
First, you have to go to your WordPress Dashboard > Products > All Products.
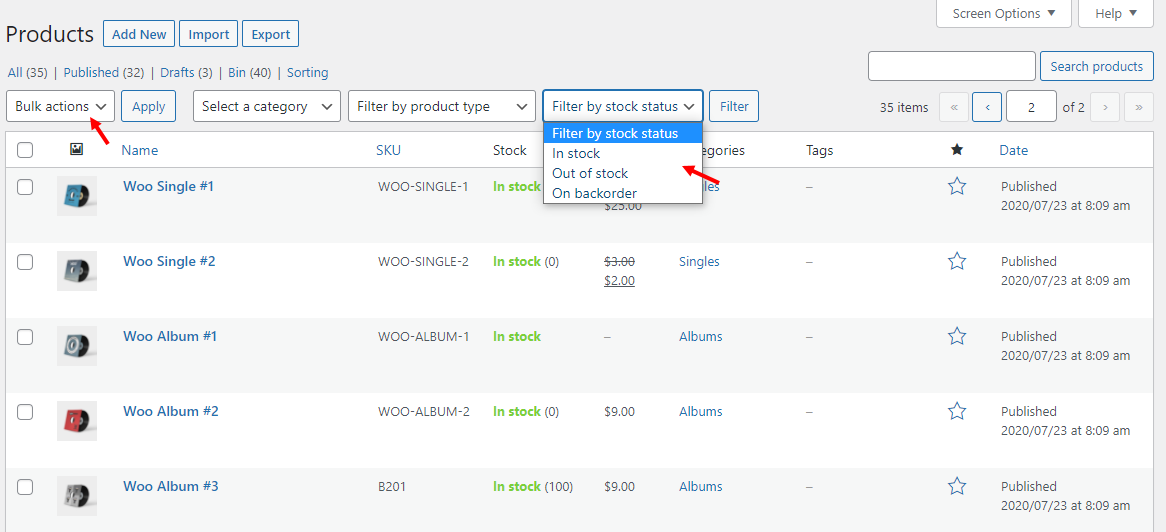
Here you can select the products to be edited by clicking the checkbox on the left side of the product image. Or, if you want to filter the products based on the category, product type, and stock status, you can choose the options accordingly, and click the Filter button to list the filtered products to proceed to the next step.
You can bulk edit products that are out of stock to in stock or vice versa, and change the status to on backorder, etc., according to your requirements. For easily filtering the products based on the stock status, you can make use of this filtering option as I marked in the above screenshot.
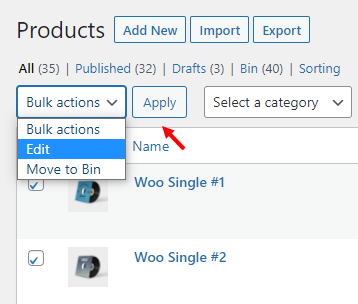
After that, you can click the Bulk Actions button and choose Edit from the drop-down pick-up list.
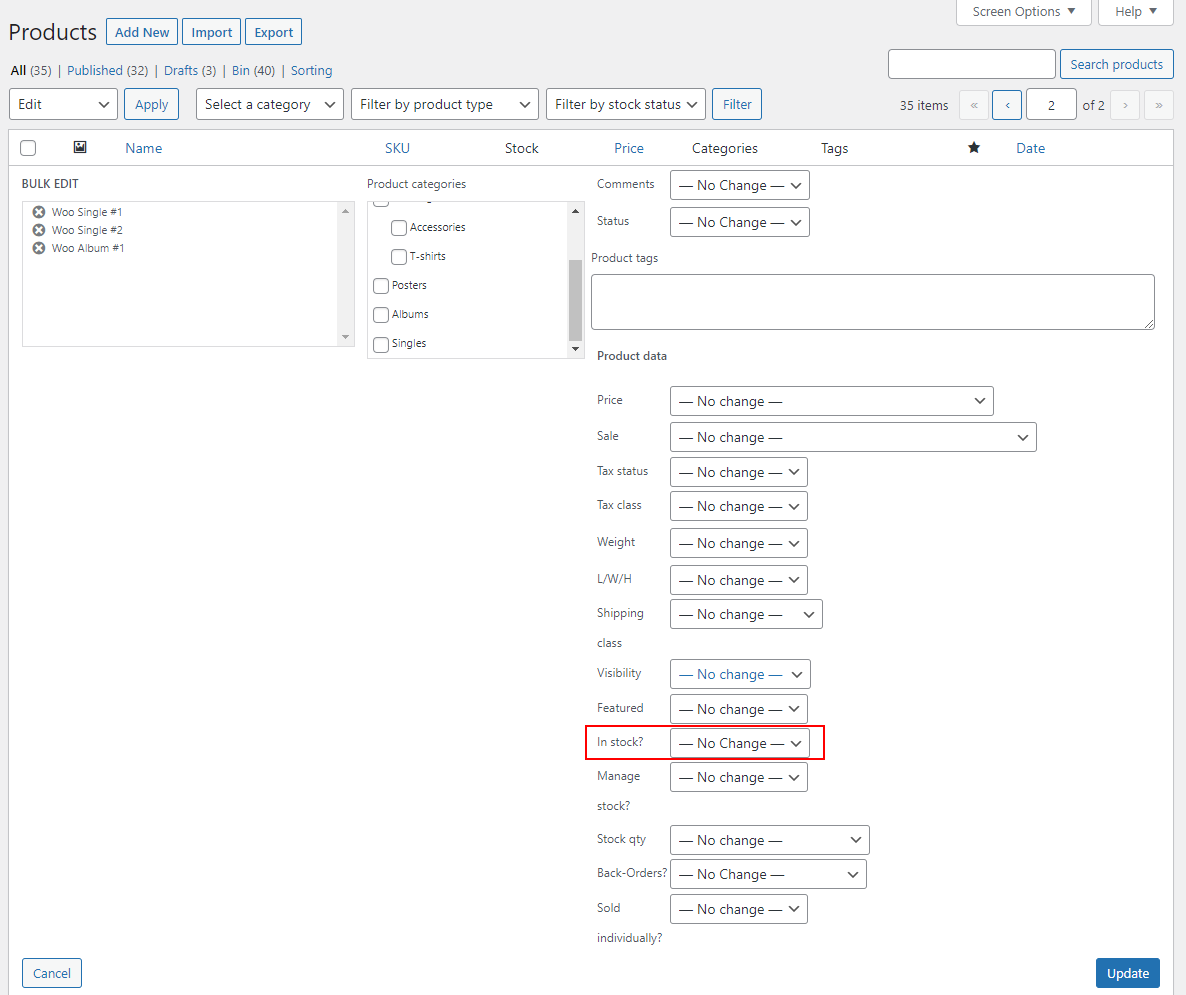
After clicking the button, a new page will be opened to edit the product attributes in bulk. From there, you can choose the Stock Status accordingly.
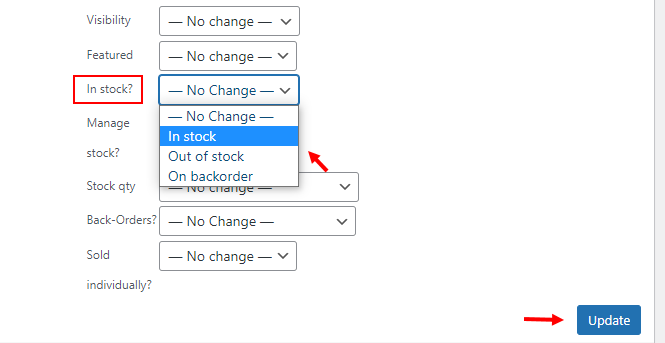
You can click the drop-down list and choose the stock status to which the products’ stock status must be changed. And finally, you can click Update.
Now, let us check how to apply the stock status of products in bulk using an advanced bulk edit plugin – ELEX WooCommerce Advanced Bulk Edit Products, Prices & Attributes.
Bulk Edit Stock Status Using ELEX WooCommerce Advanced Bulk Edit Products, Prices & Attributes Plugin
If you want to filter the products based on their stock status, title, tags, prices, even attributes or custom attributes, you can go for this advanced bulk edit plugin. And, you can bulk edit all default product attributes, as well as the custom product attributes you have added using third-party plugins with this bulk edit plugin.
Another advantage of using this plugin is, you can schedule the bulk update on a future date and time as well as revert the values to the old ones on a fixed date and time. Also, you can schedule the frequency such as Daily, Weekly, or Monthly for repeated bulk edit execution.
There are many more advantages of using this plugin apart from bulk editing the stock status. To know more features and the configuration processes, refer to the article – How to set up ELEX Bulk Edit Products, Prices & Attributes for WooCommerce plugin?
Now, let us get back to the configuration process.
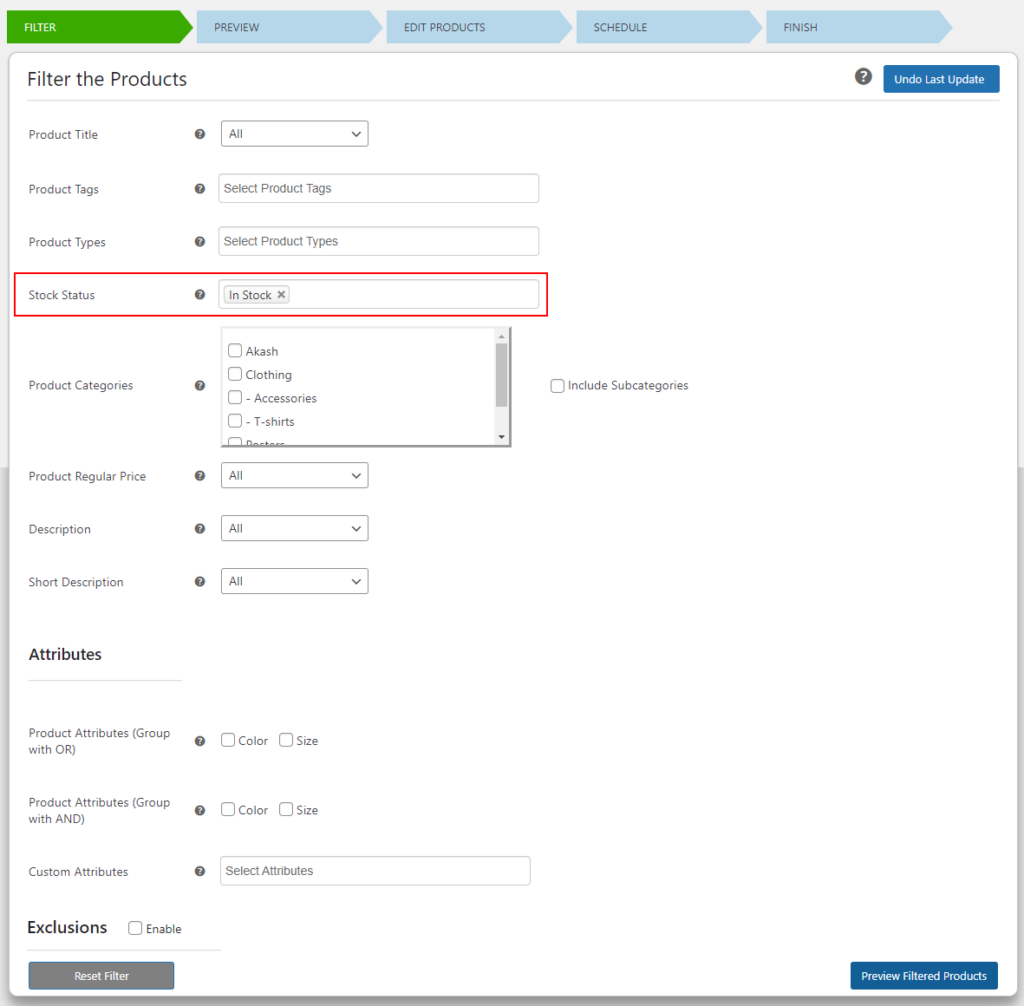
After installation and activation, you can go to the Filter tab to filter the products. For example, I am filtering the products based on their stock status. Here, I am filtering the products which have the stock status ‘In Stock’, and editing them into ‘Out of Stock’ status.
Check the screenshot below:
You can set the required filters accordingly. After setting the filters click Preview Filtered Products.
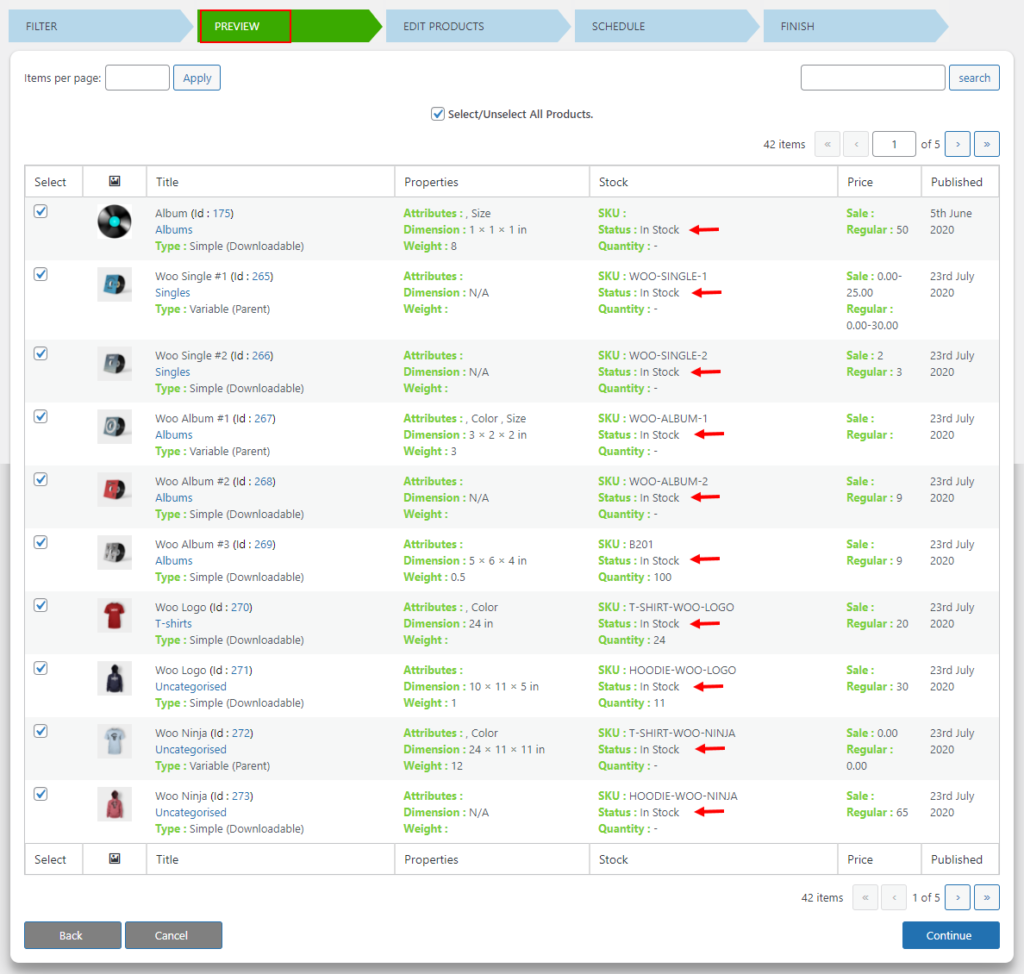
In the preview tab, all the products with stock status as ‘In Stock’ will be listed. Check the screenshot below:
You can deselect some products if required. Then, click the Continue button.
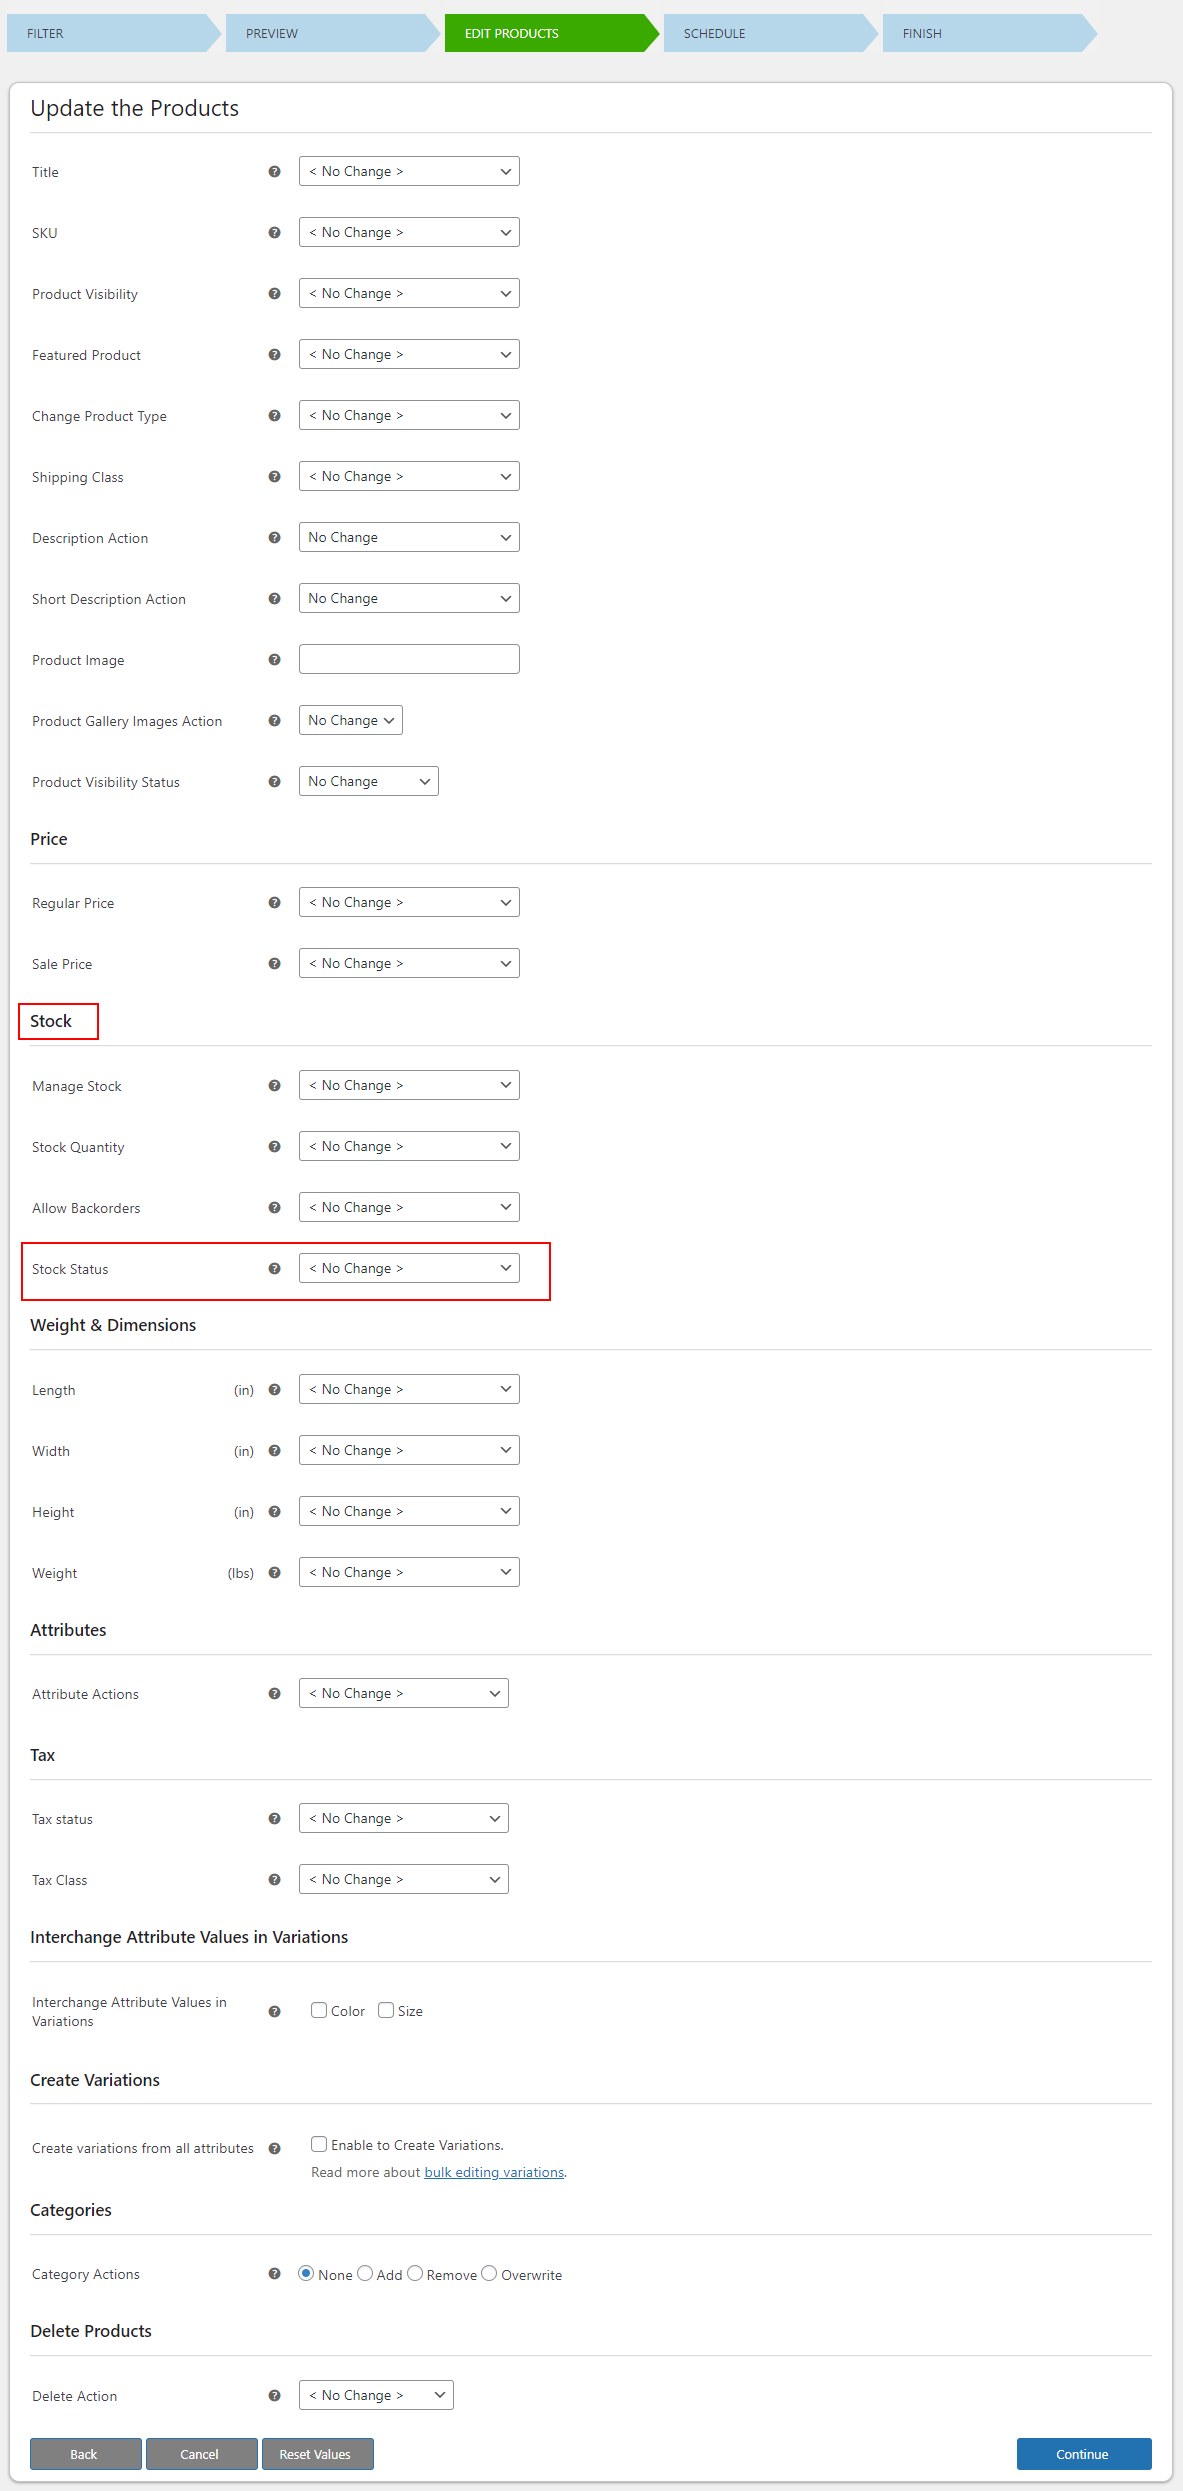
You will be directed to the page, where you can set the product attributes to bulk edit them for the filtered products. From there, you can bulk edit the following product attributes:
- Product title
- Product SKU
- Product Visibility
- Featured Product
- Product Type
- Shipping class
- Product Visibility Status
- Sale Price and Regular Price
- Managing stocks
- Stock quantity
- Allowing backorders
- Stock status
- Product Length, Width, Height, and Weight
- Global product attributes
- Product variations
Check the screenshot below:
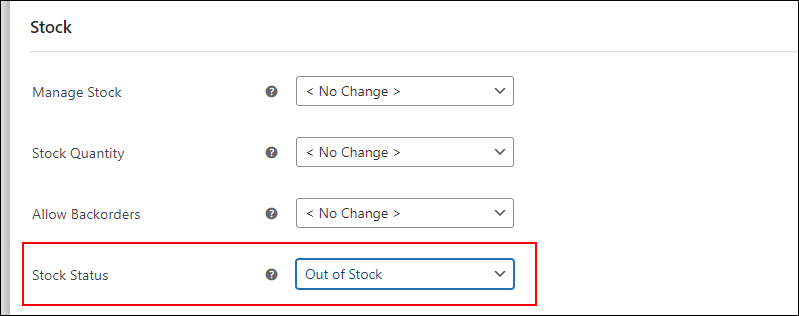
You can choose a stock status from the drop-down pickup list for setting the stock status for filtered products. Check the screenshot below:
After choosing the required stock status, click the Continue button. Here, for demonstrating the example, I have chosen Out of Stock.
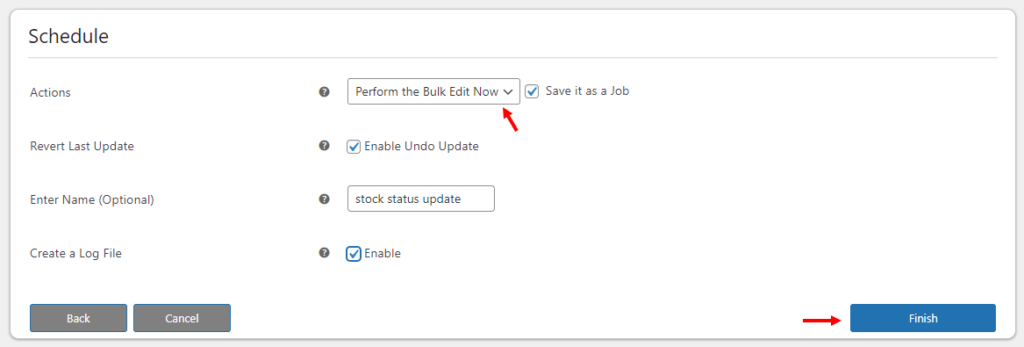
The next step is to execute the bulk update. You can execute immediately or schedule the update for later by entering the date and time of execution, date and time to revert back to the old attribute values, and schedule frequency such as Daily, Weekly or, Monthly.
In this example, I am choosing immediate execution.
You can enable the options to save the update as a job, enabling undo option, and creating a log file for the update. It would be better if you provide a name for the bulk update. But, it is optional. After entering these details, click the Finish button.
You can see a message as all products are updated. If you want to undo the operations you have done previously, click the Undo button. Else, click the Continue button.
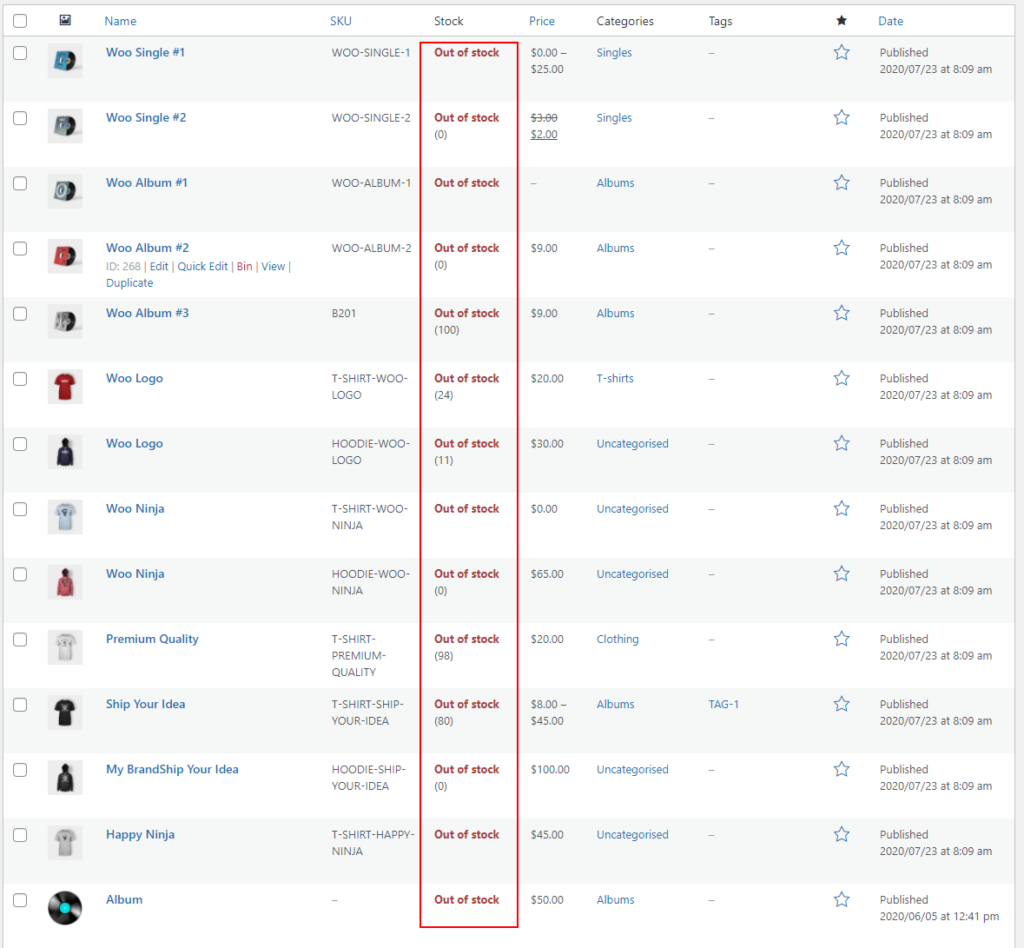
After the execution, you can see that the products we have filtered are out of stock in the store.
Check the screenshot below:
This is how you can bulk update the stock status of WooCommerce products in your store using a plugin.
Conclusion
It is very easy to bulk edit the stock status of your WooCommerce products using the 2 methods I have explained in this article. If you want to simply bulk edit the products by applying limited filters, you can use the default WooCommerce bulk edit option. But, if you require some advanced options for filtering, bulk editing, and executing the bulk update, you can choose ELEX WooCommerce Advanced Bulk Edit Products, Prices & Attributes plugin.

