Do you own an e-commerce store? Are you making use of social media to promote your business online? For online businesses to be successful, Facebook and Instagram are essential! Using Facebook and Instagram’s Catalog Manager, companies can store a catalog of their products for use in advertisements. To display your products, you can connect your product catalog with various channels such as Facebook marketplace and Instagram Shopping, among others. In this article, we are going to demonstrate creating a Facebook Catalog Feed for your online business using the ELEX WooCommerce Catalog Feed Plugin.
If you do not have one of these catalog generation plugins, you can still create a Catalog manually; it will just take a lot longer, and upkeeping the catalog with regular updates can be a tough job. Begin by ensuring your business manager is set up and ready to go! Everyone in business should have the Facebook Business Manager installed, no matter what industry they are in. Advertisements can be created in greater detail with the Business Manager, which also provides essential analytics to help you better understand what is working and what isn’t.
What is a Facebook Shop?

When it comes to selling and marketing products through Facebook Shops there are many tools available to help you do so. Businesses can go all-in on Facebook Shops and create a full-fledged online shopping experience for free. According to the company’s strategy, Facebook will also keep expanding its partnership network, including Shopify, WooCommerce, and many others.
After you’ve created a catalog, you can do the following:
- Information about your products can be added and managed, such as titles and images as well as descriptions and prices, as well as variants, and other information. It is possible to upload items one by one or in bulk.
- Your catalog can be divided into sub-groups called sets (for ads) or collections (for shops).
- Allow selected people or businesses to work on your catalog by granting them access to it.
- Customers can see the correct item information and prices for their country or language in your ads and shop if you upload the country and language information.
Using the ELEX WooCommerce Catalog Feed Plugin for Facebook & Instagram to create a Facebook Catalog

Key Features
- Facebook Marketplace and Instagram Shopping allow you to easily promote your products to a wider audience.
- You can create and manage an infinite number of feeds.
- Product Feed for Variable Products can be created.
- Sell your products to the countries you want to reach.
- Generate product feeds in XML/CSV file formats as needed.
- Set the Product Feeds to Refresh Automatically.
- Google Product Categories assist you in mapping out your Product Categories.
- Efficiently Map Product Attributes
- Google Product Attributes can be used to map your Custom Attributes.
- Create a feed based on the number of items in stock and the number of items sold.
Configuring the ELEX WooCommerce Catalog Feed for Facebook and Instagram:
Learn how to complete the checkout process on ELEX by reading this article. Additionally, you can learn how to download, install, and activate ELEX plugins here.
After you’ve installed and activated the plugin, you can begin creating your feed. Navigate to the WordPress Sidebar menu, then to the “ELEX Facebook Shopping Feed”, and then to the “Create Feed” option.
Generic settings
The plugin’s generic settings are shown below.

Project Description: Enter a description for your feed, or leave it blank.
Country of Sale: Specify the country in which you want to focus your Facebook marketplace sales efforts.
Include Variations: Select this option to include all the product variations for your products.
Auto-set identifier_exists: Catalog feeds can upload products without unique identifiers (like GTIN, MPN, and Brand) when the auto-set identifier is enabled.
File Format: Depending on your needs, select CSV, TSV, or XML as the file format.
Refresh Schedule: It is possible to schedule Cron jobs to automatically update the catalog feed. Daily (at a specified time), Weekly, or Monthly (at a specified time and day of the week when the feed was created) are all options available (at specified time and date of creation of the feed).
Currency Conversion: Adding the conversion rate is useful if you’re selling your products in an area that uses a different currency.
When you’ve finished configuring the above options, click Save & Continue.
Map Category

Customers who search for your product on Facebook or Instagram will see it if it’s mapped with the default category on Google. By default, this tab will display all of your store’s categories. All you have to do now is map them with the appropriate Google categories.
It’s possible to map out all of the categories you need from the list. When generating the feed, only categories that have been mapped will be taken into account. Multiple products can be added and mapped to a single Google category. Mapping with Google product categories will assist you in categorizing and subcategorizing your items for sale. Your products will be listed on the Facebook marketplace when a customer searches for them.
Map Product

After you’ve finished configuring these, click the Continue button.
Mapping Attributes

Filtering Options

You can prevent specific products from being added to the feed by entering their names in the exclude products box.
Your feed will be generated once you click on “Generate Feed.” Upon successful feed generation, you will be taken to the Generate Feed tab, where you will see that all products have been updated.
Submitting the Catalog Feed file to Facebook
Visit the Facebook Commerce Manager to upload the generated product feed.
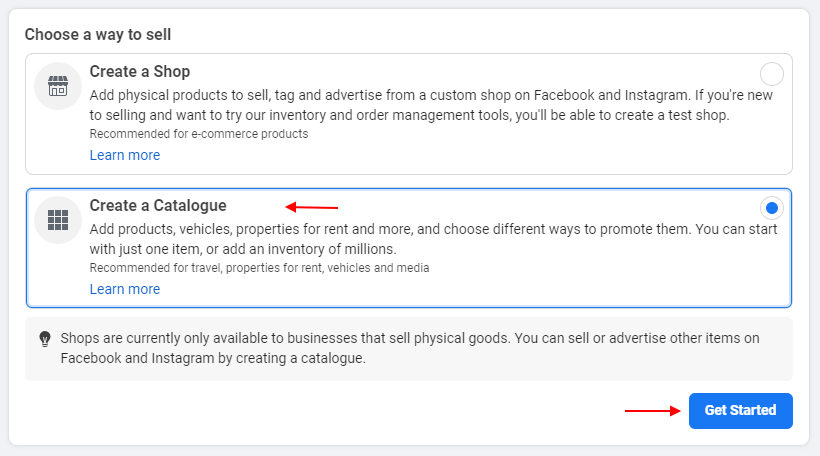
To begin, click Get Started.

Click Get Started.
Select the catalog type. You have the option of selecting E-commerce here.
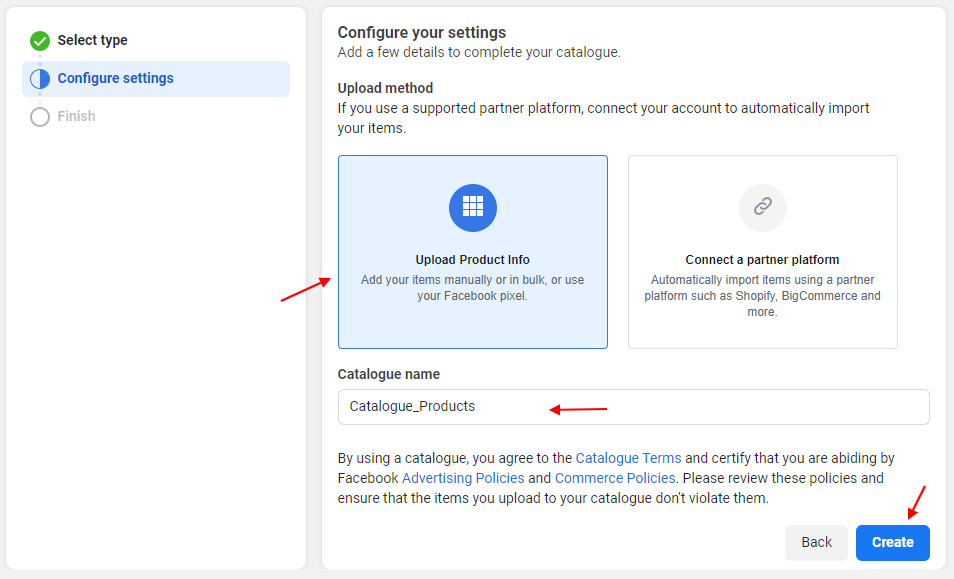
Add product information by selecting Upload Product Info, entering a catalog name, and clicking the Create button
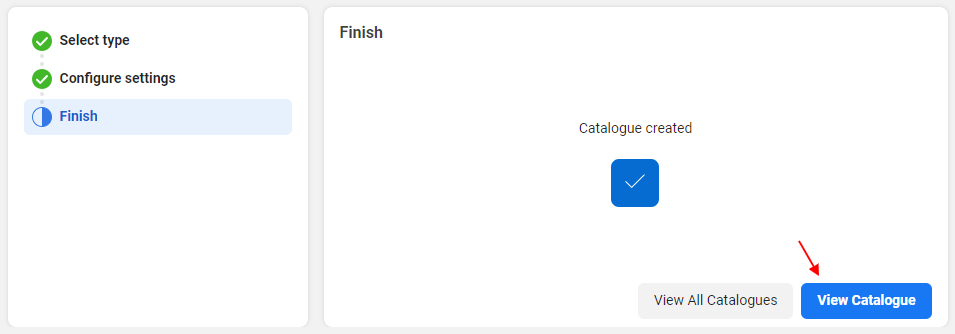
After clicking the Create button, you’ll see a message in a new tab about the catalog being created.

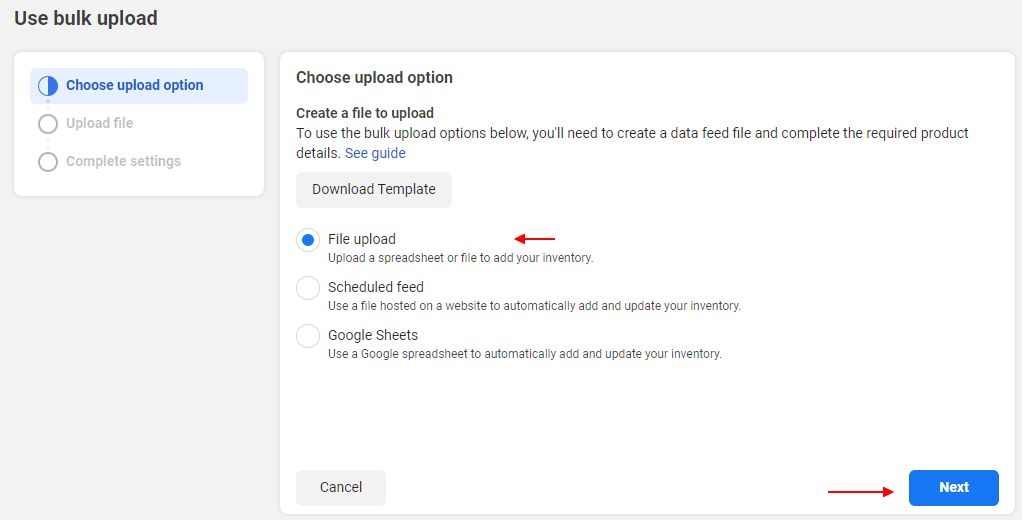
Select the Add Multiple Items option after clicking Add Items.


And just like that, we have created a Facebook Catalog Feed for your Online Business! Read more for detailed settings regarding how to set up ELEX WooCommerce Catalog Feed for Facebook Plugin.
If you have any questions regarding creating a Facebook Catalog, let us know in the comments.


