When you want to start advertising your WooCommerce products on Google shopping ads, you will need to start by creating a product feed that includes a list of product information that you’d like to promote through Google Merchant Center. A product feed is a file that includes a list of product information that you’d like to promote through Google Merchant Center. You’ll have to assign attributes to each of your products once they’ve been added. The pieces of information that identify a product are referred to as attributes. It is easier for potential customers to find your products if you provide the necessary and suggested attributes to appropriately describe them. Currently, the product feed file formats supported by Google Merchant Center are .gz, TSV, CSV, XML, .zip, and .bz2. This article will walk you through the process of setting up a WooCommerce Product feed in XML files if you are an eCommerce retailer looking to boost your online exposure by increasing product visibility. The main advantages of a product feed in XML are that it is easily readable and highly compatible with many websites and the chances are that your website already has an XML file containing all its content. Second, XML files make it much easier to include multiple values for an attribute. The only disadvantage is that you may need some technical knowledge to generate an XML file, but we will explain how to do it in a few simple steps in this article.
What exactly is an XML file?
An XML file is a file that uses the extensible markup language to organize data for processing and transfer. Attributes, tags, and text can be found in an XML file. The structure of the data is provided through tags. An XML file is essentially a conventional text file that uses specific tags to specify the file structure and how it should be saved and transferred. Once the data is stored by XML, you can manipulate the content for multiple devices and marketing platforms including but not limited to Google Merchant Center.
To put it simply, Google Merchant Center is Google’s own marketing platform that assists you in getting your store and product information into Google and making it available to buyers across Google. This implies that when customers search on a Google property, including Google Ads and other Google services, they will be able to see information about your store and the products that you offer that match their search. And, in order to have your product information uploaded to Google Merchant Center, you must first create a product feed that includes all of your product information and attributes. To do so, we’ll be using the ELEX WooCommerce Google Shopping Plugin, which will assist you in quickly creating an XML product feed.

You can download the plugin by clicking here.
You can also try out the plugin’s functionality by downloading the free version.
You can read this document to know how to download and activate the plugin.
Let set up an XML WooCommerce Product Feed
Once the plugin is installed and activated, you will see a Google Shopping feed tab on your WordPress sidebar. Under the Google Shopping Feed tab, click Create Feed.
Step 1. Generic Settings

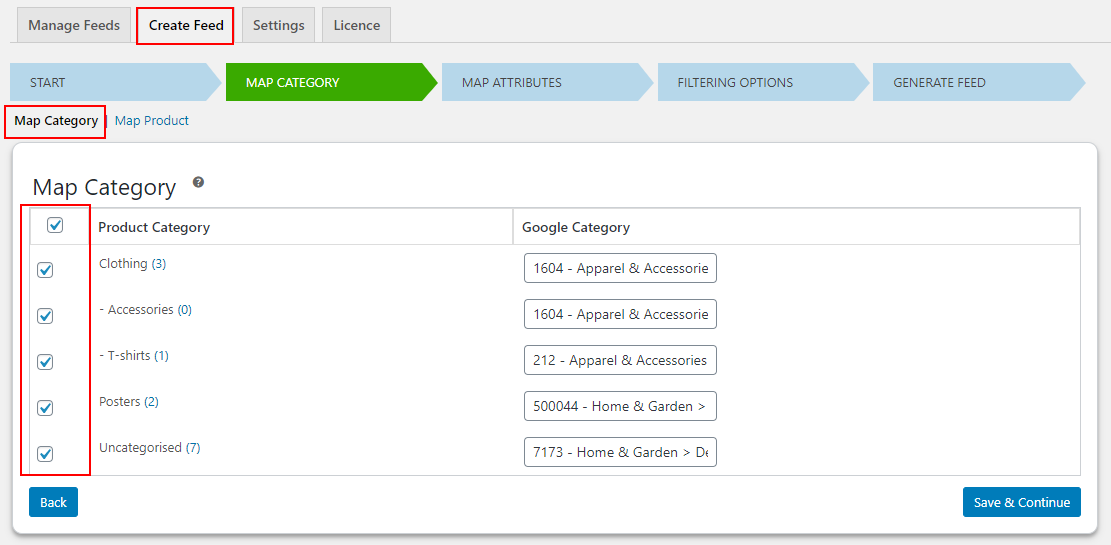
Step 2. Mapping Product Category
Here, you must map your categories to Google categories. Check the checkboxes for the categories you want to use in your product feed after you’ve selected the applicable Google Product Category. Simply enter a matching Google category into the box, and a list of related categories will be provided for you to choose from.
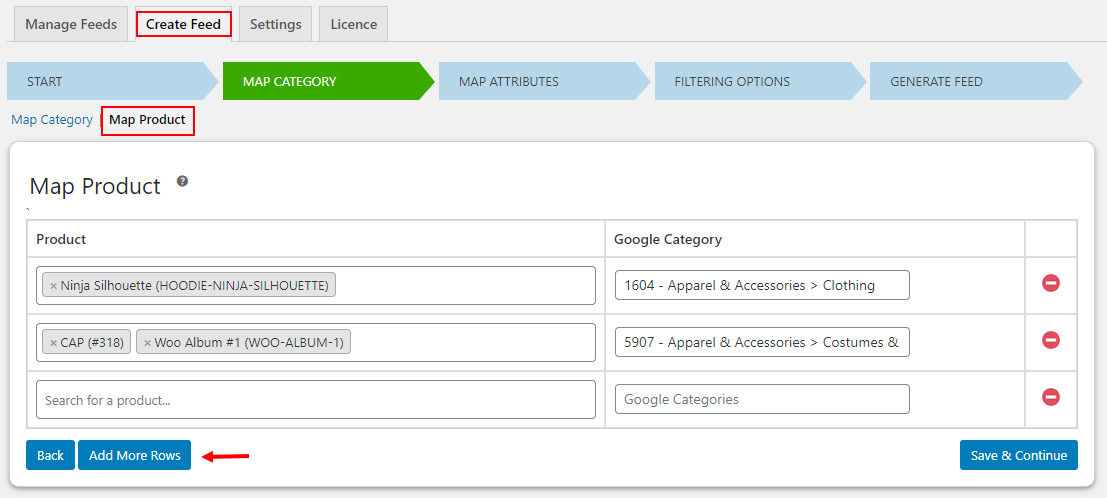
Step 3. Mapping Individual Products

Step 4. Mapping Product Attributes

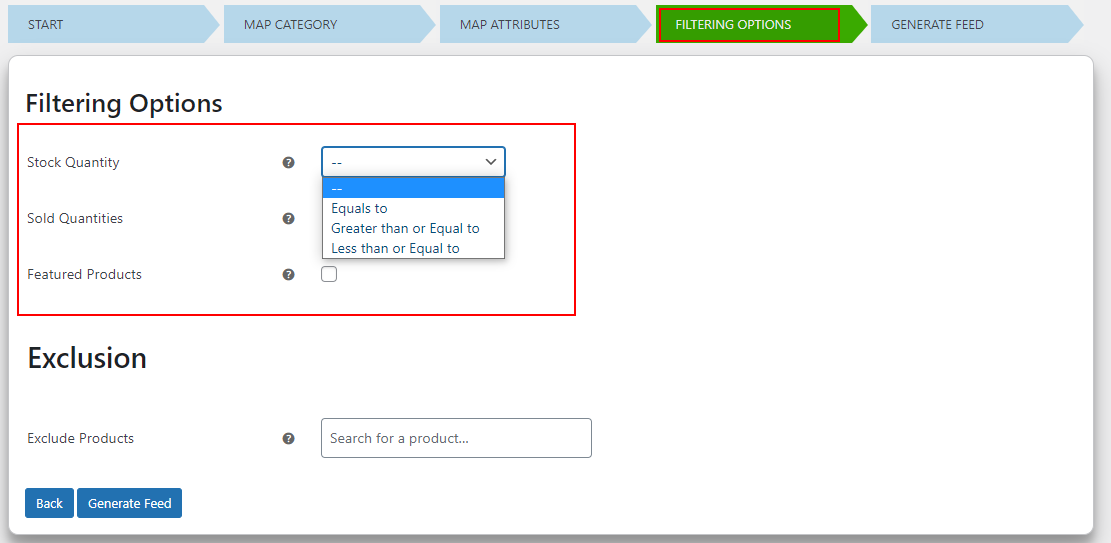
Step 5. Filtering Options


