The ‘Add to Quote’ button is one of the most important features that all B2B and wholesale stores should have. These buttons are the first step of the customer journey that leads to an eventual sale or purchase. Some customers might not know the price of the product in their cart. They don’t want to leave the site and call customer service, which takes time. A Request a Quote button solves this problem.
What is the importance of the ‘Request a Quote’ button?
The WooCommerce Request a Quote button is an easy way for customers to find out what they can get your product for, so they can decide if it’s worth their time to stay on your site. Since WooCommerce does not provide a feature to add the ‘Add to Quote’ button in their e-commerce platform, we can use a plugin that would help us in this task.
Today, we will be talking about how to easily enable the ‘Add to Quote’ button on your WooCommerce Store.
The Request a Quote plugin offers the following functionality:
- Display the products customers are interested in and their quantity in a list format.
- Provide an option to request a quote for specific products.
- Offer products with quote request options along with products that can be added to cart like a regular store.
- Hide the price for products that need to be made available only through quotes.
- Notifications when a quote is requested for, and responded to.
- Easy payment and checkout process once a quote is accepted.
This article will show you how to implement this button in your WooCommerce store in just 5 simple steps.
Step 1: Install and activate the plugin
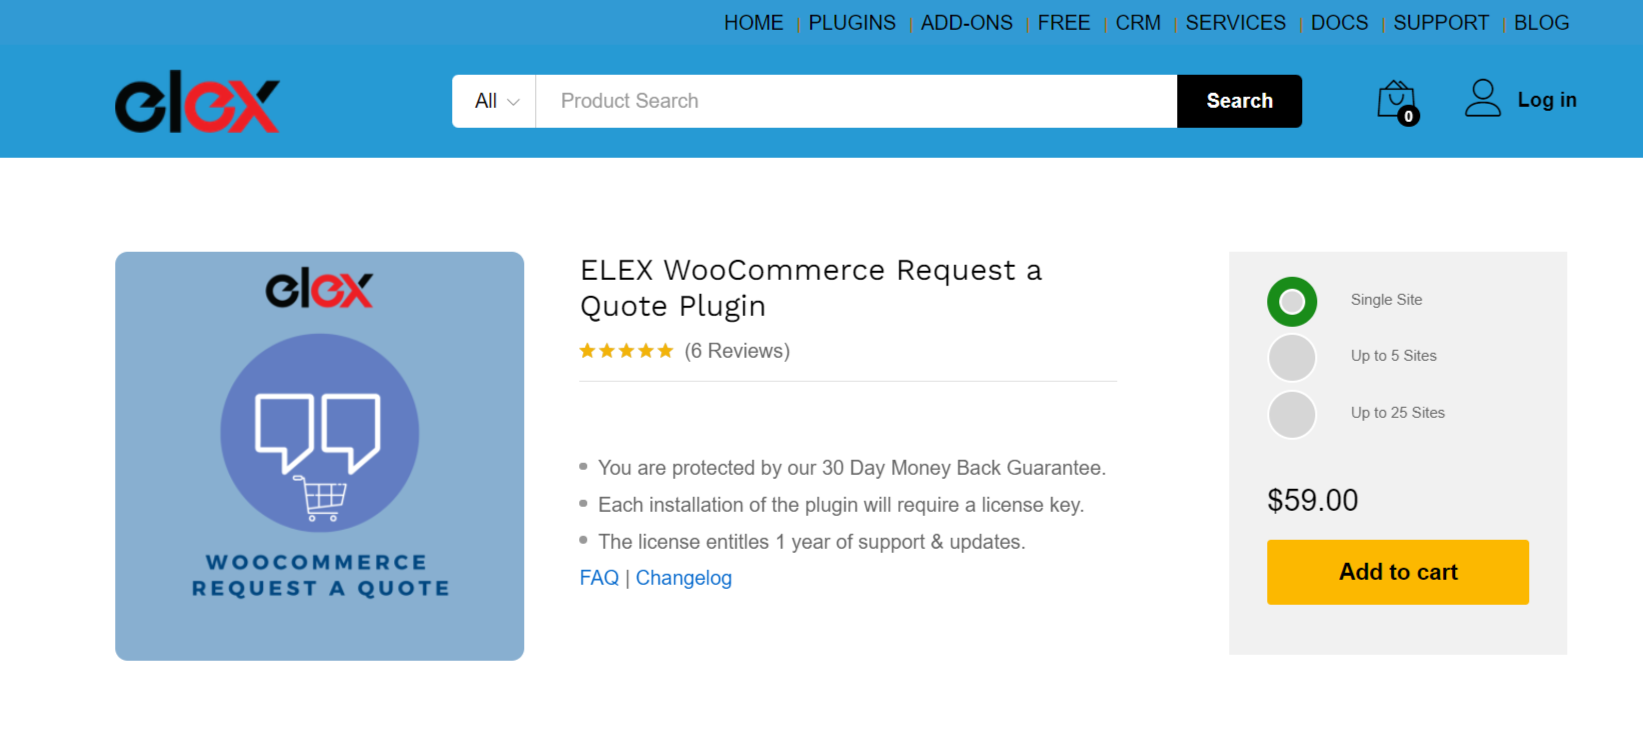
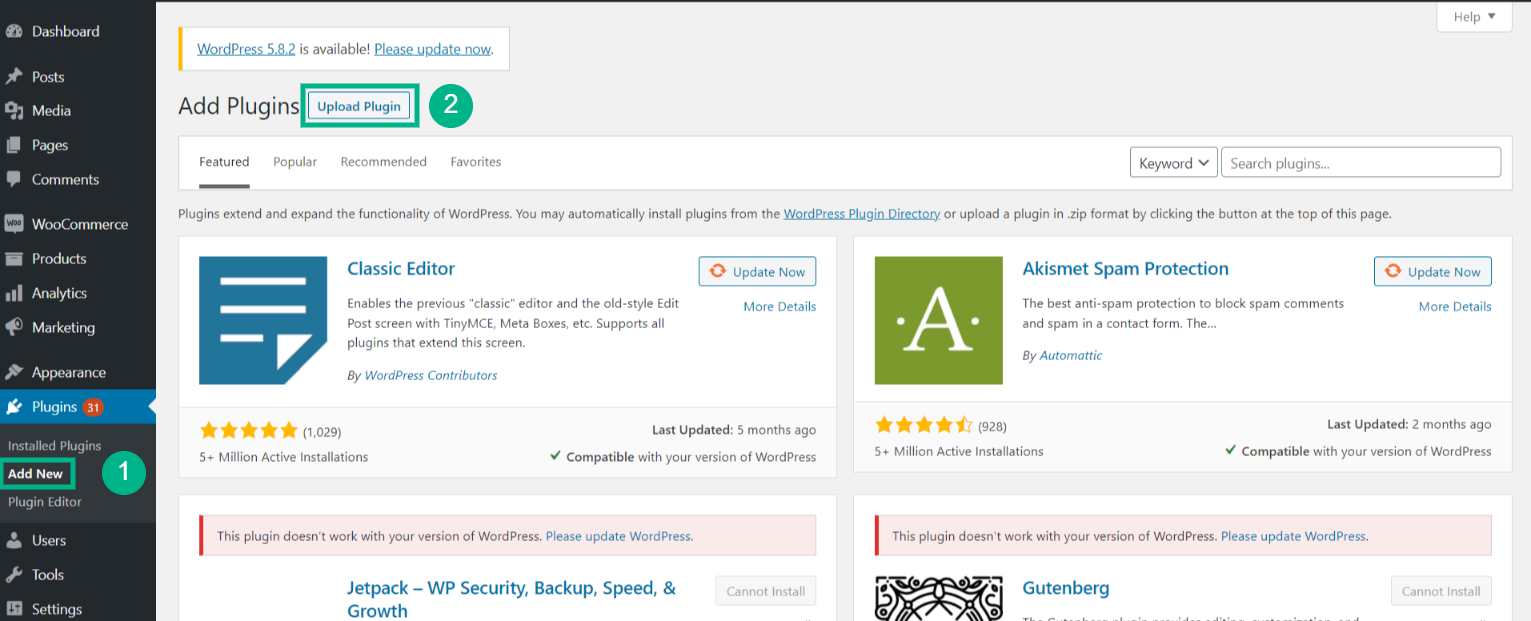
The plugin can be purchased from the ELEXtensions website and installed using easy to follow steps, like any other plugin. Refer to this article on Steps to Add Request a Quote Button to your WooCommerce Store.
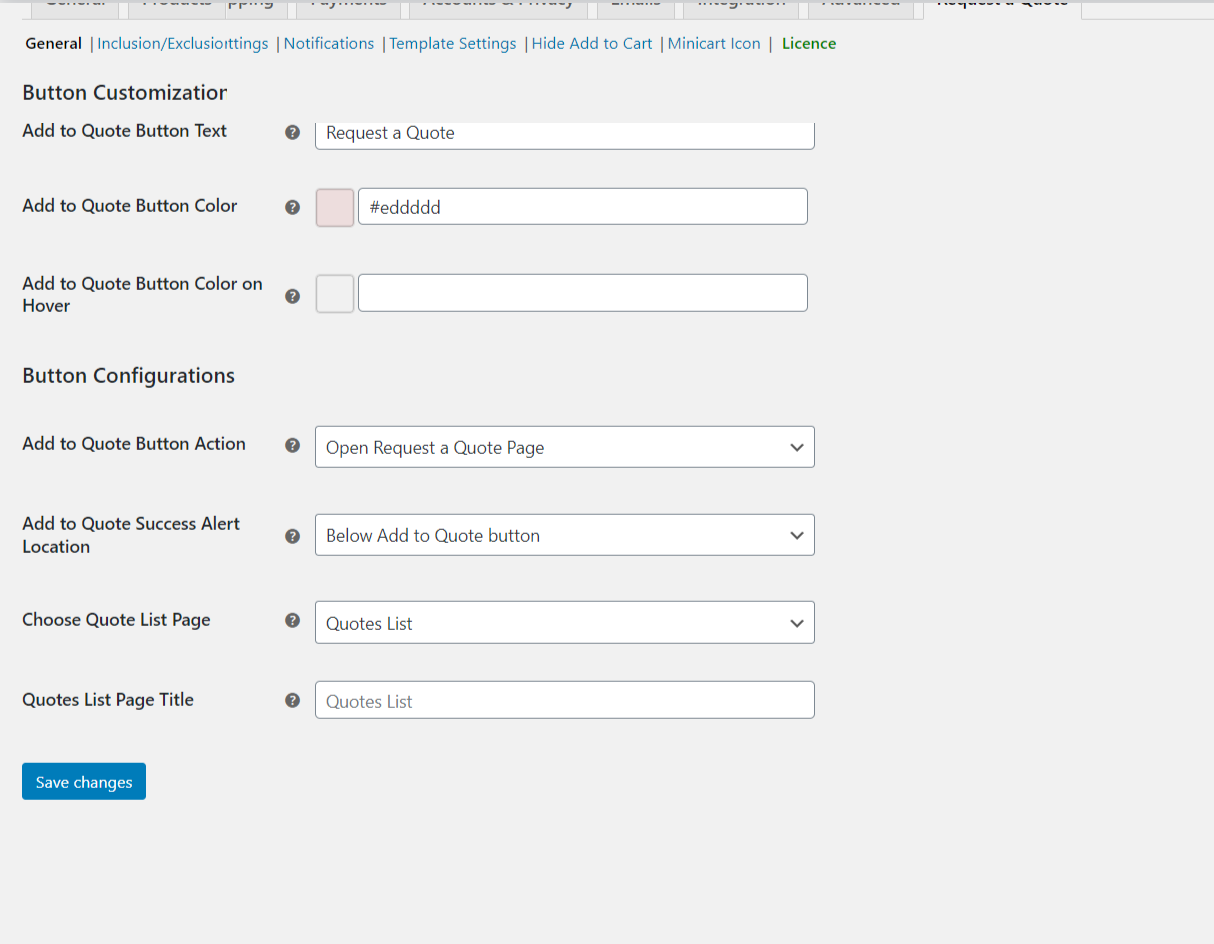
Once the plugin is installed and activated, you can access the settings by going to WooCommerce > Settings > Request a Quote.
Step 2: Configure the request a quote button and page
A customized Request a Quote button would be an automated way of generating quotes with the product details you enter in the form. This would eliminate the need for potential customers to contact you to submit an inquiry or request a quote, which saves them time and gives them more control over when they want to purchase your products.
The ability to customize this button will also help increase conversions on your site by giving customers more confidence in their decision before they’ve contacted you with their personalized questions.
The ‘Add to Cart’ button can be vastly customized to your criteria, as in you can change the button color, its name, and the page where customers can make the list of products to request a quote! When a customer clicks on the request a quote button, they will be redirected to the page where they can add the quantity required to purchase and the form to submit the request. This form is customizable as you can decide the fields and areas to be presented in the form and map each field with corresponding WooCommerce checkout fields.
Step 3: Customize the Quote list form
After completing the previous step, in which we describe the page in which the Request a Quote feature applies, now we will customize the Request a Quote form.
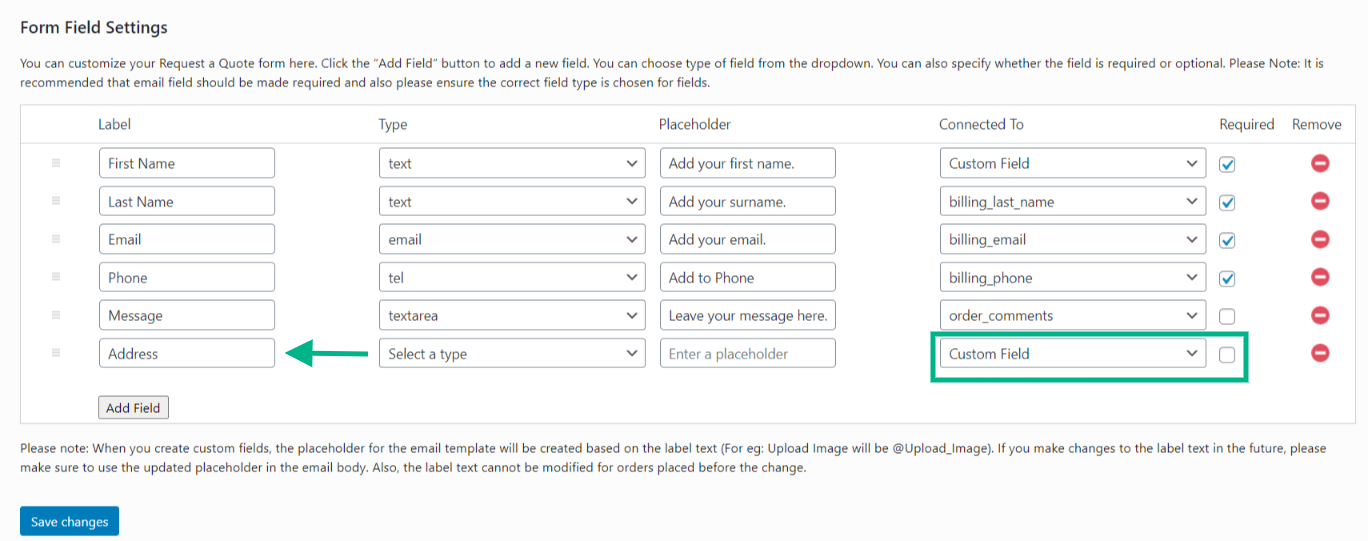
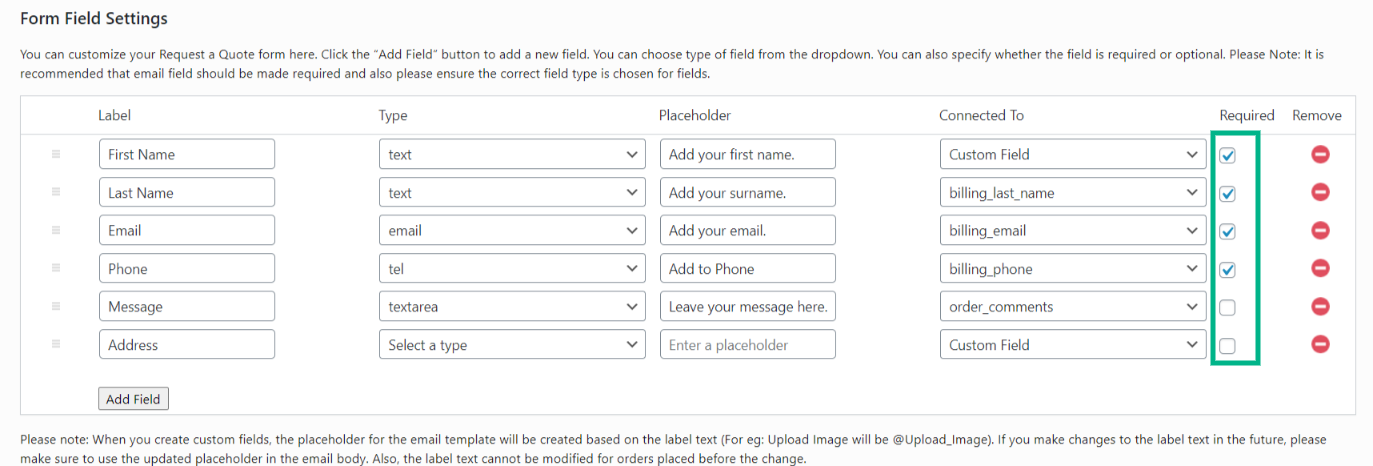
You can add the fields to be present in the form for the customers to fill up for requesting a quote. By default, there will be first name, last name, email, phone, and message. You can set each field to be ‘required’ by enabling it. If you do not enable it, it will be displayed as ‘optional’. And also there is an option to remove the fields.
To add a new field, you need to enter the text as a field label, the field type and placeholder text and connect it to the respective field. In the ‘connected’ dropdown menu, you will find the core fields of WooCommerce listed. You can also add a URL to redirect customers to a certain page after filling in the form.
You can create custom fields by connecting it to the ‘custom field’ option in the dropdown menu.
Once all the required fields are filled in, save changes.
Step 4: Set Inclusions and Exclusions to the add to quote Plugin
The free version of the ELEXtensions ‘Request a Quote’ plugin portrays the ‘Add to Quote’ button for all the products on your WooCommerce store. To apply the ‘Add to Quote’ button for selective products, you need to procure the premium version of the plugin.
If you enable ‘Exclude Products’ only those products selected will not display the ‘Add to Quote’ button in contrast to all the other products on the page displaying the button. By default, all products will have the ‘Add to Quote’ button available, if no option is selected in this settings section.
Step 5: Set up notifications
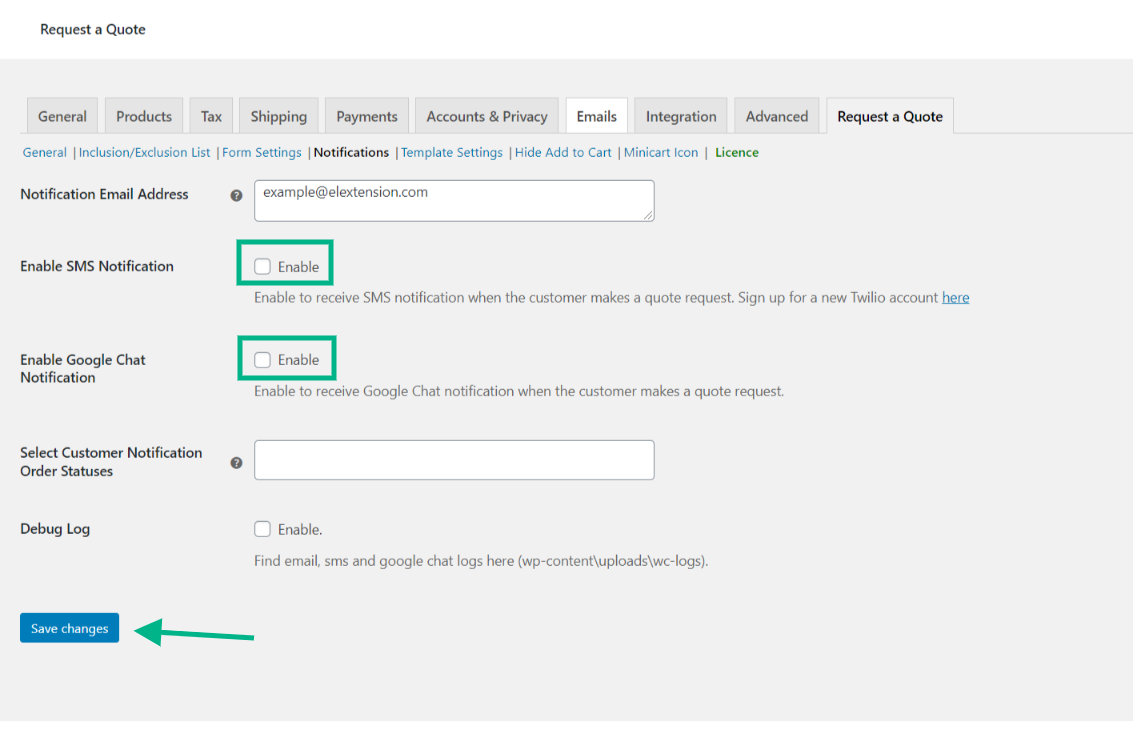
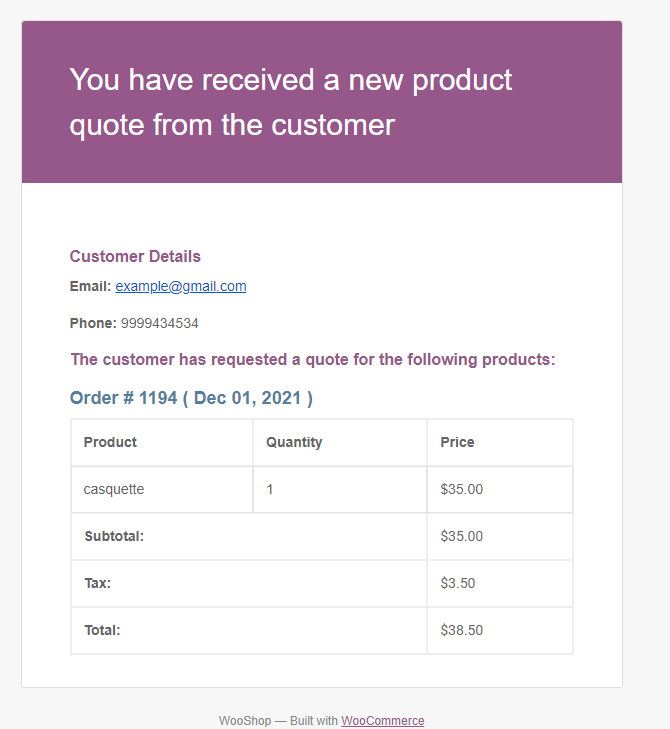
It is crucial to set notifications, as it sends an email or SMS to the admin stating that a customer has requested a quote for a certain product and in turn helps provide prompt responses to the customer and boost customer loyalty.
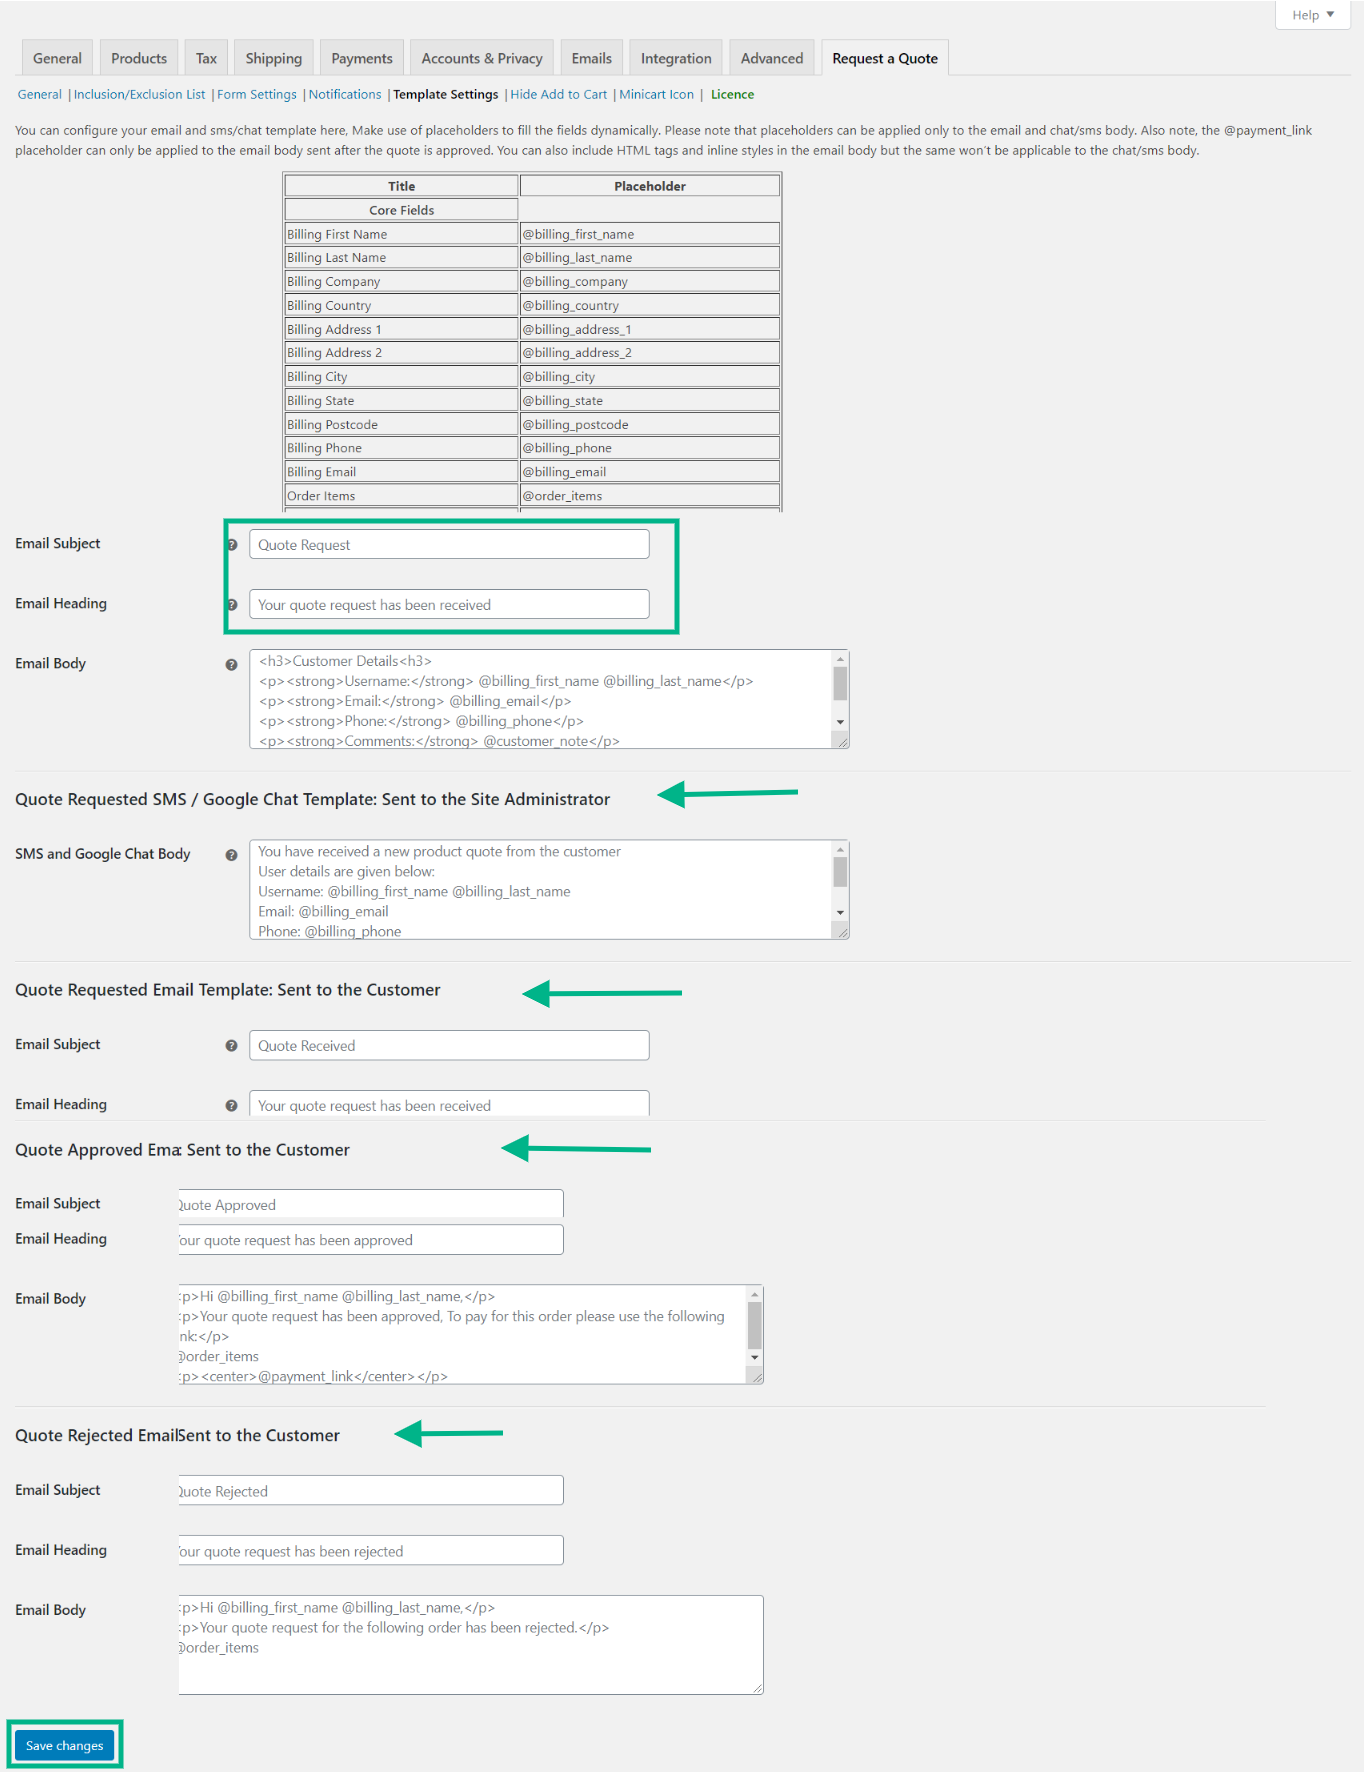
You have the option of customizing the template for your email, SMS, and Google chat notifications sent to the admin. You can change and customize the subject, heading, email body, chat body, and so on according to the requirements.
Conclusion:
In conclusion, the ‘Request a Quote’ plugin is one of the most efficient and useful plugins out there. The ELEXtensions Request a Quote plugin is one of the most reliable options, with the cost being reasonable along with a large variety of features. To purchase the plugin, click on this link, ELEXtensions Request a Quote plugin.
For further help, visit the product documentation, which consists of step wise guides on how to use the plugin.
Further Reading:
How To Help Your Customers To Calculate The Shipping Rates And Print The Labels Easily?

