In this article, we will be going over the steps involved in integrating DHL eCommerce Services into WooCommerce. We will be needing the ELEX WooCommerce DHL Express/Paket Shipping Plugin with Print Label for this.
Introduction:
For eCommerce stores, especially those that use WooCommerce and WordPress stand to benefit greatly from DHL eCommerce. It is one of the most economical ways you can ship products to your customers with more reliable transit times and commercial clearance. DHL eCommerce provide standard parcel delivery services for international business customers. Supplementing WooCommerce shipping with DHL eCommerce services can help improve your online business’s shipping and fulfillment solutions.
The ELEX WooCommerce DHL Express/Paket Shipping Plugin with Print Label lets you integrate DHL eCommerce products and services into WooCommmerce. Using the plugin you can enable DHL eCommerce shipment and label creation on your store. The plugin facilitates the shipping of your WooCommerce orders through DHL eCommerce services.
Integrating DHL eCommerce into WooCommerce
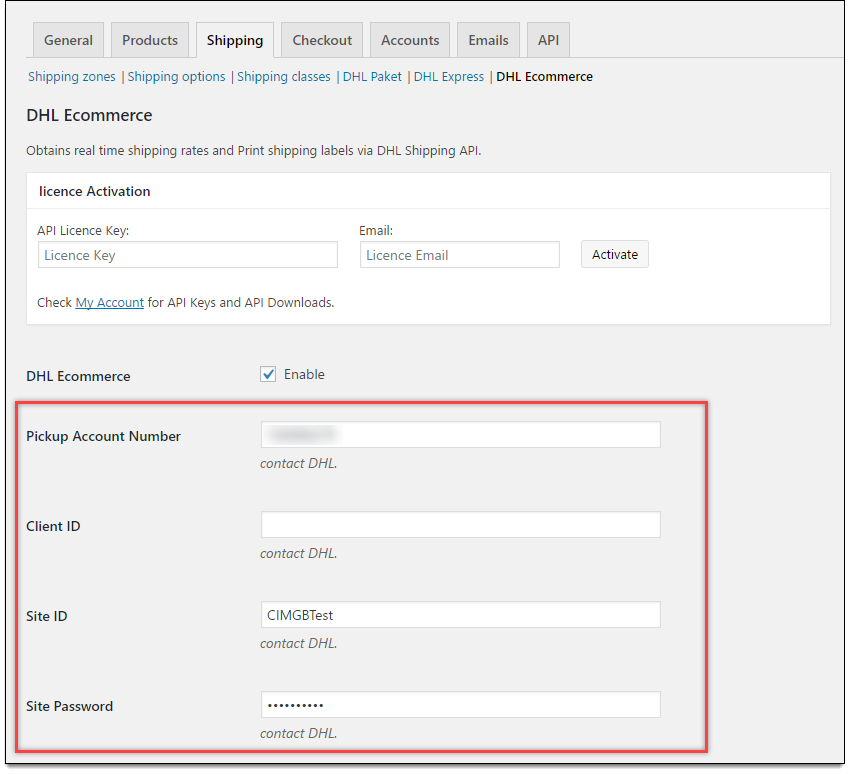
After you download, install and activate the plugin, navigate to the settings found under Dashboard > WooCommerce > Settings > Shipping > DHL eCommerce. You will need to enable the DHL eCommerce services using the checkbox found under the DHL eCommerce settings tab.
Connecting to DHL eCommerce:
To connect the plugin to your DHL eCommerce account, you will need to provide the following credentials:
- Pickup Account Number: Customer ID (or DHL eCommerce account number) provided to you once you sign up for a DHL account. e.g. 5311234
- Client ID: This ID is the identifier for accessing the web services, e.g. 29123
- Site ID: DHL eCommerce account username.
- Site Password: DHL eCommerce account password.
Access your DHL eCommerce Account to get these details or contact your DHL account manager for the same.
DHL Facility Code & Dimension/Weight Unit:
Facility code defines the DHL eCommerce facility location that receives and processes the shipment. It is assigned based on your shipping location. e.g. USORD1
Our plugin converts product dimensions and weight to the selected unit, and then the selected dimension and weight unit are used to send API requests during shipment and label creation.
From the Dimension/Weight Unit dropdown, you can choose the product dimension and weight that you want. The following are the two available options:
- Pounds & Inches: Any and all product dimensions get converted to pounds and inches before being sent to DHL servers as an API request.
- Kilograms & Centimeters: Any and all product dimensions get converted to kilograms and centimeters before getting sent to DHL servers as an API request.
Configuring Rates and Services:
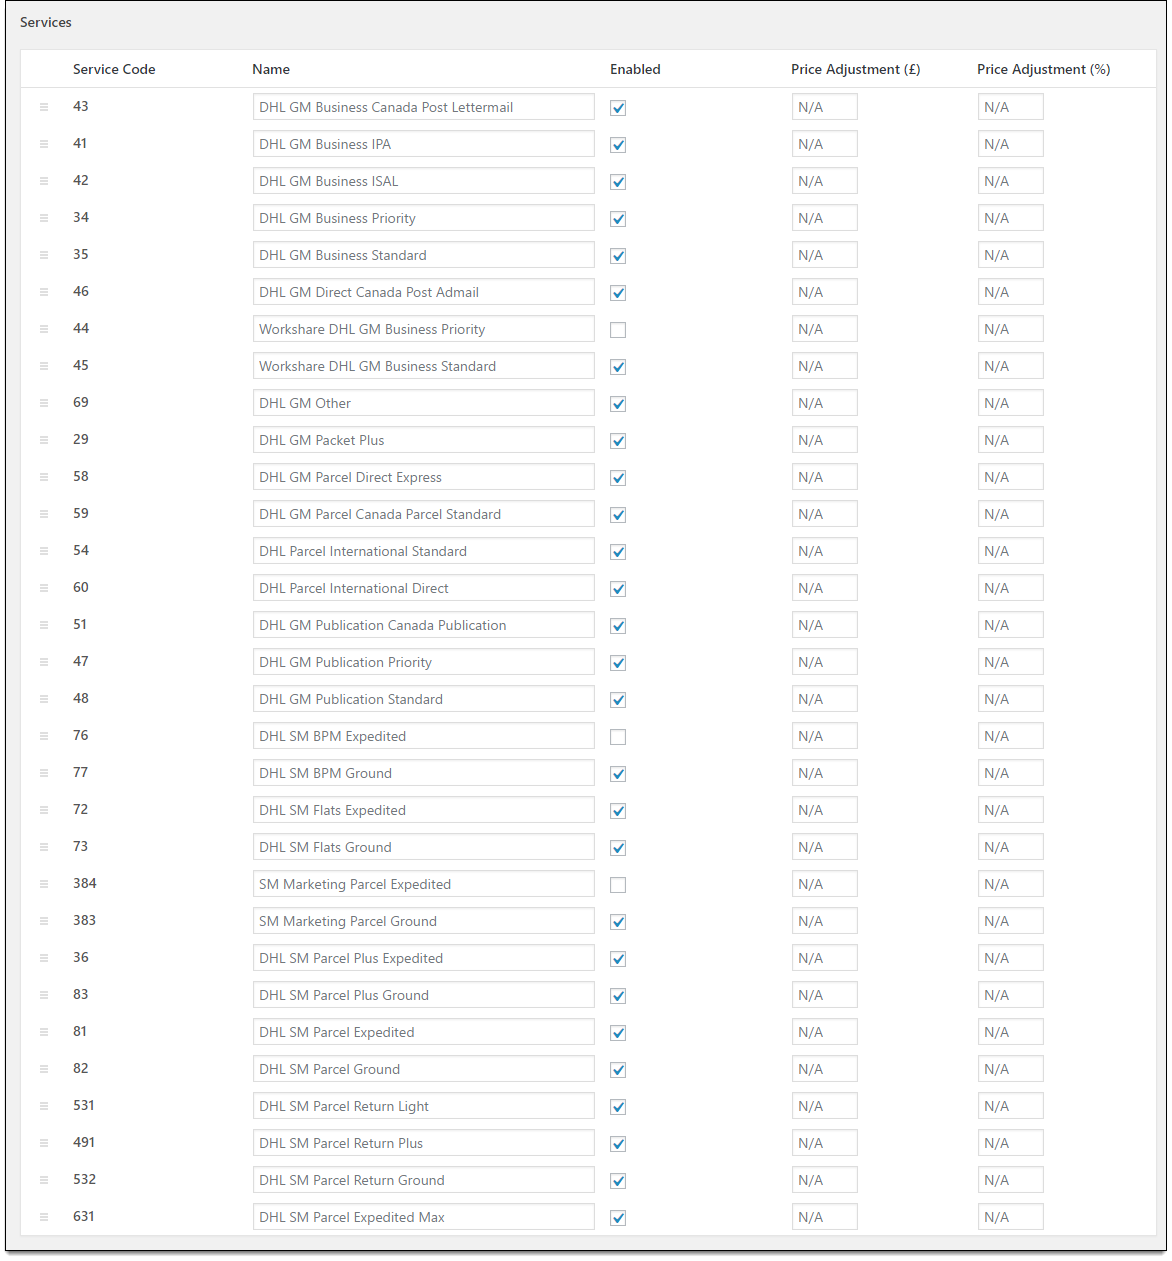
DHL provides varied kind of services that suit the different needs of customers. Our plugin supports the following DHL services:
- DHL GM Business Canada Post Lettermail
- DHL GM Business IPA
- DHL GM Business ISAL
- DHL GM Business Priority
- DHL GM Business Standard
- DHL GM Direct Canada Post Admail
- Workshare DHL GM Business Priority
- Workshare DHL GM Business Standard
- DHL GM Other
- DHL GM Packet Plus
- DHL GM Parcel Direct Express
- DHL GM Parcel Canada Parcel Standard
- DHL Parcel International Standard
- DHL Parcel International Direct
- DHL GM Publication Canada Publication
- DHL GM Publication Priority
- DHL GM Publication Standard
- DHL SM BPM Expedited
- DHL SM BPM Ground
- DHL SM Flats Expedited
- DHL SM Flats Ground
- SM Marketing Parcel Expedited
- SM Marketing Parcel Ground
- DHL SM Parcel Plus Expedited
- DHL SM Parcel Plus Ground
- DHL SM Parcel Expedited
- DHL SM Parcel Ground
- DHL SM Parcel Return Light
- DHL SM Parcel Return Plus
- DHL SM Parcel Return Ground
- DHL SM Parcel Expedited Max
Enabling or disabling the DHL eCommerce service option of your choice is as simple as ticking the checkbox next to the said option, under the Enabled column. Moreover, the plugin lets you change the order of enabled options as well. Apart from this, the plugin can be used to give custom names to enabled DHL eCommerce services.
The plugin also lets WooCommerce users configure the price of enabled DHL eCommerce services using the Price Adjustment fields. There are two fields by which you can adjust the price of the services.
- Price Adjustment (£): Increase or decrease the shipping rate of desired services by a flat amount.
- Price Adjustment (%): Increase or decrease the shipping rate of desired services by a percentage of the total cost.
This is useful in configuring promotional discounts or to account for unforeseen shipping expenses like packaging materials or handling costs.
Setting Origin Address for DHL eCommerce Shipments:
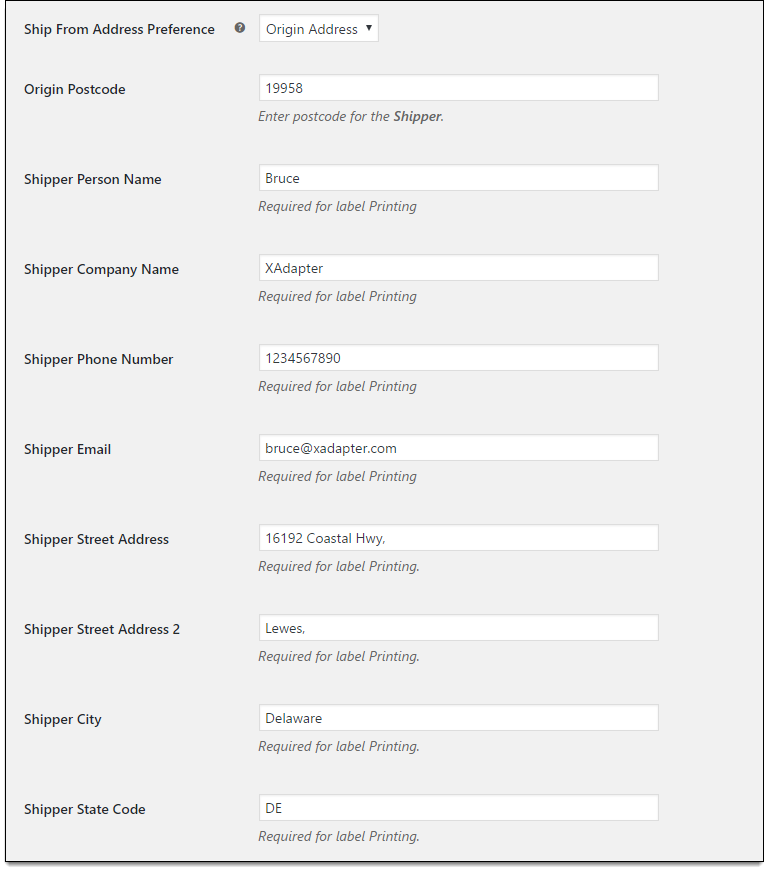
It is important to set the Origin Address using the appropriate fields in the plugin settings. These details are used in the calculation of DHL eCommerce shipping rates and the printing of shipping labels.
- Ship From Address Preference: With this field, you can set an address of the actual order shipper. This option is useful when using a multi-vendor plugin along with this plugin.
- Origin Postcode: This is the postcode of the place from where you are shipping items.
- Shipper Name: Enter the name of the shipper.
- Shipper Company Name: Enter your company name.
- Shipper Phone: Enter your contact number.
- Sender Email: Enter the email address of the shipper, so that you can receive emails from DHL while creating the label.
- Shipper Street Address: Enter the first line of Address.
- Shipper Street Address 2: Enter the second line of Address.
- Shipper City: Enter your city name.
- Shipper State: Enter your state name.
- Shipper State Code: Enter the respective state code.
Note: It is mandatory to enter all of the above fields.
Configure DHL eCommerce Shipping Label Printing:
The Print Label Settings are as shown below:
- Label print size: With this field, you can set the size of the printing label.
The available options are as given below:- 8X4_A4_PDF: Generates labels in PDF format with a size of 8 x 4 inches.
- 8X4_thermal: Generates labels with a size of 8 x 4 inches. This is suitable for ZPL2 and EPL2 format.
- 8X4_A4_TC_PDF: This option generates labels in TCPDF format with a size of 8 x 4 inches.
- 8X4_CI_PDF: Generates labels in PDF format with a size of 8 x 4 inches for CI printers(compact printer).
- 8X4_CI_thermal: Labels will be in PDF format with a size of 8 x 4 inches for CI thermal printers(compact printer).
- 6X4_A4_PDF: This option generates labels in PDF format with a size of 6 x 4 inches.
- Print Label Type: With this field, you can set the required file format for printing the labels.
The available options are as given below:- PDF: This option prints the label in portable document format, which is used to present documents in an independent manner of application, software, hardware, and operating systems.
- ZPL2: This option is suitable for printing on Zebra branded printers.
- EPL2: This option is suitable for printing on media of reduced space, and although it supports bitmaps (and therefore, arbitrary images), its use is usually for labels including bar-code information.
Configuring DHL eCommerce Tracking, Customer Messages, and Debug Mode:
The plugin integrates DHL shipment tracking into WooCommerce seamlessly. When enabled, the tracking pins for packages that are being shipped with DHL eCommerce will have a DHL tracking pin generated and included in the Order Notes.
To enable the DHL tracking pin, simply tick the checkbox that says Add Tracking PIN to customer order notes.
Additionally, the plugin lets you create Custom Shipment Messages for your customers. These messages contain placeholders that contain vital shipping information for customers. These placeholders are replaced with the information that they stand for, in every order. The place holders are as follows:
- [ID] for Shipment ID
- [SERVICE] for Shipment Service
- [DATE] for Shipment Date
Using these place holders you can create a custom message to be sent to your customers when their orders are shipped. This can help in opening communication and promoting long mutually beneficial relationships with customers. By default, there’s a message already configured with all of the placeholders and this will be sent to customers if a custom one isn’t configured.
Furthermore, the plugin has a debug mode that can be enabled in case of any discrepancies in the rate, or errors in package and shipment creation.
Configuring Default Services and Customs Descriptions:
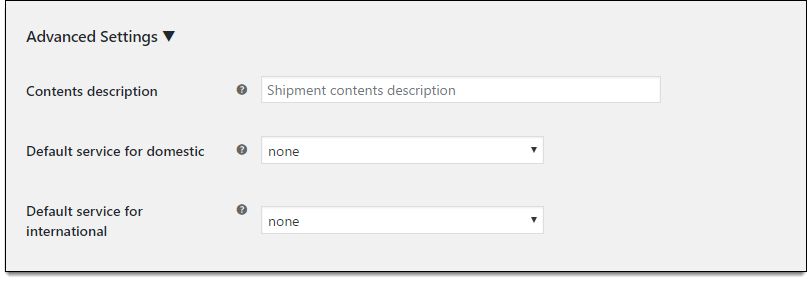
The plugin also lets you choose from all the enabled DHL eCommerce options, the service you wish to be the default for domestic and international services. There is also a facility to provide a Contents description that is necessary for international shipments and is used by Customs.
Creating DHL eCommerce Shipment Labels:
Once DHL eCommerce settings are configured to your liking you can proceed to create DHL eCommerce shipments and generate shipping labels from WooCommerce.
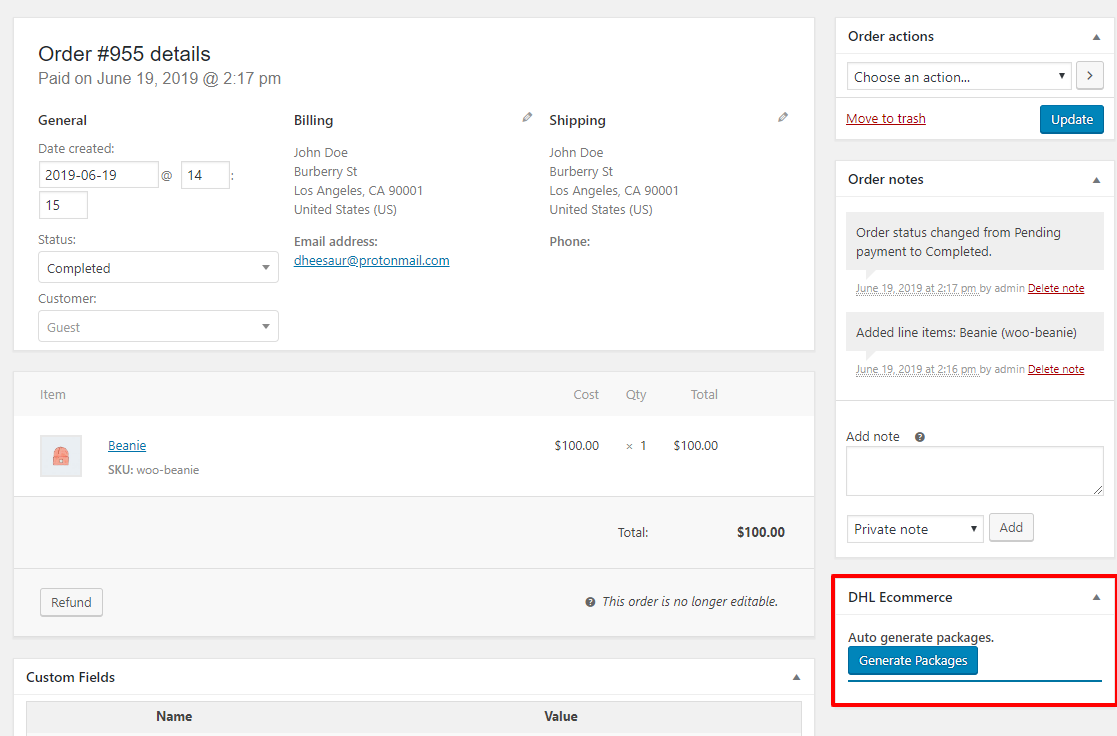
Once a customer has placed an order on your site, it will show up in the Orders page under WooCommecre. Navigate to the individual order that you wish to ship with DHL eCommerce with WooCommerce>Orders>Individual Order. Here you will find the DHL eCommerce package generation tab.
Clicking on Generate Packages will prompt you to enter more details in the eCommerce window. Here you can choose the type of DHL eCommerce service, the expected delivery date, and package configuration. The plugin pulls the product dimensions automatically.
These are the Mail types that can be chosen to send the packages:
- Machinable Parcel
- BPM Machinable
- Parcel Select Mach
- Parcel Select NonMach
- Media Mail
- Marketing Parcel < 6 oz
- Marketing Parcel >= 6 oz
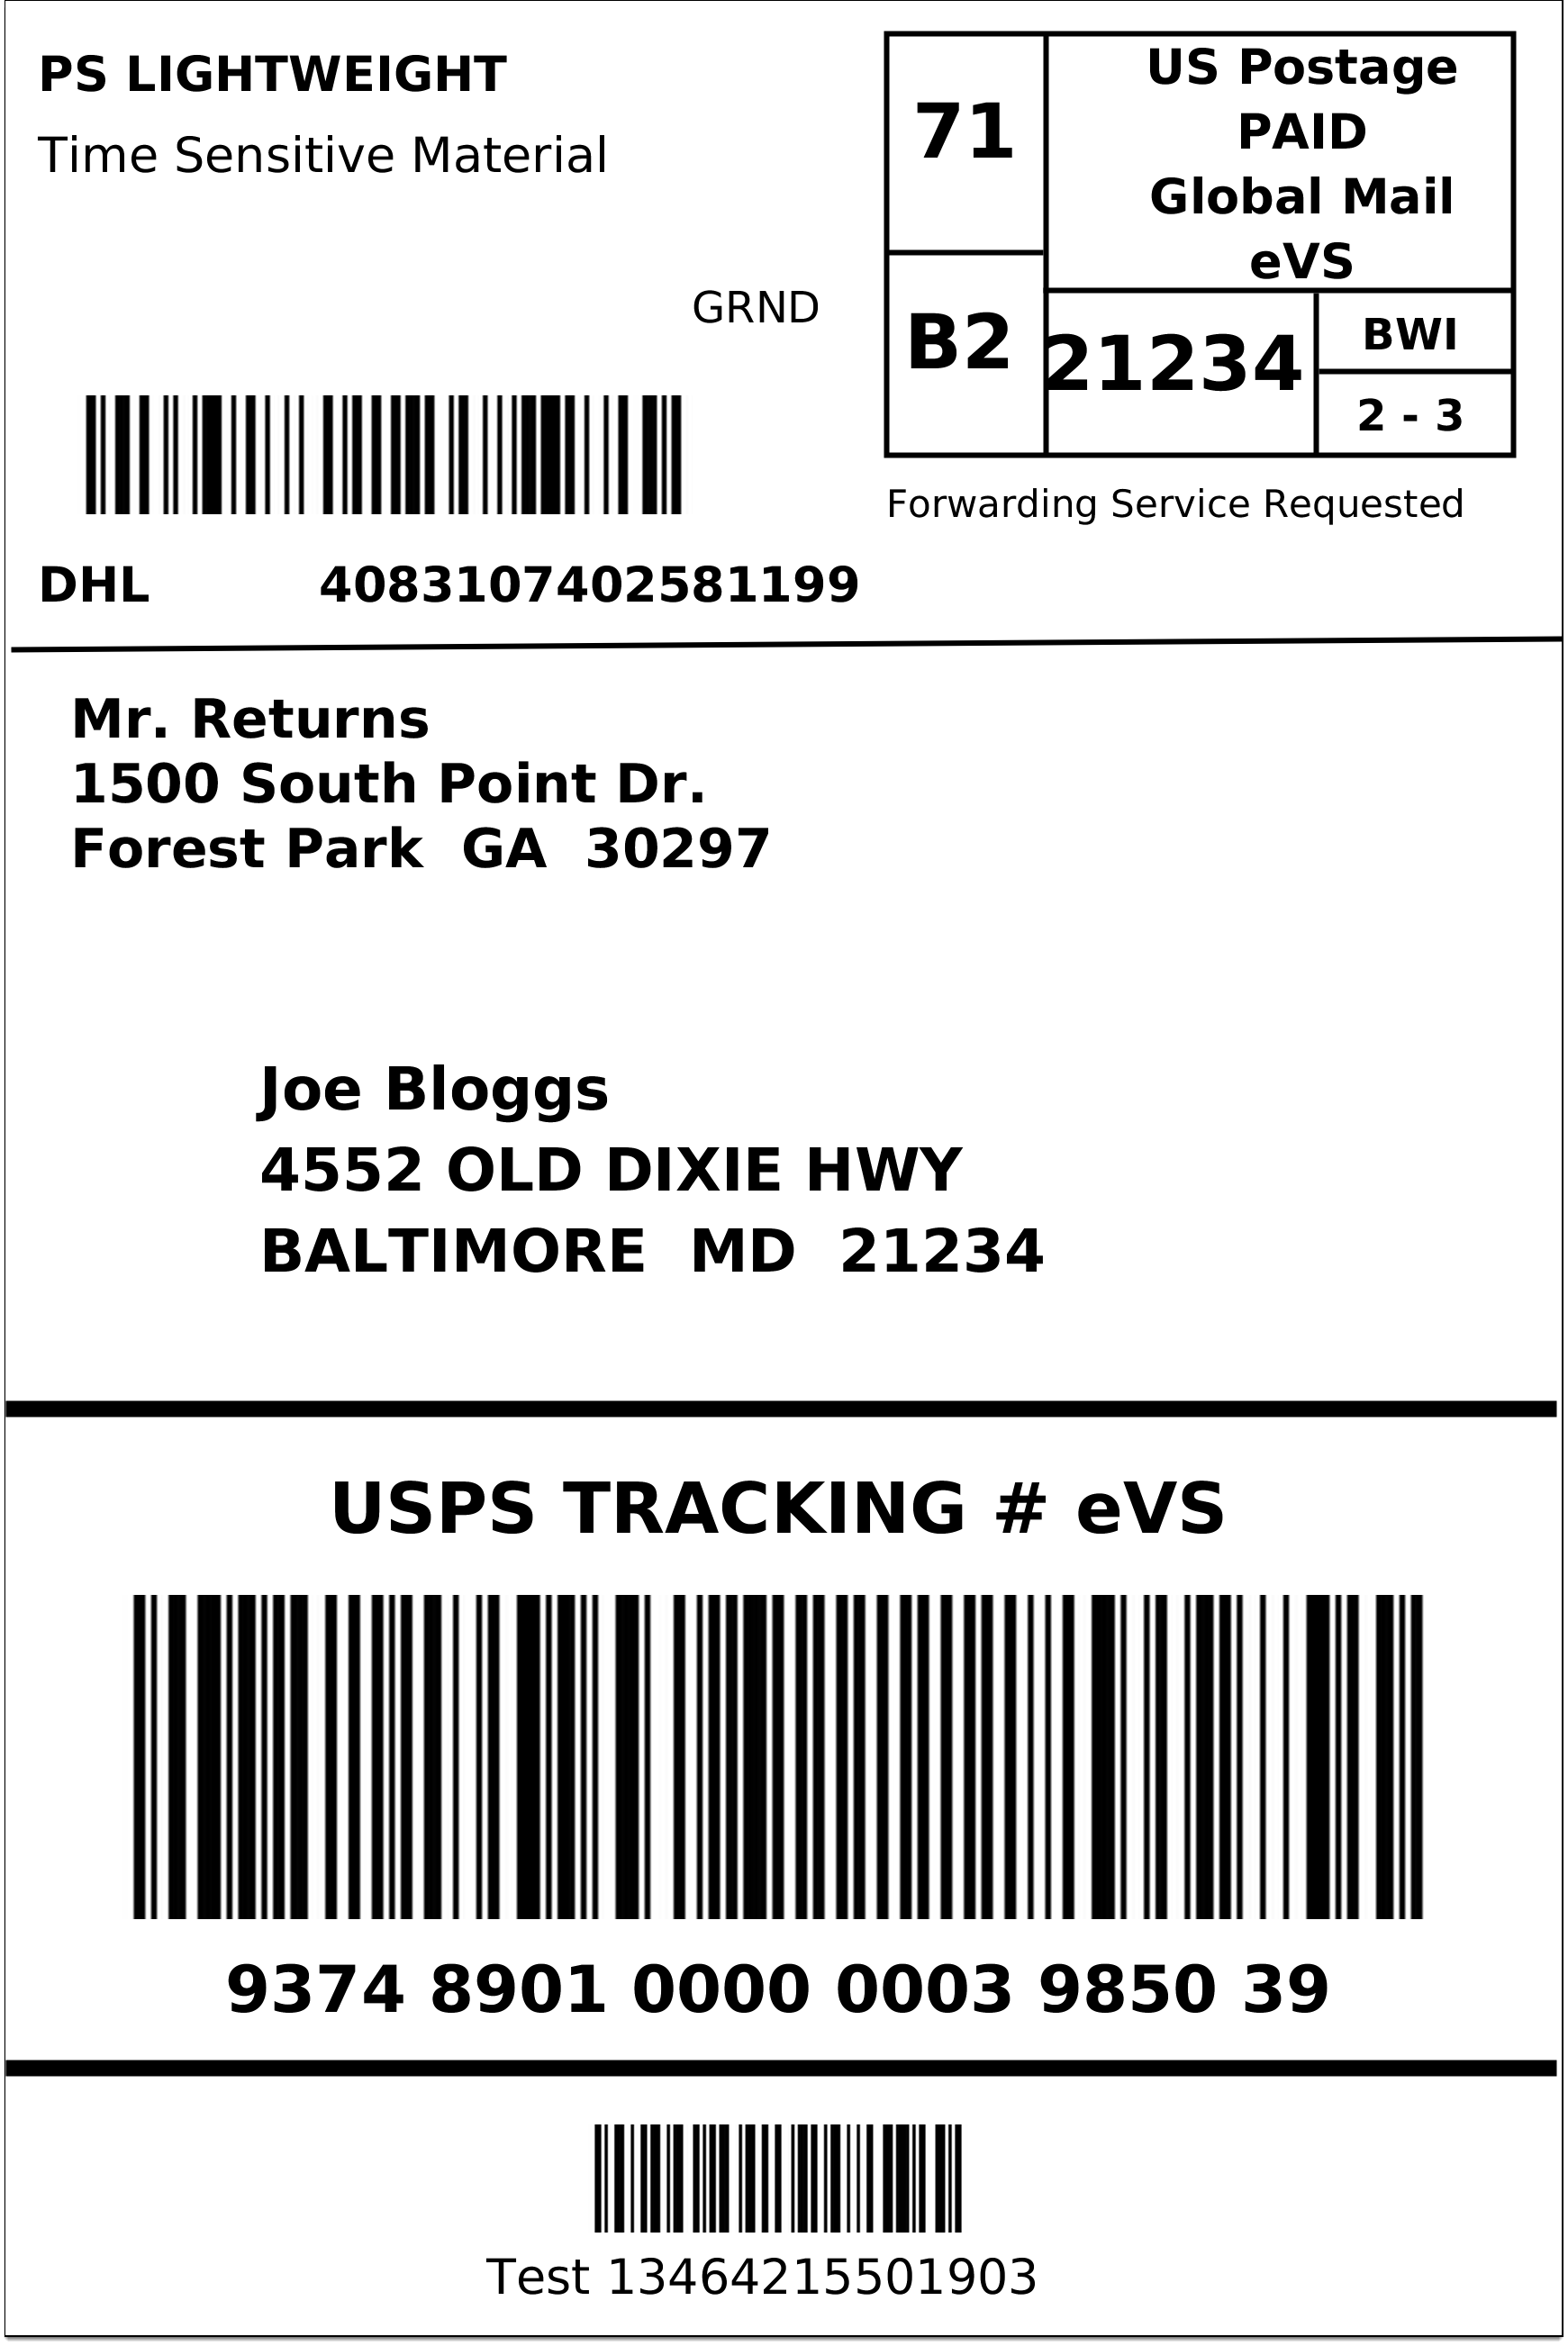
Once the shipment is created, you can click the Print Label option to print a shipping label. Attach the label to the packaged items and you can either take it to the nearest DHL shipment center by yourself or use the plugins DHL pickup request feature to have DHL personnel drive to your physical location to pick up the packages. A sample DHL eCommerce shipping label generated using the plugin looks like this:







Further Reading: