The digital era has redefined the way customers engage with brands, and a seamless shipping experience has become a fundamental expectation. Efficient shipping processes are not just about delivering products; they encompass customer satisfaction, brand reputation, and competitive advantage. EasyPost is a powerful solution, providing a unified gateway to multiple carriers’ services.
Every click of the “Buy” button initiates a journey from your store to your customer’s doorstep. The efficiency and reliability of this journey define customer satisfaction and, ultimately, your brand’s success. This is where EasyPost steps in — a comprehensive shipping API platform that unifies the shipping experience across major carriers like FedEx, UPS, Canada Post, and USPS.
In this article, we embark on the journey of signing up and utilizing EasyPost as your go-to shipping solution for WooCommerce. Prepare to unlock a world of streamlined shipping operations, enhanced customer experiences, and a stronger foothold in the competitive e-commerce landscape.
Watch the walkthrough video here:
Introduction: The Power of Efficient Shipping
In the current world of e-commerce, customer expectations for fast and reliable shipping are higher than ever. A smooth shipping process not only enhances customer satisfaction but also impacts your brand’s reputation and competitiveness.
EasyPost emerges as a beacon of efficiency, offering a single API integration that connects you to a multitude of carriers, simplifying your shipping operations and enhancing the delivery experience.
All About EasyPost
EasyPost is not merely a shipping solution; it’s a gateway to a world of shipping possibilities. By aggregating various carriers and their services under a single API integration, EasyPost streamlines the entire shipping process.
From label generation and tracking to rate calculation and address validation, EasyPost simplifies the complexities of shipping, making it accessible to businesses aiming to deliver exceptional customer experiences.
The Benefits of Integrating EasyPost Into Your WooCommerce Store
- Access to Major Carriers: By integrating EasyPost, your WooCommerce store gains access to a diverse range of major carriers such as FedEx, UPS, Canada Post, and USPS. This diversity empowers you to offer multiple shipping options to customers, catering to their preferences and needs.
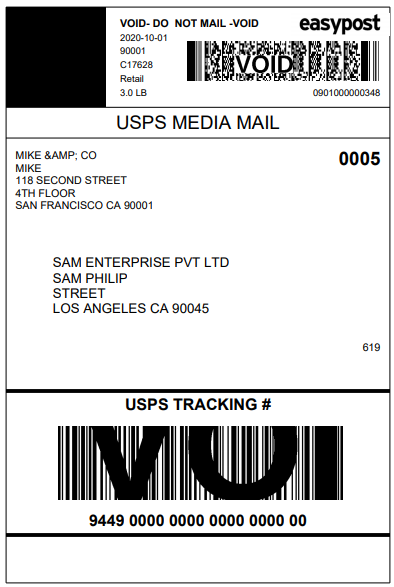
- Simplified Label Printing: With EasyPost, generating shipping labels becomes a breeze. The platform ensures that labels contain all the necessary information for carriers and customers, streamlining the labeling process and minimizing errors.
- Real-Time Tracking: EasyPost provides real-time tracking updates, keeping both businesses and customers informed about the status of shipments. This transparency increases client trust and happiness.
- Accurate Rate Calculation: Calculating accurate shipping rates is crucial for customer trust and revenue optimization. EasyPost’s rate calculation engine ensures that customers receive precise shipping costs based on factors like weight, dimensions, and destination.
- Address Validation: Accurate delivery begins with accurate addresses. EasyPost offers address validation services, reducing the chances of delivery errors and returns due to incorrect addresses.
- Enhanced Customer Experience: By offering accurate shipping options, real-time tracking, and reliable delivery, integrating EasyPost enhances the overall customer experience, fostering loyalty and repeat business.
- Time and Cost Savings: EasyPost eliminates the need to manage separate integrations for different carriers. This not only saves time but also reduces the costs associated with managing multiple shipping solutions.
- Streamlined International Shipping: For businesses venturing into international markets, EasyPost simplifies the complexities of international shipping, ensuring compliance with regulations and providing reliable delivery options.
Section 1: Signing Up for EasyPost
Step 1: Visit the EasyPost Website
Begin your journey by visiting the EasyPost website, where the power of seamless shipping awaits.
Step 2: Creating Your EasyPost Account
To sign up for EasyPost, use the “Get Started” or “Sign Up” button. Fill in the necessary details to initiate the registration process.
Verify Your Email:
Check your inbox for a verification email from EasyPost. Click on the link provided to verify your email address and activate your account.
Step 3: Setting Up Your EasyPost Profile
Log In:
After email verification, log in to your newly created EasyPost account using your credentials.
Complete Your Profile:
Navigate to your account settings and provide essential details about your company, including contact information and shipping preferences.
Step 4: Connecting Your Carriers
Access the Carriers Section:
Within your EasyPost dashboard, locate the “Carriers” section, where the magic of carrier integration begins.
Link Your Carriers:
Connect your FedEx, UPS, Canada Post, and USPS accounts to EasyPost. This connection allows EasyPost to access carrier services on your behalf.
Section 2: Integrating EasyPost with ELEX EasyPost Plugin for WooCommerce
For this, we’ll be utilizing the ELEX EasyPost (FedEx, UPS, Canada Post & USPS) Shipping & Label Printing Plugin for WooCommerce, which lets you display shipping rates in real-time and print labels for USPS, UPS, FedEx, UPS DAP, UPS SurePost, and Canada Post. Besides real-time shipping rates, the plugin generates shipping labels, and packaging options, and tracks shipments. You may set up USPS Flat rate boxes, make your own custom box packaging options, and see when your packages are estimated to arrive, all with the help of this plugin.
Step 1: Install and Activate the Plugin
Reading this article will demonstrate the ins and outs of ELEX’s checkout process. In addition, you can read instructions on how to download, install, and activate ELEX plugins in this article.
Once the plugin has been installed and activated, there are two methods to access its settings:
Dashboard > WooCommerce > Shipping > Easypost or (alternatively)
Settings can be accessed via Dashboard > Plugins > Installed Plugins > ELEX EasyPost Shipping Plugin for WooCommerce > Settings.
Step 2: Configure Plugin Settings
- Real-time Rates: To use EasyPost’s real-time pricing and service, you must enable this option. If you disable this option, you won’t have access to any EasyPost services.
- Debug Mode: By switching on ‘debug mode,’ you’ll have the option to keep a log of all the errors that might arise while requesting and receiving responses via the EasyPost API. Once enabled, on the cart and checkout pages, there is a section at the top with debugging information.
- Disable rates on cart: When this option is checked, shipping rates for EasyPost packages will not show up on the cart page.
- API Mode: You can test your plugin configurations in TEST mode (to see how they perform in terms of real-time pricing, label printing, and so on) before switching to LIVE mode and accepting live purchase transactions.
- API-KEY: Registration with EasyPost is required to obtain an API Key for the use of the EasyPost.com APIs. You’ll get both a test key and a live key once your registration is complete, as described in the previous sections. Paste the generated API key here.
Step 3: Choose Carriers and Services
Within the plugin settings, select the carriers and services you want to offer to your customers. These choices determine the shipping options available during checkout.
- Method Title: Customize the name of the EasyPost shipment option here. You’ll find this heading in your shopping cart’s shipping section when checking out.
- Method Available to: This field enables you to select the countries for which you would like to offer the EasyPost shipping method. You can either choose to ship to all countries or to specific countries of your choice.
- Zip Code: Enter the sender’s postal code. You’ll get an accurate delivery rate based on this zip code.
- Sender Country: Select your preferred sender country.
- Estimated Delivery Date: This is an estimate of when the package will be delivered to the specified shipping address.
- Working Days: Choose the delivery working days. Based on the specified days, the customer will obtain the estimated delivery date.
- Cut-off Time: Select your preferred cut-off time. For orders placed after the cut-off time, EasyPost API will choose the next working day as the shipping date. Your system’s date and time format will determine the time format.
- Lead time: If inventory shortages or supply delays cause shipping delays, you can determine the lead time. The lead time options determine the estimated delivery date.
- Fallback: If EasyPost is unable to provide any shipping rates, the fallback rate will be made available so that customers can complete their purchases. Leave empty to disable.
EasyPost’s services for the following shipping carriers are as follows:

Click Save Settings once they are configured.
Step 4: Label Generation Rules
Set up your shipping rates and rules based on factors like destination, weight, and dimensions. This ensures that the shipping charges that are displayed to your customers are accurate.
- Print Label Type: Choose the shipping label file format here. The options available are PNG, PDF, ZPL, and EPL2.
- Insurance: Add insurance if required.
- Label Size: Select the label size between default and custom.
- Signature Option: Enables secure, informed delivery. Signatures notify the sender and confirm delivery. This is perfect for sending fragile items or important paperwork.
- Branding link: A standard label-generating URL can be specified as a branding link.
- Commercial Invoice: When enabled, the consumer will receive an email containing a link to the commercial invoice upon order completion.
- IOSS and HAZMAT: Add your IOSS and HAZMAT declarations if needed.
When creating domestic or international shipping labels in bulk, select the right default service for your store. Orders with no shipping services will use these options’ default services.
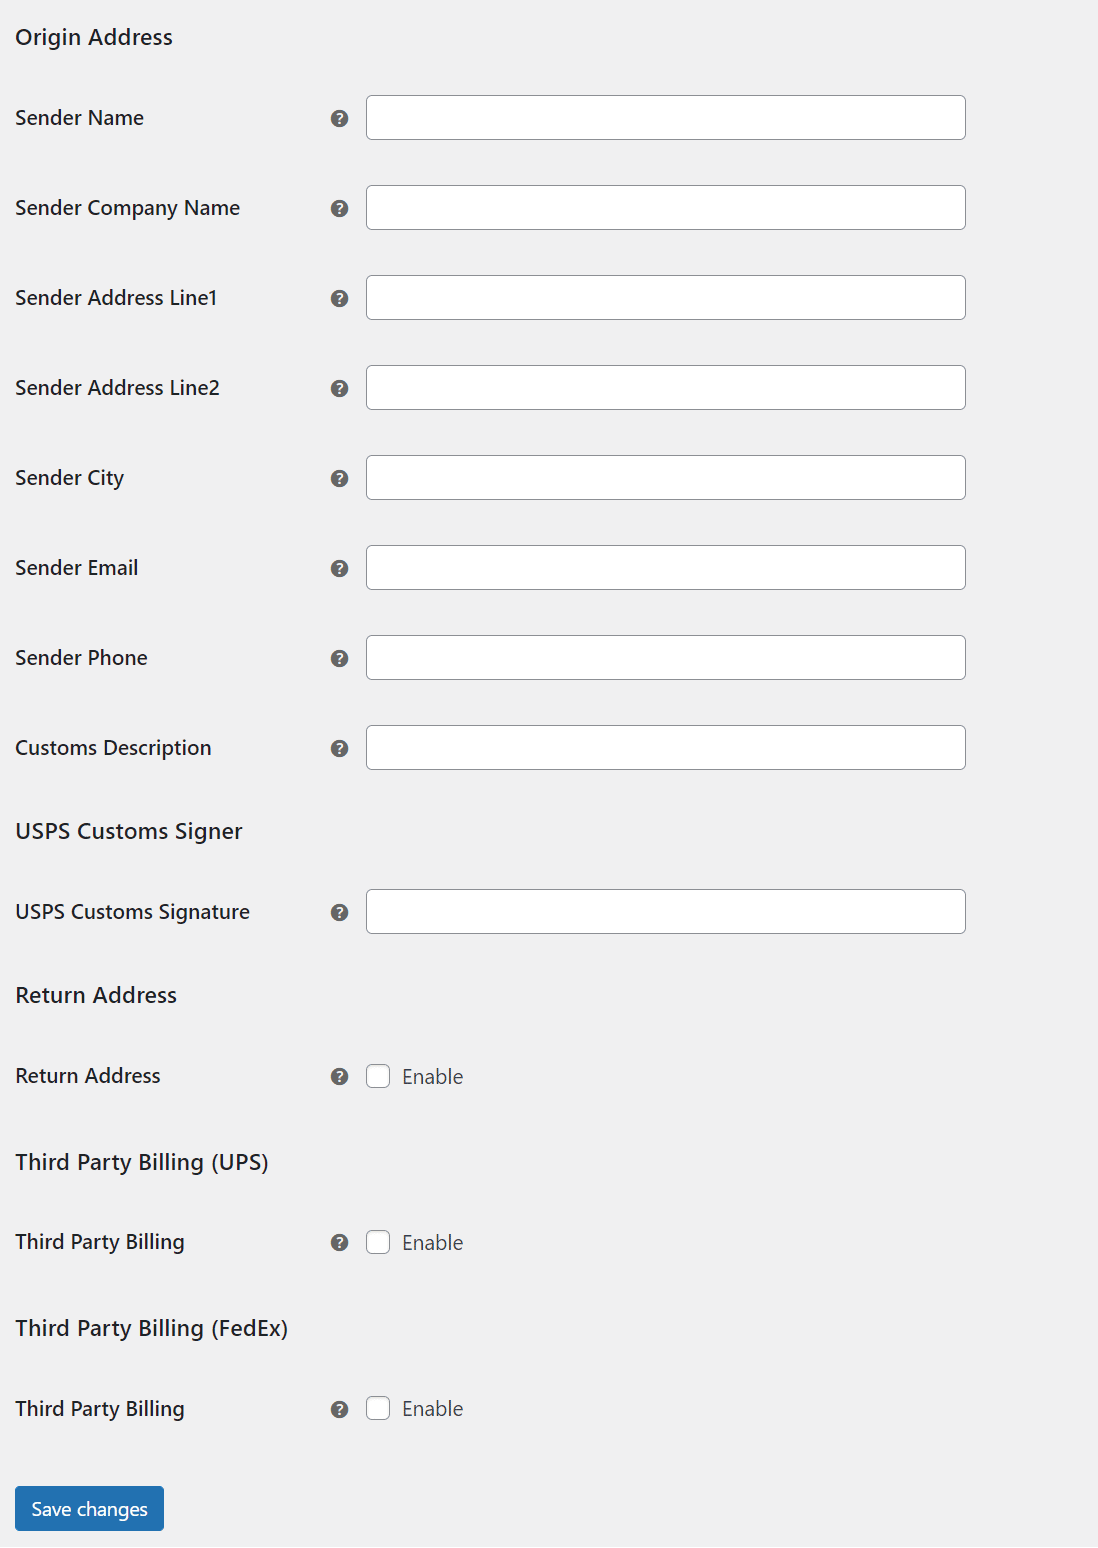
- Sender Details: Type in the name, business name, address, email address, and phone number of the sender.
- Customs Description: Enter the item’s description here for use in international customs declarations. This description will assist with customs procedures.
- Return Address: Check this box if you have a different return shipping address than the one you used to send the item. If this box is left unchecked, the sender’s address will be used as the recipient’s. Once the box is checked, you may fill out the rest of your information, such as your name, company name, address, phone number, and email address.
You can also enable Third-Party Billing for FedEx and UPS from here.
Once all the settings are configured, click Save Changes.
Step 5: Packaging

Lastly, click Save Changes.
Section 3: Demonstration
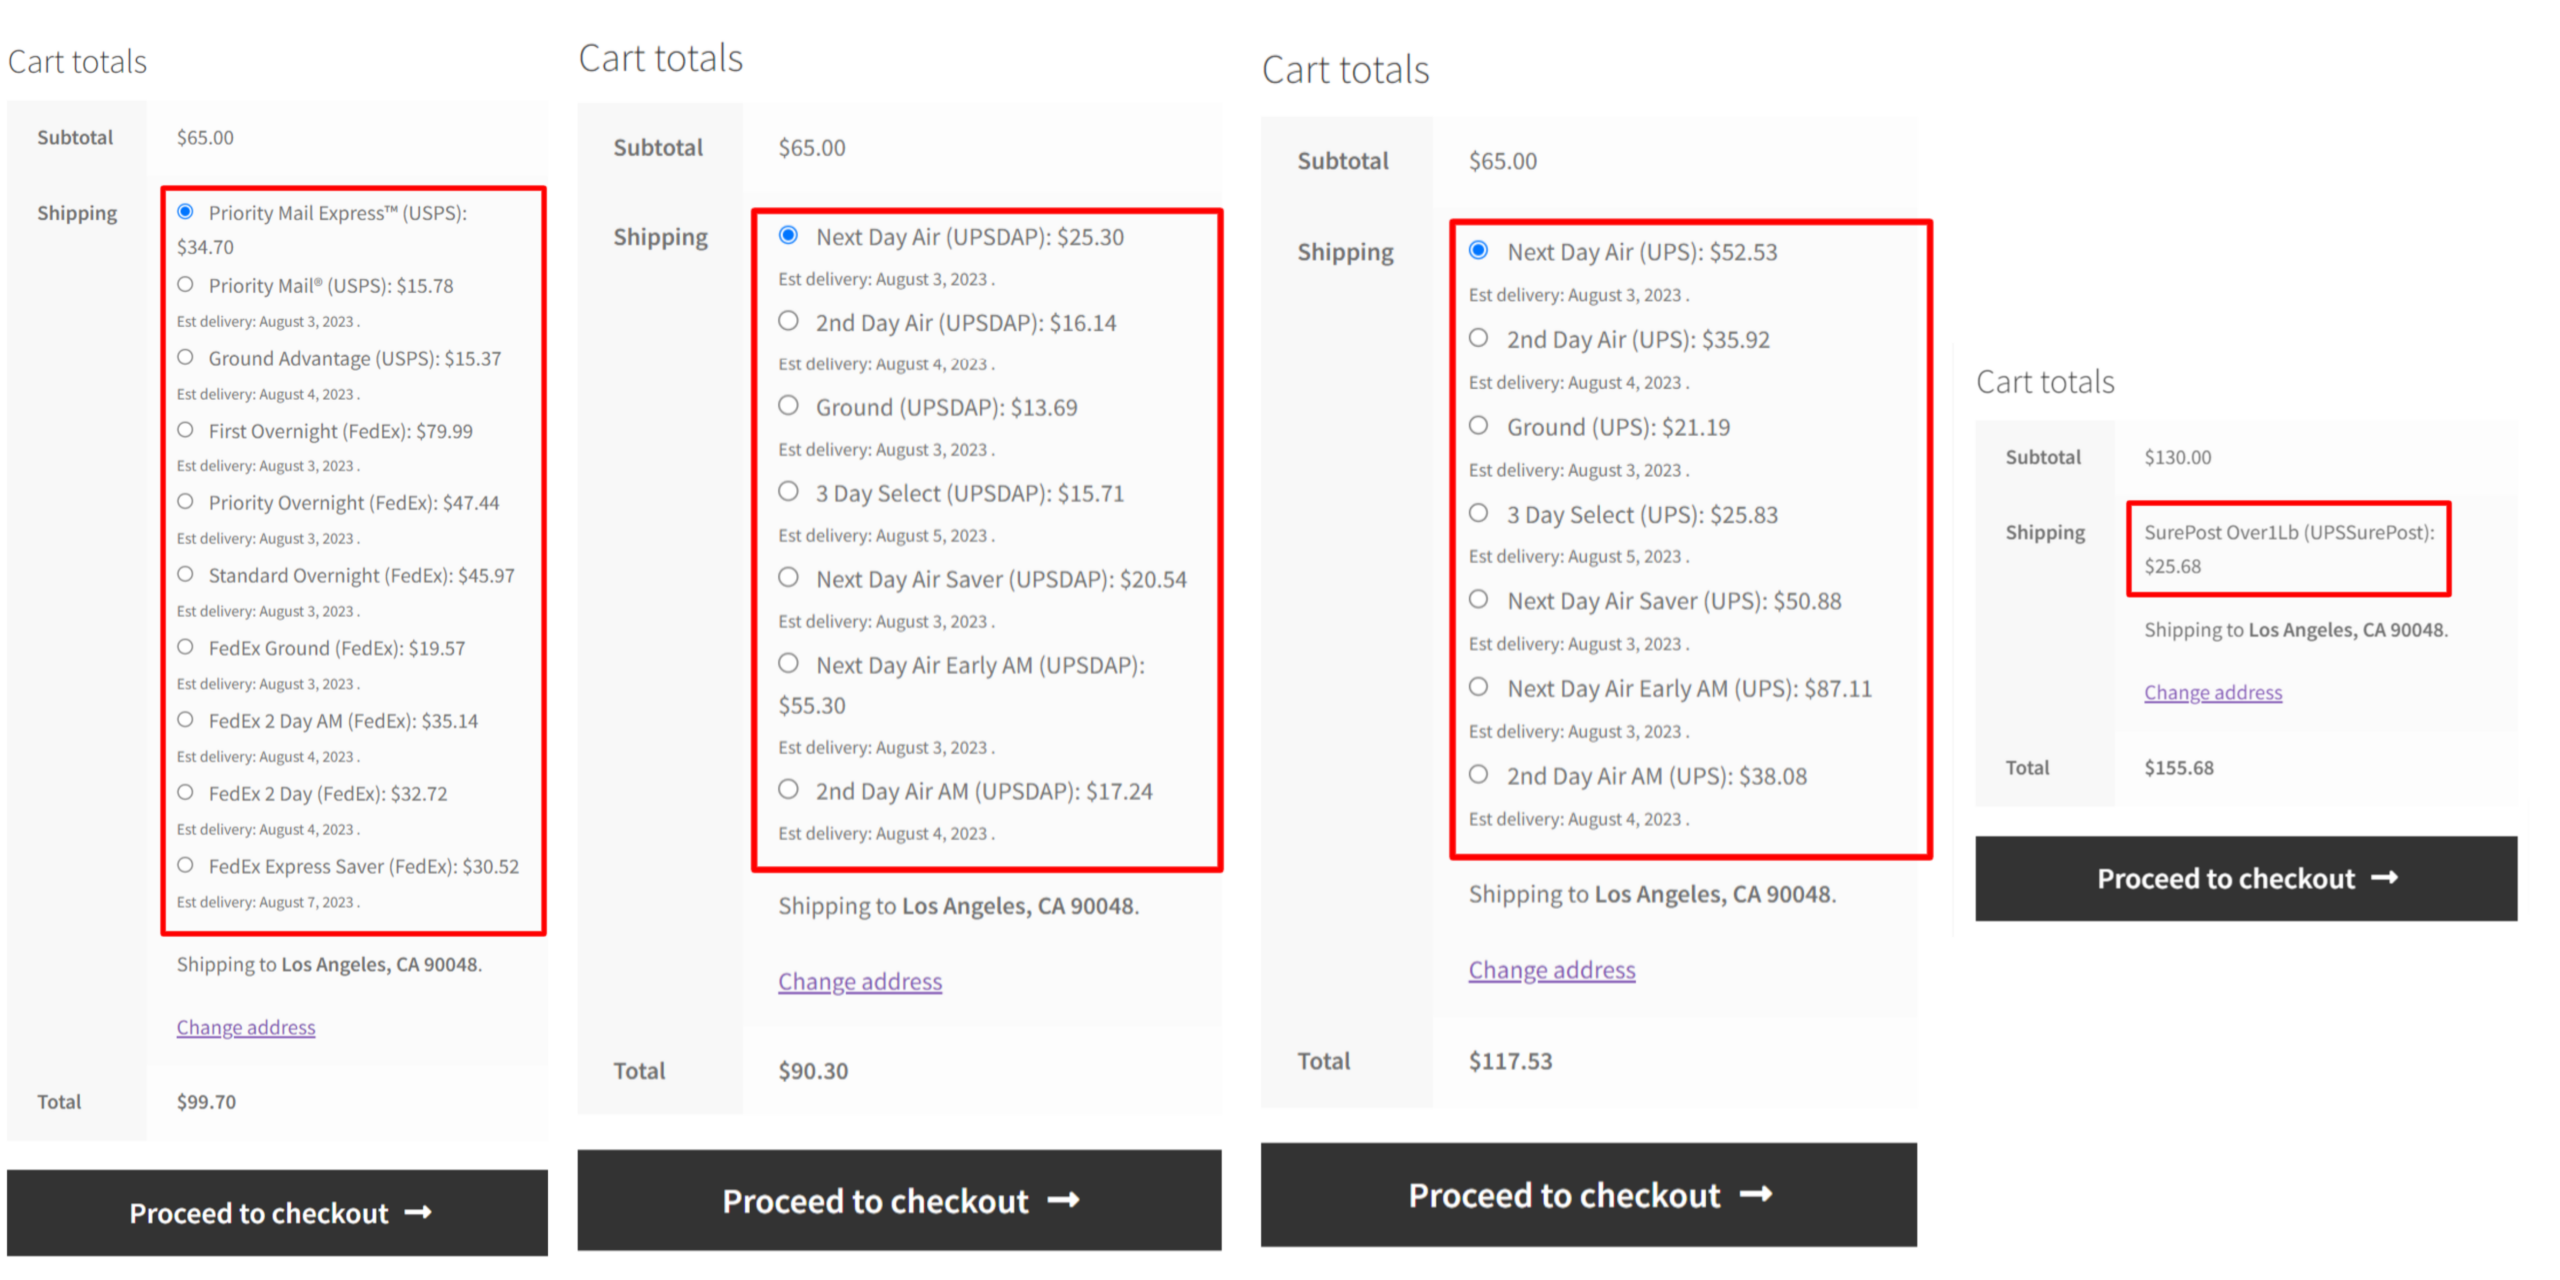
This screenshot illustrates EasyPost domestic rates and services.


 Conclusion: Elevating Shipping Operations with EasyPost Integration
The integration of EasyPost through the ELEX EasyPost (FedEx, UPS, Canada Post & USPS) Shipping & Label Printing Plugin for WooCommerce opens a realm of possibilities for your e-commerce shipping operations.
With a seamless sign-up process and user-friendly plugin configuration, you can effortlessly access the capabilities of major carriers and provide customers with accurate shipping options.
From label generation to real-time tracking, EasyPost and the ELEX plugin ensure that your shipping process becomes a cornerstone of customer satisfaction and business success. Embrace the power of efficient shipping today and witness the transformation in your e-commerce journey.


