E-commerce businesses thrive on efficiency and seamless processes, and one critical aspect of this success is streamlined shipping. Creating shipping labels is a crucial step in the order fulfillment process. With the integration of EasyPost into your WooCommerce store, you can simplify and automate the label creation process, saving time and ensuring accuracy.
Creating shipping labels accurately and swiftly is a crucial aspect of the fulfillment process. One solution that streamlines this process for WooCommerce store owners is the ELEX EasyPost Shipping & Label Printing Plugin.
This plugin integrates seamlessly with popular shipping carriers such as FedEx, UPS, Canada Post, and USPS, providing a unified platform for label creation and printing. In this comprehensive guide, we’ll walk you through the steps of creating labels with EasyPost on your WooCommerce store.
Let’s get started!
Overview of EasyPost
EasyPost is a shipping API that simplifies the shipping process for e-commerce businesses. It provides access to multiple carriers through a single integration, offering real-time rates, label creation, tracking, and other shipping-related functionalities.
Integration with WooCommerce
The EasyPost plugin for WooCommerce seamlessly connects your online store with the EasyPost API. This integration allows you to leverage EasyPost’s features directly from your WooCommerce dashboard, creating a unified and efficient shipping solution.
Introduction to the ELEX EasyPost Shipping & Label Printing Plugin
The ELEX EasyPost Shipping & Label Printing Plugin for WooCommerce is a feature-rich tool designed to simplify the shipping and label printing process for e-commerce businesses. It supports multiple carriers, including USPS, UPS, FedEx, UPS DAP, UPS SurePost, and Canada Post, allowing users to choose the best shipping options for their specific needs.
Key Features:
- Real-Time Shipping Rates: Users can access real-time shipping rates directly from their WooCommerce store based on the carrier and service selected.
- Label Printing: The plugin facilitates the creation and printing of shipping labels with EasyPost directly from the WooCommerce order page, saving time and reducing manual efforts.
- Shipment Tracking: Keep customers informed by providing real-time shipment tracking information for their orders.
- Address Validation: Ensure accurate deliveries by validating shipping addresses at the time of order placement.
- Box Packing: Optimize shipping costs by packing items efficiently into boxes based on weight and dimensions.
Step-by-Step Guide to Creating Labels with EasyPost
Follow these steps to begin creating shipping labels with EasyPost directly on your WooCommerce store using the ELEX EasyPost shipping & label printing plugin.
Step 1: Install and Activate the Plugin
You can go through this guide to understand the steps for downloading, installing, and activating the ELEX plugin.
After successfully installing and activating the plugin, accessing the plugin settings is straightforward:
Navigate via your Dashboard to WooCommerce > Shipping > Easypost, or
Head to Dashboard > Plugins > Installed Plugins > ELEX EasyPost Shipping Plugin for WooCommerce > Settings.
Step 2: Configure General Settings
 Real-time Rates: Activate to fetch real-time rates from shipping services and display them during checkout.
Debug Mode: Troubleshoot rate issues by enabling debug mode, revealing warnings and errors on the cart/checkout pages.
Status Log: For developers, enable this feature to access order information for troubleshooting purposes. Disable it on live sites.
Disable Rates on Cart: Prevent EasyPost shipping rates from showing on the cart page.
API-KEY: Register with EasyPost, receive a test and live key, then enter it here.
Enable TEST Mode: For trying out plugin settings, such as real-time rates and label printing.
Switch to LIVE Mode: When ready to process real order transactions.
Step 3: Set Up Rates and Services
 Method Title: Set a custom title for the EasyPost shipping method visible on the cart and checkout pages.
Method Available to: Choose between offering EasyPost shipping to All Countries or Specific Countries of your choice.
Zip Code: Enter the sender’s zip code for calculating shipping rates.
Sender Country: Select the desired sender country.
Estimated Delivery Date Settings: Enable this setting to show an estimated delivery date based on working days, cut-off time, and lead time.
USPS Flat Rate Settings: Choose EasyPost flat-rate services for USPS.
USPS International Flat Rate Settings: Similar to domestic settings, choose USPS International Flat Rate boxes.
Duty Settings: Set who pays duty in international shipping: recipient, sender, or none.
Fallback Rate: The fallback rate for cases when EasyPost fails to return rates.
Carrier & Rate Settings: Choose from various carriers and services for both domestic and international shipments.
Services: Select desired services, set custom names, and adjust prices if necessary.
Step 4: Set Up Label Generation Settings
 Print Label Type: Choose the file format for printing shipping labels – PNG, PDF, ZPL, or EPL2, each with specific features.
Insurance: EasyPost charges 1% of the value for insurance, with a $1 minimum. Claims are handled by EasyPost. Enable this option to make insurance available on the WooCommerce order page during label generation. Options include Customer Choice, Mandatory, or No Insurance.
Label Size: Choose Default to keep the carrier-specified label size or Custom for a specific size for each carrier.
Signature Option: Enable this feature for secured informed delivery, ideal for important or fragile items.
Branding Link: Specify a standard label-generating link as a branding link.
Commercial Invoice: Customers receive an email link to the commercial invoice upon order completion, if enabled.
IOSS Number: For businesses meeting VAT e-commerce obligations on distance sales of imported goods to EU buyers, use the Import One-Stop-Shop (IOSS) from July 1, 2021.
HAZMAT USPS: Select the type of package for hazardous materials, including various classes and provisions.
Bulk Shipment: Set default domestic and international services for bulk label generation on the WooCommerce Orders page.
Origin Address & Return Address: Enter sender details, customs description, and return address information.
Third-Party Billing: Enable this for UPS or FedEx shipments to issue bills with a third party, providing specific account details.
Step 5: Packaging Settings
 Pack Items Individually: Each item in the cart is packed separately, with the total shipping cost calculated by adding up the shipping cost for each item. This is the default option.
Pack into Boxes with Weight and Dimensions: If packing items individually doesn’t suit your needs, you can define custom box sizes under “Box Dimensions.” All cart items are then packed into these custom boxes, and the plugin automatically selects the best-fit box. This is the recommended choice.
Packing Algorithm: You can choose between two packing algorithms: “Volume-Based Packing” (default) and “Stack First Packing.”
- Volume-Based Packing: It packs items based on the total volume of the box and the items.
- Stack First Packing: This algorithm stacks items on top of each other, considering their dimensions and the box’s dimensions. The box with the least remaining space after fitting the items is chosen for shipping, ensuring cost-effectiveness.
Box Dimensions: Define the outer and inner dimensions of boxes. Outer dimensions refer to the package size, while inner dimensions relate to the product size. You can also specify the weight of the box if it contributes to the overall weight for shipping rate calculations.
Pack Items Based on Weight: Set a maximum weight limit for packages. All cart items’ weights are combined, and items are packed based on this limit before rates are obtained from the API. You can choose whether to pack heavier or lighter items first, or simply divide items by weight.
For a further detailed step-by-step guide on how to set up the ELEX EasyPost Shipping Plugin, you can check out the product documentation.
Step 6: Create and Print Shipping Labels with EasyPost from the WooCommerce Order Page
To create and print shipping labels with EasyPost from the WooCommerce Order Page, follow these steps after customers place an order:
- Navigate to your WooCommerce admin order page.
- Select the specific order you want to process for shipment and label generation.
- Click the “Generate Packages” button, allowing you to customize services for each package or add additional packages.

- If your customers opt for USPS or Canada Post Flat Rate Box service during checkout, it will automatically load in the plugin. Note that FedEx and UPS do not offer Flat Rate Box services.
- After clicking, you can choose your preferred service, replacing the one selected by the customer, in the “Generate Shipping Label By Using EasyPost API” section.
- A list of preferred services will be displayed for your selection.
- Click the “Create Shipment” button.
 Once the label is generated, you’ll receive a shipment tracking ID.
- To print the label, click “Print Label”.
- You can find the EasyPost Shipment Tracking meta box on the right, where you can use the tracking ID to monitor shipments.

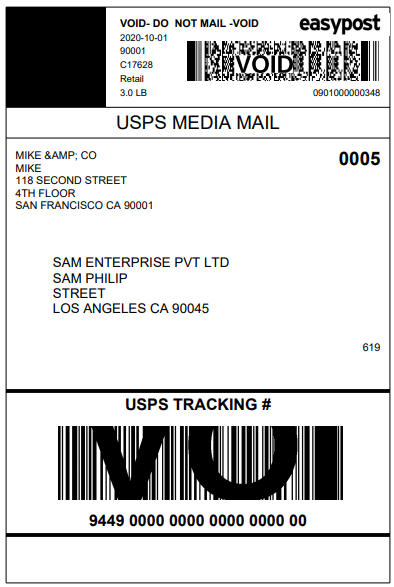
- The generated label will be displayed, and you can download it from there, customized based on your preferred service choice. Check out a screenshot of the created label:
 Conclusion
Mastering the art of creating labels with EasyPost on your WooCommerce store is a pivotal step toward optimizing your e-commerce fulfillment process. EasyPost provides a seamless integration that empowers you to efficiently manage shipping labels with EasyPost directly from your WooCommerce Order Page.
From real-time rate calculations to label creation and shipment tracking, the plugin offers a comprehensive solution. By optimizing the fulfillment process, businesses can enhance the overall customer experience, leading to increased sales and customer loyalty.
As the e-commerce landscape evolves, embracing tools like EasyPost becomes imperative, ensuring that your shipping processes remain agile, responsive, and aligned with customer expectations. Elevate your WooCommerce store to new heights by simplifying label creation, a cornerstone of delivering a seamless and reliable shopping experience for your customers.
If you have any questions regarding label creation with EasyPost, please let us know in the comments section below.

