Adding a live chat on your website is necessary today as everyone prefers chatting rather than contact through email, contact forms, and telephone calls, etc. This is because these methods are more formal and do not give a personal touch in communication. Like we use any chatting platforms, we can simply send messages through chats. Based on the domain of your business, the use of live chat on your website will be different.
If your WordPress website is a blog, you may receive feedback or topic suggestions, and so on from the customers. Or if your website is a business website and sells services or products, then the customers will send presale queries, maintenance, and support queries to you. So you should make your live chat to be fit for this customer support and assistance as you may receive hundreds of queries in a day and you need to share different articles, support documents, and other file formats for assisting them.
The Idea of a Live Chat Plugin for Customer Support
As I have already mentioned, there are many uses of live chat on a WordPress website. In order to make your customers more comfortable to reach you for assistance, you have to provide the convenient way they prefer. If you are planning to set up live chat on your website for considering the customer support and assistance, you need to choose a live chat plugin that has the features to help you for streamlining these tasks seamlessly.
Customers always prefer fast responses. When it comes to a chatting platform, they prefer a fast reply as they do not like a feeling of gap between you and them. It is like an open place to communicate rather than sending an email and waiting for its reply for some hours. And there are live chat plugins that will help you to leave automated responses and customize the replies automatically when you are not available online. This will never let your customer be disappointed as they get faster replies. And even for support assistance, you can integrate AI (Artificial Intelligence) with some plugins and provide all the support documents, videos, or any support files automatically based on the query customers have asked.
Even though every customer needs personalized assistance for the best solution and replies based on their situations and the products, up to a limit you can reduce the number of queries or tickets with AI integration.
If your website has been integrated with a helpdesk or support ticketing system plugin, you can choose a live chat plugin, which will help you to convert a chat conversation into a ticket. And if your website is a WooCommerce website, it should have the option to sync as you need to suggest products or easily access the orders that the customers have placed.
The Idea of a Live Chat Plugin for Pre-sale Assistance
Pre-sale is also as important as customer support and maintenance assistance after the sales. You should be able to convince and attract your customers to your website to make a valid lead to your business. You should be able to convert a simple site visitor to your loyal customer. Hence you can choose a plugin that has the option to monitor the live visitors of your website and should be able to send a pre-sale message to the customer who is hovering over your product pages or service page in just one click. It will be more interesting for the customers if you reach them for assistance even before they send a question or query to you!
How to Choose a Live Chat Plugin for Your Store?
As I have already mentioned, you have to check the features of the live chat plugin to see whether it can fulfill all the requirements of your business’ communication with customers. Since everyone would like to improve their business, acquiring customers and satisfying them plays a vital role. Go through the product pages and documentation of a number of live chat plugins and get an idea of the features they offer. If they match your requirements, go for it!
It would be good if you choose a live chat plugin that is AI integrated. Sometimes your customers may be from another country or continent. So their working hours and working days will be different from yours. And the holidays and the temporary unavailability of the agents may make the customers disappointed. In such cases, you can turn on the AI triggered conversations. If you are online, you can assist them individually as well!
Which Is the Best Live Chat Plugin in the Market?
If you are looking for a live chat plugin that is AI-integrated and rich in features to provide the best customer experience through the live chat platform, then WSChat – ELEX WordPress Live Chat plugin is the best choice. As it comes up with a handful of advanced features, you can configure your live chat according to your business requirements. And also, it has a lot of advanced customization features, which will help you to set up the chat widget according to your website theme and colors.
Advantages of Using WSChat – ELEX WordPress Live Chat Plugin in Your WordPress Website
This robust advanced plugin is a complete package for your WordPress and WooCommerce website. And it is highly mobile responsive since the majority of the customers might browse your website through their mobile phone. It does not break any design of widget when opening from a mobile phone screen. And also using its maximizing option will make the widget fit on your mobile screen for a better chatting experience. And it comes up with interesting emojis!
 Before going through the steps to integrate WSChat – ELEX WordPress Live Chat plugin to your website, let us go through the major features of this plugin.
Higher security
The security of your data is extremely important when it comes to a deal with customers. You may need to pass the confidential information or credentials through the chat to the customers. And any external dependency should not hamper or stop the workflow of the live chat as customers like fast and accurate replies without any flaw and delay. WSChat – ELEX WordPress Live Chat plugin lets your data to be stored on your server exclusively and you are the only owner of your data. Hence you can take complete control of your data, which ensures higher security.
Option to add unlimited agents and other advanced features
According to the size and nature of your company, you may need to add more agents to deal with the tickets from the customers. While expanding your business and recruiting more agents, you have to add them on the plugin accordingly without any limit. Here, WSChat – ELEX WordPress Live Chat plugin does not restrict you from adding the agents. Additionally, you can import agents from WSDesk – WordPress Helpdesk & Customer Support Ticket System plugin as these both plugins are highly compatible with each other.
Unlimited chat history
You can store all the conversation happening through the live chat plugin. If you want to refer to any of the conversations which happened in the past, you can retrieve them at any time. This will be useful when you want to check the data which you have shared in the past.
Tracking of live chat visitors and option to initiate a chat from the agent side
You can see all customers or site visitors along with their details such as their IP address, the operating system of their device, the page which the customer is viewing, and the time duration they spend on your website. With an IP address, you can understand the location-related details of the customers, and by viewing the page on which a customer hovers will help you to understand what product or services they are looking for. With these details, you can initiate a conversation from your side to assist them to choose the best one according to their preferences. In just one click you will be redirected to the chatting dashboard where you can send messages to the customers. You can also use the details for analysis and get into a point on which product or service you need to market more.
Agent alerts and triggering notifications
Since everyone needs fast and accurate replies without making them wait, we have to let the agents know that a ticket has been received and an immediate solution should be provided to the customer. You can set a sound or email notification to the agents for giving immediate responses to the customers.
Customization options for the widget
Many live chat plugins provide default templates or themes of the chat which may not be perfectly fit into your website theme and color. This will make it feel an odd visual impact on your website. With WSChat – ELEX WordPress Live Chat plugin, you can customize the theme of the widget according to your website theme and color. And also even agents can change the backend chatting dashboard color according to their comfort. And there are options to add buttons for customers to send files, images, audio, and video, and so on, rate the conversation, and send the entire conversation to a given email address. Besides these options, this plugin has a default mute button.
Pre-chat form for not skipping any customer
If you are not available online to give immediate answers or it is a holiday for your company, you can enable the pre-chat form where customers can enter their details in a form and leave a message to you. When you are available, you can use these details and get back to the customer as soon as possible.
Mobile responsiveness and interesting emojis
As the mobile phone is a comfortable device to search for products and services, some customers will reach you through their mobile phones. As an AJAX-based live chat plugin, your chat widget will not break when it is accessed from a mobile phone. And using a button to expand the widget for making it fit into the mobile screen will improve the chatting experience.
Emojis are interesting and it helps to convey the exact emotions through tiny faces. This will make the customers’ chatting experience more interesting and they will feel a friendly connection with you!
AI integration
There are so many reasons to integrate your live chat with AI. As I have already mentioned earlier, this will help you to trigger automated responses based on the query from the customers. This plugin is highly compatible with Google’s Dialogflow tool, that helps to implement machine learning to your live chat. You can trigger audio, video, images, and other file formats besides simple text replies. Hence the majority of the tickets will be reduced when they get immediate responses from the solutions and support documents you trigger.
WooCommerce compatibility
If your website is a WooCommerce store, you might need to assist them in the shopping and queries or solutions regarding the products you sell or the orders a customer has placed. With this plugin, when you are chatting with the customers, you can see the orders they have made, the products in their cart and even you can suggest products from your store to the customers. Hence WSChat – ELEX WordPress Live Chat plugin is a perfect choice for WooCommerce stores.
Detailed reports
To analyze the overall performance of your customer support, agent performance, and the rating of the customers for your service, you can check the detailed report that this plugin provides. You can also set the desired date range to view reports for that duration. You can view ratings, quality scores, and the number of tickets associated with all agents in this report. And using this report you can make improvements to the areas which need to be improved and track the changes and growth happening on your customer support system. Based on that you can take required actions and measures.
Well, we have gone through the benefits of choosing the WSChat – ELEX WordPress Live Chat plugin. Now let us go through the step by step procedure of setting up a live chat on WordPress website.
Step by Step Procedure to Do Live Chat on WordPress with WSChat – ELEX WordPress Live Chat Plugin
Step 1: Install and activate the plugin.
Go to the product page and subscribe to the plugin. Then go to your WordPress dashboard > install and activate the plugin.
Step 2: Set up WSChat – ELEX WordPress Live Chat plugin.
For that go to dashboard > WSChat > Settings.
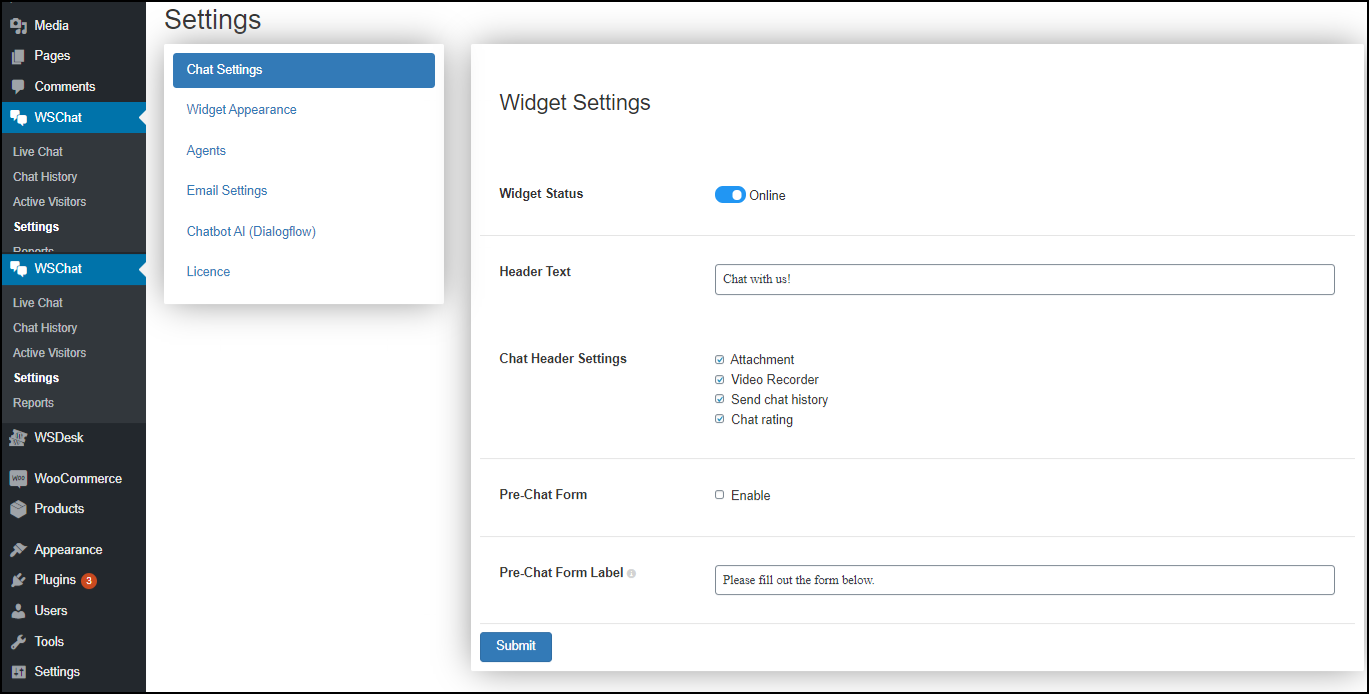
First, you have to enable the ‘Widget Status’ to show your availability as online on the chat widget when a customer opens your website. As I have mentioned earlier, if you are not online, you can turn it off and enable the pre-chat form for the customers to enter the details such as their name, email address, and contact number, and any other field as you required. This information will be displayed to the agents’ dashboard or in an email, and you can get back to the customers easily.
Then you can add a header text, enable the required options on the chat widget, and pre-chat form accordingly if you have enabled it. You can also add custom chat header options on the widget by enabling them here. Besides all the options you enable there, a default mute button will be available on the chat widget. The chat widget buttons you can enable here are as follows:
- Attachment: This option is for letting the customers attach files to send you for describing their issues or queries with more details.
- Video recorder: Using this option, the customers can record a video and send it to you instantly.
- Send chat history: Customers can enter an email ID here. The entire chat conversation will be sent to the entered email ID for further references.
- Chat rating: This option is important for knowing the feedback of your customers. They can rate your support and assistance with a ‘like’ and ‘dislike’ button. This will reflect on the report page.
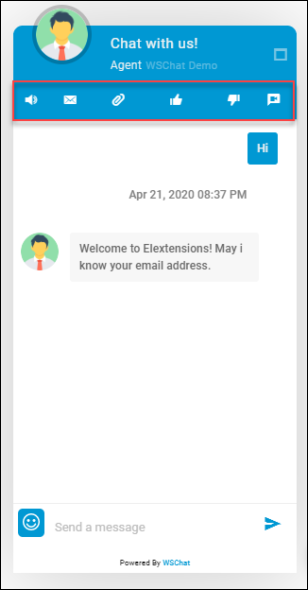
After enabling all these 4 options, the chat header will look as:
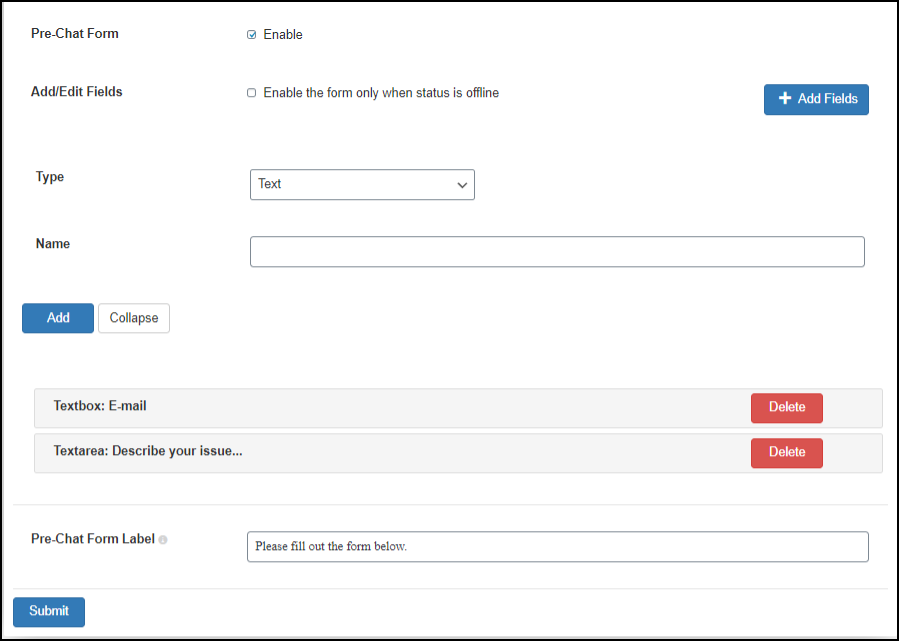
When it comes to pre-chat form, you can enable the pre-chat form first, and you can also enable the option to enable the pre-chat form only when your status is offline. And by clicking on Add Fields, you can add the required fields to be displayed on the form. You can also set a pre-chat form label to be displayed for the customers to understand what needs to do such as “Please fill the form”. Check the screenshot:
For more information, you can also refer to an article- How to Set Up WSChat – ELEX WordPress Live Chat Plugin?.
Step 3: Reply to the customers.
This is one of the most important parts as you need to give a solution or response to the customers properly and accurately. For doing that, go to WSChat > Live Chat.
After clicking on that a new window will be opened with 2 tabs such as Active Chats and Recent Chats.
Active Chats: All the chats you receive will be listed on this tab. It holds the chats until the session ends. After that, they will be moved to the Recent Chats tab.
Recent Chats: The chats on the Recent Chats tab will last up to 10 minutes. After that, all the chats will be moved to Chat History, where you can find all the chats as WSChat – ELEX WordPress Live Chat plugin does not restrict the limit of storing chats.
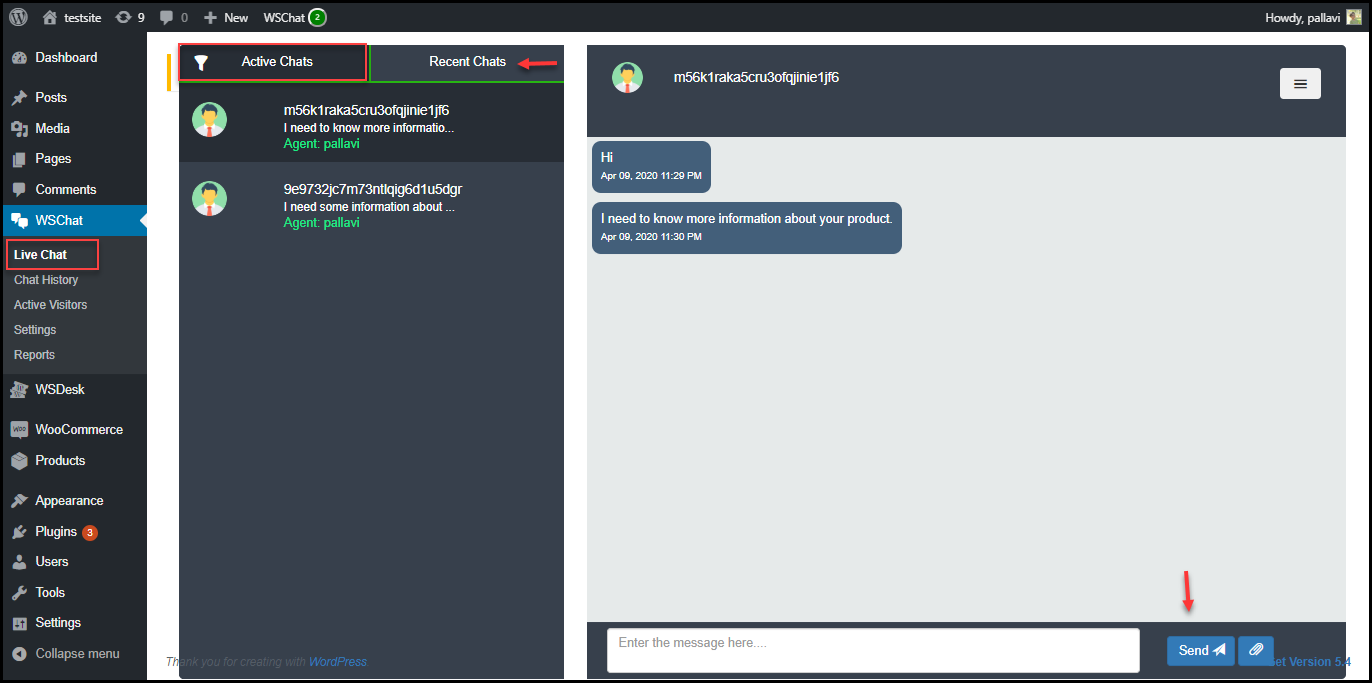
You can reply to the customers by entering the response and type to enter or click on the button to send. You can also attach files to be sent to the customers for support as well.
For checking the chats on the Chat History tab, go to WSChat > Chat History.
There you can find the session ID, user name, user email address, agent name (if the chat has been assigned to an agent), and last date of the chat. Check the screenshot:
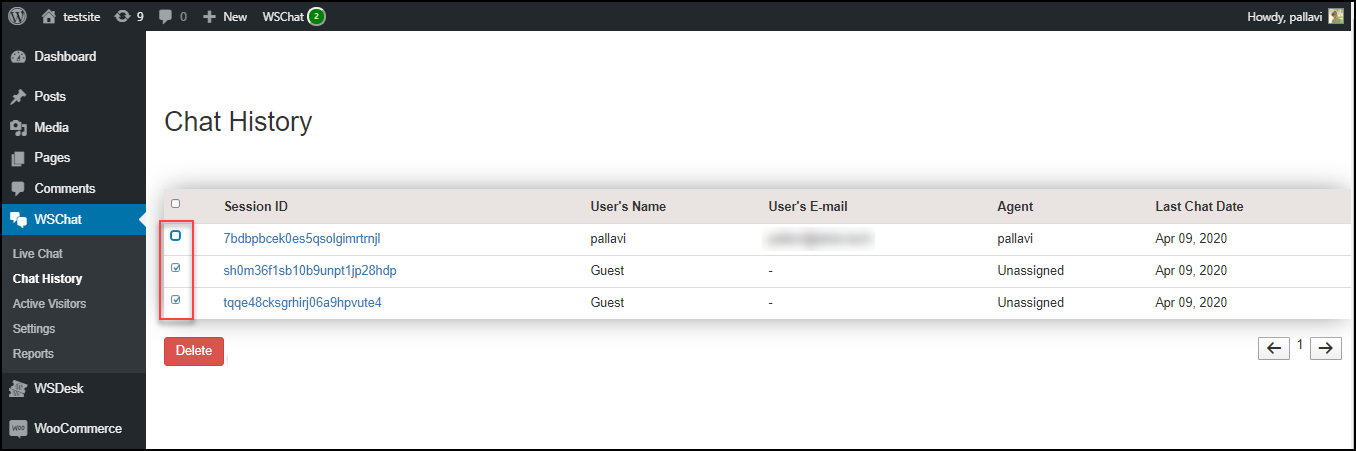 You can click on the session ID to get on to the chat and you can delete the chats as well by selecting them and clicking on the Delete button.
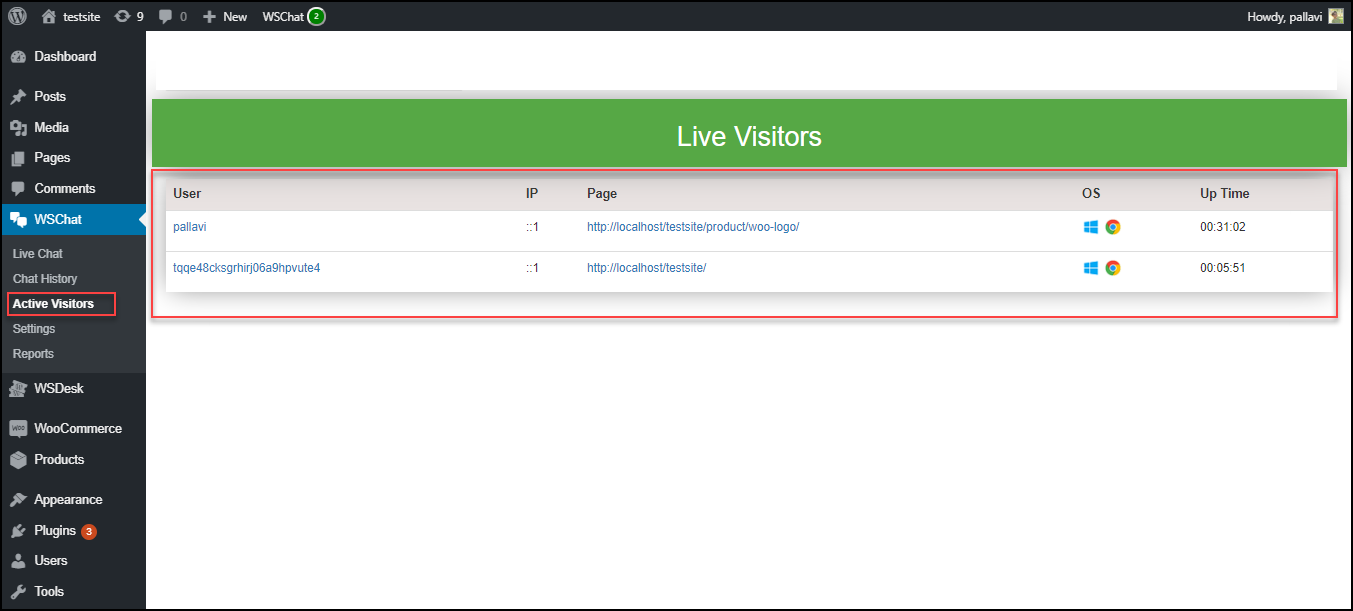
Step 4: Track the real-time website visitors and initiate chat from your side for pre-sale assistance.
For tracking the site viewers of your website and initiating a chat from your side, go to WSChat > Active Visitors.
You can find the user name or ID, the IP address of the visitors, the URL of the page they are currently viewing, the logo which indicates the operating system of the customers and the browser, and the time they have been spending on your website. Check the screenshot:
 You can click on the user name or ID (if they are unregistered), you will be redirected to a new chat dashboard wherein you can type the pre-sale message or query to them and reach the customers.
Step 5: Set up the widget appearance.
For setting the widget appearance, go to WSChat > Settings > Widget Appearance.
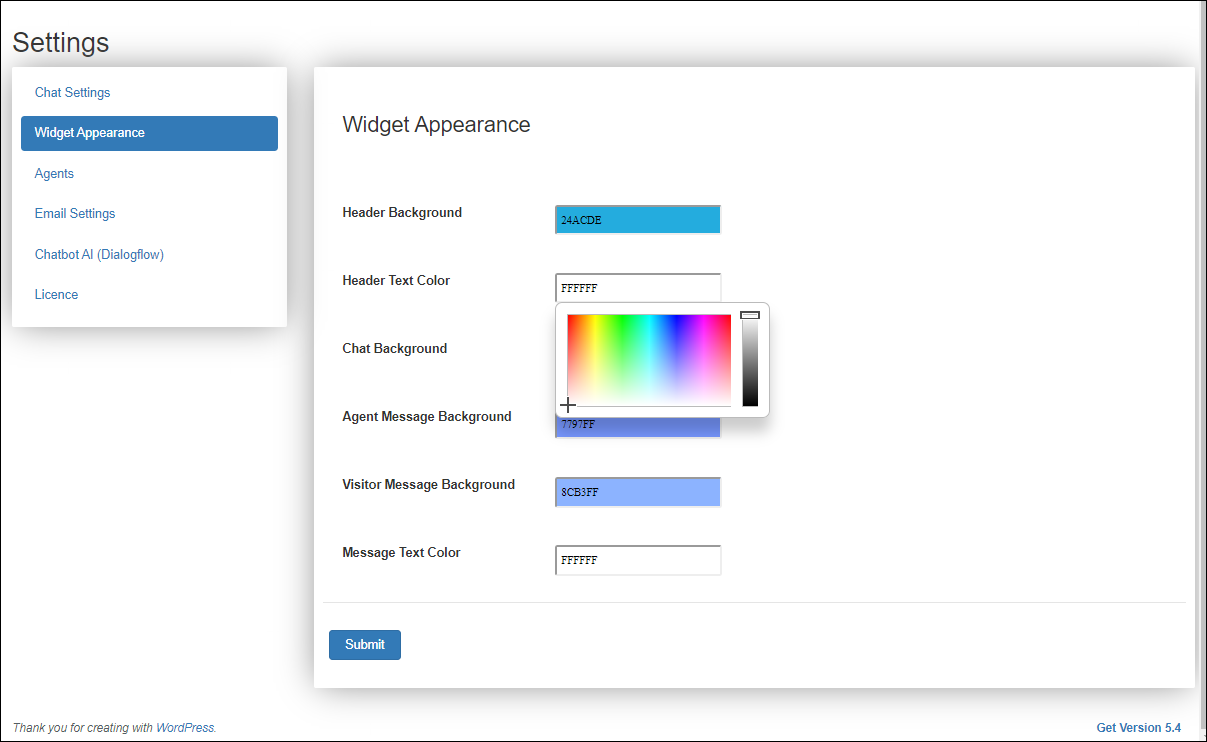 Choose the colors you need to apply on the entities on the chat widget by pointing to the colors which appear when you click on the field.
Step 6: Add or import agents from WSDesk – WordPress Helpdesk & Customer Support Ticket System plugin
Go to WSChat > Settings >Agents tab.
Click on Add Agents and enable create user option, then add the agent’s email ID and password to create the agent profile on this plugin. Then you can click on the Submit button. You can also remove the agents from this plugin by clicking on the Remove button.
For importing agents from WSDesk – WordPress Helpdesk & Customer Support Ticket System plugin, click on Import WSDesk Agents.
 Step 7: Set up Email

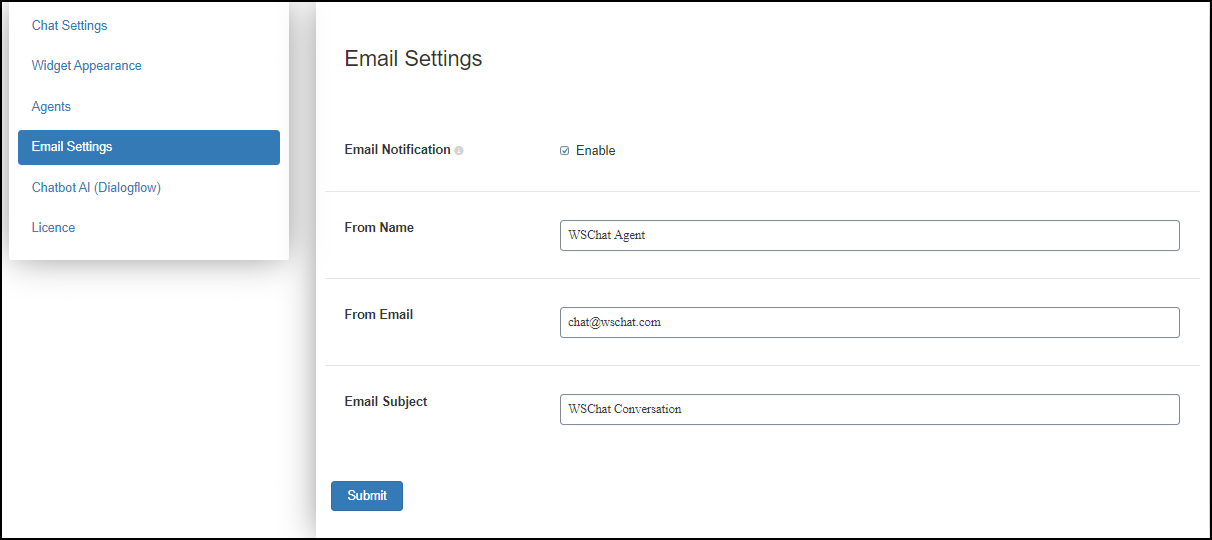
For setting up email, go to WSChat > Settings > Email Settings.
You can set up this for letting users send emails from the pre-chat form. For that, add the sender name, sender email address, and a subject line. You can enable the ‘Email Notification’, for sending an email notification to the ‘from’ mail ID you have added when a chat is initiated. Check the screenshot:
 Step 8: Trigger automated responses by setting up Chatbot AI (Dialogflow).
Go to WSChat > Settings > Chatbot AI (Dialogflow) for setting up that.
Enable Dialogflow, and add the information such as Google Project ID, Google service account private key file and choose an agent language if required.
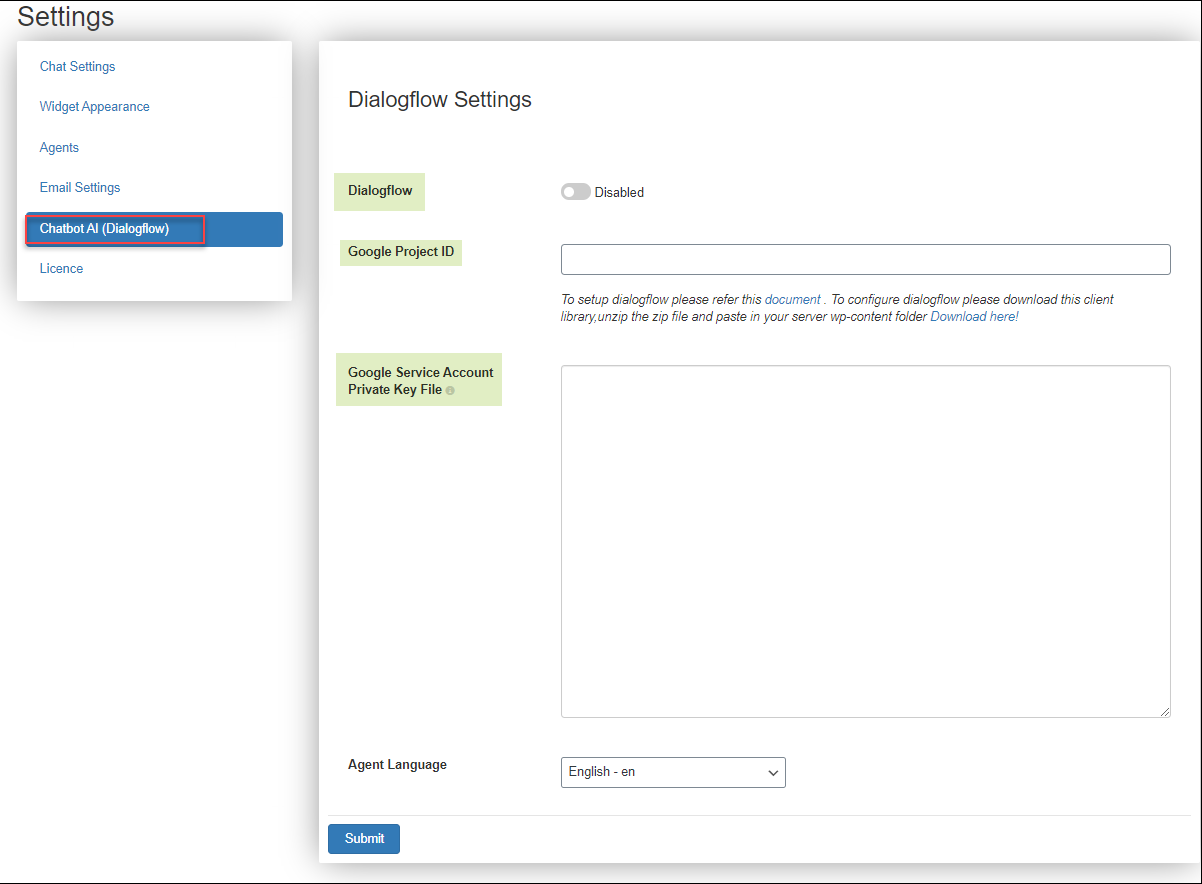
For getting the Google Project ID and Google service accounts private key file, you have to create an account on Dialogflow with your Gmail account. To know more details regarding how to take these data, check out an article: Detailed Guide on Setting up Dialogflow – Artificial Intelligence Based NLP, Optimized for the Google Assistant and Chatbot Development.
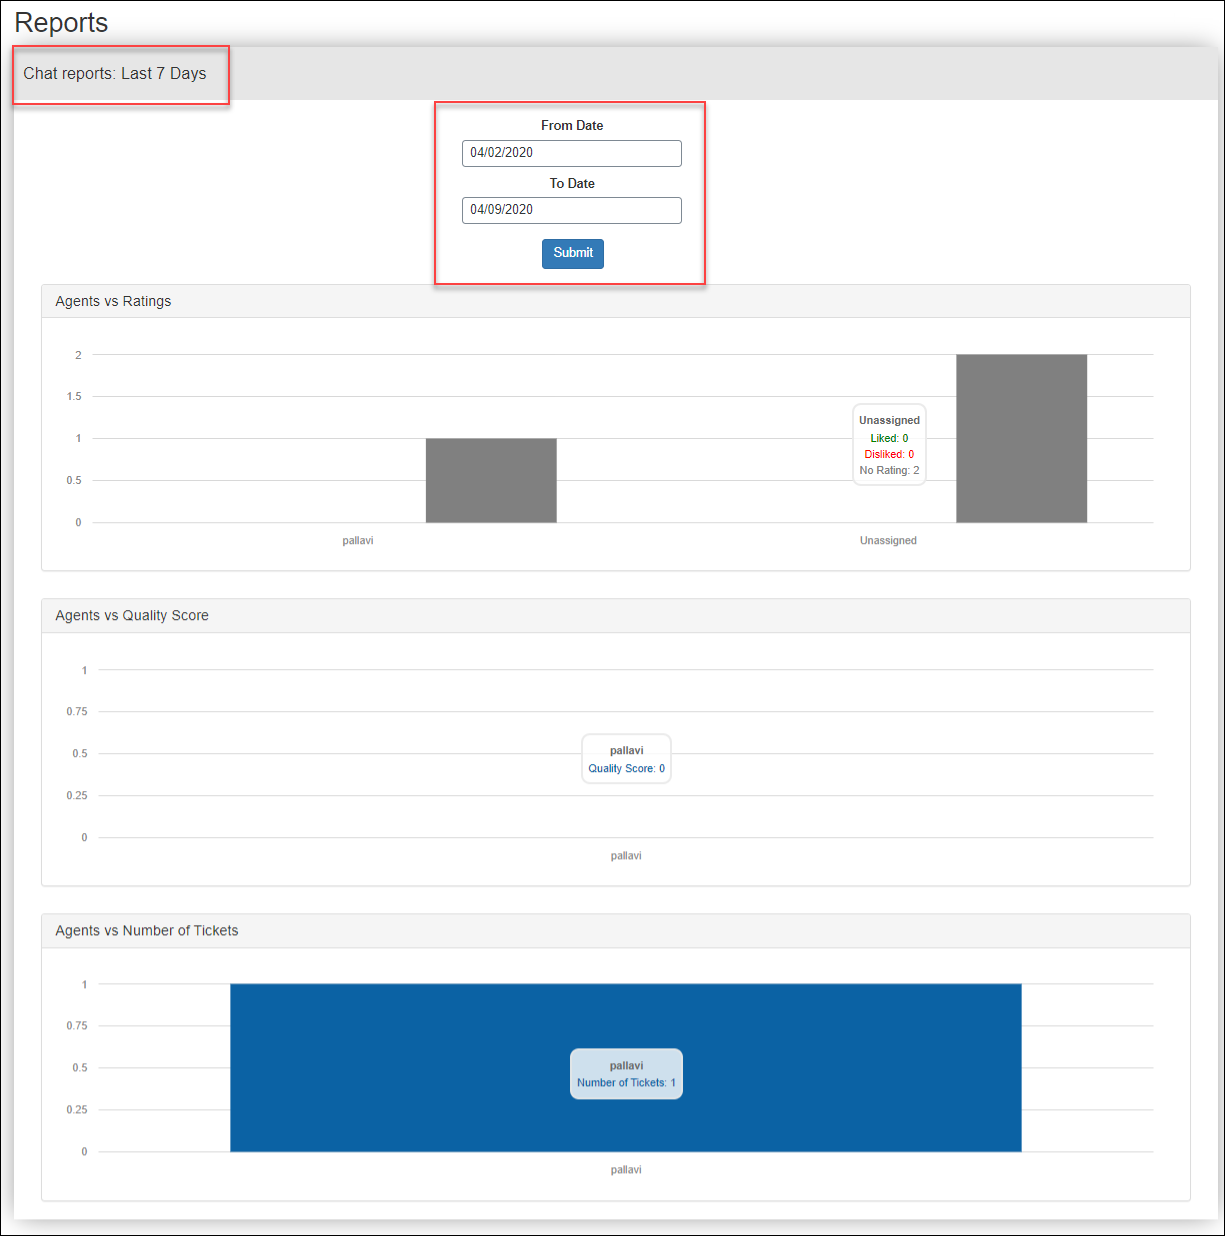
Step 9: Analyse the performance of your customer support system.
Go to WSChat > Reports and choose the desired date range to see the reports in that duration. You can check the ratings, quality scores, and the number of tickets associated with all agents.
 To sum up,
As we have gone through the benefits and steps to set up a live chat on WordPress, I hope you got an idea about it and this article will be really helpful to set a live chat with WSChat – ELEX WordPress Live Chat plugin in your website.

