Do you want to create WooCommerce Google Shopping ads to drive traffic to your products? Google Shopping advertisements allow you to place your products above regular search results. By increasing the visibility of your products, integrating WooCommerce with Google Shopping can help you drive more sales. There are several benefits of adding your WooCommerce products to Google product feed, but adding every product along with its attributes can be extremely time-consuming. We’ll show you how Google Shopping works in this article. Then we’ll show you how to use Google Merchant Center to create an XML feed for your WooCommerce store.
What are Google Shopping Ads, and how are they beneficial?

Top-of-the-page ads tend to get more clicks. Shopping advertising can also appear on partner sites, the Google Display Network, and the dedicated Shopping tab in search results:
The advantages of Google Shopping advertisements are simple to comprehend. If someone is looking for a certain product, they are most likely at the end of the purchasing process. You can draw customers that wouldn’t have gotten otherwise if you can get your products to show up in their search results.
How to Create an XML feed of WooCommerce Store in Google Merchant Center

By mapping to Google’s required attributes, it will automatically generate a product feed. The plugin also assists you in creating a feed that includes all of your variations and variable items.
You can start creating your feed once the plugin has been installed and activated. Create a product feed by going to the WordPress Sidebar menu > ELEX Product Feed > Create Feed.
Generic settings

Leave it blank if you want the project name to be used as the project description, or enter a product feed project description.
Select the country from which you will sell your goods.
Enable the include variants option to include all variations of your WooCommerce products.
You have the option to publish product feeds to Google Merchant Center without utilizing unique product identifiers (Example: GTIN, MPN, and Brand) if you enable Auto-set identifier exists.
For all of your product categories, you have the option of picking a default Google category. Simply enter the category you want, and the list of categories will appear in the next section with that category populated by default in the mapping section. In the Map Category tab, the category can also be changed while mapping it.
CSV, TSV, and XML file formats are currently supported by the plugin. You can choose XML as the file format as we are creating an XML feed.
Create a refresh schedule to refresh the feed generated by Cron jobs. You can choose to refresh the feed Daily at a certain time, Weekly at a specific hour and on a specific day of the week, or Monthly at a specific time and date.
It is possible to provide a currency conversion rate. The value you give here will be multiplied by the existing product prices before being used to create the product feed.
Map Category

You’ll see a list of all the product categories on your store, as well as the opportunity to add the Google Product category when you start mapping product categories. If you choose a default category in the General Settings, all of the Google categories provided will be the same. Simply enter a different Google category, and the other categories will display on the list.
After selecting the correct Google Product Category, tick the checkboxes for the categories you wish to include in your product feed. If you don’t want to list any of the product categories, uncheck the checkbox next to them.
Map Product

Map Attributes

When it comes to how you set up your data for the feed, the plugin gives you several options. It’s also simple to build up your data according to your store’s demands and develop a feed for your business using the conditions.
With the plugin, you can even design your custom fields and add as many attribute fields as you like. By clicking Add Field, you can map the Google attribute to your WooCommerce attribute.
Filtering Options

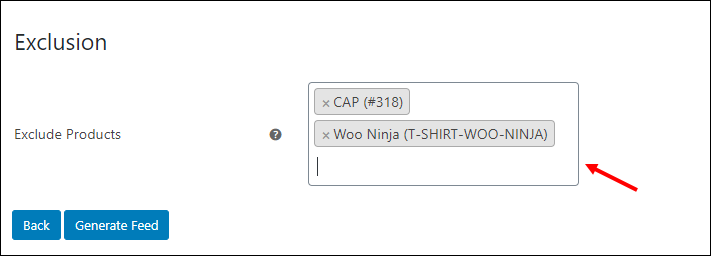
Simply type in the product name to exclude specific products from the feed, and it will only show you items that contain the terms you specified. This step facilitates the process of eliminating products.


Manage Feeds

- Edit: You can make changes to your feed at any moment.
- Copy: If you’d like to make a copy of your feed, click here.
- Pause: You can stop the feed from refreshing when you need to, and then resume when your feed is ready to be posted.
- Regenerate: You can regenerate or refresh the feed manually with new data from your store.
- Download: This option allows you to save the feed to your computer and then check for it later.
- View: This option allows you to look at the product feed in XML and CSV format.
- Show Report: This graph report is used to examine the overall performance of the feed.
- Delete: If you no longer require the feed, you can simply delete it.
And just like that, your XML feed is created! To get a step-by-step tutorial to set up ELEX WooCommerce Google Product Feed Plugin click here! Do you have any queries concerning WooCommerce’s integration with Google Shopping? Let’s take a look at them in the comments area.
Further reading


