What can we help you with?
How to Set up WSDesk Pay For Support Add-On? (With Video)
This article explains the step-by-step tutorial to accept payment for customer support using WSDesk Pay For Support Add-On.
Overview
The WSDesk Pay For Support Add-On lets store owners accept payments from the customers in return of credits, that enable them to pay for your customer support. As the support transaction proceeds, the required credits will be deducted from the customer’s account. The store owners can easily manage all the credits, subscriptions, and transaction history from the back-end, in addition to manually adding credits to the customer’s account from the add-on’s dashboard.
Prerequisites
For sending WSDesk SMS notifications, you need the following:
Getting started with WSDesk Pay For Support Add-On
Read an article to know how to complete the checkout process on ELEX. You can also read how to download, install, activate ELEX plugins.
The core configuration depends on the WSDesk – WordPress Helpdesk Plugin settings and not the add-on settings. Hence you need to set up WSDesk first and then proceed with configuring Pay For Support.
You can also watch the video on how you can Charge for Support using Pay For Support AddOn for WSDesk WordPress Helpdesk Support System here :
Creating Credit Rules
Go to Pay For Support > Create Rules.
This section allows you to create credit rules for individual or subscription-based products. Based on the settings you configure here, the credits will be applied to the user when a purchase, subscription, or a support transaction happens.
Following are the settings to be configured: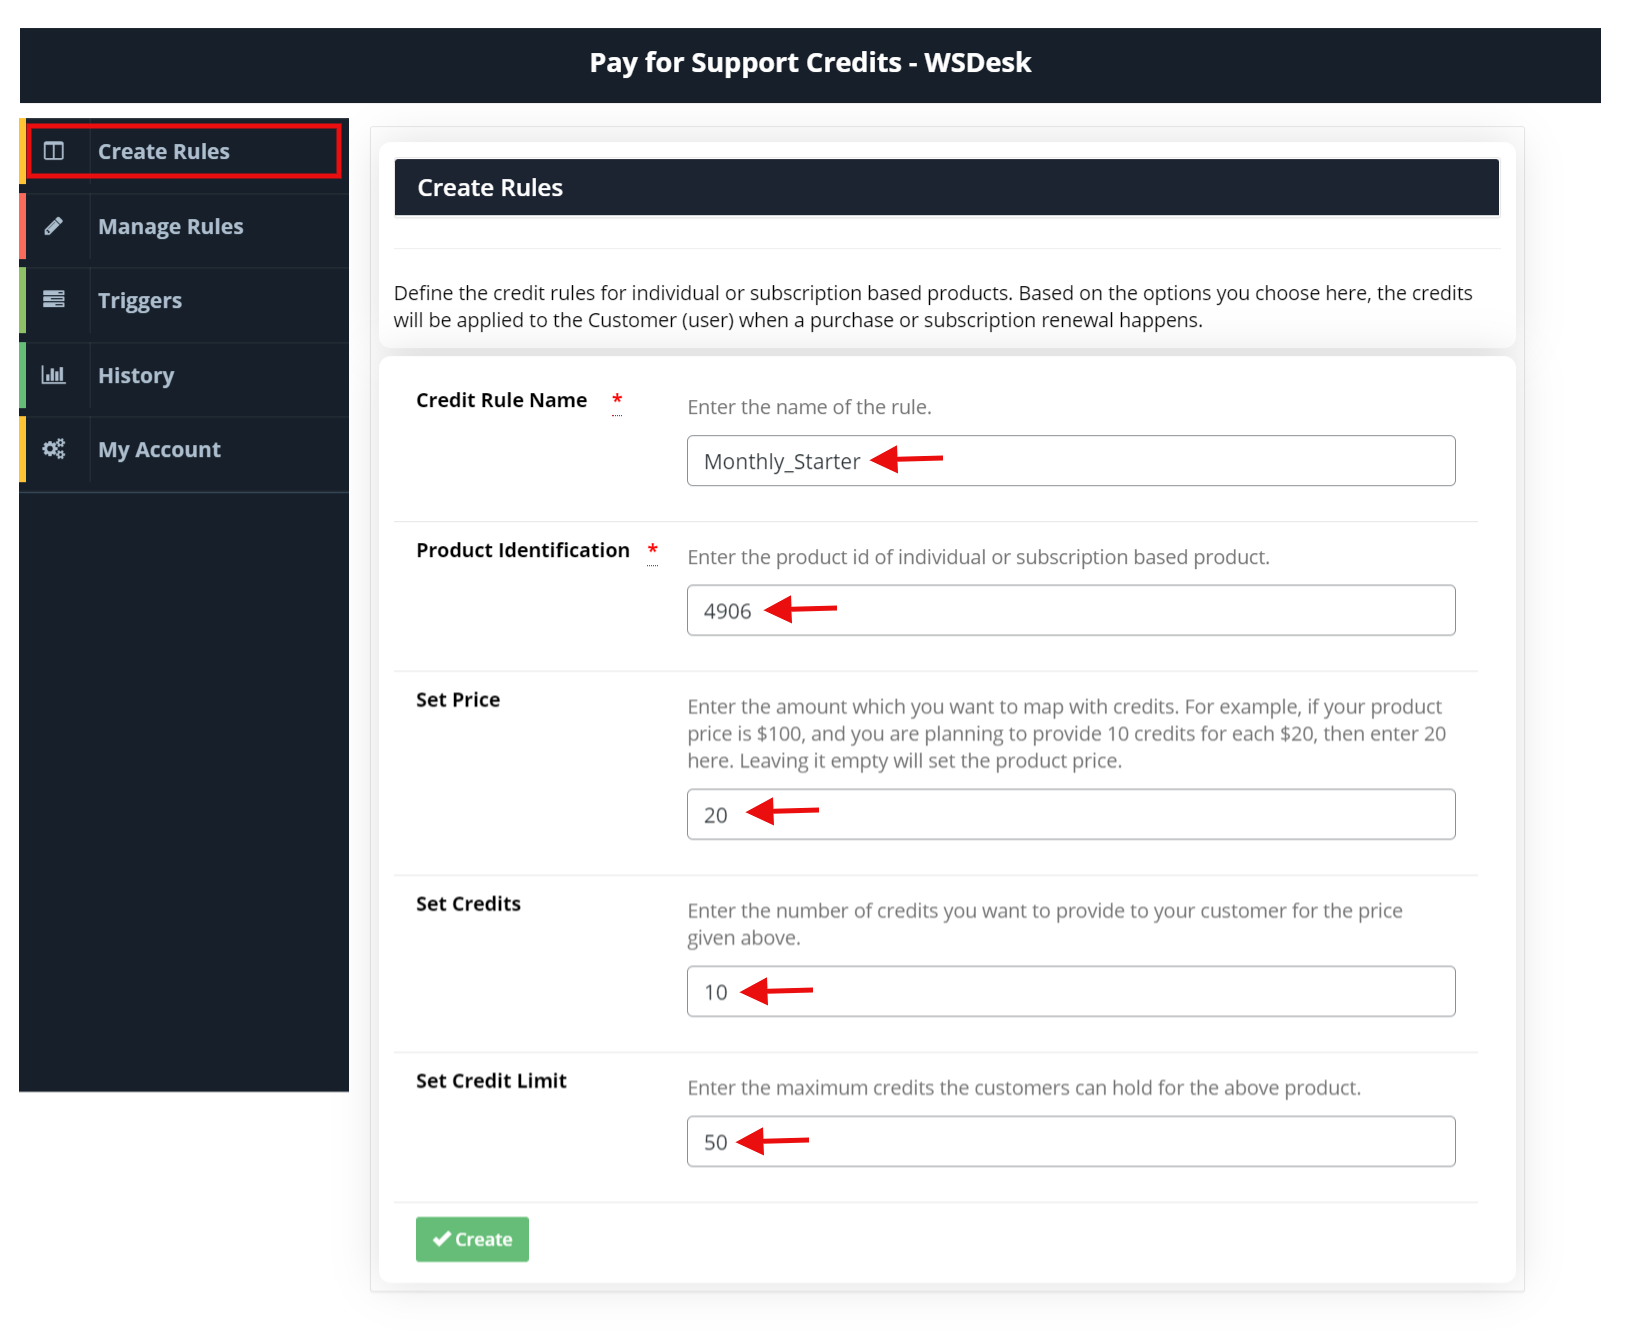
- Credit Rule Name: Provide a suitable name for the credit rule.
- Product Identification: Specify the WooCommerce product ID from your store that you want to associate in the credit rule.
- Set Price: Specify the amount that you want to map with credits. For example, if your product price is $100, and you are planning to provide 10 credits for each $20, then enter 20 here. Leaving it empty will set the product price.
- Set Credits: Enter the number of credits you want to provide to your customer for the price specified in the above settings.
- Set Credit Limit: For subscription products, when you have set the credit renewal method to carry forward, you can enter the maximum number of credits a customer can have. Leaving it empty will remove any cap on holding the credits.
Managing Credit Rules
Go to Pay For Support > Manage Rules.
You can manage all the created rules in this tab. All the information is laid out in a table that consists of Credit Rule Name, Product ID, Price, Credit, Credit Limit, in addition, to edit and delete options.
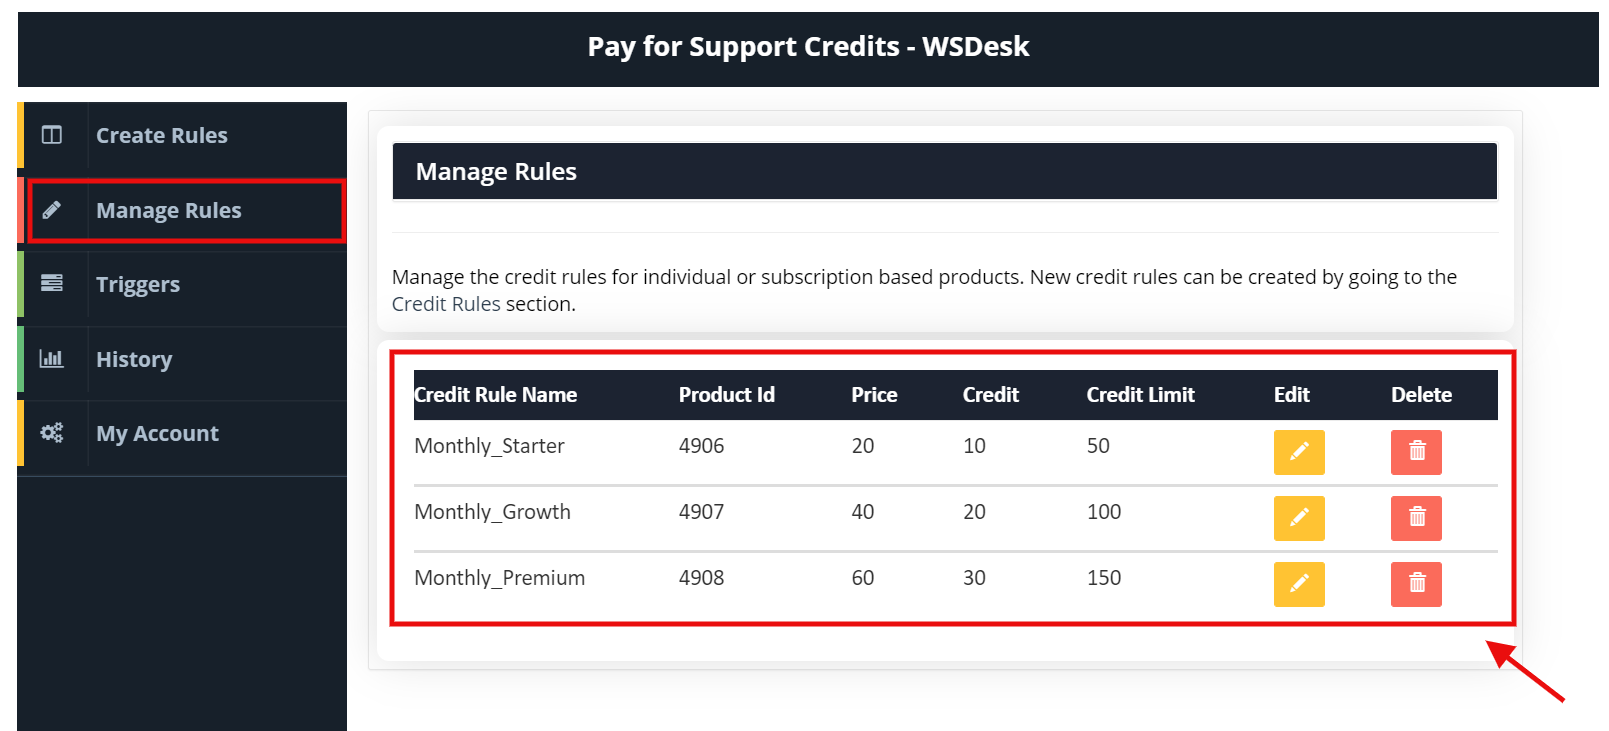
When you click on the respective edit icon, a pop-window appears that allows you to edit/update the credit rule.

Creating and Managing Triggers
Go to Pay For Support > Triggers.
The Triggers help you automatically deduct credits from the user’s account. Based on the rules set, credits will be automatically deducted based on the WSDesk Ticket Status. When the conversation in the WSDesk tickets dashboard, moves to any one of its ticket statuses and if it is assigned a credit, it will be deducted from the customer’s account.
For setting up a new trigger, you need to select the desired WSDesk ticket status and assign credit value to be deducted.

You can always go back and edit or delete the triggers anytime by clicking on the respective edit or delete icons of the trigger.
Tracking History of Transaction
Go to Pay For Support > History.
In the History tab, you can track all credit transactions that are done by the users. The table shows information like date of transaction, user email address, Order/Ticket ID, Product Information, Agent, the status of the transaction, credits deducted, the credit balance, and time.![]()
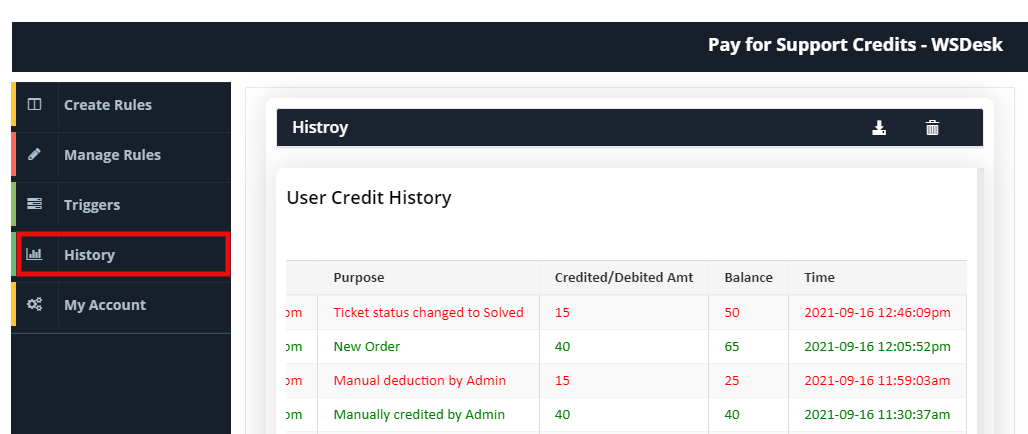
The add-on also allows you to download the complete history in a CSV file and even delete the complete history. The options are which are located on the top right corner of the window, as shown in the screenshot below.

Once you click on Order/Ticket ID, it will redirect to the respective WSDesk ticket page.
The WSDesk ticket page shows the manual credit deduction tab and the credit balance on the top, as shown in the screenshot below.

Adding Credits Manually
Store owners can manually add credit to a user’s WooCommerce account from the Orders page. To do so, select the order that you want to add credits to > click bulk actions > add credits manually > Apply.

Adding a Virtual Product as Subscription support service
As a seller, you can also add a virtual product like a subscription to the shop page. A subscription can be easily added to the products using any popular WooCommerce subscription plugins and then customize them for the store accordingly. The support services can also be included as a virtual product like a discount, subscription or even a coupon. Upon using it on the store, the virtual products can be purchased like a normal product and then applied to the customer profile. Hence that much credit which amounts to the virtual product will be added to the customer as credits.
The virtual product credit details can also be looked into in the account page- transaction history.
Accessing Credit Details by the Customer
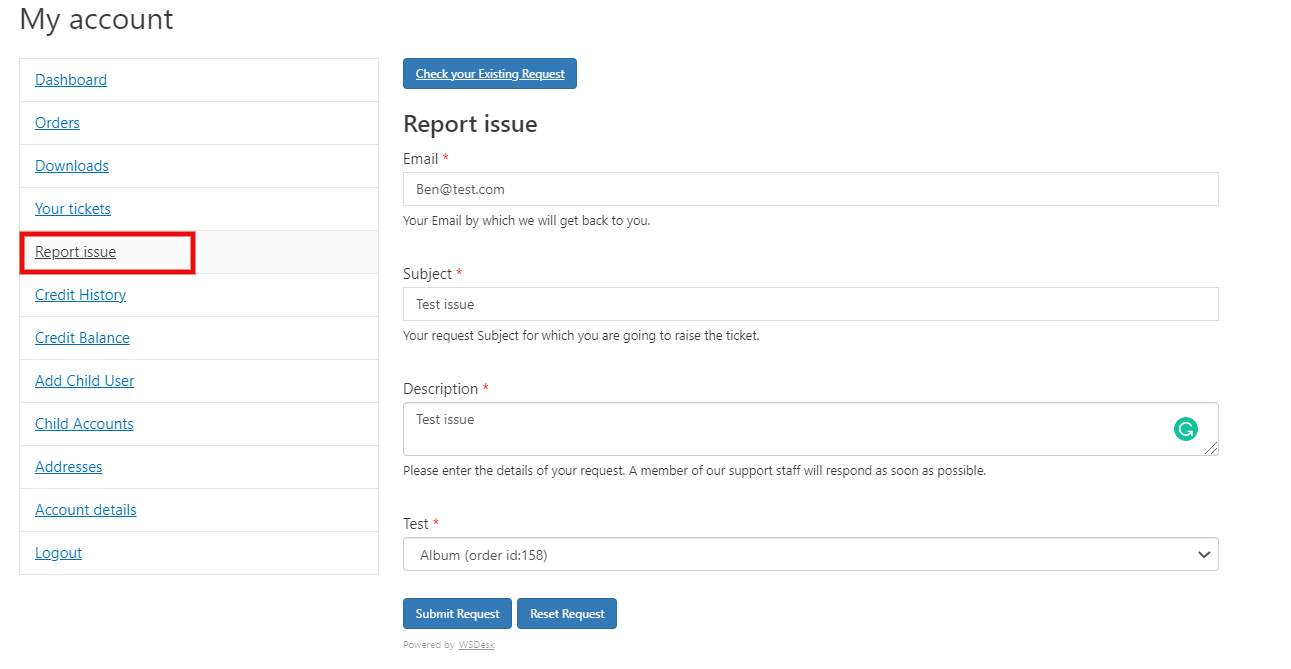
Customers can access, track, and manage their credits on the custom My account Dashboard.

- Your Tickets: All the tickets raised by the user are listed under the “Your tickets” tab along with the ticket status like solved, unsolved, and pending tickets.

- Report issue: This is where the user needs to go in order to issue a new ticket. They need to provide some basic details like their email ID, the name of the product they are creating a ticket for, and a short description of the issue that they are facing.
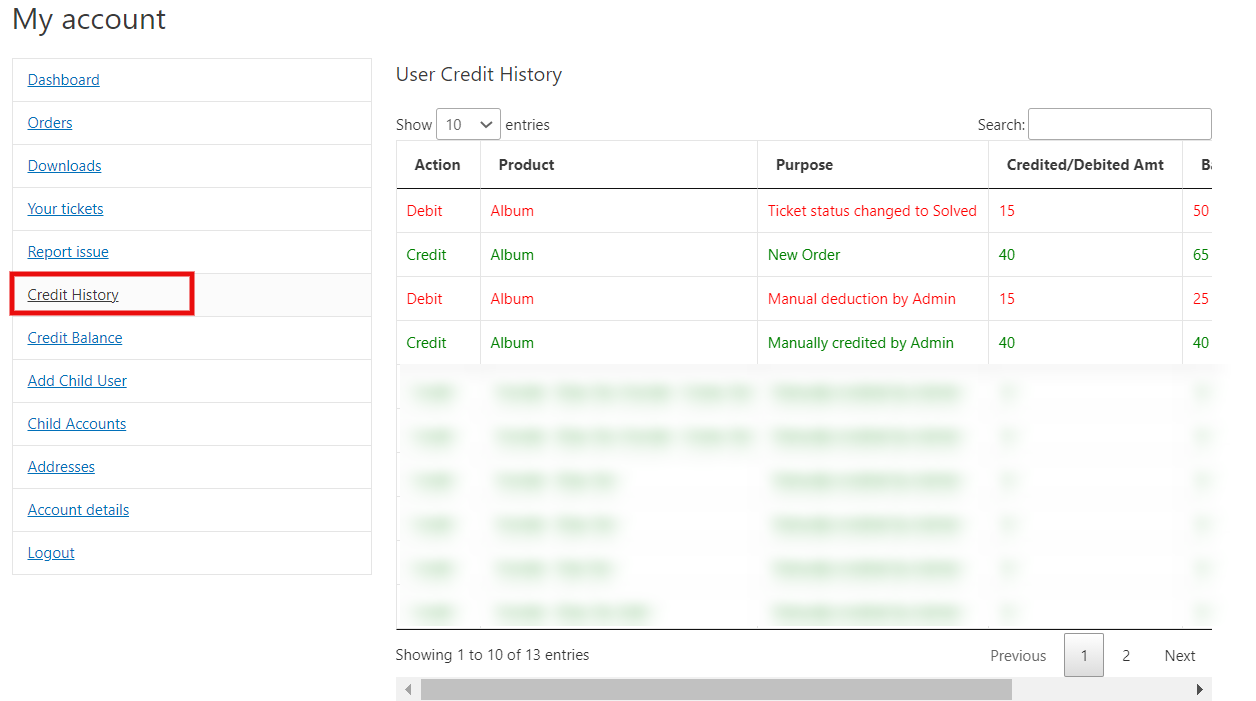
- Credit History: This tab displays all the credit amounts that were credited and debited for the various products and purposes, along with the remaining credit balance.
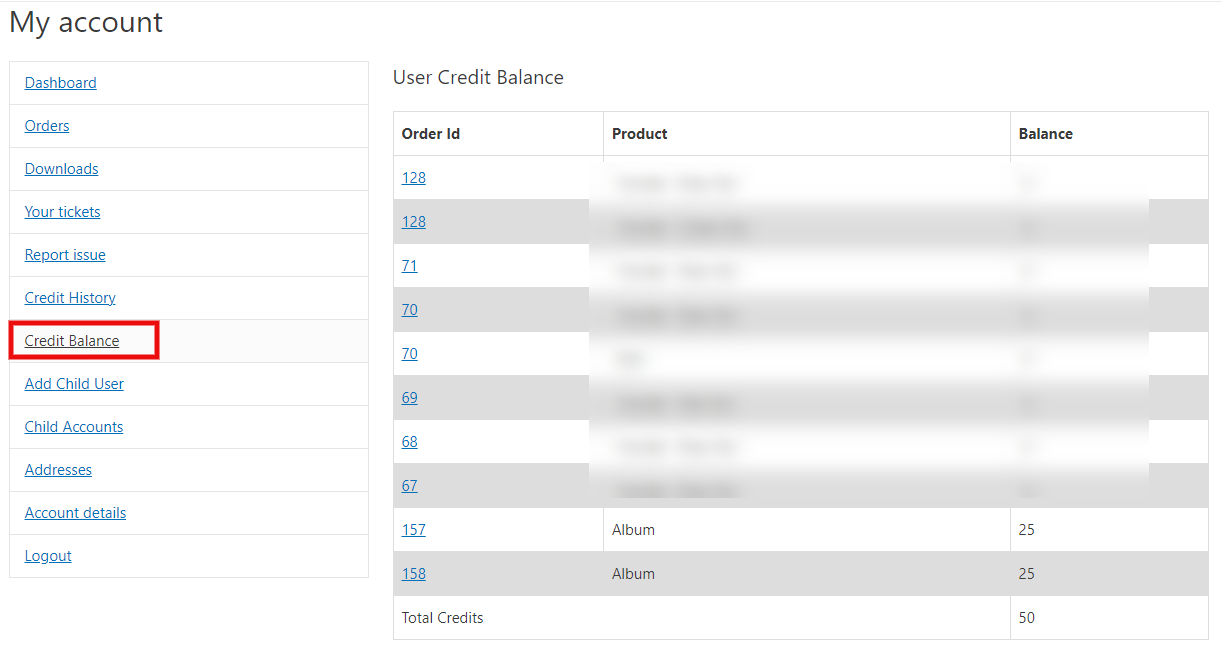
- Credit Balance: Users can check their total credit balance from this tab.
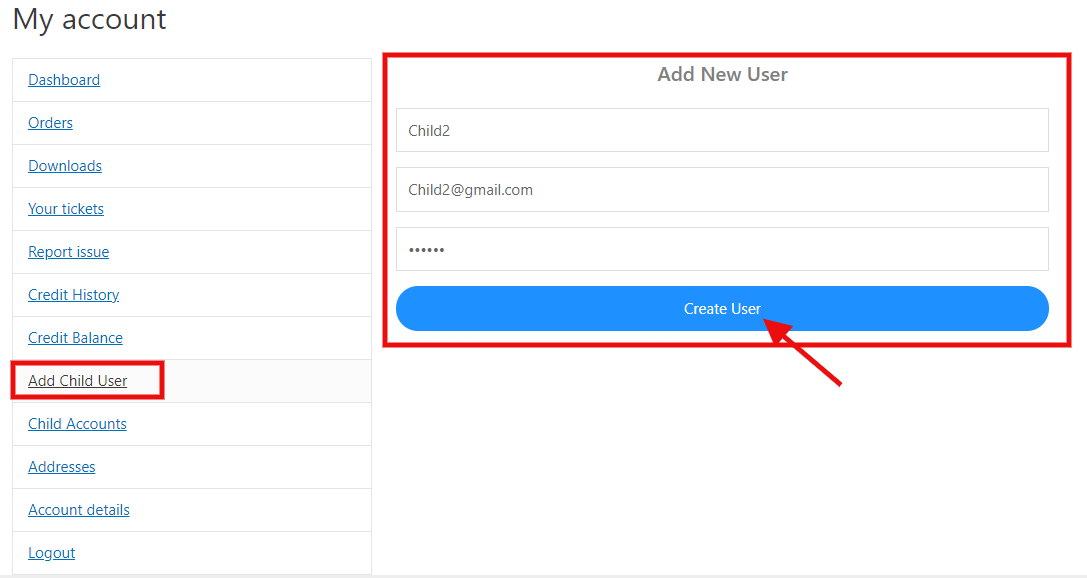
- Add Child User: Customers can create child user accounts that can make the transaction on their behalf. A parent account holder needs to enter details like username, email address, and a password for the child account, as shown in the screenshot below.
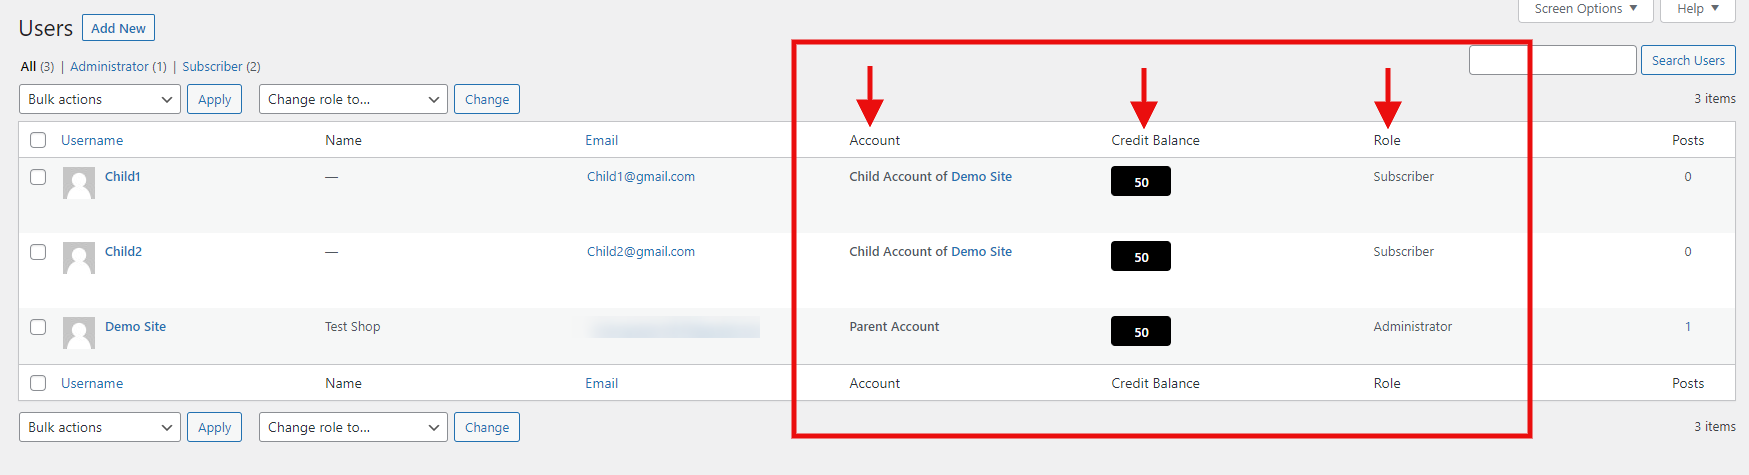
As a store owner, you can track these account types, the current subscription method associated with the account, and the remaining credit balance in the WordPress Users dashboard as shown in the below screenshot.
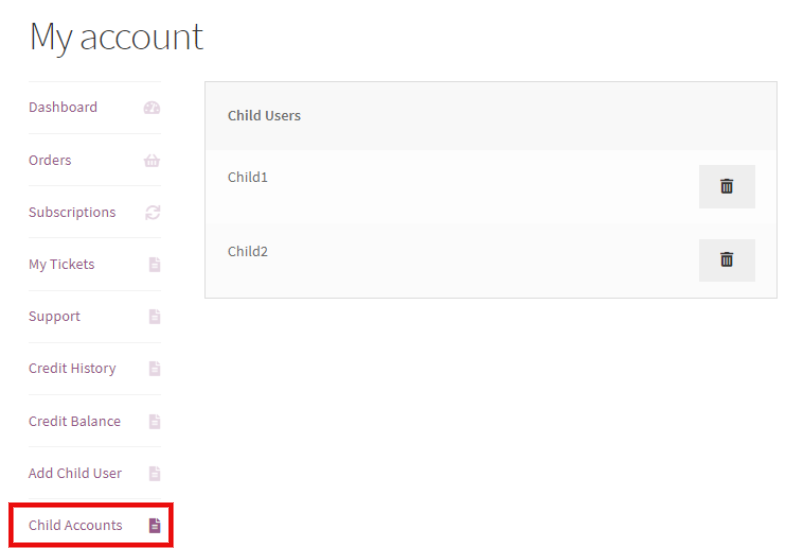
- Child Accounts: Under this tab, the parent account can view and manage all the associated child accounts.
Store owner accessing User Credit Details
Store owners can track and view a user’s credit details on the individual WordPress user profile page. In the WordPress Users dashboard, simply click on a user profile to open the page for viewing.

When you click on a user profile and scroll down to the User Credit History section, you will be able to see the credit transaction history and the remaining credit balance for the user.

My Account
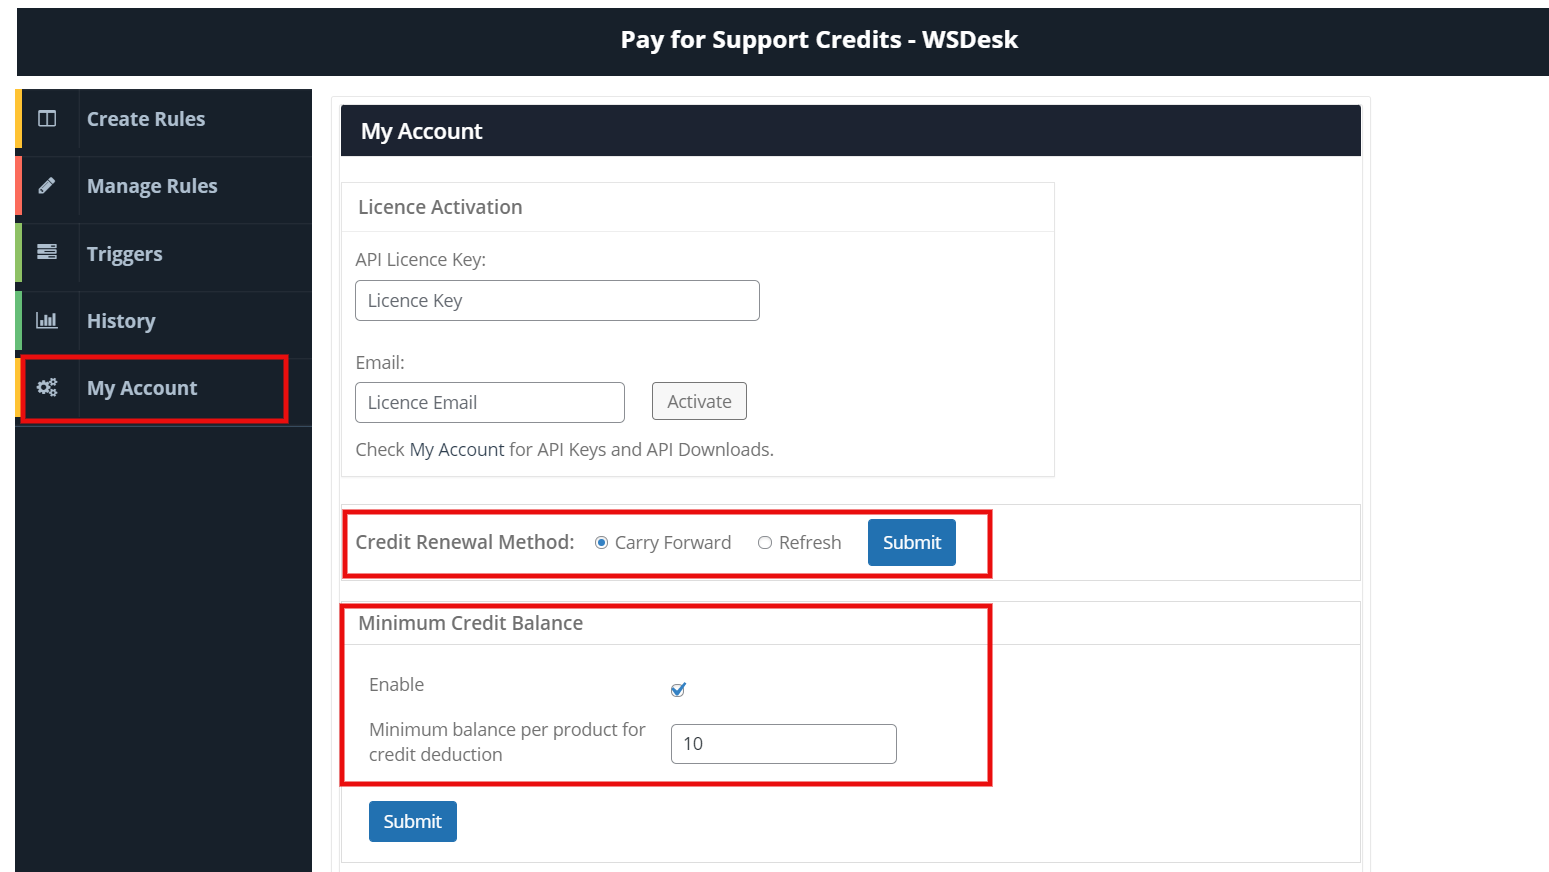
- License Activation: Under the ‘My Account’ tab, the API License Key has to be entered along with the registered license email address to activate the Pay for Support Add-On.
- Credit Renewal Method: Under the credit renewal method you are provided with two options; 1) Carry forward – Opting for the carry forward option will allow your customers to carry forward their previous credit balance when credits are added to their account upon purchase or renewal. 2) If you opt for the Refresh option, the previous credit balance is automatically removed from the customers’ user profile as soon as new credits are added upon product purchase or renewal.
- Minimum Credit Balance: You can set a minimum credit balance per product for credit deduction. If the users’ credit balance is below the set minimum credit balance, they will not be able to issue a ticket.
This should help you get going!
To explore more details about the plugin, go check out WSDesk Pay For Support Add-On. You can also check out WSDesk – WordPress Helpdesk Plugin.
You can also check out other WooCommerce and WordPress plugins in ELEX.
3 Comments. Leave new
How does one go about manually debiting a user’s credits? In my situation, we offer support at no extra cost, but we want to charge for support tickets related to updating a user’s website content, such as adding a new page or doing other edits.
Yes, We do have option available in the PayForSupport Addon for manually debiting the credits. You may watch this video https://www.youtube.com/watch?v=2HUo3cgfcvg At 8:50 it shows how to edit the credits manually. Please feel free to contact our support if you have any further queries.
Yes, We do have an option available in the PayForSupport Addon for manually debiting the credits. You may watch this video https://www.youtube.com/watch?v=2HUo3cgfcvg At 8:50 it shows how to edit the credits manually. Please feel free to contact our support if you have any further queries.