What can we help you with?
How to Schedule DHL Express Pickup on your WooCommerce Store? (with Video)
Once an order is placed by a customer, you proceed with creating shipments and generating shipping labels. After you are done with the packaging, you are ready for the shipments to be dispatched. If you are using DHL Express service in your WooCommerce store, you can schedule DHL Pickup to let DHL know that they pick your packages for the shipment.
In this article, we will see how to schedule DHL Express Pickup on your WooCommerce store, with ELEX WooCommerce DHL Shipping Plugin.
Scheduling DHL Express Pickup
We will discuss the specific settings involved for enabling DHL Express Pickup Request. For understanding the other features of the plugin, you can read the product documentation.
You can watch the video tutorial below.
1. Enabling DHL Real-time Rates
The very first step is to enable the plugin to access real-time rates and shipping label generation from DHL. These settings are available in the General settings tab of the plugin, as shown in the screenshot below.
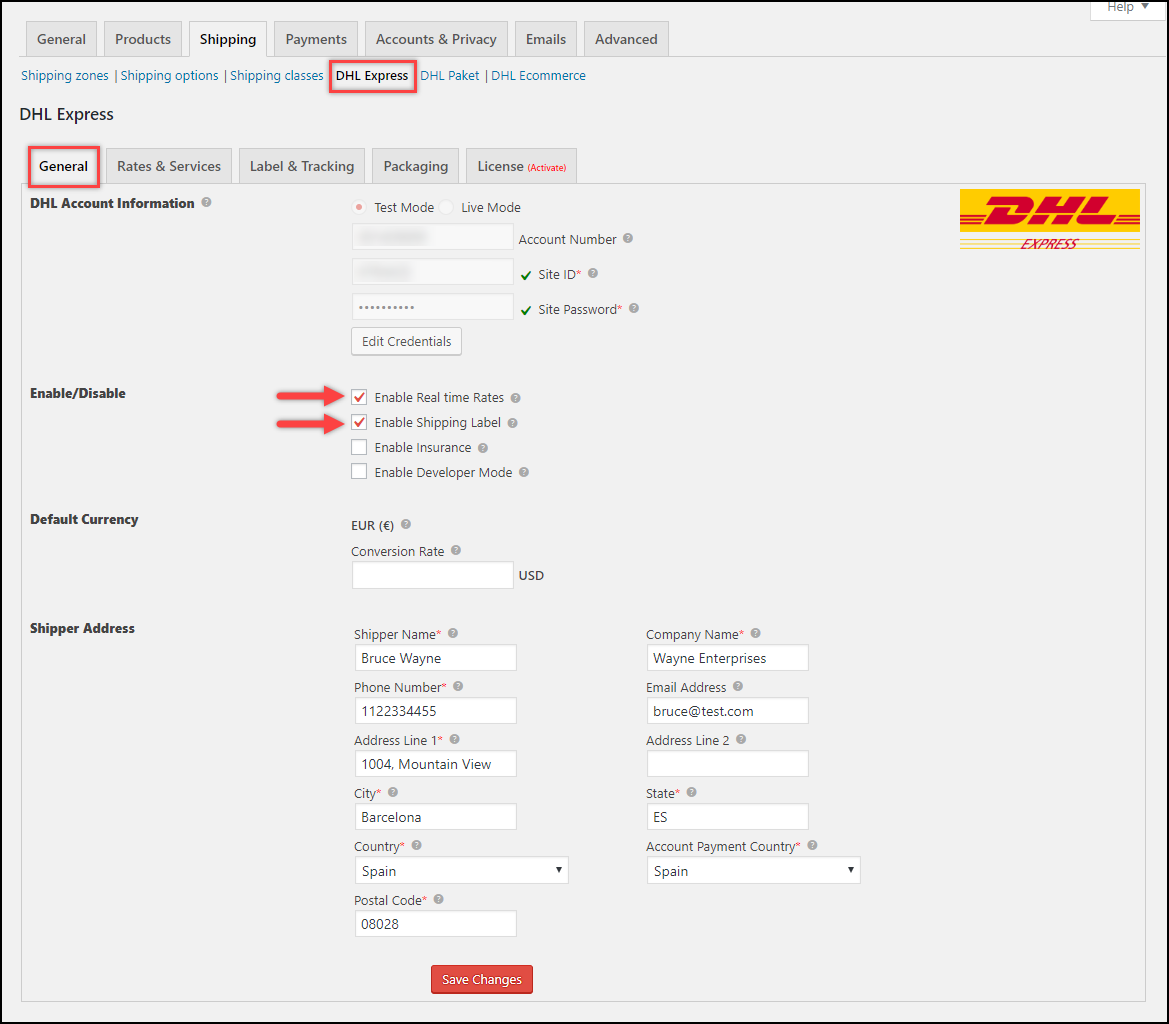
You also need to provide DHL credentials in the given fields, enable insurance if you want, provide the currency exchange rate (if any), and shipper address. For a more detailed understanding of these settings, read the General settings section of the product documentation.
2. Configuring DHL Rates and Services
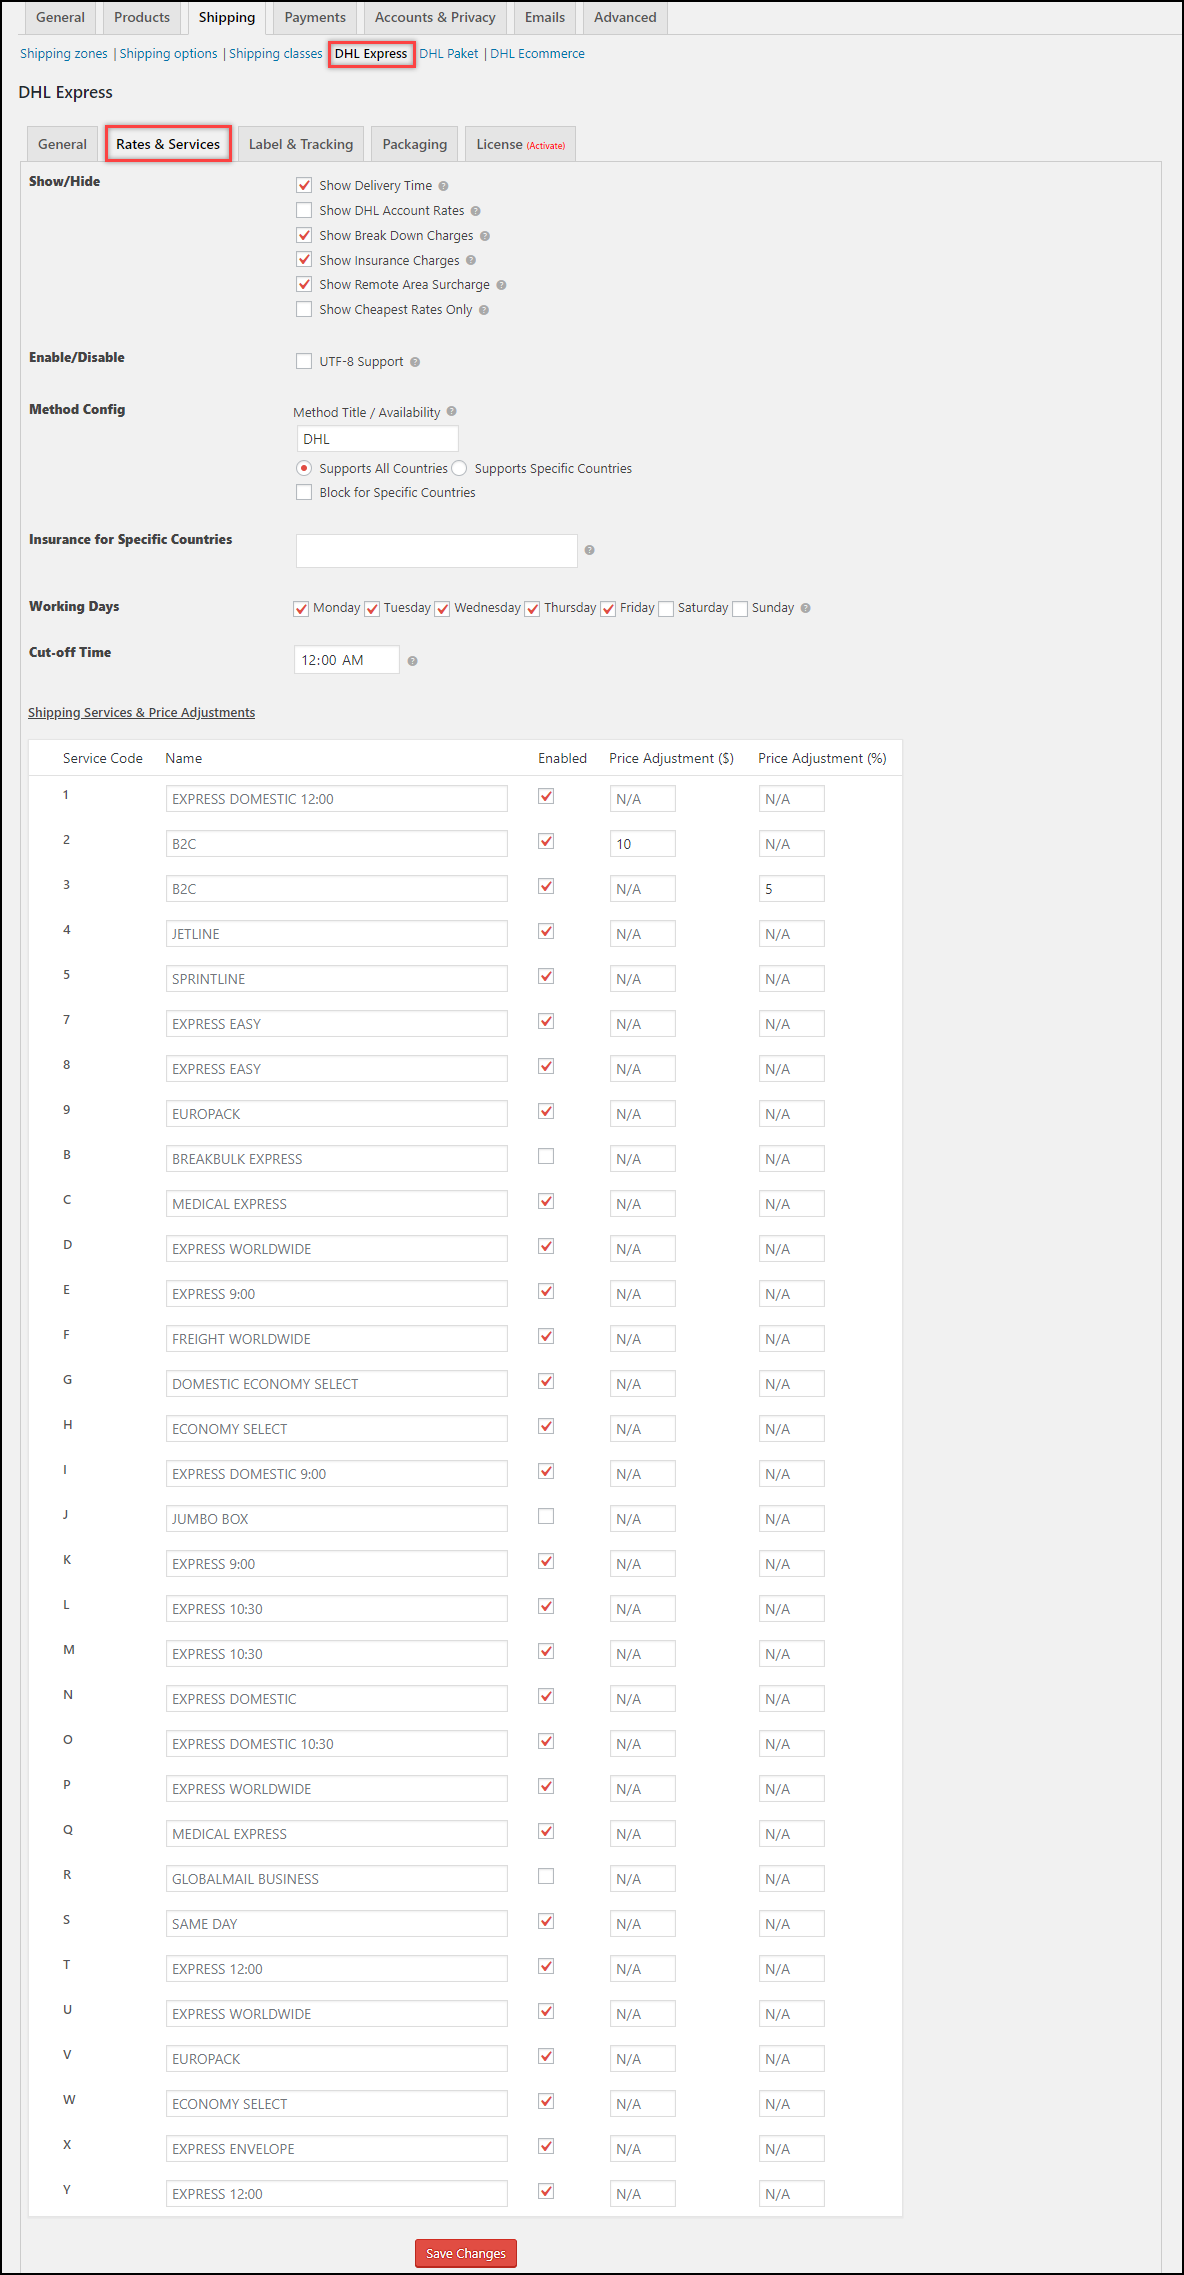
You can choose the DHL services that you want to offer, in addition to the price adjustments, enabling Delivery Time, DHL Account Rates, Break Down Charges, Insurance, Remote Area Surcharge, Working Days, and so on in the Rates & Services settings tab.
To understand each feature in detail, read the Configuring Rates & Services section of the product documentation.
3. Configuring Label, Tracking, and Parcel Pickup
The Label & Tracking section of the plugin contains settings to customize the shipping labels, enable shipment tracking, Return labels, Archive Air Waybill, PaperLess Trade (PLT), Saturday Delivery, Cash on Delivery, etc. You can also configure DHL Duty Payment, Bulk Shipment, Commercial Invoice settings and so on.
This section also contains settings for DHL Pickup. Enable the Pickup feature to reveal further settings, as shown in the screenshot below.
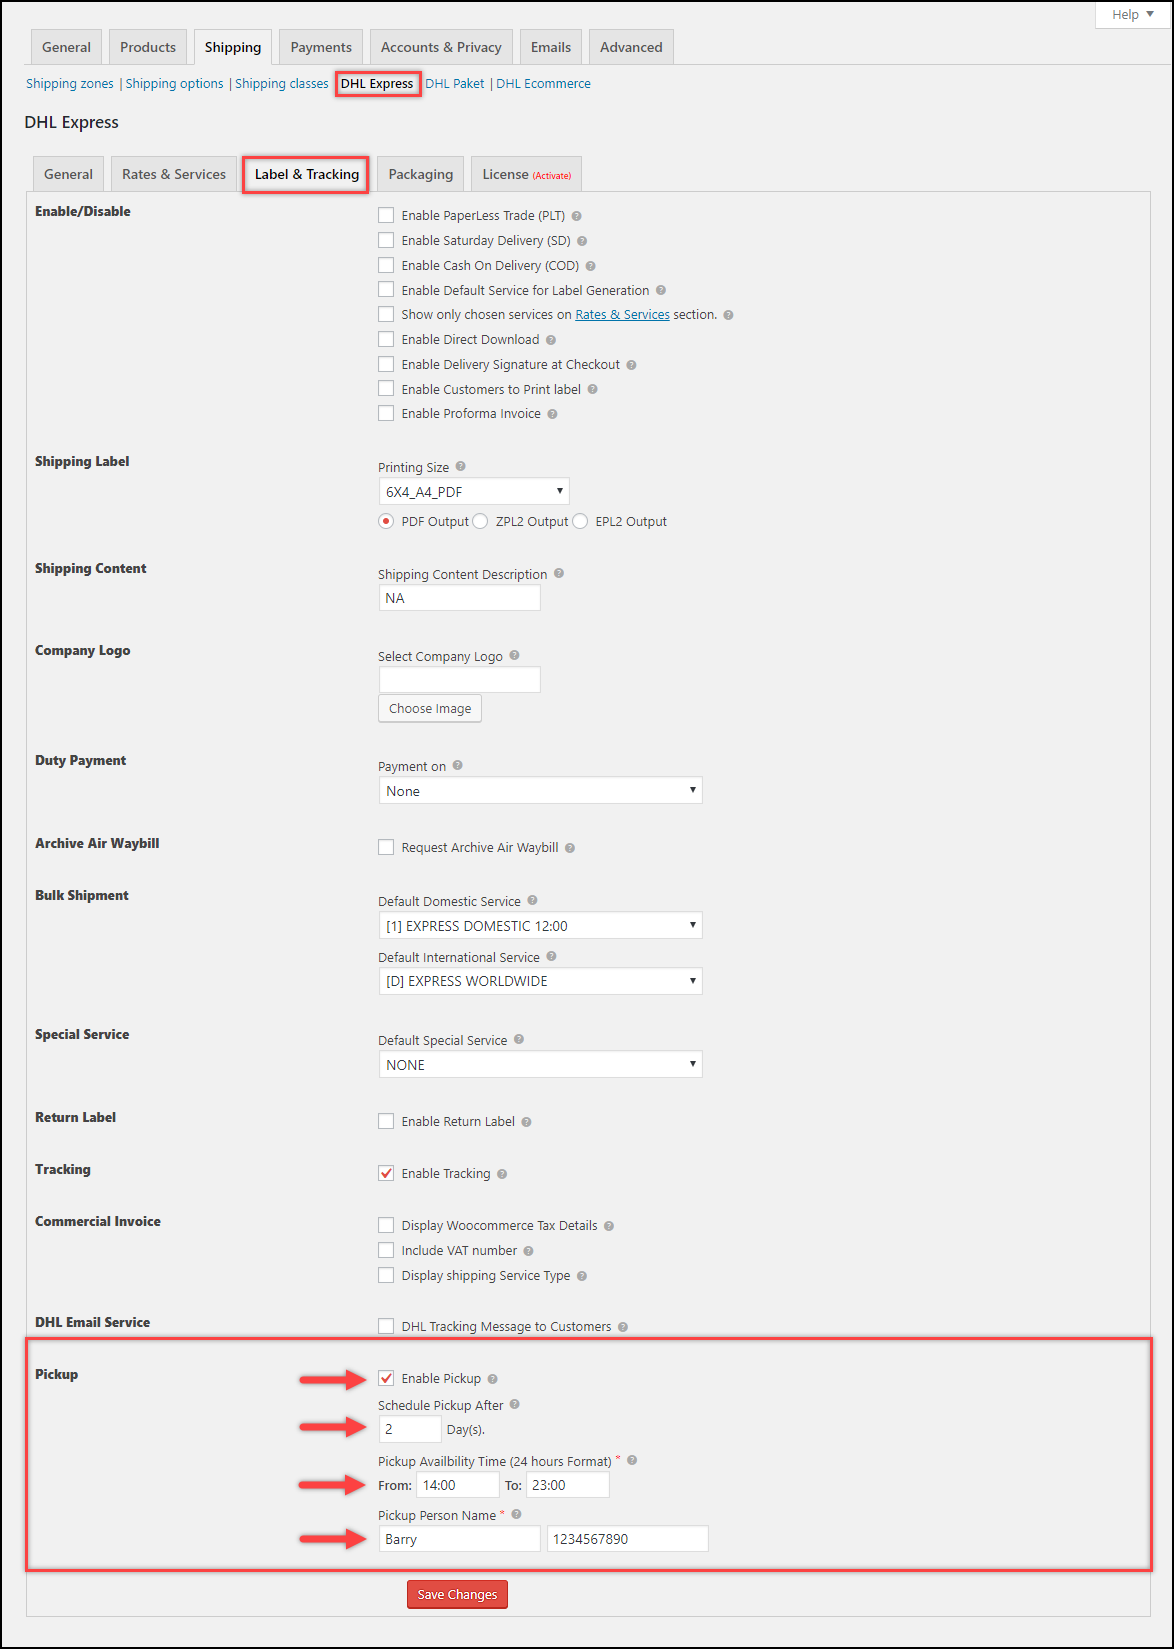
The number of days for scheduled pickup – Specify the desired number of days for scheduled pickup. If the number of days is set as 0, the pickup will be scheduled for the same day. If it is set as 2, the pickup will be scheduled after 2 days of the date of shipment creation.
Time duration – Set the time duration in which the parcels have to be picked. Remember to specify the time in 24-hour format.
Pickup Person Name and Contact Number – Provide the name and phone number of the person-in-charge of the parcels in your warehouse. The DHL personnel will contact this person while picking up the parcels.
4. Configuring Parcel Packaging
Parcel packaging is crucial for calculating the rates returned from DHL. Make sure you have provided weights and dimensions for the products and selected any one of the parcel packaging methods provided by the plugin.
You can read the Setting up Packages section of the product documentation to understand the parcel packaging methods.
Demonstration
Let us walk through the process of how a DHL Parcel Pickup is scheduled with our ELEX WooCommerce DHL Shipping Plugin.
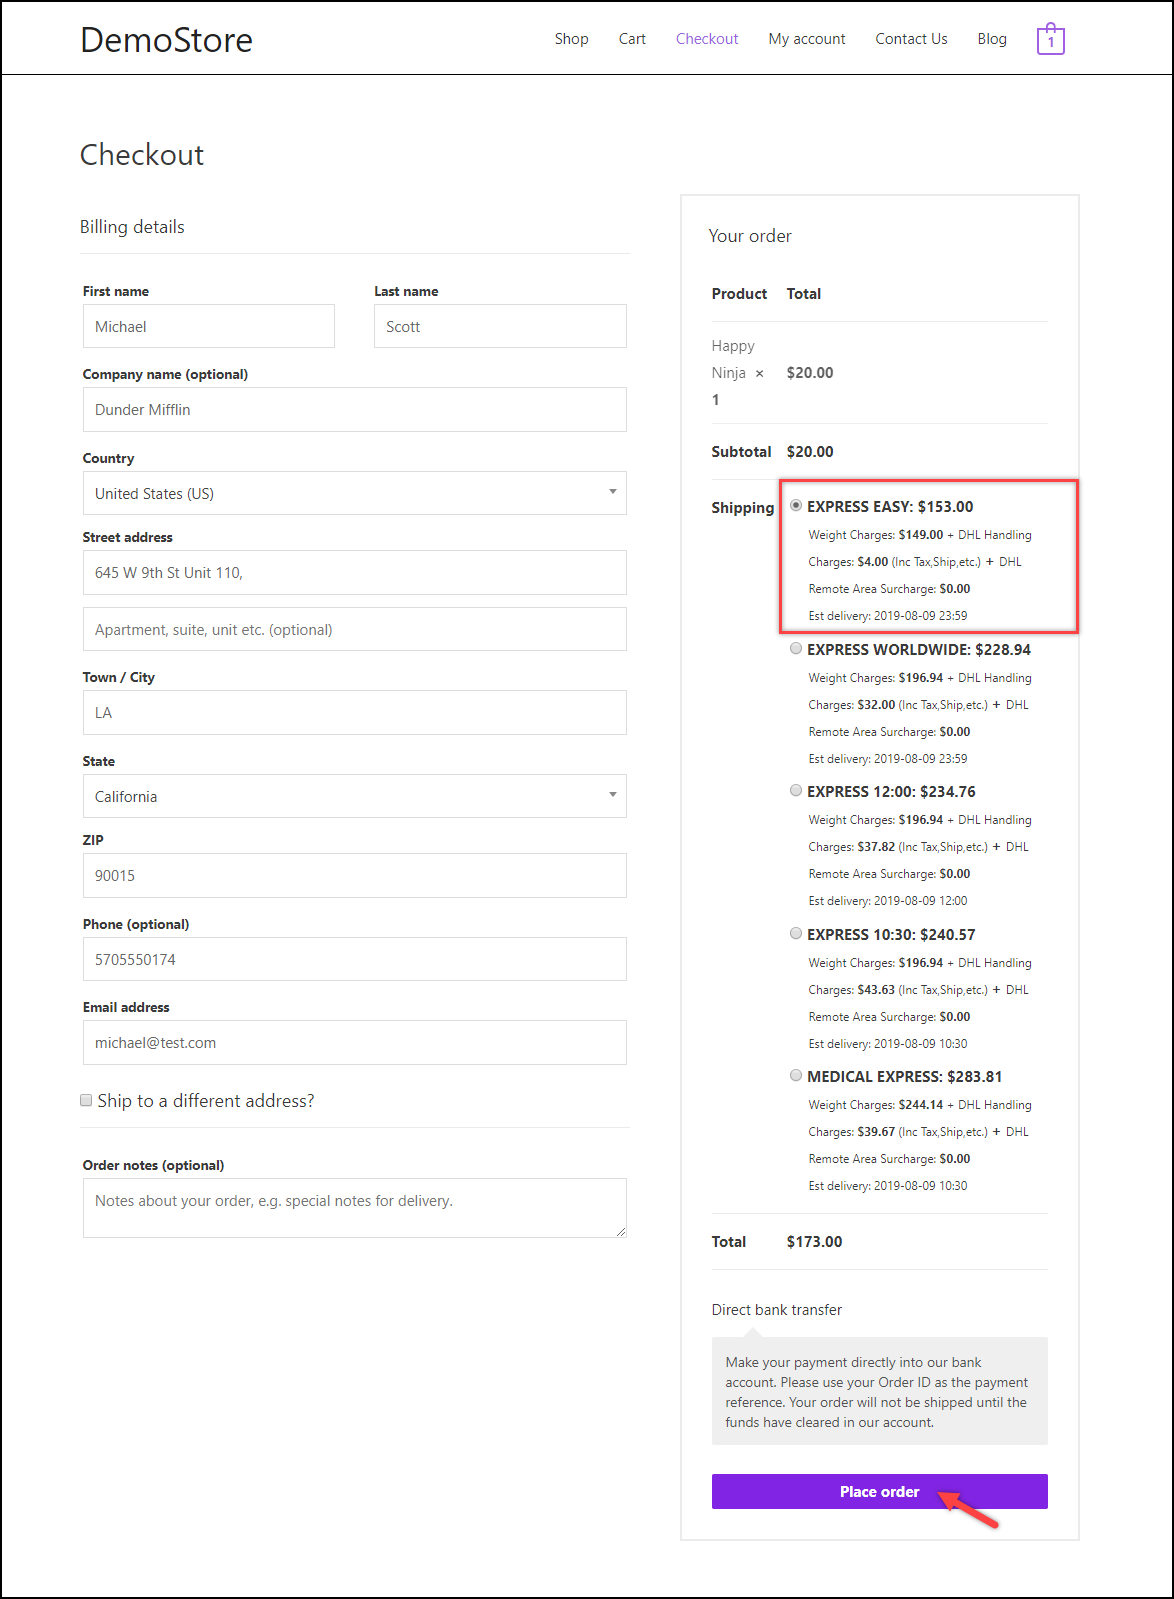
- A customer adds a product to the add, selects one of the DHL shipping services, and proceeds with the checkout, as shown in the screenshot below.
- After an order is placed, the store owner can go to the WooCommerce Orders dashboard, open the required order. The store owner can then click Generate Packages to get started, as shown in the screenshot below.
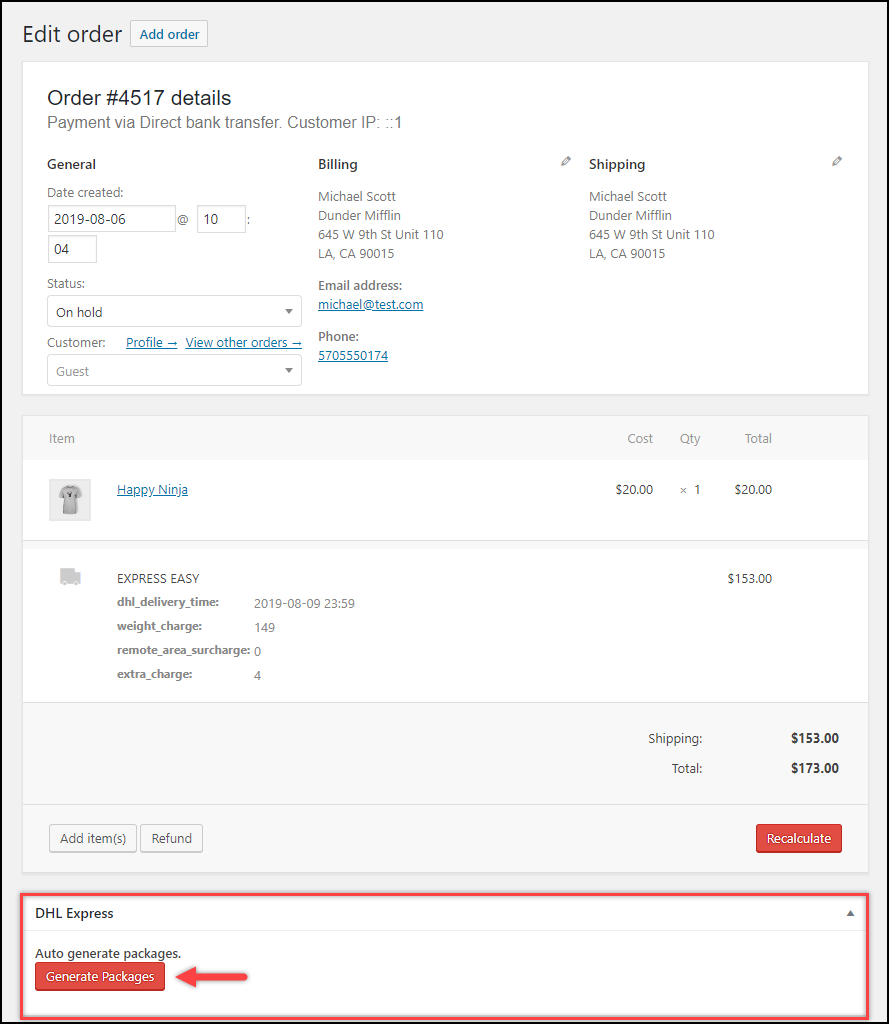
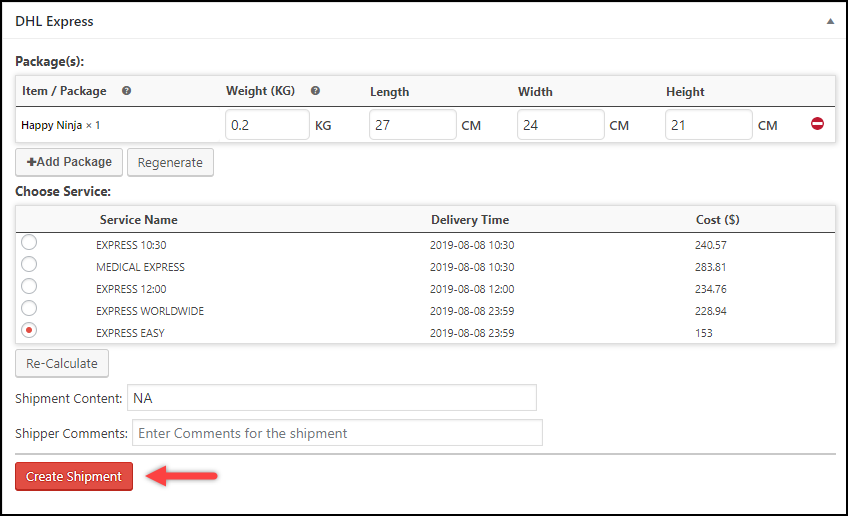
- Next, the store owner can choose to update the shipping service, add Shipment Content & Shipper Comment, and proceed to create a shipment, as shown in the below screenshot.
- Once the shipment is created, the shipping labels are generated. If the return shipment is enabled, you will see a button to process the return shipment. To schedule DHL pickup, click on the Create Pickup Request button, as shown in the screenshot below.

- The store owner will receive a Pickup Booked Confirmation Number from DHL which can be used for reference, as shown in the below screenshot.

If the pickup is missed in the designated date and time, DHL will provide the next pickup date which can be seen next to the Next Possible Pickup Date label.
Hence, in this way, you can schedule DHL Express pickup on your WooCommerce store, with ELEX WooCommerce DHL Shipping Plugin.
To explore more details about the plugins, go check out ELEX WooCommerce DHL Express / eCommerce / Paket Shipping Plugin with Print Label.
Read the product documentation to understand the plugin, in detail. Or check out the knowledge base for more related articles.
You can also check out other WooCommerce and WordPress plugins in ELEX.
