What can we help you with?
How to exclude specific Products and Categories while performing WooCommerce Bulk Edit? (with Video)
If there are thousands of products to bulk edit/update, it becomes difficult to exclude specific products or even categories from your WooCommerce store. How would you skip these products from the bulk update operation?
One way is to filtrate products using Filters, which we already saw in our article to selectively filter products for bulk editing with ELEX Bulk Edit Products, Prices & Attributes for WooCommerce. But the plugin also provides an even advanced process to do this, which is using Exclusions.
In this article, you will understand how to exclude specific Products and Categories while performing WooCommerce Bulk Edit with ELEX Bulk Edit Products, Prices & Attributes for WooCommerce.
You can watch the Video tutorial below.
Or continue reading the article.
Steps to exclude specific Products and Categories for WooCommerce Bulk Editing:
Consider a use-case, where we have a parent product category called ‘Leisure’, and which further has ‘Music’ and ‘Posters’ as sub-categories. We want to show products under ‘Leisure’ category only on the Shop page. We also want to exclude a product with its Product ID and exclude a sub-category called ‘Singles’ (under ‘Music’), both of which come under the ‘Leisure’ category hierarchy.
Here’s how it is done.
1. Filtering products under the ‘Leisure’ category
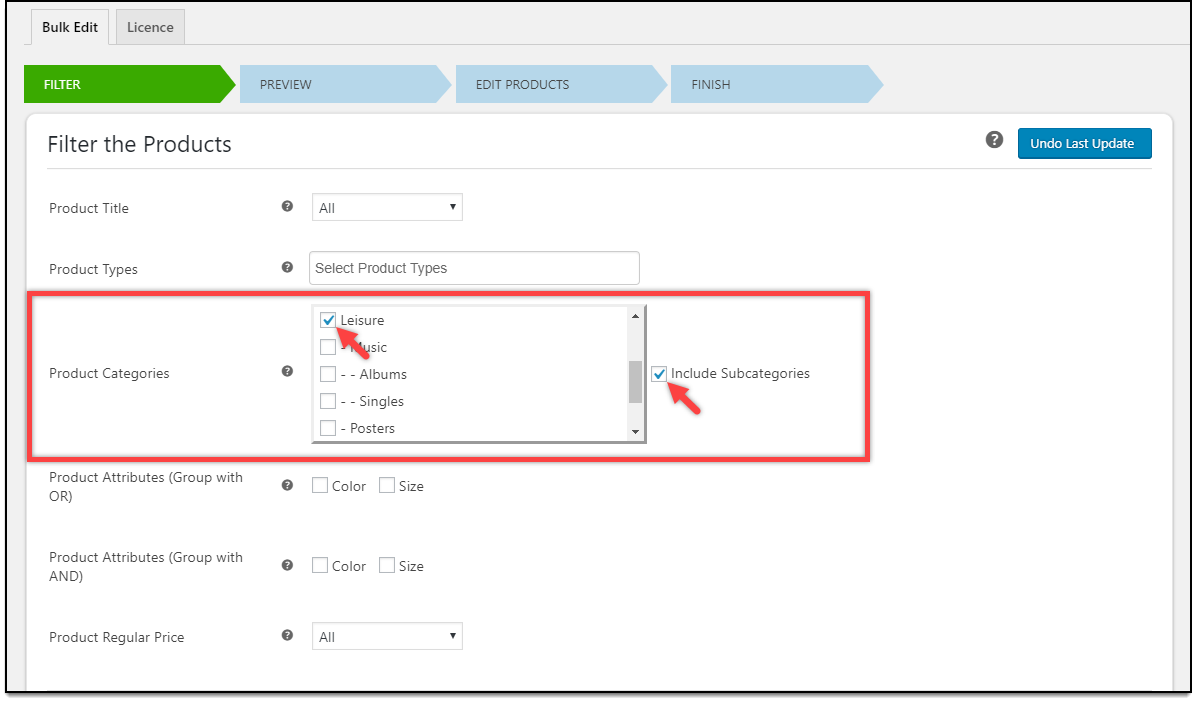
In the plugin settings, the very first step is the product filtering process. From the list of filters offered by the plugin, we need to make use of ‘Product Categories’. We should select the product category ‘Leisure’ from the given list. You can notice there are several sub-categories in the selected category, hence you need to tick the ‘Include Subcategories’ checkbox. This will automatically include all the sub-categories of the ‘Leisure’ category.
The configured settings are as shown in the screenshot below.
2. Excluding Products using Product ID and Category for Bulk editing
The next step is to exclude the required products. If we scroll down, we can find the Exclusions setting. Tick the checkbox to reveal further settings.
The Exclusions feature allows you to exclude specific products using only Products IDs and Product Categories (for now).
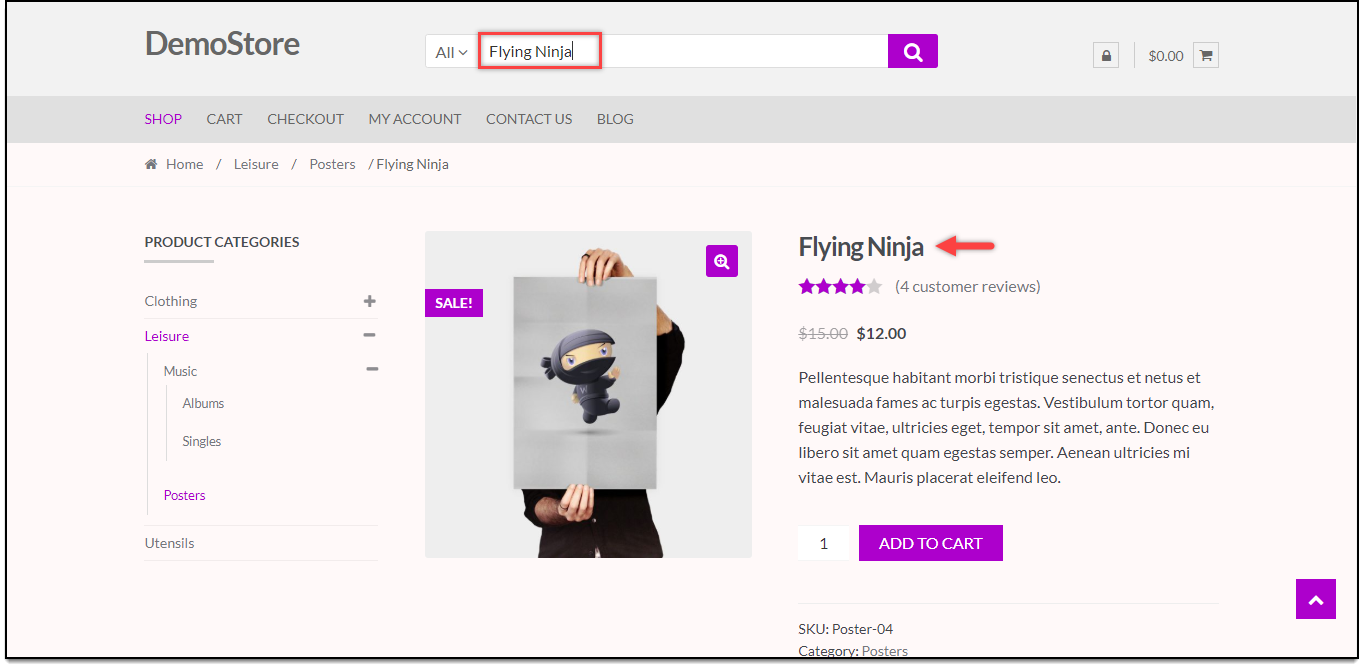
Let us exclude a product ‘Flying Ninja’ whose ID is ‘434’. The product is as shown in the below screenshot.
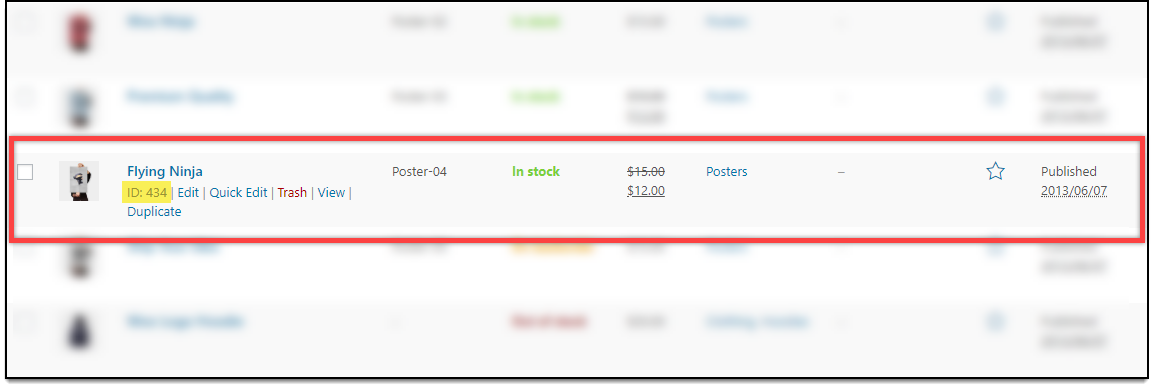
We should enter the product ID ‘434’ in the given text field. If there are multiple products, you can enter multiple product IDs separated by commas. Next, for excluding product category, tick the ‘Singles’ category in the given categories list.

This means that the bulk edit operation will be applied to all the products that fall under Leisure and its sub-categories, except the product with Product ID ‘434’ and all the products of ‘Singles’ category.
Once these settings are configured, click Preview Filtered Products.
3. Preview all products under ‘Leisure’ category
The next step previews all the products that fall under the ‘Leisure’ category. You can notice that the excluded products – the product with product ID ‘434’ and all products under ‘Singles’ are also listed.
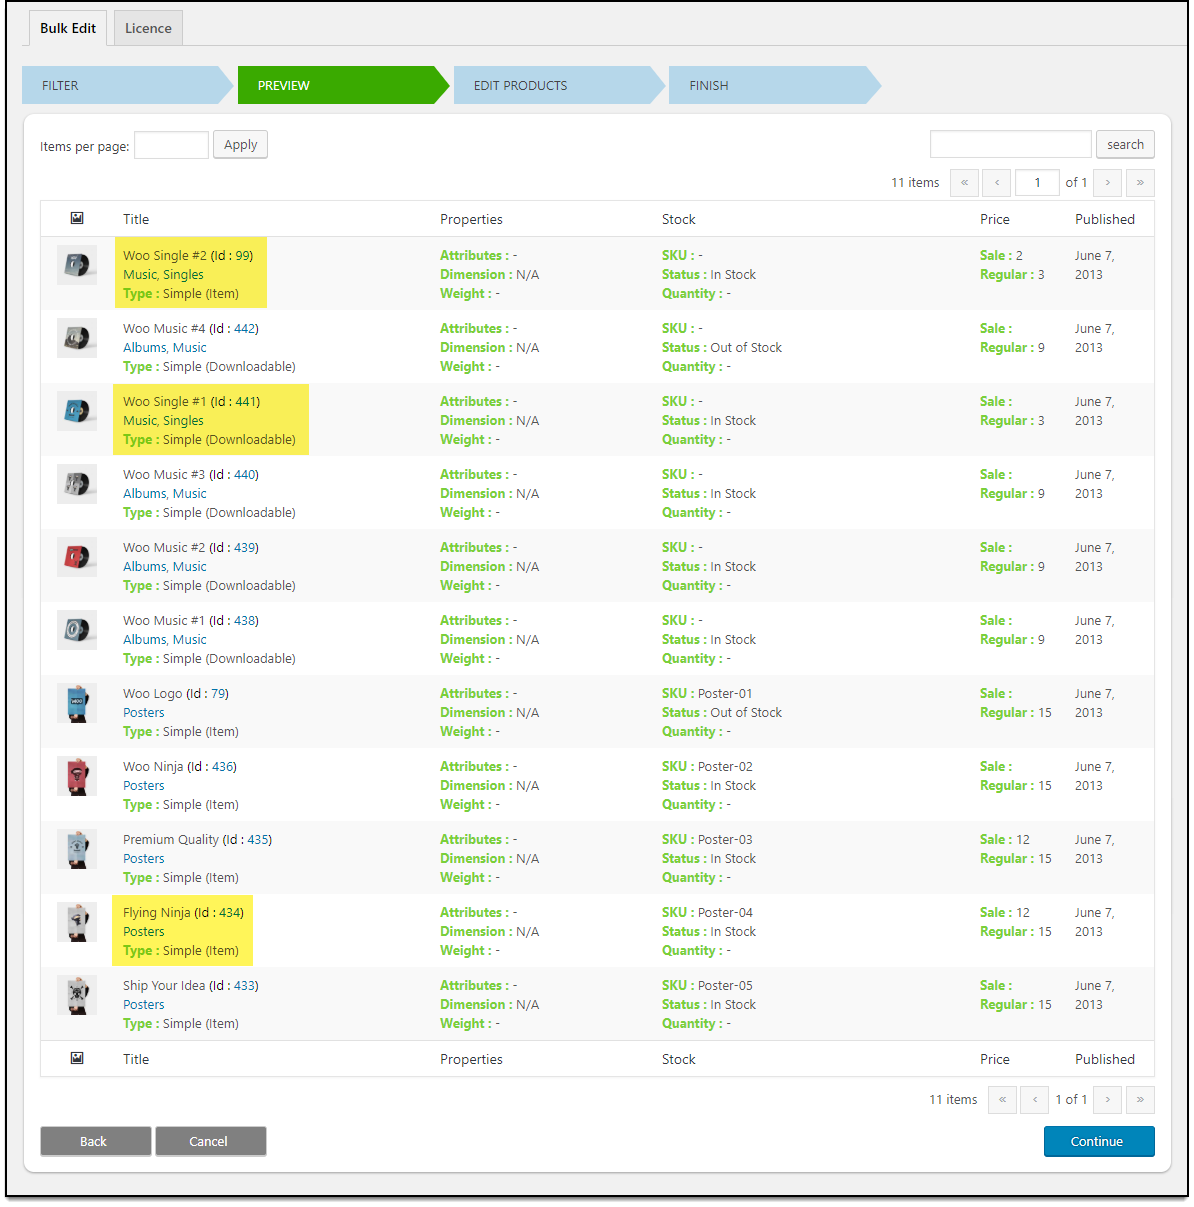
One important point to remember here is that the preview stage will display all the products that are filtered using the Filters in the previous step. The products will be excluded only from the bulk edit operation, and not from the preview.
Click Continue to proceed to the next step.
4. Applying ‘Shop Page only’ visibility in bulk
The plugin is powered by several product properties for the bulk update operation. For our demonstration, we need to make use of Product Visibility setting.
There are four options for Product visibility:
- Shop and Search – Products will be visible on both Shop page and search results.
- Shop – Visible on Shop page only.
- Search – Visible on Search results only.
- Hidden – Products will be hidden from the store completely.
Since we want to display our products only on the Shop page, we should select this option. This means, all the products under Leisure and its subcategories will only be visible on the Shop page and not in search results, except the product with Product ID ‘434’ and all products under ‘Singles’ category.
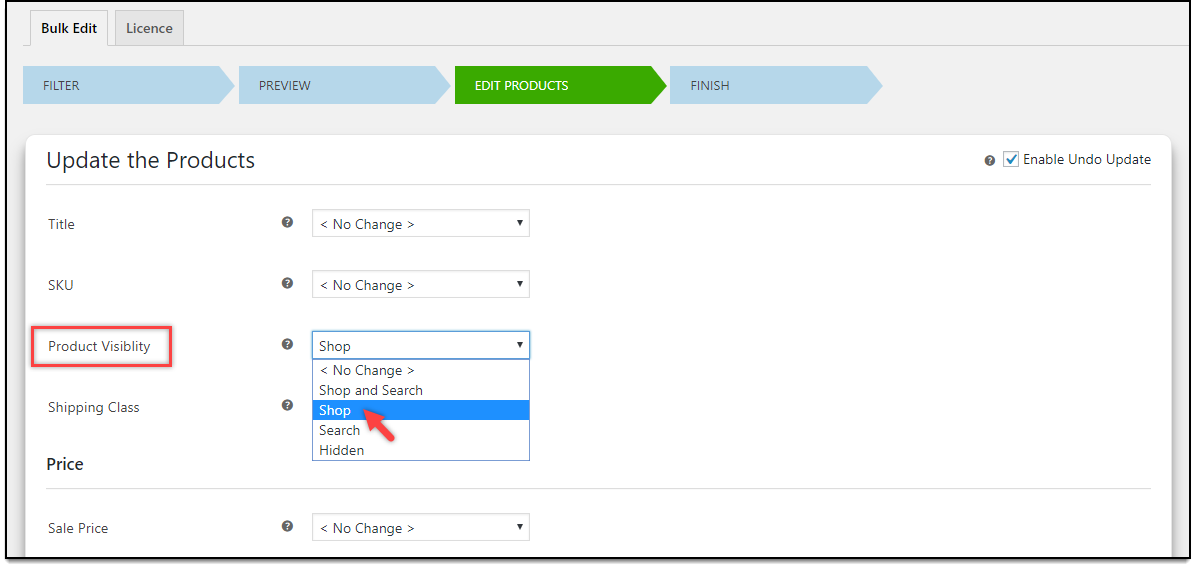
Finally, click on Update Products button to move ahead with the bulk edit operation.
The End Result
Once the products are updated, you’ll see a success message as shown in the below screenshot.

Let us move to the front-end of our WooCommerce store to see the updated changes.
All products will be listed on the Shop page by default, as shown in the screenshot below.
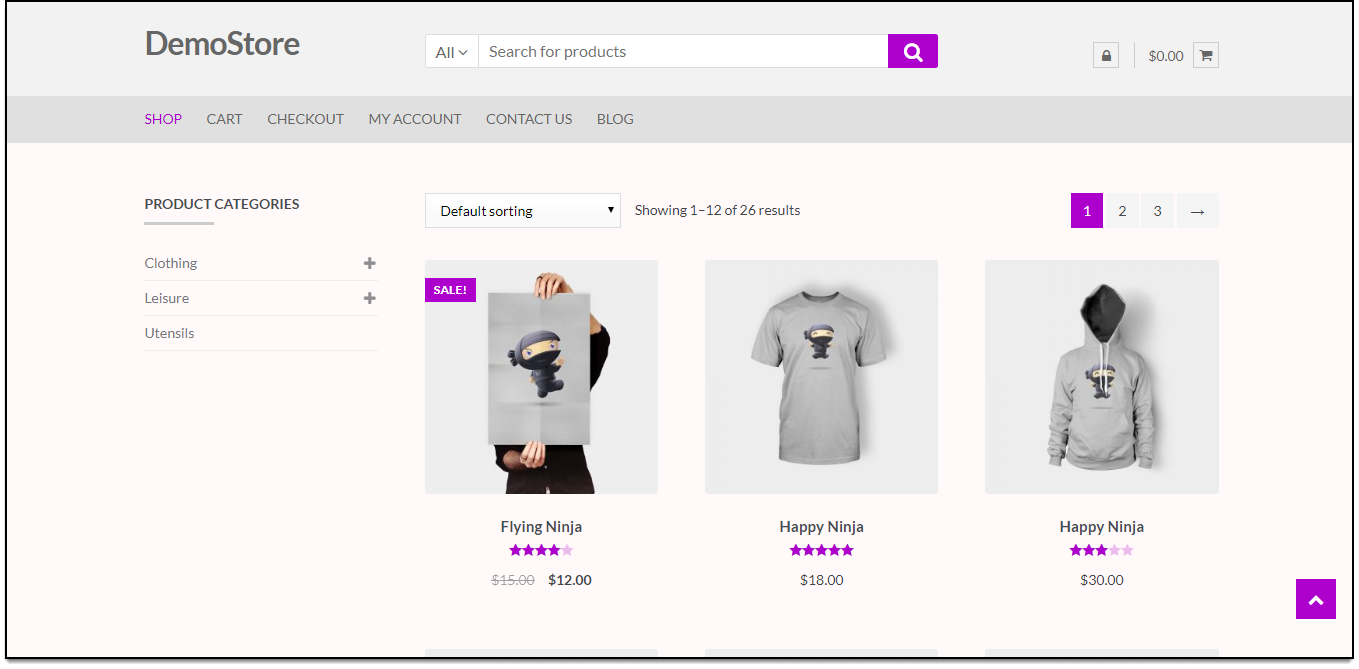
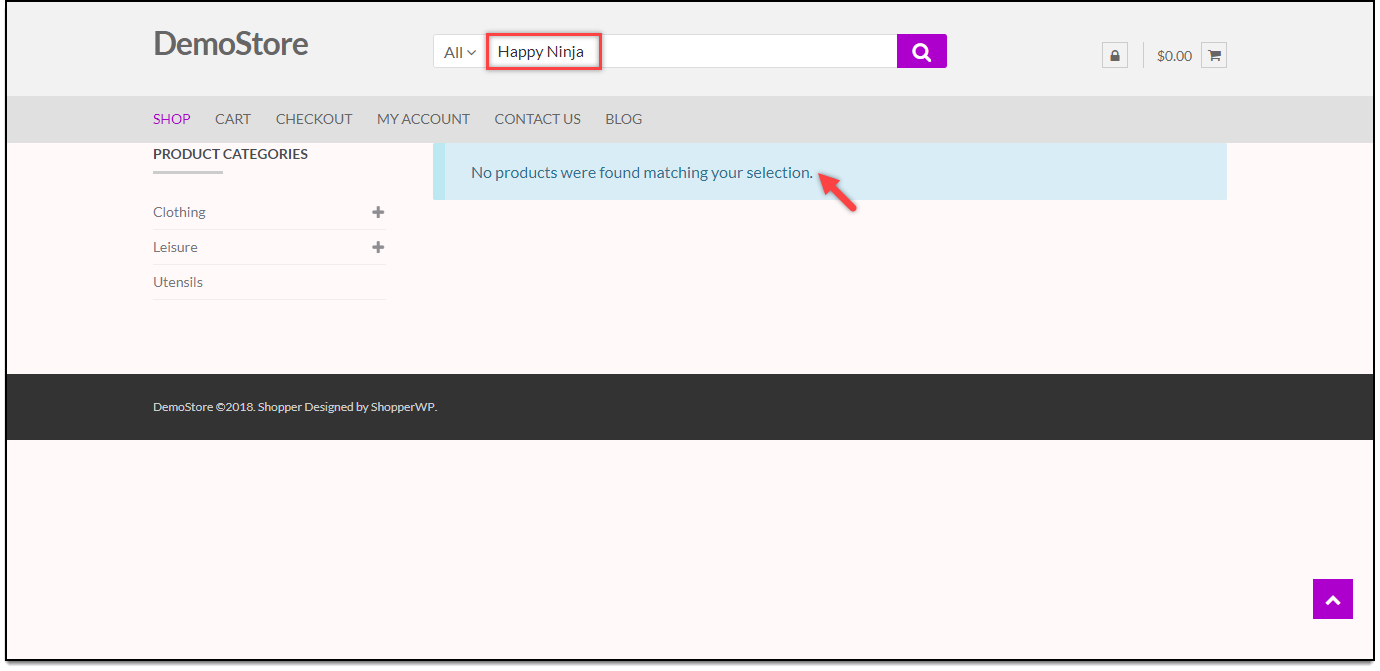
Case 1: First, let us search for products that are expected to not appear in the search results. For example, as seen in the above screenshot, the product ‘Happy Ninja’ is listed on the Shop page and is not expected to appear in the search results of the website.
When we search the product in the search bar, the product is not found, as expected.
Case 2: Let us now search for products that were excluded from the bulk edit process.
When we search for the product ‘Flying Ninja’ (excluded using product ID ‘434’), the product appears, as shown in the below screenshot.
When we search for products that fall under the ‘Singles’ category (excluded using Product Category setting), the products appear, as shown in the screenshot below.
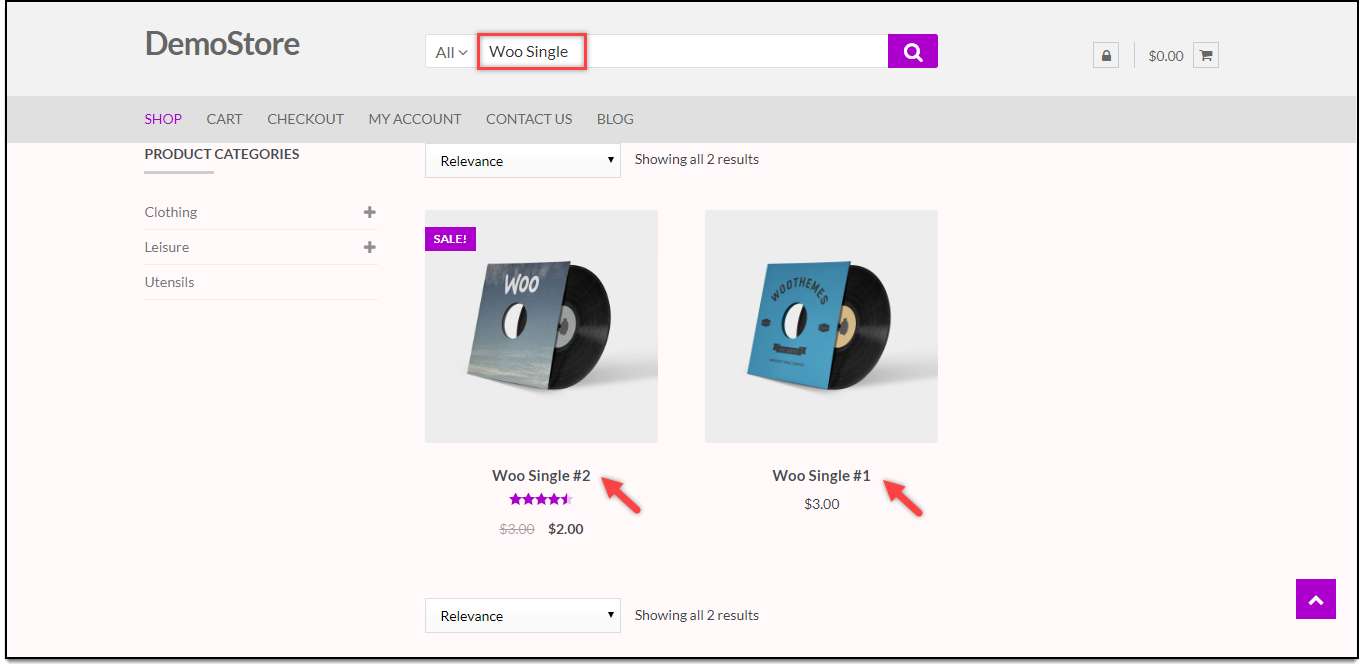
Hence, the products were excluded from the bulk edit operation.
In this way, you can exclude specific Products and Categories while performing WooCommerce Bulk Edit.
To explore more details about the plugins, go check out ELEX Bulk Edit Products, Prices & Attributes for WooCommerce.
Read the article for setting up ELEX Bulk Edit to understand the plugin, in detail. Or check out the product documentation section for more related articles.
You can also check out other WooCommerce and WordPress plugins in ELEX.
