In this article, we take a look at how to schedule USPS Pickups for WooCommerce order fulfillment from your store. Here we will be using the ELEX Stamps.com Shipping Plugin with USPS label for WooCommerce for the WooCommerce USPS Shipping and the ELEX WooCommerce Stamps.com-USPS Pickup Request Add-On.
Introduction
Shipping is quite an essential part of eCommerce.To get it done right, you need to be careful while choosing the right shipping carrier. USPS, one of the acclaimed shipping services for its on-time and accurate delivery, is always an ideal choice for businesses. With USPS incorporated, the order fulfilling becomes easy.
Upon using WooCommerce USPS shipping plugins, store owners can easily provide shipping options to the customers. In a way, it imparts confidence among the customers, when you are offering the best in class shipping service. Using the Stamps plugin, you not only get the shipping rates but also you can print shipping labels printed but also obtain the tracking number from USPS right on your store.
USPS Pickups
With pickups, it becomes easy to automate redundant jobs which are most time-consuming. If you are into shipping every day, then scheduling these jobs saves your time and you can plan things ahead. Moreover, the store owners with not many options for packaging like a warehouse, and all can benefit from these pickup services.
Basically USPS offers three pickup options :
Pickup on Demand Service – Ideal when you have multiple pickups to be done for a specific date and on a specific time.
Package Pickup Service- It allows you to schedule a pickup for the next delivery day or any day when you are eligible for mail delivery by the letter carrier. Here no additional charges will be levied.
Collection Service- This is mainly for the mails deposited on the collection box.
What do you need?
In order to configure USPS pickup requests from WooCommerce:
- ELEX Stamps.com Shipping Plugin with USPS label for WooCommerce
- ELEX WooCommerce Stamps.com-USPS Pickup Request Add-On
- A Stamps.com Account and a USPS Account
Let us now get a look at How to Schedule USPS Shipping Pickup on your WooCommerce Store.
Integrating USPS Shipping into WooCommerce
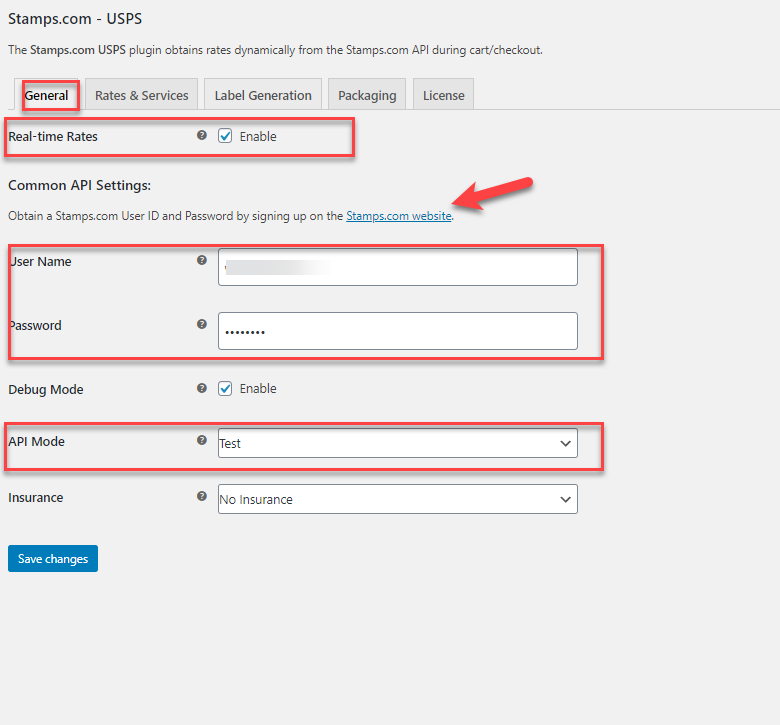
The very first thing you require is the Stamps.com account. You can log in and then obtain the credentials and then provide the same in the plugin. This will connect the plugin with the Stamp.com services and the USPS services inturn.
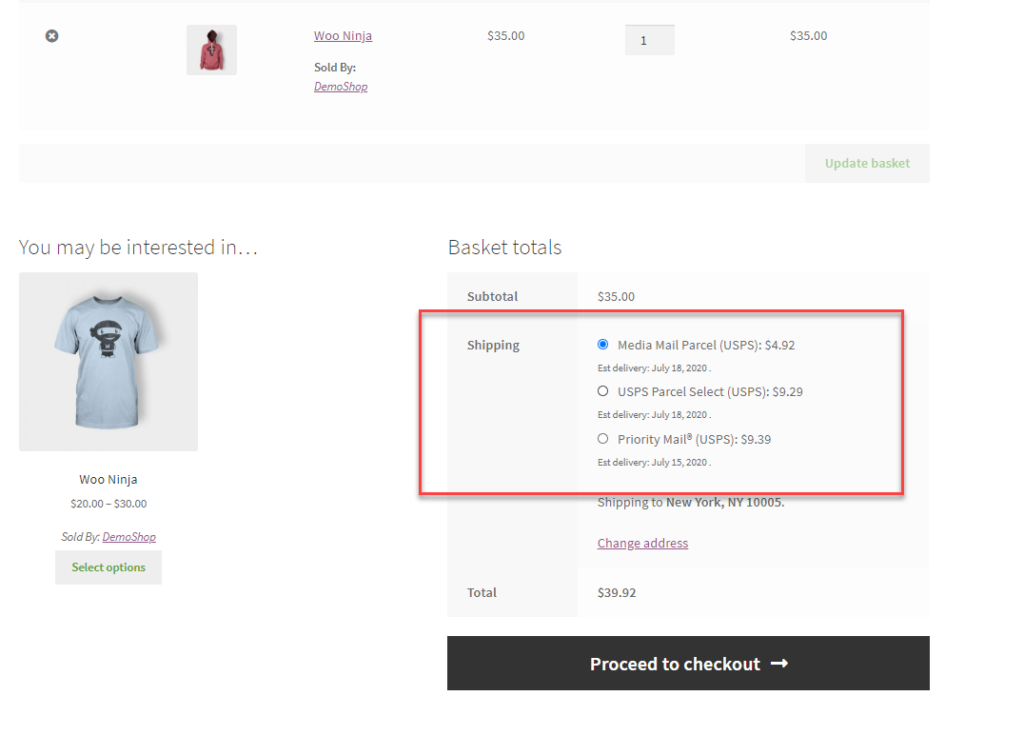
Here you can also choose the API mode on which you want to work on. On enabling the real-time rates, you get to see the real-time rates on your store cart and checkout pages.
Configure Rates and Services for WooCommerce USPS Shipping
The next thing to be done is to configure the rates and services for USPS.
Here you can configure the estimated delivery dates, fall back rates, and even disable or enable the display of cheapest rates on the store. You need to provide the origin postcode as well for shipping.
Label Generation for WooCommerce USPS shipping
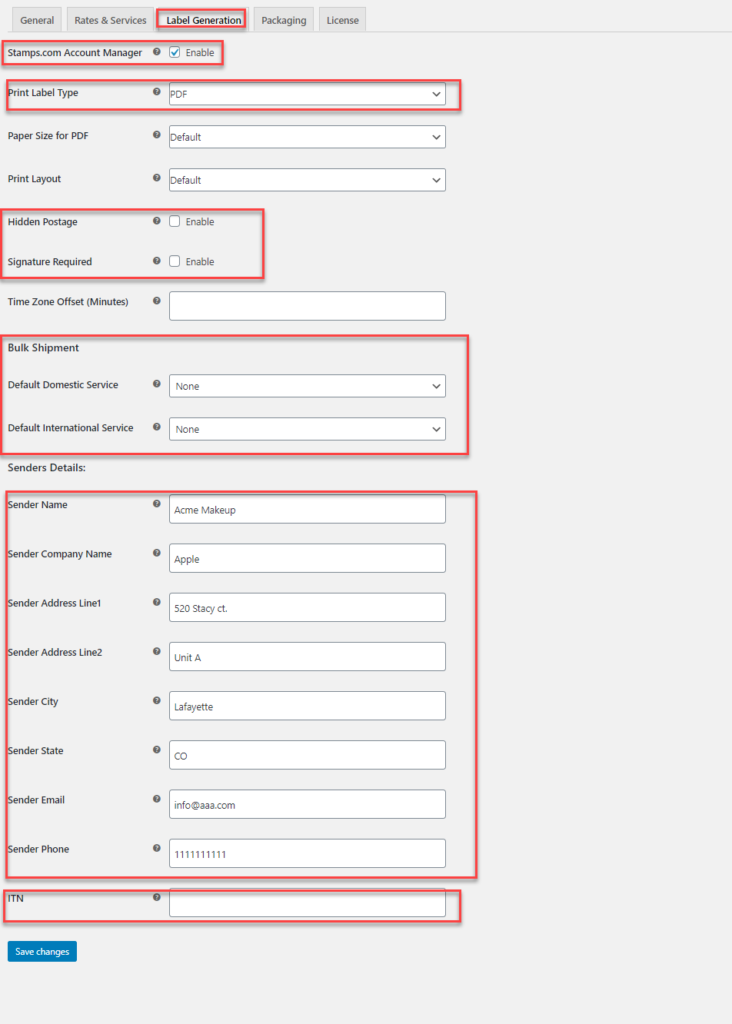
The next step is to set the label generation settings. Here you can set the label printing type. Mostly we choose the PDF format for the labels. You can also choose to hide postage, for hiding the shipping rate on the labels.
Also, provide the sender details for the order here. If you are planning for bulk shipments, then you can also set the default shipping service for your domestic and international USPS shipments here.
Configure WooCommerce USPS Shipping Packages options
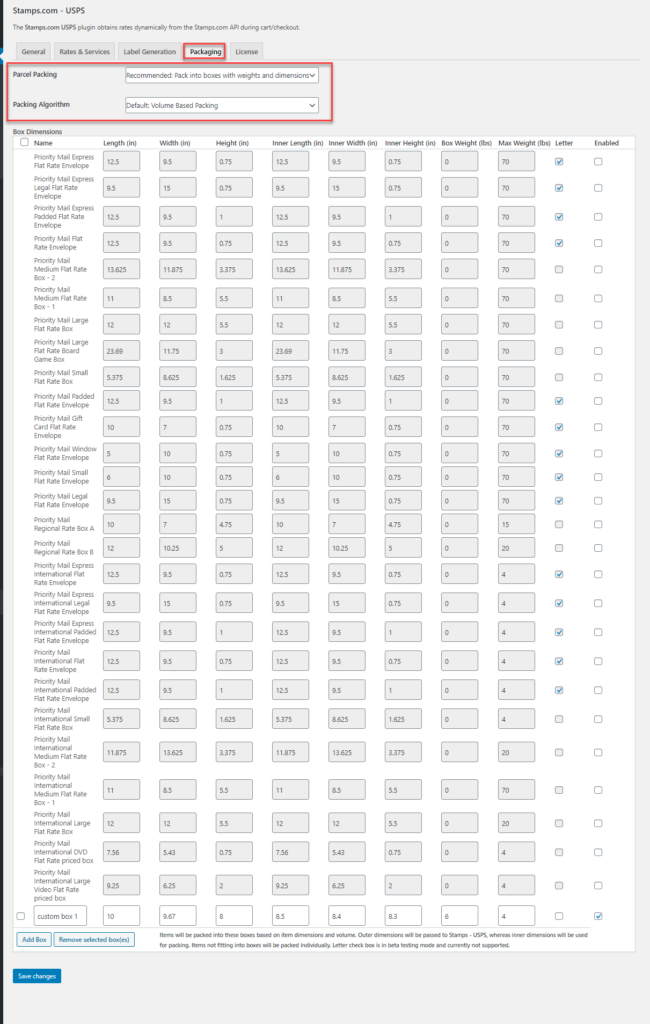
The next option is to set the packaging options for the orders. Basically you can set the options using three options provided by Stamps.com here:
1.Pack Items individually
2.Pack items into boxes with weight and dimension.
3.Weight-based packing.
All three are ideal for the shipping packages. In the pack items into boxes with dimensions, is ideal when you want to include certain bones with specific dimensions for packing. Ideally, the boxes listed are the default USPS flat rate boxes which are again the most economical way of packing.
Upon placing the order, the order is processed in the backend from the Dashboard. Firstly you create the packages for the order.
Then you create the shipment for the order.
Once done, you get a tracking id for the order and then the shipping label.
How to Schedule Pickup for WooCommerce USPS shipping
In order to schedule the pickup request for your WooCommerce USPS shipping, you need to have the Stamps pickup request add-on. Using the add-on you can schedule the same.
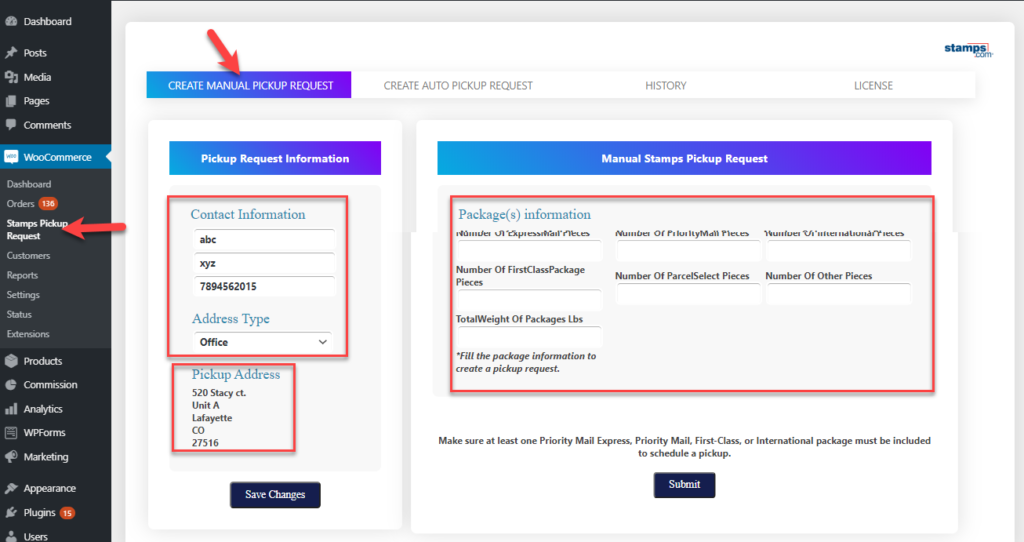
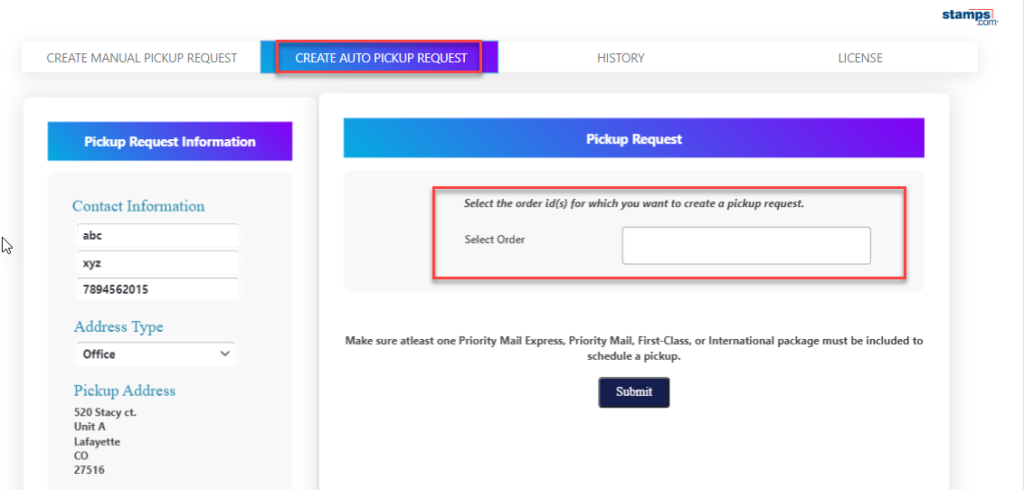
Using the plugin you can create two kinds of pickup requests – one manual and another is the auto pickup request.
To create a Manual Pickup Request, you need to specify the number of packages that are shipped with Express Mail, Priority Mail, International, Parcel Select, First Class, services. It is important to include at least one package shipped using one of these services. The total weight of the packages must be specified in the Manual Stamps Pickup Request subwindow. Once done, click on Submit to place the pickup request to the Stamps.com-USPS.
In the case of an Auto Pickup request, you need to provide only the order id for the pickup.
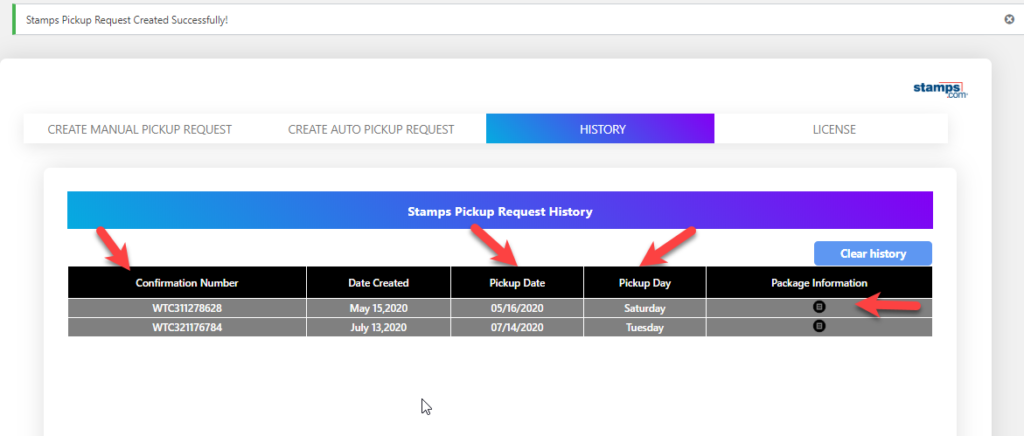
Once the pickup request is generated, the requests can be seen in the history tab.
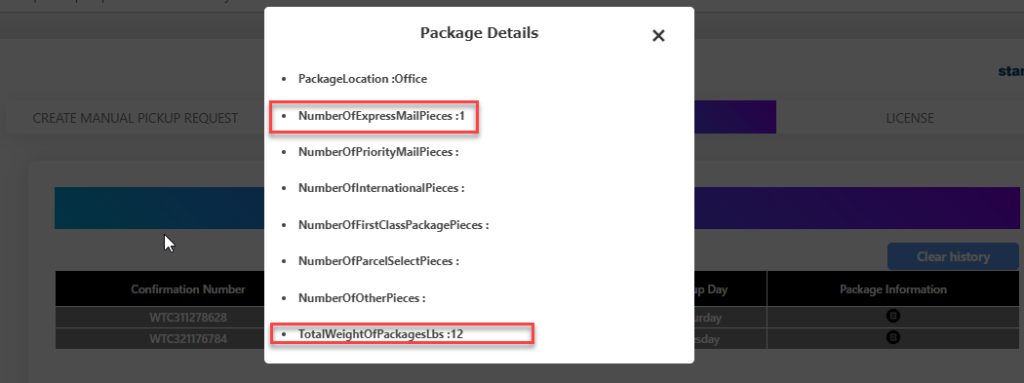
Here, you get a confirmation number, the date created, the pickup date, and the pickup day along with the package information. On clicking the package information, you get the number of packages and the total weight of the package.
To Wrap up
Using the ELEX Stamps.com Shipping Plugin with USPS Postage for WooCommerce along with the ELEX WooCommerce Stamps.com-USPS Pickup Request Add-On , you can easily set a schedule pickup for your WooCommerce USPS shipping on your WooCommerce store. Not only does it save a lot of time and effort for the store owners but also it is an economical way to ship the packages across locations.

