Chatbots are quite necessary for your business websites nowadays. Because it is the most convenient and easiest way for your customers to reach you while they want to ask any questions to you. It is not a tedious task to find the best WordPress chat plugin that satisfies your requirements. There are many advantages while you use a chatbot as a medium to make your customers reach you. Form submissions, emailing, or calling you through the phone are time-consuming and some customers may not be comfortable with that. Since everyone is familiar with social media and different chatting platforms, customers will prefer chatbots rather than forms.
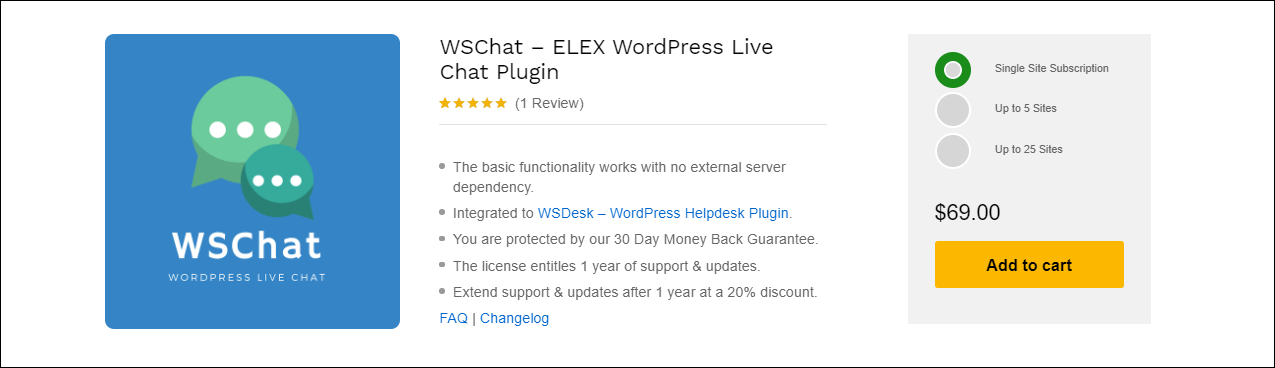
Before choosing one chatbot plugin for your WordPress store, you should clearly research its features, customization options, and the security it offers. One of the top-notch chatbot plugins in the market is WSChat – ELEX WordPress Live Chat Plugin. As it offers many advanced features besides the basic chatting option, you can choose this plugin for the best customer chatting experience.
Why Should you Choose WSChat – ELEX WordPress Live Chat Plugin?
As I have already mentioned, it offers many advanced features that will satisfy your business as well as your customers. First, let us take up an analysis of the advanced features of this handy plugin and check why you should choose this plugin among other third-party chatting plugins.
 Security
The first and foremost concern regarding a third-party chatting plugin is the security and privacy of data. Because customers may send sensitive information through their conversation and any security breach could lead to critical issues for your business as well as customers. So the data should be safe and secure. How WSChat – ELEX WordPress Live Chat Plugin ensures the security of yours as well as your customers’ data?
Unlike other third-party chatting plugins, this plugin doesn’t store your data in different locations. Without any external dependency, you can store your data exclusively on your server. Any external server issue or a connectivity issue will not affect your workflow. Since you are the only owner of your data, you can manage it according to your requirements.
Track live visitors of your site
It is better you know who are the potential customers of your product or services. This will help you to get an insight into the overall performance and customer engagement on your website. Another advantage of this feature is, you can reach out to customers from your side. For any presale queries or getting in touch with your regular customers before they reach you will improve your customer-business relation. You can see your live visitors and track the important details with this plugin. In the live visitors’ tab, you can track details such as the page they are currently viewing, their IP address, the operating system of the customer’s computer, and the time each customer spends on your website. Using this information you can reach them for any assistance.
Advanced features for agents
Sometimes you may reply to your customers’ queries if it is very less in numbers. But what if you are receiving hundreds of queries simultaneously? Customers always expect fast replies and solutions from you. Especially if they are a new customer of your product or service, they will definitely need your support. They may reach you when they are stuck with any emergency issues. In such cases, you need to recruit agents or analysts to solve their problems. You can create unlimited agents profiles on this plugin. Meanwhile, you can import agents fromWSDesk – ELEX WordPress Helpdesk & Customer Support Ticket System Plugin. Since it is highly compatible with this top-notch customer helpdesk plugin, you can even convert a chat conversation into tickets with simple clicks.
There is an option to trigger a sound or email notification to the agents when a customer raises a ticket. In addition to that, agents can initiate a chat conversation from their side as we have already discussed previously. Also, you can configure pre-chat forms. Using this option, agents can reply to the customers through their email. Customers can also see whether you are online or offline if you have configured it accordingly.
Unlimited chat history
Another benefit of choosing this plugin is, you can store unlimited chat conversations. Chat history is a record and a backup for all the data as we can retrieve as and when any requirements arise. Unlike other chatting plugins, WSChat – ELEX WordPress Live Chat Plugin does not limit you to store chat conversations. You can retrieve and check any chat conversation in the past at any time from anywhere.
Customization options for the chat widget
Many chatting plugins offer a default widget that may not match or fit into your website theme and colors. For making it more customer-friendly and suitable to your website, you should be able to customize with the colors of your website. Using this plugin, you can customize chat widget background, Header Background, Header Text Color, Chat Background, Agent Message Background, Visitor Message Background, and Message Text Color.
In addition to that, you can customize the chat header buttons of the widget. By default, there will be a mute option on the header. You can add 4 custom buttons if needed. They are:
- Attachment: Users can attach files in their conversation.
- Video recorder: Using this feature they can record a video and send it.
- Send chat history: Customers can enter an email ID for sending the conversation as such to that address.
- Chat rating: Users can ‘like’ or ‘dislike’ the chat to notify their satisfaction with your assistance.
For making the chatting experience more interesting and user friendly, this plugin offers emoji support. This will help the customers to express their exact emotions and it will not make the conversation boring.
Provide a detailed report for analysis
Check the total ratings, quality scores, and the number of tickets associated with all agents in a detailed report. This will help to understand the overall performance of your support and will help to make improvements. You can choose a particular time duration to check the report.
Mobile responsive
Since this is an era of smartphones and everyone uses smartphones for each and everything, the chat widget should be mobile responsive as well. WSChat – ELEX WordPress Live Chat Plugin is an AJAX-based mobile responsive plugin. So it will make your users access and send their queries through their mobile. The users can also enlarge the size of the chat widget to fit into their mobile screen.
Generate AI integrated responses
One of the most important benefits of choosing this plugin is, you can integrate your chatbot with AI (Artificial Intelligence) and NLP (Natural Language Processing) to trigger automated responses to customer queries. Now the questions are why do you need to generate automated responses to your customers? and how can you integrate AI to generate these responses with WSChat – ELEX WordPress Live Chat Plugin?
Well, let us analyze this for a clear understanding.
Why do you need to generate automated responses to your customers?
Since the customer is king, it is very important to satisfy them for the smooth functioning and running of your business. They always expect immediate answers from your side. Maybe they are the new users of your products or they do not have the technical knowledge to handle your products. In such cases, it is necessary to give frequent assistance to the customers until they get used to the products.
Even after they get used to the products, there are chances of problems or issues that will arise while using the products. They will immediately reach you via the chat, and they expect a solution from you as soon as possible. What if they do not get a quick reply from your side? Yes, it will definitely affect their trust towards you and you will start to lose your potential customers gradually.
You might have provided some documentation and set up videos to them, sometimes it will not work with them. So the next turn is personal assistance. Some customers might be facing critical issues and some might only need simple guidance from you. But if these multiple tickets come to you at the same time, it is difficult to handle all tickets simultaneously.
Another problem is the unavailability of the agents to answer the questions. Some network issues from the agents’ side may hamper the speed of response. And they are the recruited agents, the holidays in your business should not affect your customers to get a solution to their problem. If your customers reside in different locations, countries, or even continents, the working time will be different. In these situations, the best solution is to automate the responses.
There are many benefits of automating responses. They are:
- Customers will get quick solutions to their problems.
- The majority of the tickets can be solved by providing automated responses.
- It will increase customer engagement on your site.
- It can improve the trust in your brand.
WSChat – ELEX WordPress Live Chat Plugin is an AI integrated live chat plugin. You can integrate AI and NLP to generate automated responses by following simple steps. This live chat plugin integrates AI using Dialogflow, a tool by Google. Before getting into the benefits of using Dialogflow, let us have a look at what is Dialogflow.
Dialogflow
Dialogflow is a software powered by Google’s machine learning. It is a natural language processing software used to configure and trigger automated responses via mobile apps, web applications, devices, bots, and so on. You can add training phrases, which are the probable queries that could arise from your customers as well as you can set what are the responses to be triggered to the users while they raise a particular query. There are options to trigger images, documents, video, audio, and other files besides a text response. It helps you to build Actions, Skills, bots, and apps for the Google Assistant, Alexa, Cortana, Facebook Messenger, and other platforms your users are on.
As it is a bit technical and needs some time to configure the responses properly, you may need to refer to some documents or tutorials to set it up by yourself. This article is about a guide on setting up Dialogflow for integrating AI with your chatbot. In this article, I would like to explain how you can set up Dialogflow with WSChat – ELEX WordPress Live Chat Plugin according to your business and niche.
Before going to the step by step guide let us check what are the benefits you will get when you integrate Dialogflow with WSChat – ELEX WordPress Live Chat Plugin.
They are:
- Provide solutions to the customers as soon as possible even if you are not online.
- Customize the responses by fetching values from the customers and adding it to your next response to them. It will help to improve the bond with customers by providing personalized replies.
- Create training phrases and corresponding responses to them.
- Create custom payloads to send audio, video, images, and documents, etc, along with text responses.
- Easy integration with Google Assistant, Facebook Messenger, Amazon Alexa, and Slack, etc.
- Easy integration with Firebase tool for storing the image, audio, video, and other files to store for triggering responses.
These are the benefits you will get while integrating Dialogflow with WSChat – ELEX WordPress Live Chat Plugin.
Now let us check how you can integrate it in step by step.
How to set up Dialogflow for triggering automated responses?
First, you have to sign up for Dialogflow and create an account.
Step 1: Create a Dialogflow account
Go to Dialogflow -> Click Sign up for free.
Using your Gmail ID, you can create an account on this.

Step 2: Create agents
The next step is to create an agent. This process is like we are creating a set of responses for a particular product or service. You can name it accordingly for your convenience. Put a name that is unique and understandable later.
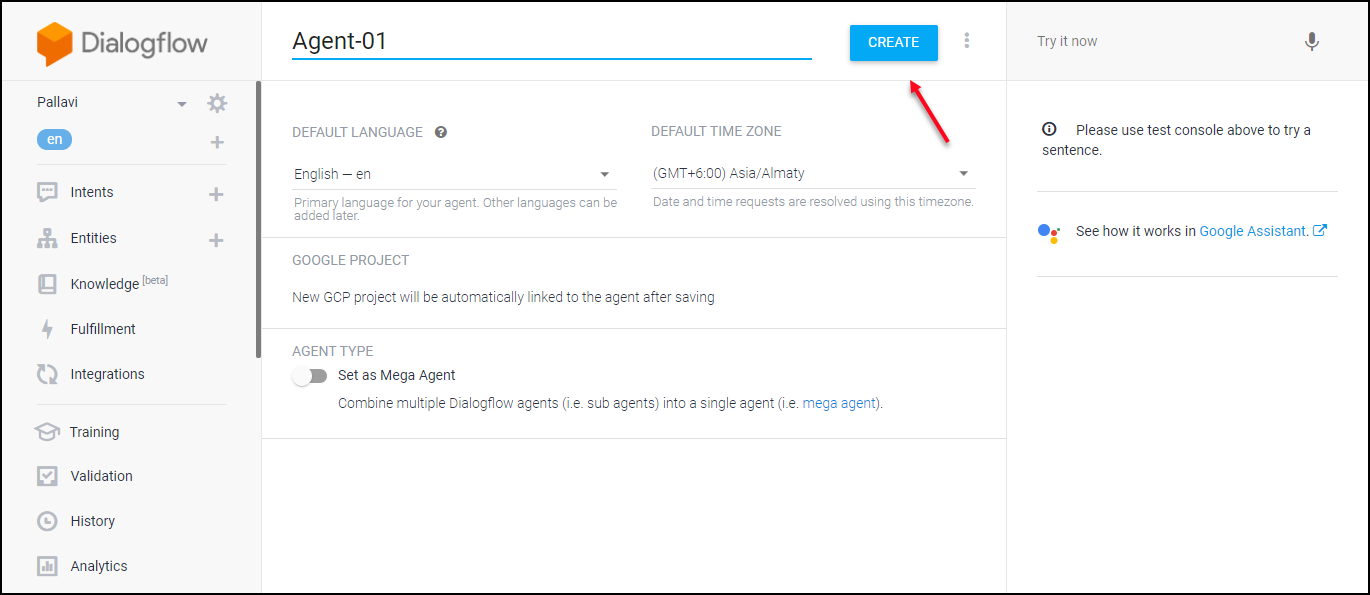
It has a very user-friendly interface and you can enter the agent name, default language, and default time zone, and click on ‘Create’.
Step 3: Create intents
Intents are used for taking the queries from the user and it will analyze and trigger the configured responses to the users. Do not need to confuse agents and intents. Keep in mind that you can create a number of intents in an agent. Intents are used to execute actions. The actions here are the triggering of answers by analyzing customer queries. How can you set up these intents?
Well, first let us create an intent and give a name to it. Then save the intent.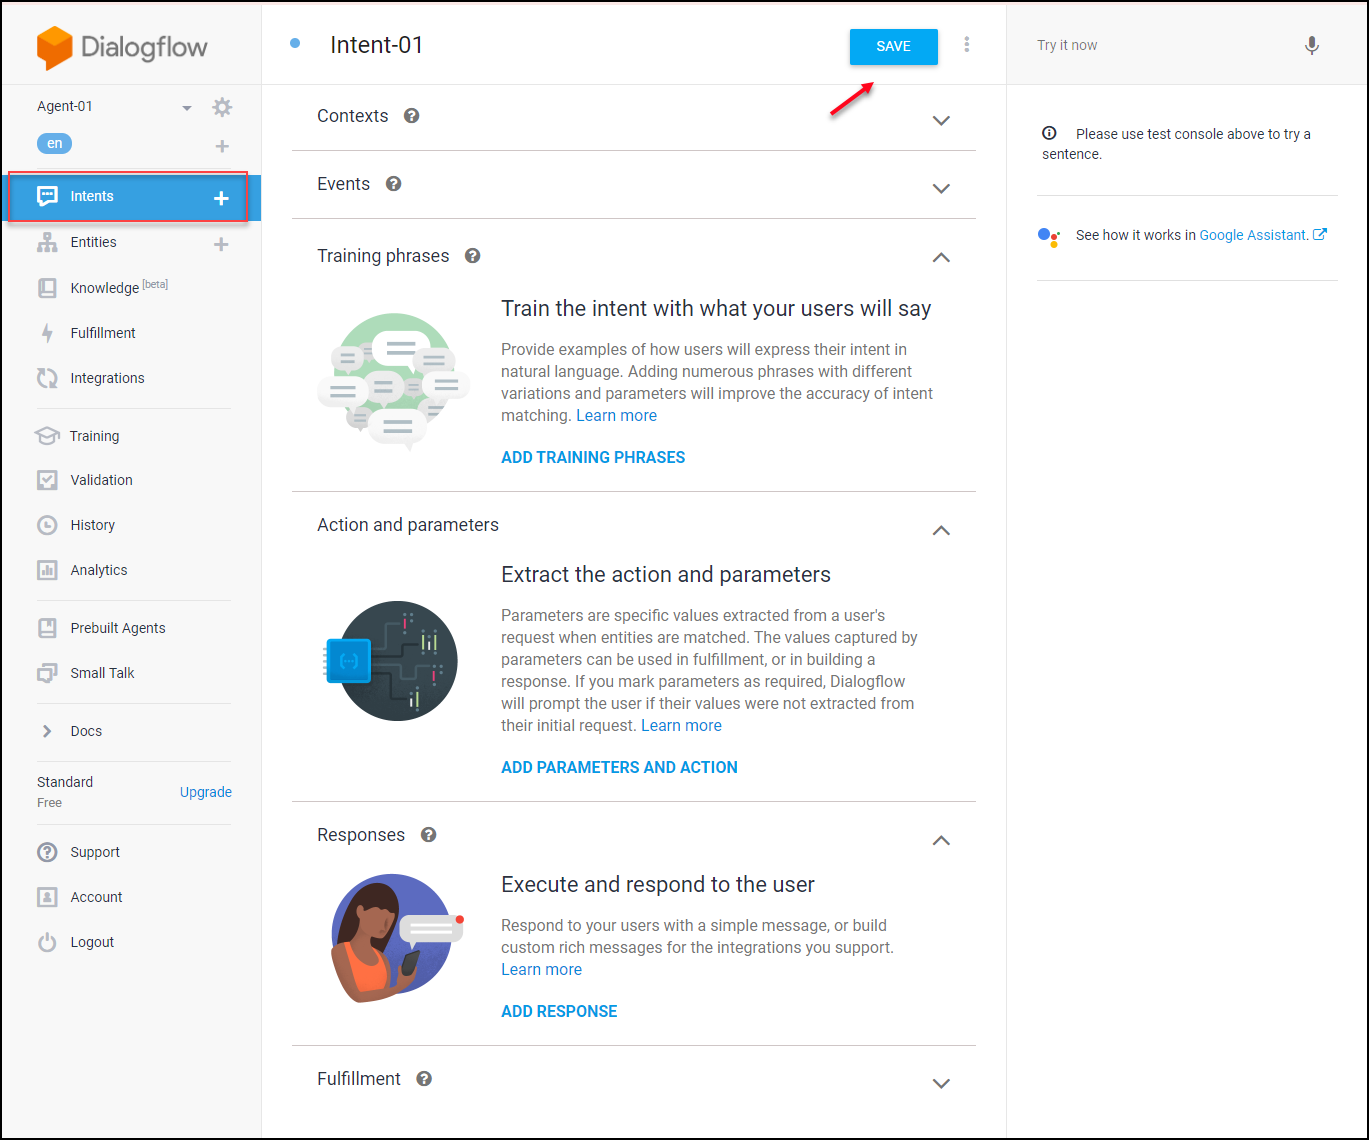
As I have mentioned while naming Agents, give a sensible name to each intent. Because you may need to interconnect the intents later. So you can avoid any confusion if you have given unique and sensible names to them. It is better to give a product or service name you offer as names or something related to it.
You can see a number of features on the above screenshot. Let us go through them one by one.
Step 4: Configuring automated responses
Let us check how we can configure automated responses to be triggered using the available methods in Dialogflow.
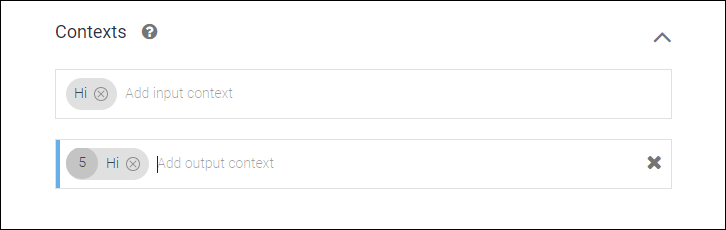
Contexts
You can set contexts here such as input context as well as output context. They are used to configure the responses based on the parameters in the user queries. Input contexts should be the parameters that could probably present in your customer queries. Based on your experience and customer support services you can assume the parameters could present in your customer queries. Similarly set the output context as the responses to be generated to the users if those input contexts are present in their query.
So the process happens here is, comparing the parameters with the input context you have entered and triggering output context you have entered to the users.
Events
Events are actually button actions. Without any input context and matching to the parameters, you can use predefined platforms here. You can add Google Assistant, Skype, Viber, etc.

Training phrases
Think about how the customer will send you a query in their natural language and add them one by one as training phrases. You can enter its different variations by assuming their queries and messages. Using these training phrases we can trigger the responses. Check the screenshot:

Well, we have added the training phrases. What is the next step?
Yes, we need to configure the corresponding responses to be triggered. For that, go to the ‘Responses’. There you can see Execute and respond to the user. Click on that.
Execute and respond to the user
You can add custom payloads to be triggered to the queries here. That is, you can set images, audio, and video, etc, to be triggered to the customer queries. You can even add a youtube video link or use different layouts such as Facebook Messenger, Google Assistant, Slack, etc.
You have 2 ways to respond to the users. Using normal text responses or custom payloads.
Setting up text responses is quite easy, right? You only need to enter the responses to be sent to the customers here without any concern about any media files or videos, and how to store it, where to store it, etc.
So simply add the text response as:

The next option is adding custom payloads. You need to add a simple code here to fetch the image or any other file from the location where it is stored and send it to the customers. All payloads are stored in the Firebase tool. I will discuss how you can store as well as connect to Firebase later in this article. Now, check the screenshot of adding a custom payload.

In this above example, you can see it is an image to be triggered to the user as a response. And the URL you can find there is the image URL link stored in Firebase.
If you find it difficult to add code or it is confusing to add payloads, you can choose any available response frameworks available. You can choose any framework according to the requirements.
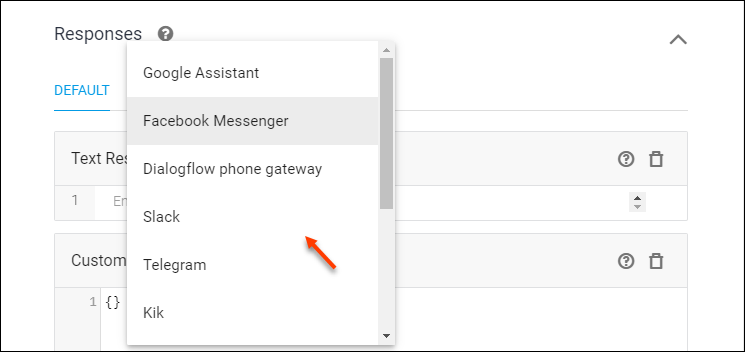
For example, I am choosing Facebook Messenger here. You can choose any framework.
In Facebook Messenger, you can add 5 types of responses. They are:
- Text response: You can enter a text response to be triggered.
- Image: You can enter an image URL stored in the Firebase here.
- Card: Here, you can add an image URL, a title, subtitle, and a button title.
- Quick replies: For sending quick replies to your customers.
- Payloads: For sending audio or video. If you want to add a video on your YouTube channel, that is also possible. You can simply add the video link here.
You can add text, image, quick replies, and payloads as we have already discussed earlier. In Card response, you can add an image URL, a title, subtitle, and a button title such as:

Similarly, you can configure the responses in simple steps as Dialogflow is very user friendly and easily navigating without making it complex.
Next let us see how we can fetch parameter values from customer queries and include it in your responses. For that, we can go to Extract the action and parameters.
Extract the action and parameters
Actions and parameters are used for fetching values from the customers and promoting them to your responses. Using this feature, you can add a personal touch to your conversation. Customers will find you dependable and customers’ trust towards you will be built gradually.
First, you have to create an input context. We have already discussed how to add an input context.
Go to Contexts and add an input context.
Next, you can go to the training phrases. And enter the probable training phrases. After adding the phrases, the next step is to tag the parameters in the training phrases with Dialogflow entities.
There you can enter the parameter name, its corresponding Dialogflow entity, and the value. The entities are used for understanding the value of the parameter-which means what does the parameter value mean to the Dialogflow. Check an example:
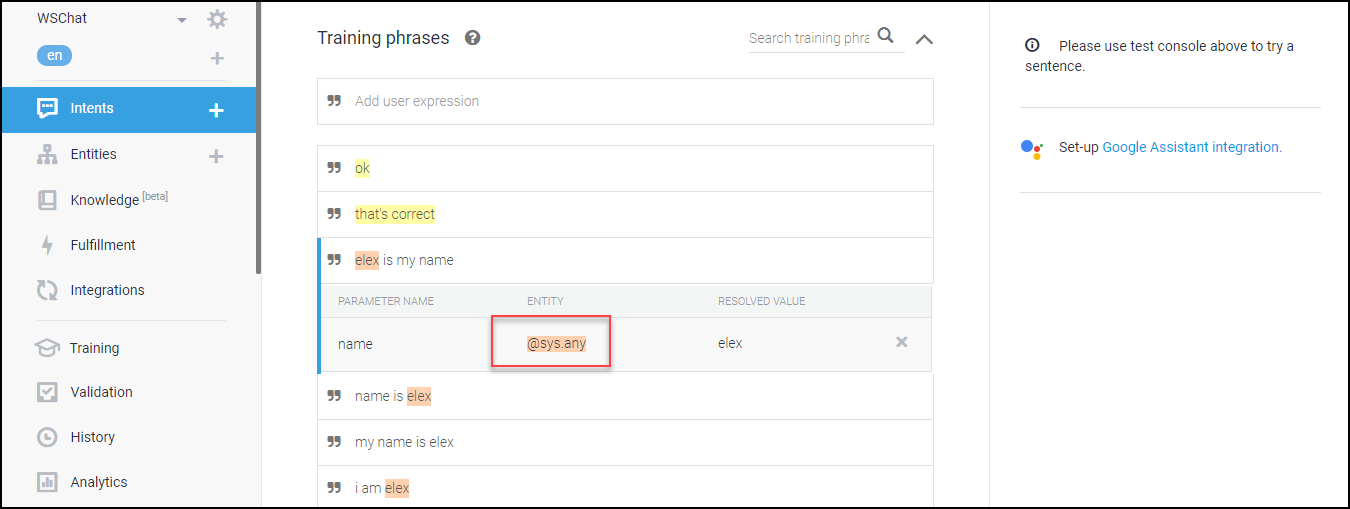
In this example, for fetching the value I have highlighted (elex), the term entered by the user will be tagged to @sys.any. Which means it could be any name. It is highlighted by the pink color.
The next step is to add the fetched parameter value to your response to the user. For that, you can go to Action and parameters.
Tag the parameters with entities and add a variable and click on prompting to send the reply with the parameter value you have fetched and stored to the variable.

Example of prompting:

You can set responses by fetching parameters like this.
Fulfillment
You can enable this to send the intent, parameters, and context to your Cloud function or a web service.

Next, let us check how we can add these response files to be triggered by saving it on Firebase and linking it to Dialogflow.
Step 5: Save files to the Firebase and integrate with Dialogflow
Firebase is a cloud storage tool by Google. Since Dialogflow and Firebase are powered by Google, there is high compatibility between two.
Use the same email ID you have used to create an account in Dialogflow for creating a Firebase account. After signing up, go to Console -> Storage -> Upload file.

It is very easy to upload files, either it is images, audio or video, etc.
Copy the URL of files from the Firebase and add it to the Responses as we have already discussed.

Now, it is time to integrate Dialogflow with our chatbot plugin WSChat – ELEX WordPress Live Chat Plugin.
Step 6: Integrate Dialogflow with WSChat – ELEX WordPress Live Chat plugin
Before going to integrate, let us check what are the details required for this integration. This chatbot plugin requires 2 details. Google Project ID and Google Service Account Private Key File. So we have to take these 2 important data and add to the plugin.
For getting Google Project ID, you can go to Dialogflow -> Settings.
For getting Google Service Account Private Key File, click on the Sevice Account link displayed on the above screenshot.
You will be redirected to the Google Cloud Platform. From there, click on the Actions corresponding to your email Id. Then click on Create Key.
Choose JSON format and click on Create.
The JSON file will be downloaded. You can open and copy the code.
You can go to the WSChat – ELEX WordPress Live Chat plugin.
Then click on Settings -> Chatbot AI.
Enable Dialogflow and add the data we have generated and choose an agent language if required.

Click on Submit. For more details you can also refer to the setup document.
Well, it is time to wrap it up.
Wrap Up
AI integration is very useful for improving your customer support experiences. By incorporating Dialogflow with your chatting plugin, you can provide the right answers to the issues of customers as soon as possible. So follow these steps and make your customer support experience more interesting and satisfying.

