If you are a WooCommerce store owner, you might have not only seen high sales and profits but also refunds and returns requests as well. The refunds are part of any eCommerce business whether you like it or not. There will be some users who may not like your product as you intended. Improper refund handling can lead to unsatisfied customers which eventually will decline your business reputation.
Even though you do not want a refund request to occur, you should be ready to process refunds with a proper channel for smooth business processing on your WooCommerce store. In addition to providing a lot of features for products, orders, payments, etc, WooCommerce also handles refunds easily.
In this article, let’s dive into understanding the suitable ways to process refunds in WooCommerce.
How to Process Refunds in WooCommerce?
There are two ways in which you can process refunds in WooCommerce:
- Manual Refunds
- Automatic Refunds (using supported Payment gateways)
1. Manual Refunds
If your WooCommerce store has default payment methods like Direct Bank Transfer, Check Payments, and Cash on delivery, you can process manual payments.
You can make full or partial refunds as well. This type of refund process is also provided by some premium payment gateways in automatic refunds.
Here’s how to do Manual Refunds in WooCommerce
Follow the below steps:
1. Go to the WooCommerce Orders page. Select the desired order for which refund has to be processed. Scroll down to find the order information and click on the Refund button, as shown in the screenshot below.

2. Next, to refund the full amount, enter the full amount value of the product in the ‘Refund amount’ field. For partial refunds, enter the desired amount in the same field. In the same way, if there are multiple quantities of product, you can select quantities of products to refund the amount, as shown in the screenshot below.

3. You can also add a reason for the amount refund for future reference.
4. If you are doing a partial refund, the order status won’t change and you can change the order status manually. Else, the order status is updated to ‘Refunded’ automatically for a full refund. After the order status is changed, the order notes will be updated, as shown in the below screenshot.

5. Finally, you need to refund the required amount from your payment gateway to the customer, to complete the manual refund process.
2. Automatic Refunds
Automatic refunds in WooCommerce can be made using premium payment gateway plugins. Usage of these plugins can make business transactions quicker and smoother. There are a number of payment gateway plugins in the market, but only a few support refund options. Refer to WooCommerce’s list of payment gateways that are compatible with refunds to know if your desired payment gateway is supported or not. Else, if you have a payment gateway already installed, you can check for refund compatibility in the plugin files as well.
The best part of these plugins is that the refunds can be handled without logging into your payment gateway account.
For our demonstration of automatic refunds, we’ll use ELEX Authorize.Net Payments Gateway for WooCommerce.
Here’s how to do Automatic Refunds in WooCommerce
Follow the below steps:
1. Register for an Authorize.Net account to receive your Login ID and transaction key.
2. Install and activate the plugin. Next, enable and configure ELEX Authorize.Net Payment Gateway for WooCommerce plugin with the credentials received from Authorize.Net.
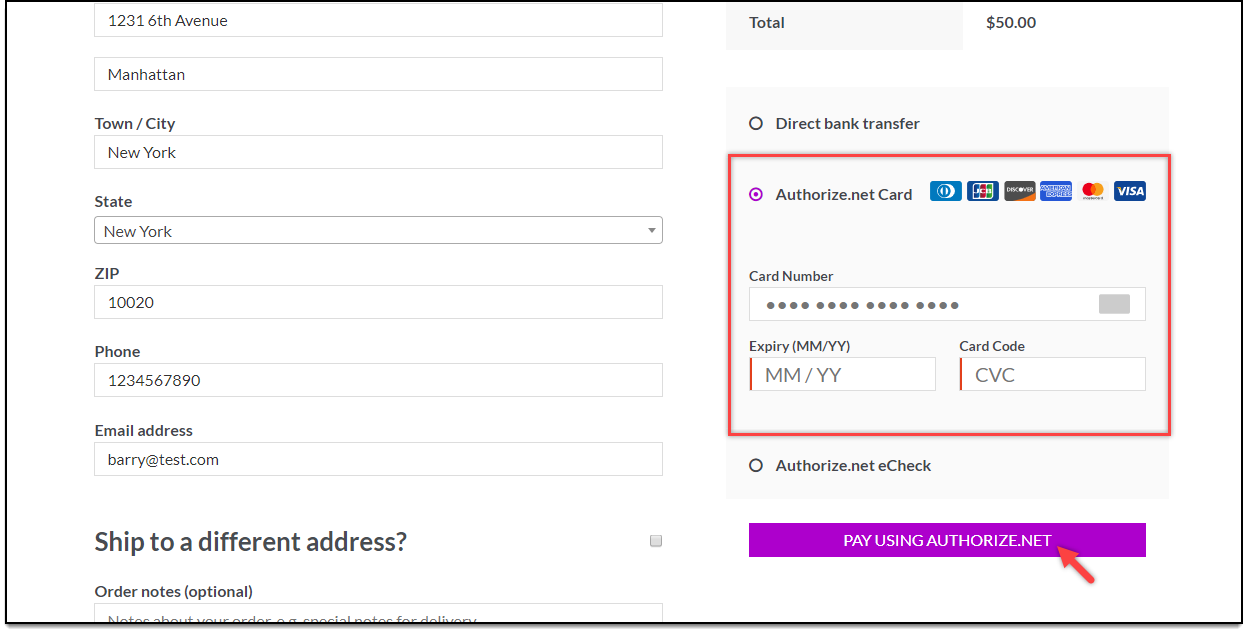
3. When a customer makes a payment using the Authorize.Net payment method, the Checkout page will be as shown in the screenshot below.
4. Once the order is placed, follow step 1 of the Manual Refund process.
5. Just like in Manual Refunds, you can make full or partial refunds here as well. Enter the desired amount in the ‘Refund amount’ field and click on the Authorize.Net refund option to process the refund, as shown in the screenshot below.

In automatic refunds, the refunded amount is transferred from the merchant’s account directly to the customer’s account by Authorize.Net (or selected payment gateway). This transaction process is handled by the payment gateway itself. Similar to manual refunds, update the order status manually for partial refunds.
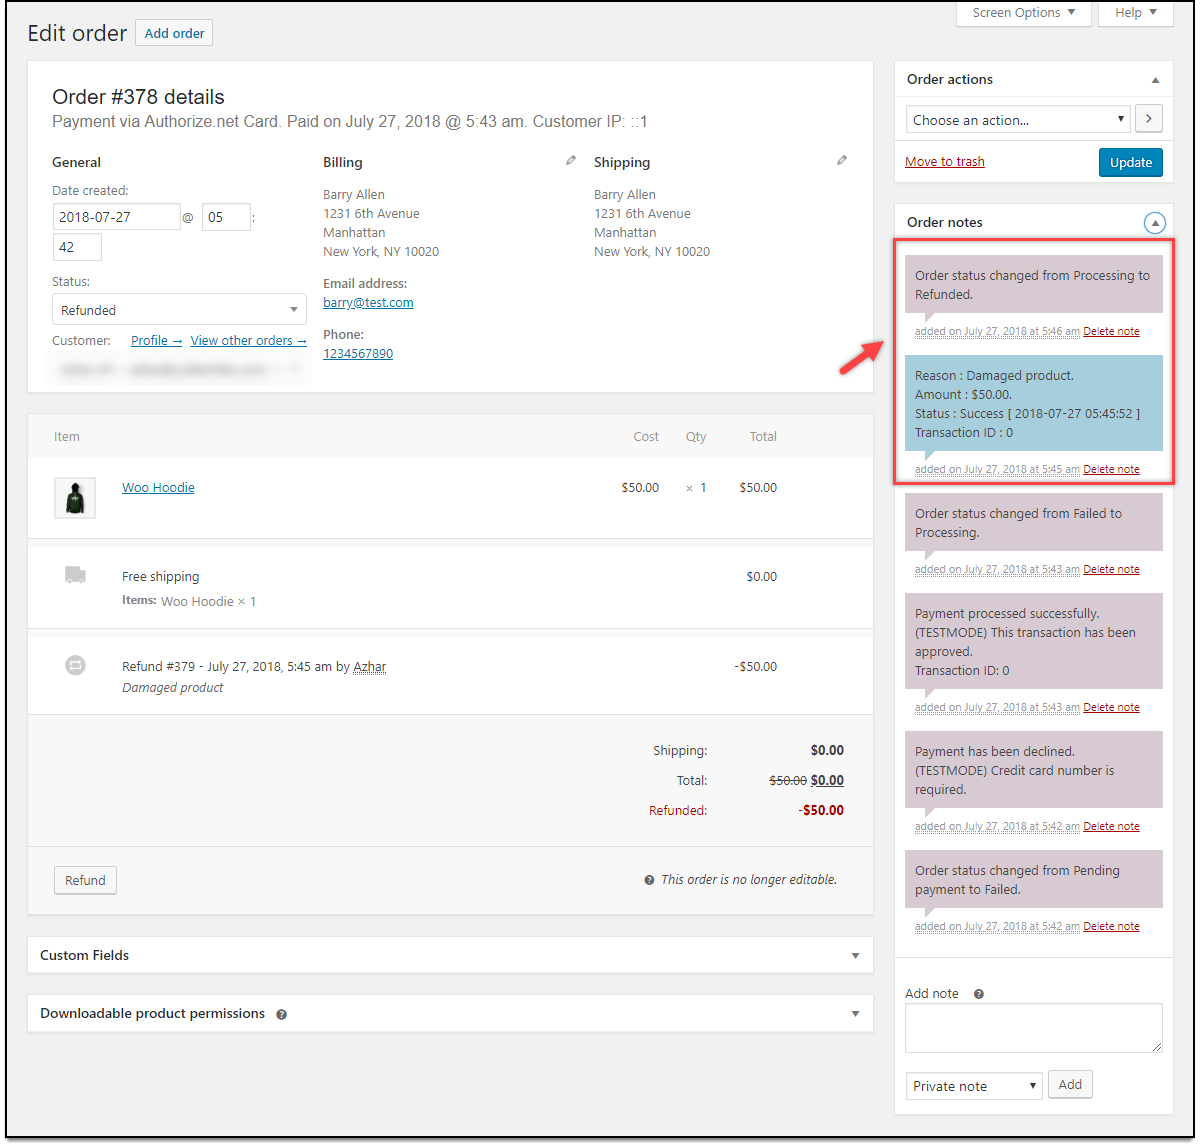
Once the refund order status is changed, the order notes will be updated as shown in the screenshot.
In this way, you can process refunds in WooCommerce.
4 significant points for handling Refunds & Returns efficiently
- Set up a Return Policy: The first thing is to have a concrete return policy. You need to write-down a balanced policy that benefits both you and your customers. What is the return process? In how many days can the customers return your product? Is there a full or partial refund? These are some of the most frequent queries that need proper explanation and documentation like we did on ELEX.
- Easy returns: If you are selling products like fashion apparel, customers look for easy returns if the size/color does not match their expectations. If you have a suitable return policy, those customers will come back to your store. Else, it will lead to customer dissatisfaction, which will eventually reduce future purchases.
If you are selling a WordPress plugin or theme, your customers may find out that your product is not suitable for their business or does not solve some specific use-case they are trying to find a solution for. - Don’t just refund, learn and improve: Before you process the refund amount, ask your customers about their problem. For example, if a customer requests a refund because he/she could not find a specific feature in your plugin, evaluate if it is possible for you to include the suggested feature. If so, do it! With this, you could save your money and would also improve your product.
- Handling WordPress plugins/themes after the refund: A customer may buy your product, use it within the return policy period and requests for a return. What do you do? You can’t say no. There is no return as well. Hence you need to process his refund request and deactivate the software license keys. You can save yourself some trouble by linking your plugin/theme updates and support with license keys. When the license key expires, the updates are suspended and the plugin/theme will be deprecated as new WordPress versions come up.
This applies to other software as well.
10 highlights of Authorize.Net Payment Gateway for WooCommerce
- Accepts Major debit and credit cards: The plugin accepts MasterCard, Visa, American Express, Discover, JCB and Diners Club. You can also configure the show desired card logo on the Checkout page.
- Authorize.Net eCheck payments: In addition to card payments, the plugin integrates eCheck payments that supports checking, business checking and savings account types.
- Authorize.Net Overview page: Save your precious time by seeing all your payment transactions on an overview page. You don’t have to log in to your site for viewing these transactions.
- Process Refunds: Process partial and full refunds from Authorize.Net overview page easily.
- Capture Payments: The plugin allows you to either only authorize the payment, or authorize & capture the payment concurrently.
- Custom Redirection URL: After successful payment transaction, redirect your customers to a custom Thank you page.
- Custom transaction messages: Set up custom success and failed transaction messages.
- Transaction modes: Try out your plugin settings in test mode and switch to live mode for real transactions.
- Security: Supports Accepts.js for improved security.
- Inflow checkout experience: Your customers do not have to leave your website for making the payment. All transactions are handled on-site, making one complete transaction on your store.
To explore more features of the plugin, visit the product page. You could also try out the plugin yourself using the live demo.