What can we help you with?
How to set up ELEX WooCommerce Shipping Calculator, Purchase Shipping Label & Tracking for Customers?
This article is a step-by-step tutorial to set up the ELEX WooCommerce Shipping Calculator, Purchase Shipping Label & Tracking for Customers. For more information on the plugin, refer to the product page.
ELEX WooCommerce Shipping Calculator, Purchase Shipping Label & Tracking for Customers plugin helps to set up a platform to calculate the shipping rates based on the source and destination addresses and weight & dimensions of products. With this Shipping Calculator, customers can choose a shipping service for printing shipping labels and getting the tracking links seamlessly. You can also charge additional handling fees along with the shipping labels.
Currently, it supports the EasyPost shipping service.
Overview
Here are some of the major highlights of this plugin:
- Calculates Shipping Rates: You can enter the country and zip code of the sender and receiver, the weight and dimensions of items to check the available shipping services, and their rates.
- Calculate Rates for Custom Packaging: If you do not go for the default available shipping services listed, you can choose the custom packaging option and enter the weight and dimensions to calculate the shipping rate.
- Print Shipping Label: You can enter the address and contact details of the shipper and receiver, and print the label in just one click.
- Add Insurance and Signature: You can add an added layer of security by giving the option to your customers to add shipping insurance and signature options.
- Print Shipping Labels for Multiple Packages: If you need to print labels for multiple products, you can feed the weights and dimensions into a CSV file, upload it, and print the labels.
- Handling Fee: When you provide your Shipping Calculator for third parties, you can charge them as handling fees when they proceed with each shipment.
- Send an Email with the Label and Tracking Link: You can set a custom email body and subject to send the generated label and tracking link to the entered sender and receiver’s email addresses.
- Provide Access to Shipping Calculator: You can provide access to the Shipping Calculator page for selected user roles in your store and you can restrict guest users from accessing it.
All the above features (and many more!) are bundled to serve you to seamlessly calculate shipping rates and print labels.
Create a Page on Your Website to Display the Shipping Calculator
Before configuring the plugin, you need to create a new page to feature the shipping calculator on your site. By default [multilabel] shortcode will be added to the shipping calculator created by the plugin on installation. If you want to display the Shipping Calculator on a dedicated webpage on your website, You can select the page in the getting started tab or, create a new page on your website and add a shortcode.
Go to WordPress Dashboard > Pages > Add New.
Add a title, say, for example, Shipping Calculator.
For adding the shortcode, click the ‘+’ button and search for Shortcode.
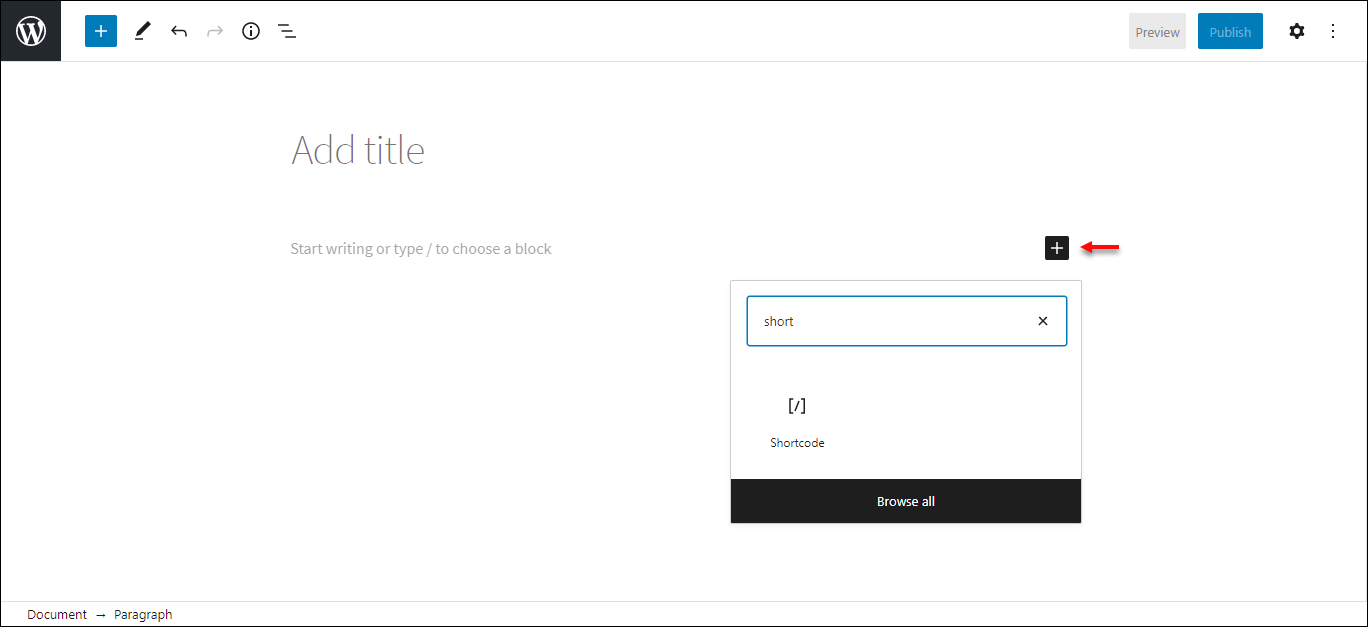
Click it and add the shortcode – [multilabel].

Click Publish.
It will display on the assigned page for the Shipping Calculator as in the below screenshot.
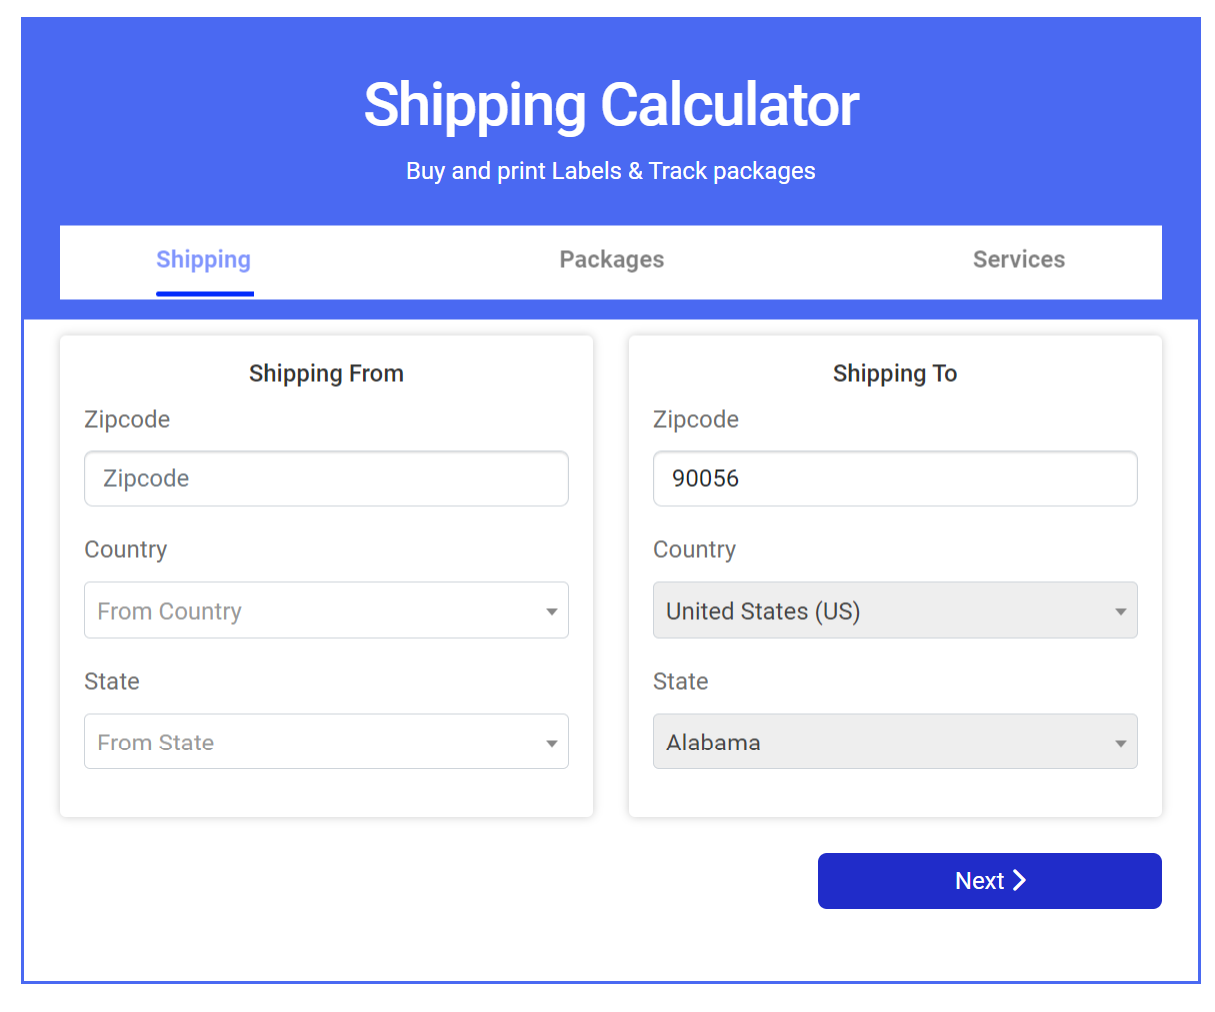
The configuration part is done.
Getting started with ELEX WooCommerce Shipping Calculator, Purchase Shipping Label & Tracking for Customers
Read an article to learn how to complete the checkout process on ELEX. You can also read how to download, install, and activate ELEX plugins.
You can access the plugin settings in the following ways:
WordPress Dashboard > Plugins > Installed Plugins > ELEX WooCommerce Shipping Calculator, Purchase Shipping Label & Tracking for Customers > Settings.
Or
WordPress Dashboard > Shipping Calculator > Settings.
Now, we know what the plugin has to offer, and have installed it on the WooCommerce store.
Let’s get down to configuring the plugin.
Add EasyPost Credentials
Here, you need to enter your EasyPost API Key and enable the API Mode to Live or Test. As of now, it supports FedEx, UPS, USPS, and Canada Post via EasyPost.
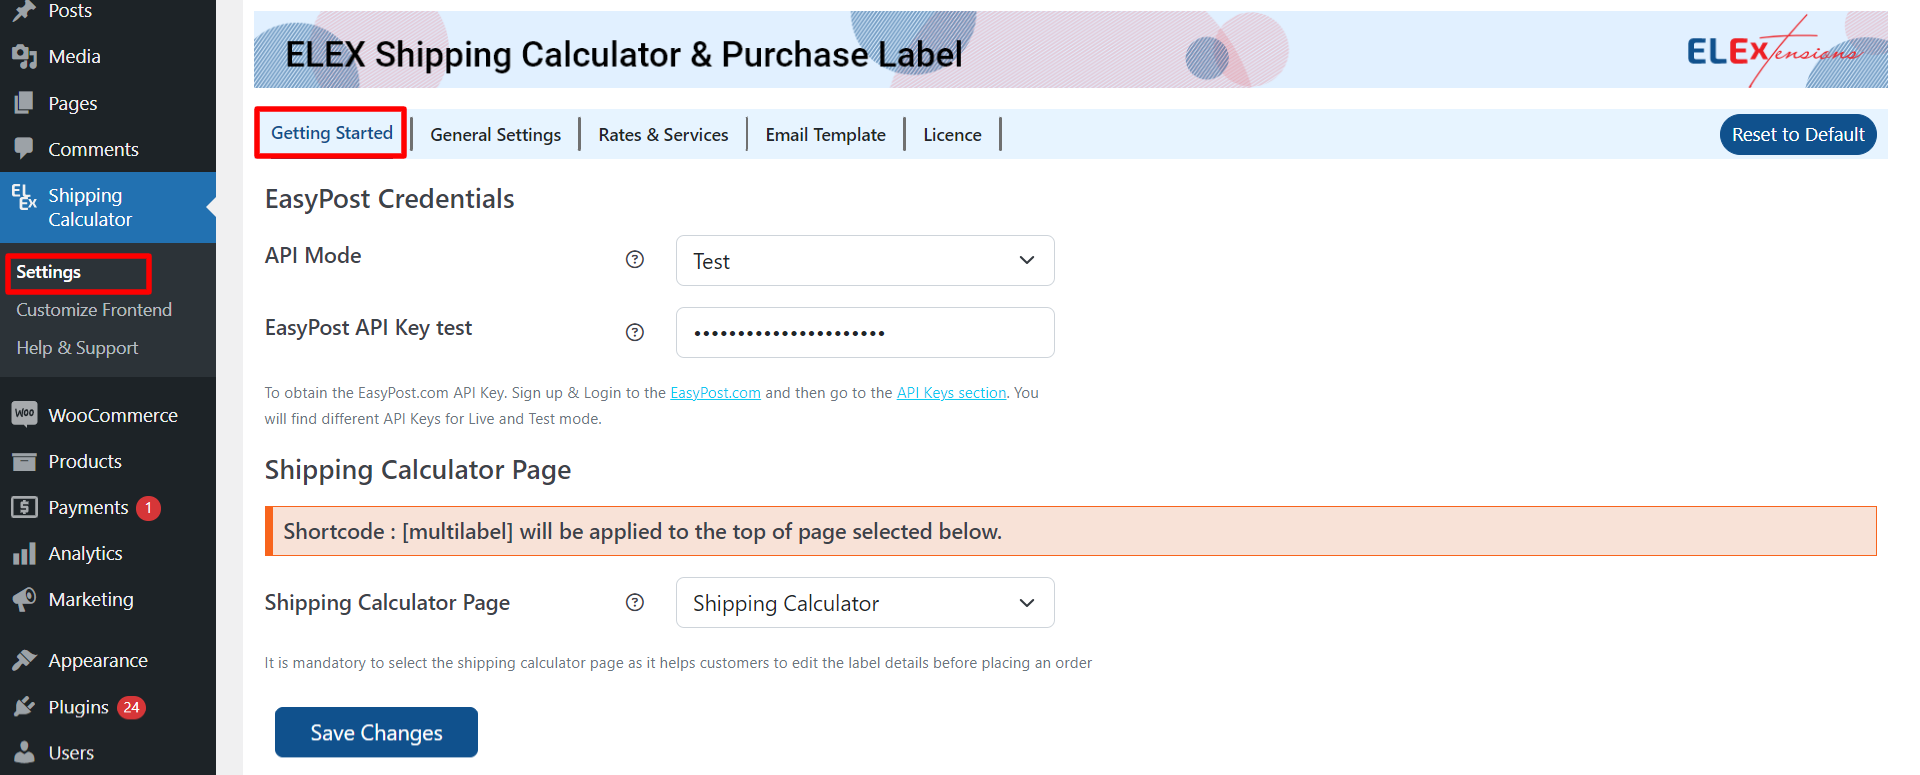
- API Mode: Live mode is the recommended mode. You can switch to the Test mode for development purposes.
- EasyPost API-KEY: Enter your EasyPost API-Key. To access EasyPost APIs, you need to register with EasyPost. After successful registration, you’ll receive a test key and a live key. Enter the received API key in this field.
Shipping Calculator Page
- Shipping Calculator Page: Select the page where you want the shipping calculator to be displayed. By default [multilabel] shortcode will be added to the shipping calculator created by the plugin on installation. You can also add the shortcode [multilabel] to any newly created page to add the shipping calculator to it.
Click Save Changes.
General settings
The general settings are as shown in the below screenshot.
Check the below video to understand the benefits of the plugin and a few use cases:
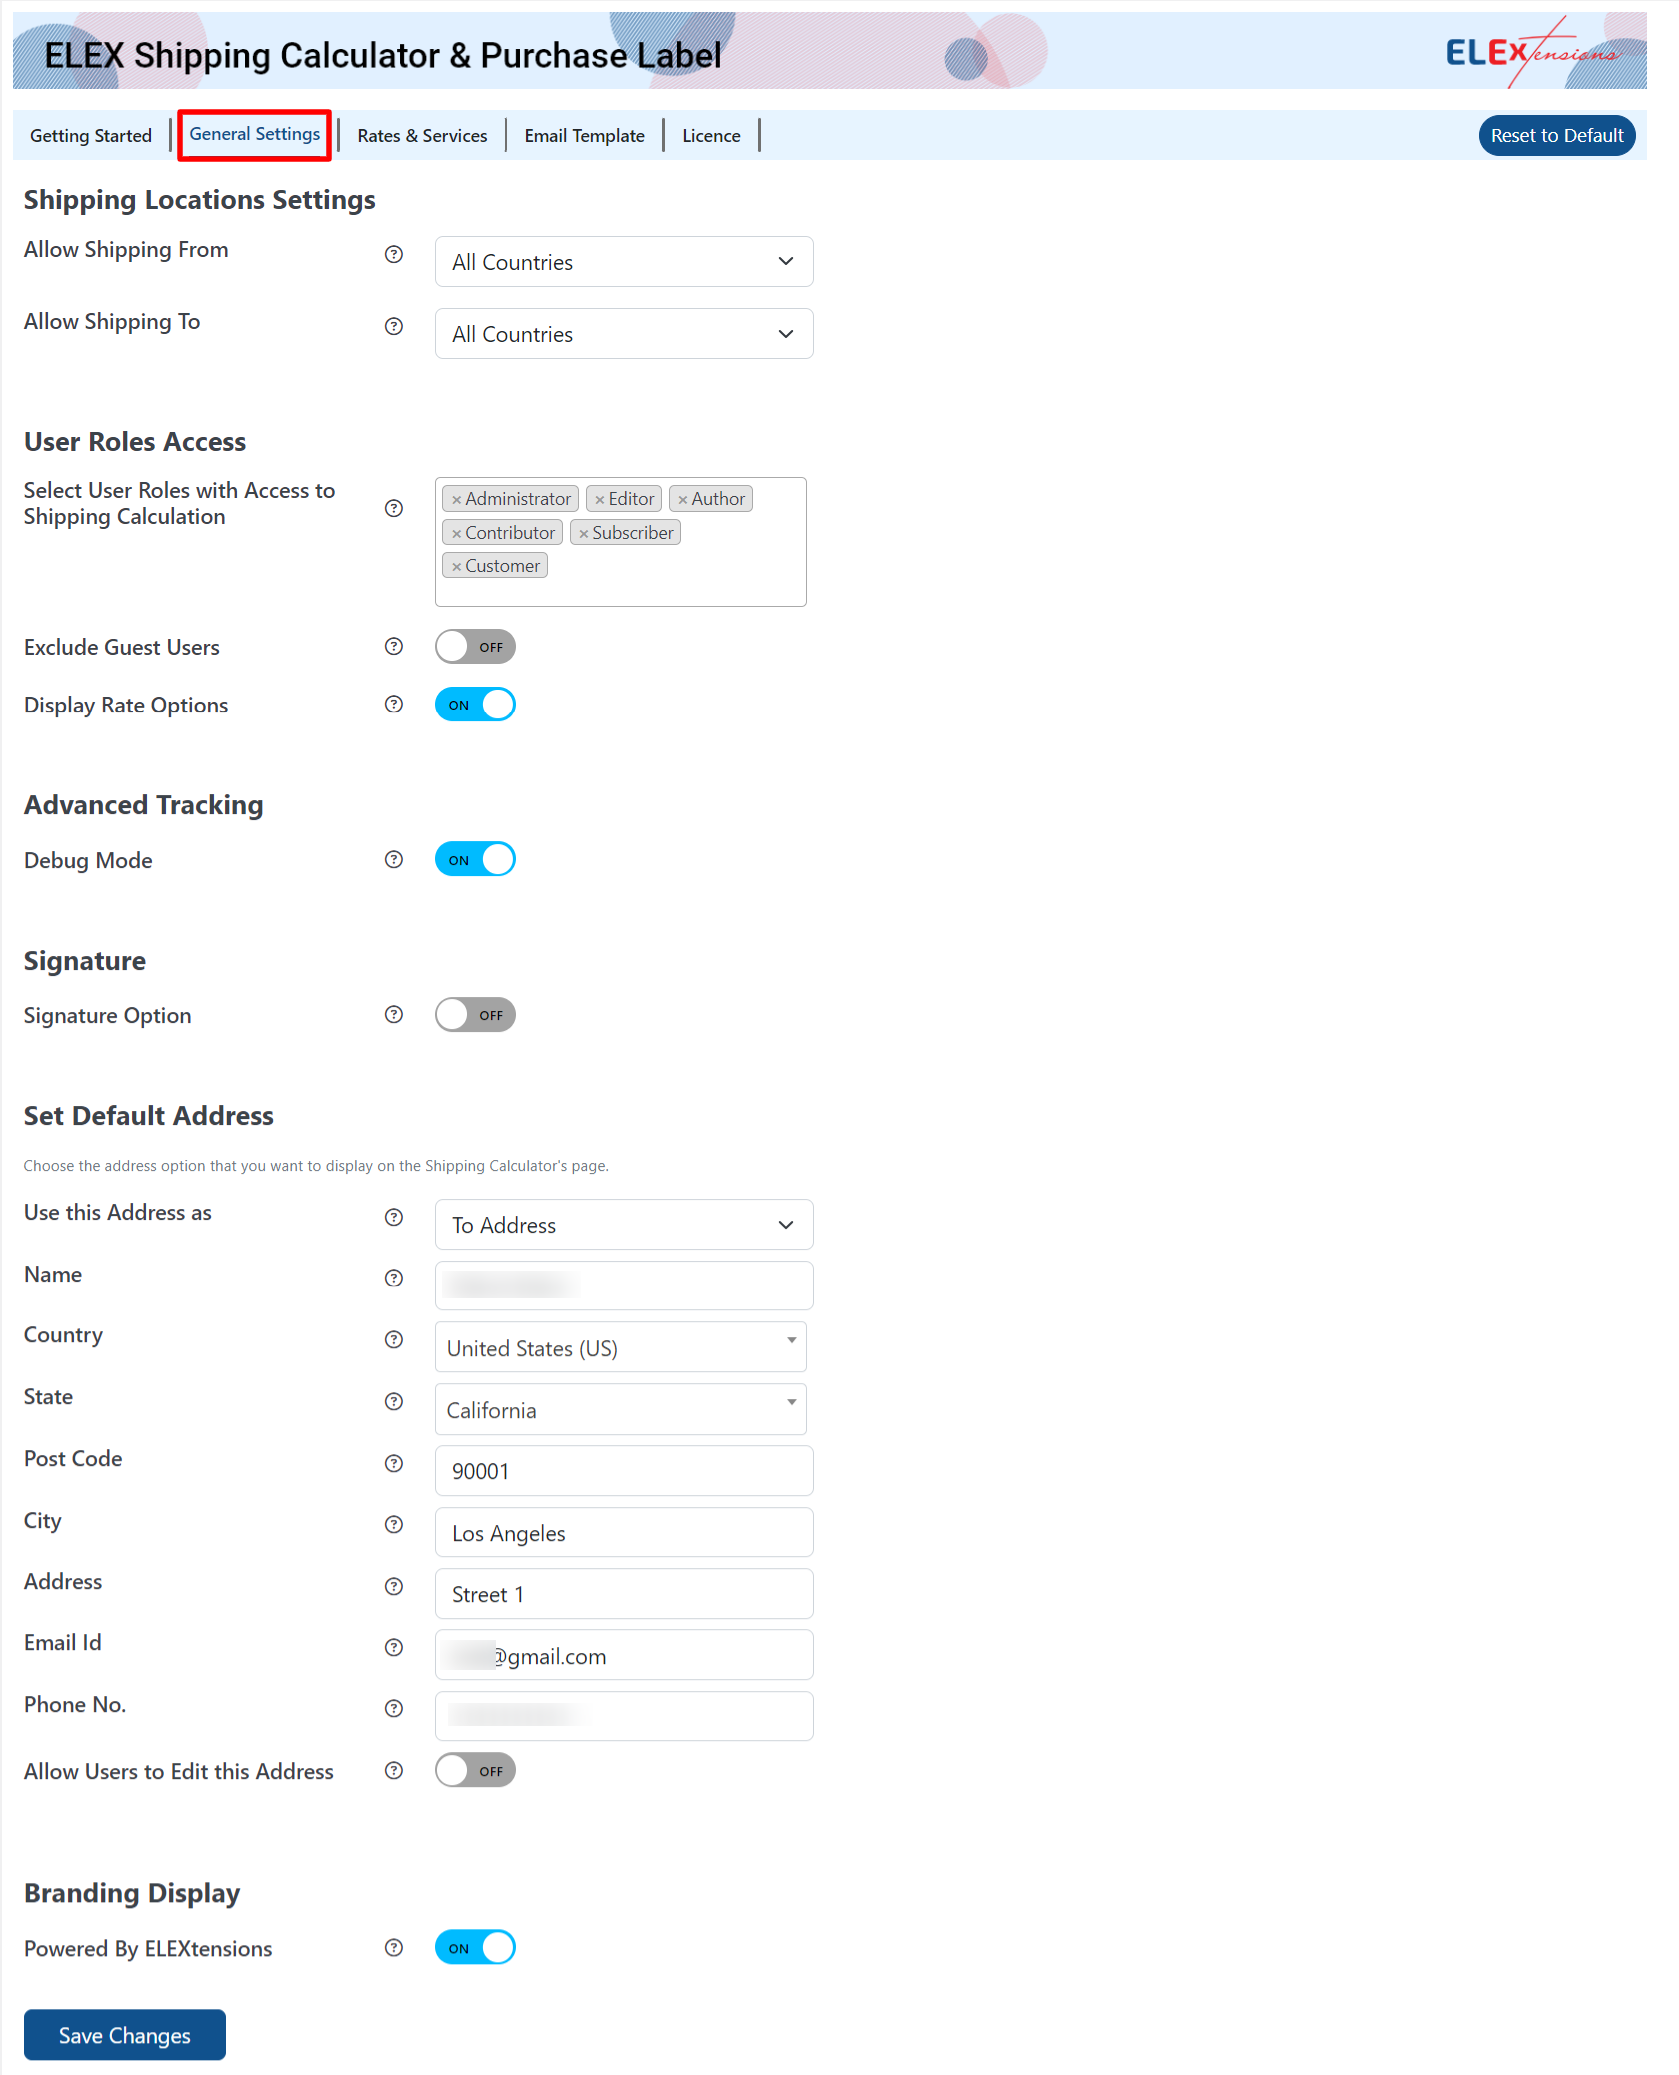
Shipping Locations
- Shipping From: You can either choose Shipping from all countries or Ship from specific countries only. If you choose the first option, the customers can generate labels for shipping from any country in the world. If you choose the latter, you can choose the countries that need to be available for customers to generate labels when they enter the source address (‘from’ address).
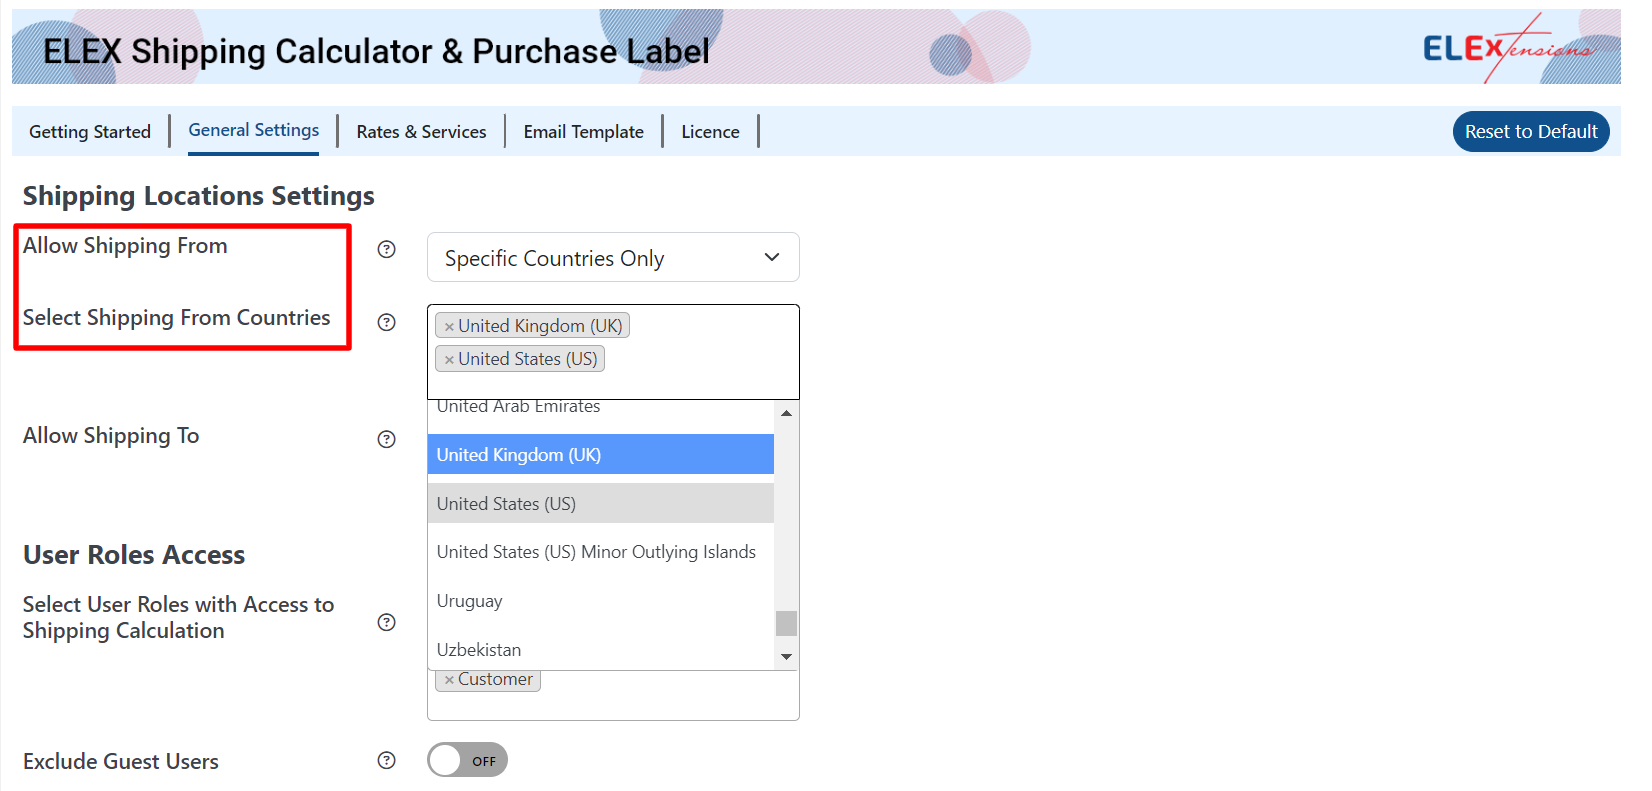
- Shipping To: Similarly, you can either choose Shipping to all countries or Ship to specific countries only. If you choose the latter, you can choose the countries that need to be available for customers to generate labels when they enter the destination address (‘to’ address).
User Role Access
- Access to Shipping Calculation: You can choose the user roles for which the Shipping Calculator access needs to be provided. You can choose the user roles from the drop-down list. If you do not choose any user roles, it will be available for all user roles.
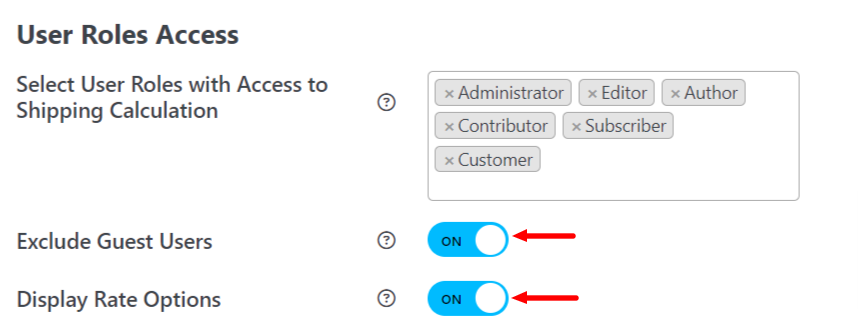
- Exclude Guest User: If you do not want to provide access to the Shipping Calculator to guest users/unregistered users, you can enable this option.
- Display Rate Option: Allow customers to choose between Retail and Commercial rates on the front end of your shipping calculator by enabling the display rate option. The commercial rate will be displayed as the default option if it is not enabled.
Advanced Tracking
- Debug Mode: You can tick the Debug mode checkbox to find the error(s) on WooCommerce logs.
- By enabling debug mode, you can trace the issue using logs. You can see information about debugging on the WooCommerce log. Go to WooCommerce > Status > Logs. Choose the log from the drop-down pick-up list and check the issues.
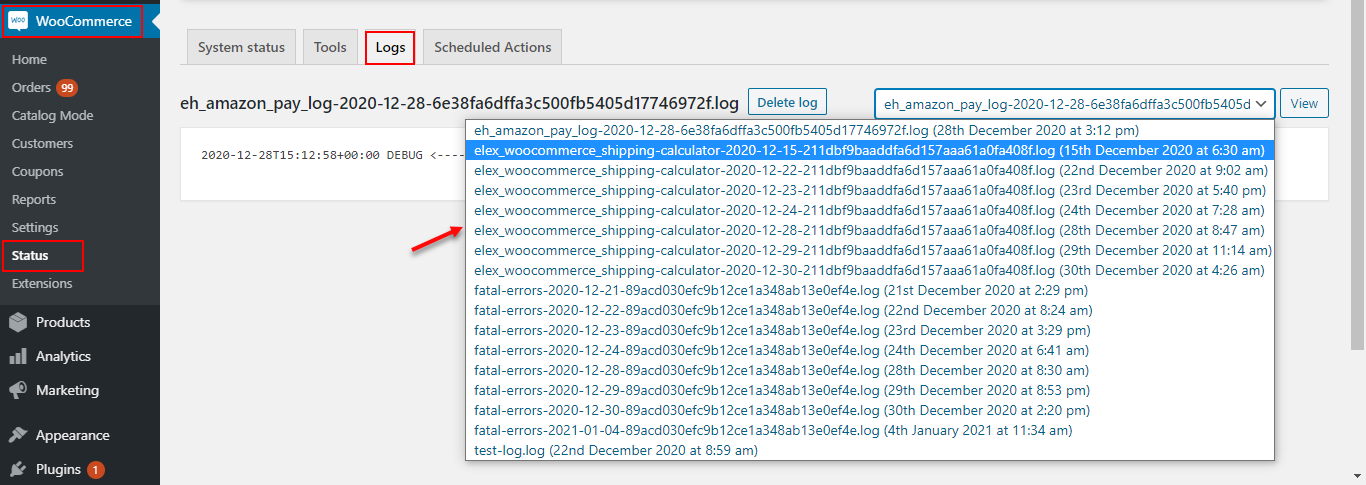
Note: This mode is not recommended on live sites.
Signature
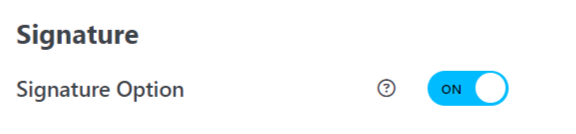
Signature Option: Enable this option if you wish to give your customers the option to add another layer of security with the receiver’s signature.
Set Default Address
Enter the address details that you want to display as the default ‘from’ or ‘to’ address on the Shipping Calculator’s page.
- Use this Address as: You can set the default address as a ‘To’ or ‘From’ address using this drop-down menu. If None is chosen, no default address will be shown, and the customer will be able to enter any address based on their requirements. If you’ve set the From or To address as the default, the customer won’t be able to alter or modify that field.
- Default Address Details: Enter the name, country, state, postcode, city, address, email, and phone number of the default To or From address. You can also choose if you want to enable users to edit the default address.
As you can see in the screenshot below, the default To address is already filled in.

Branding Display
- Powered By ELEXtensions: Enable this option to display the ‘Powered By ELEXtensions’ tag on the front end.
Click Save Changes after configuring the fields.
Rates & Services settings
This tab is for setting up the label to be printed, the handling fee, and the details of shipping carriers.
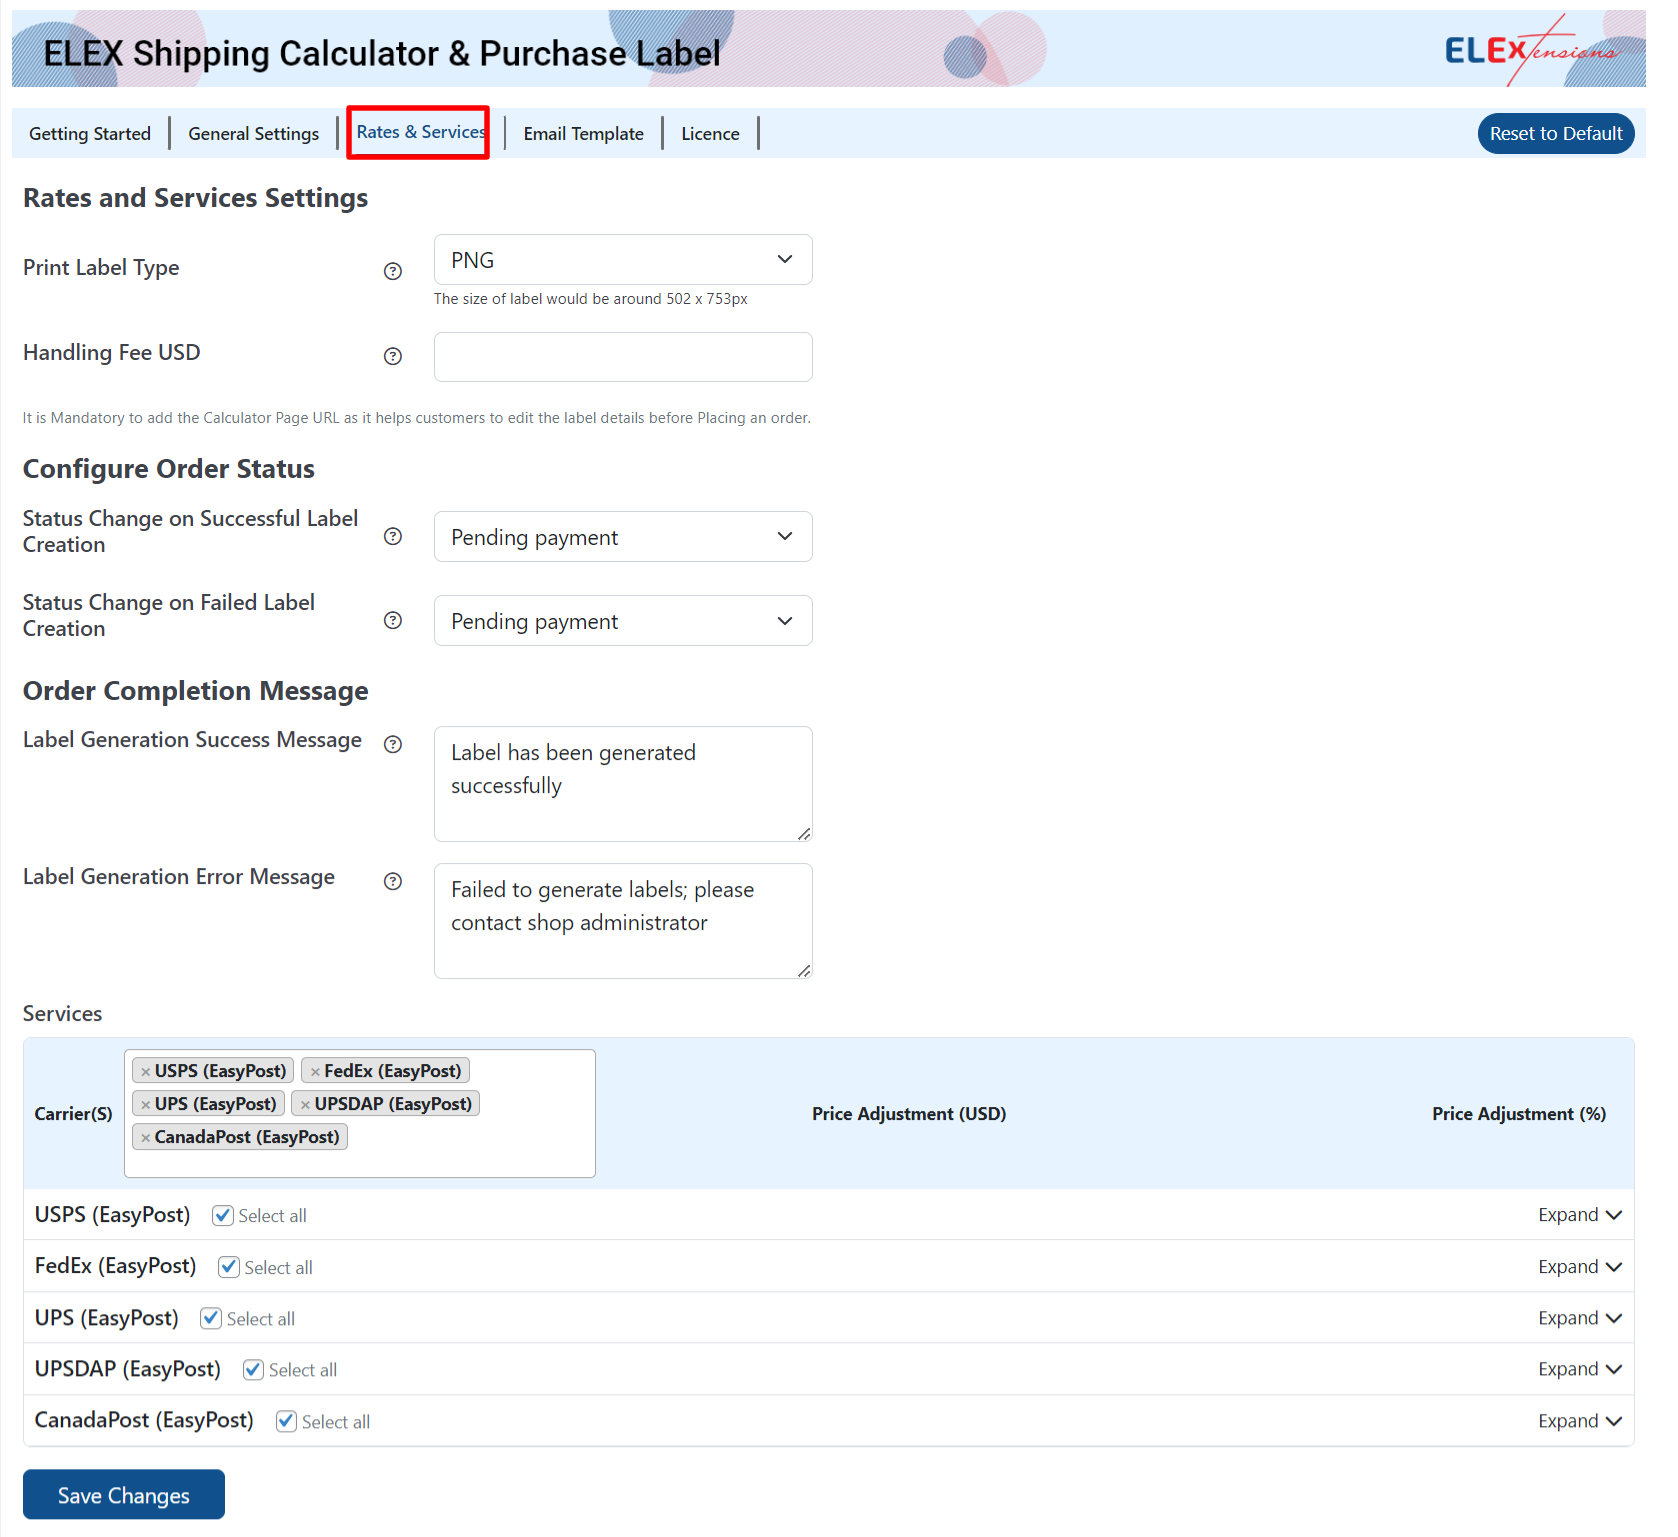
Rates and Services Settings
- Print Label Type: With this field, you can select the desired file format for printing the shipping labels.
The available options are as follows:- PNG: This option prints the label in Portable Network Graphics (PNG), which is a file format that supports lossless data compression.
- PDF: This option prints the label in Portable Document Format, which is used to present a document independently regardless of application, software, hardware, and operating systems.
- ZPL: This type prints the label in ZPL file format, which is mostly used to store playlist information.
- EPL2: This type prints the label in Eltron Programming Language format for printing labels on media of reduced space, and supports bitmaps. It is best suitable to print labels that contain barcode information.
- Handling Fee: If you want to add a handling fee to the subtotal, you can add the amount here. The amount will be automatically added to the subtotal, which you can see on the Checkout page.
If any third party uses the Shipping Calculator and prints the label, the Handling Fee will be credited to the store owner or site owner’s account.
Configure Order Status
- Status for Successful Label Creation: You can select a WooCommerce order status from the drop-down list. When the label has successfully generated, the order status will be set to this entered status.
- Status for Failed Label Creation: You can select a WooCommerce order status from the drop-down list to set it as the status of the order if the label generation fails.
Order Completion Message
- Label Generation Success Message: Enter a custom text to be displayed on the Order completion page if the label has been generated successfully.
- Label Generation Error Message: Enter a custom text to be displayed on the Order completion page if the label generation has failed.
Carriers and Services
- Shipping Carrier(s): You can select the shipping carriers you would like to list on the Shipping Calculator.
I have chosen FedEx in the following screenshot. So all the services by FedEx will be listed upon expanding the service list with an option to add a fixed price or percentage as a price adjustment.
Similarly, if you choose a shipping carrier, all its available services will be listed, from where you can tick the required services to be available on the Shipping Calculator and enter a price adjustment if required. You can select multiple carriers together.
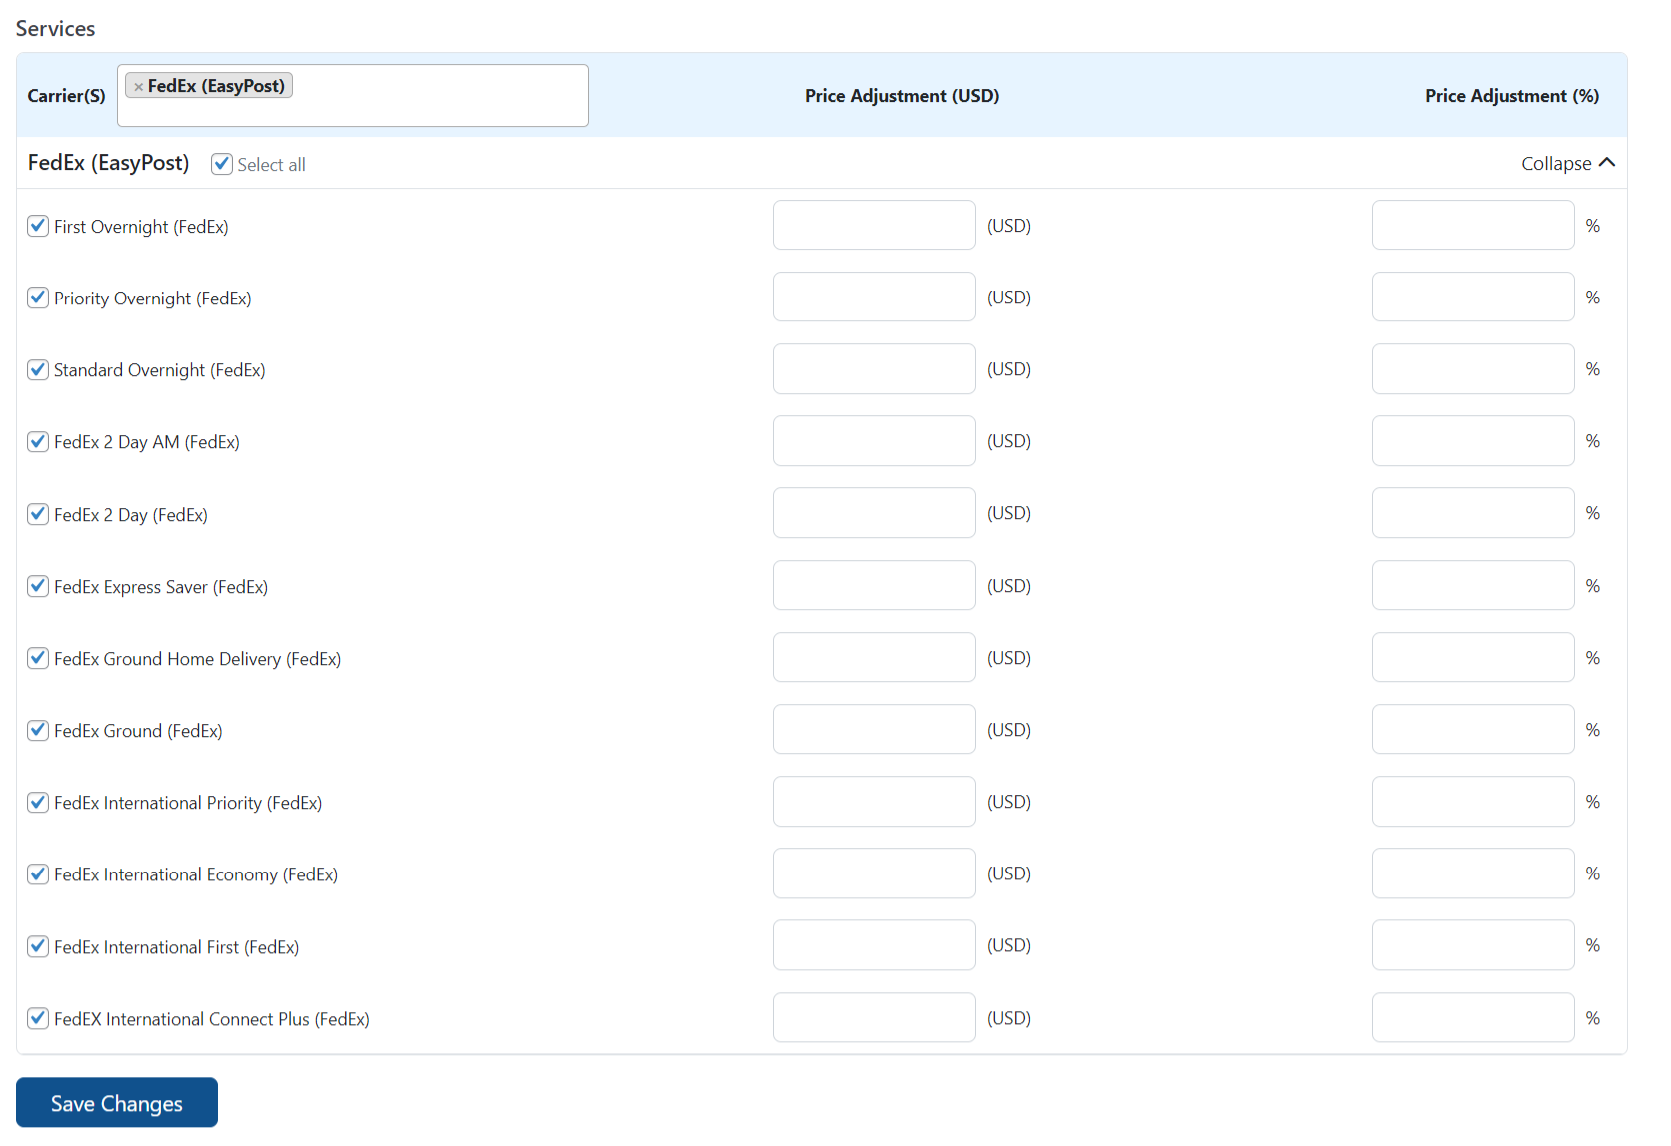
Click Save Changes after the configuration.
Email Template
Using this option, you can trigger a custom email that contains the shipping label and tracking link to the entered shipping and billing email addresses automatically when a label is generated in the Shipping Calculator.

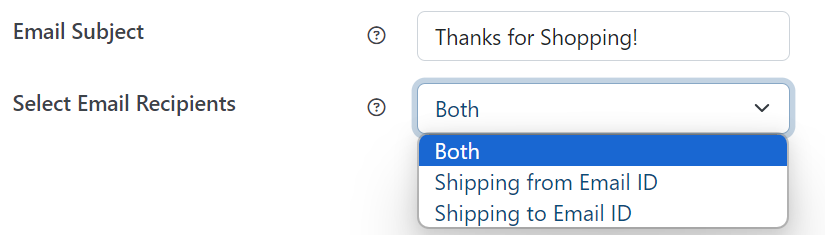
- Email Subject: Enter a custom email subject.
- Email Recipients: Choose the recipients to whom you need to send the emails.
You have 3 options here:
- Both: To send email to both sender and receiver’s email IDs.
- Shipping from Email ID: To send email to the sender’s email ID.
- Shipping to Email ID: To send email to the receiver’s email ID.
You can draft custom email content in text (using HTML tags) format or visual format.
On the draft of the email, you can add the shortcodes of the shipping label and tracking links at which part of the mail body you need to display them. The shortcodes are as follows:
For shipping label – [SHIPPING_LABEL]
For tracking link – [TRACKING_LINK]
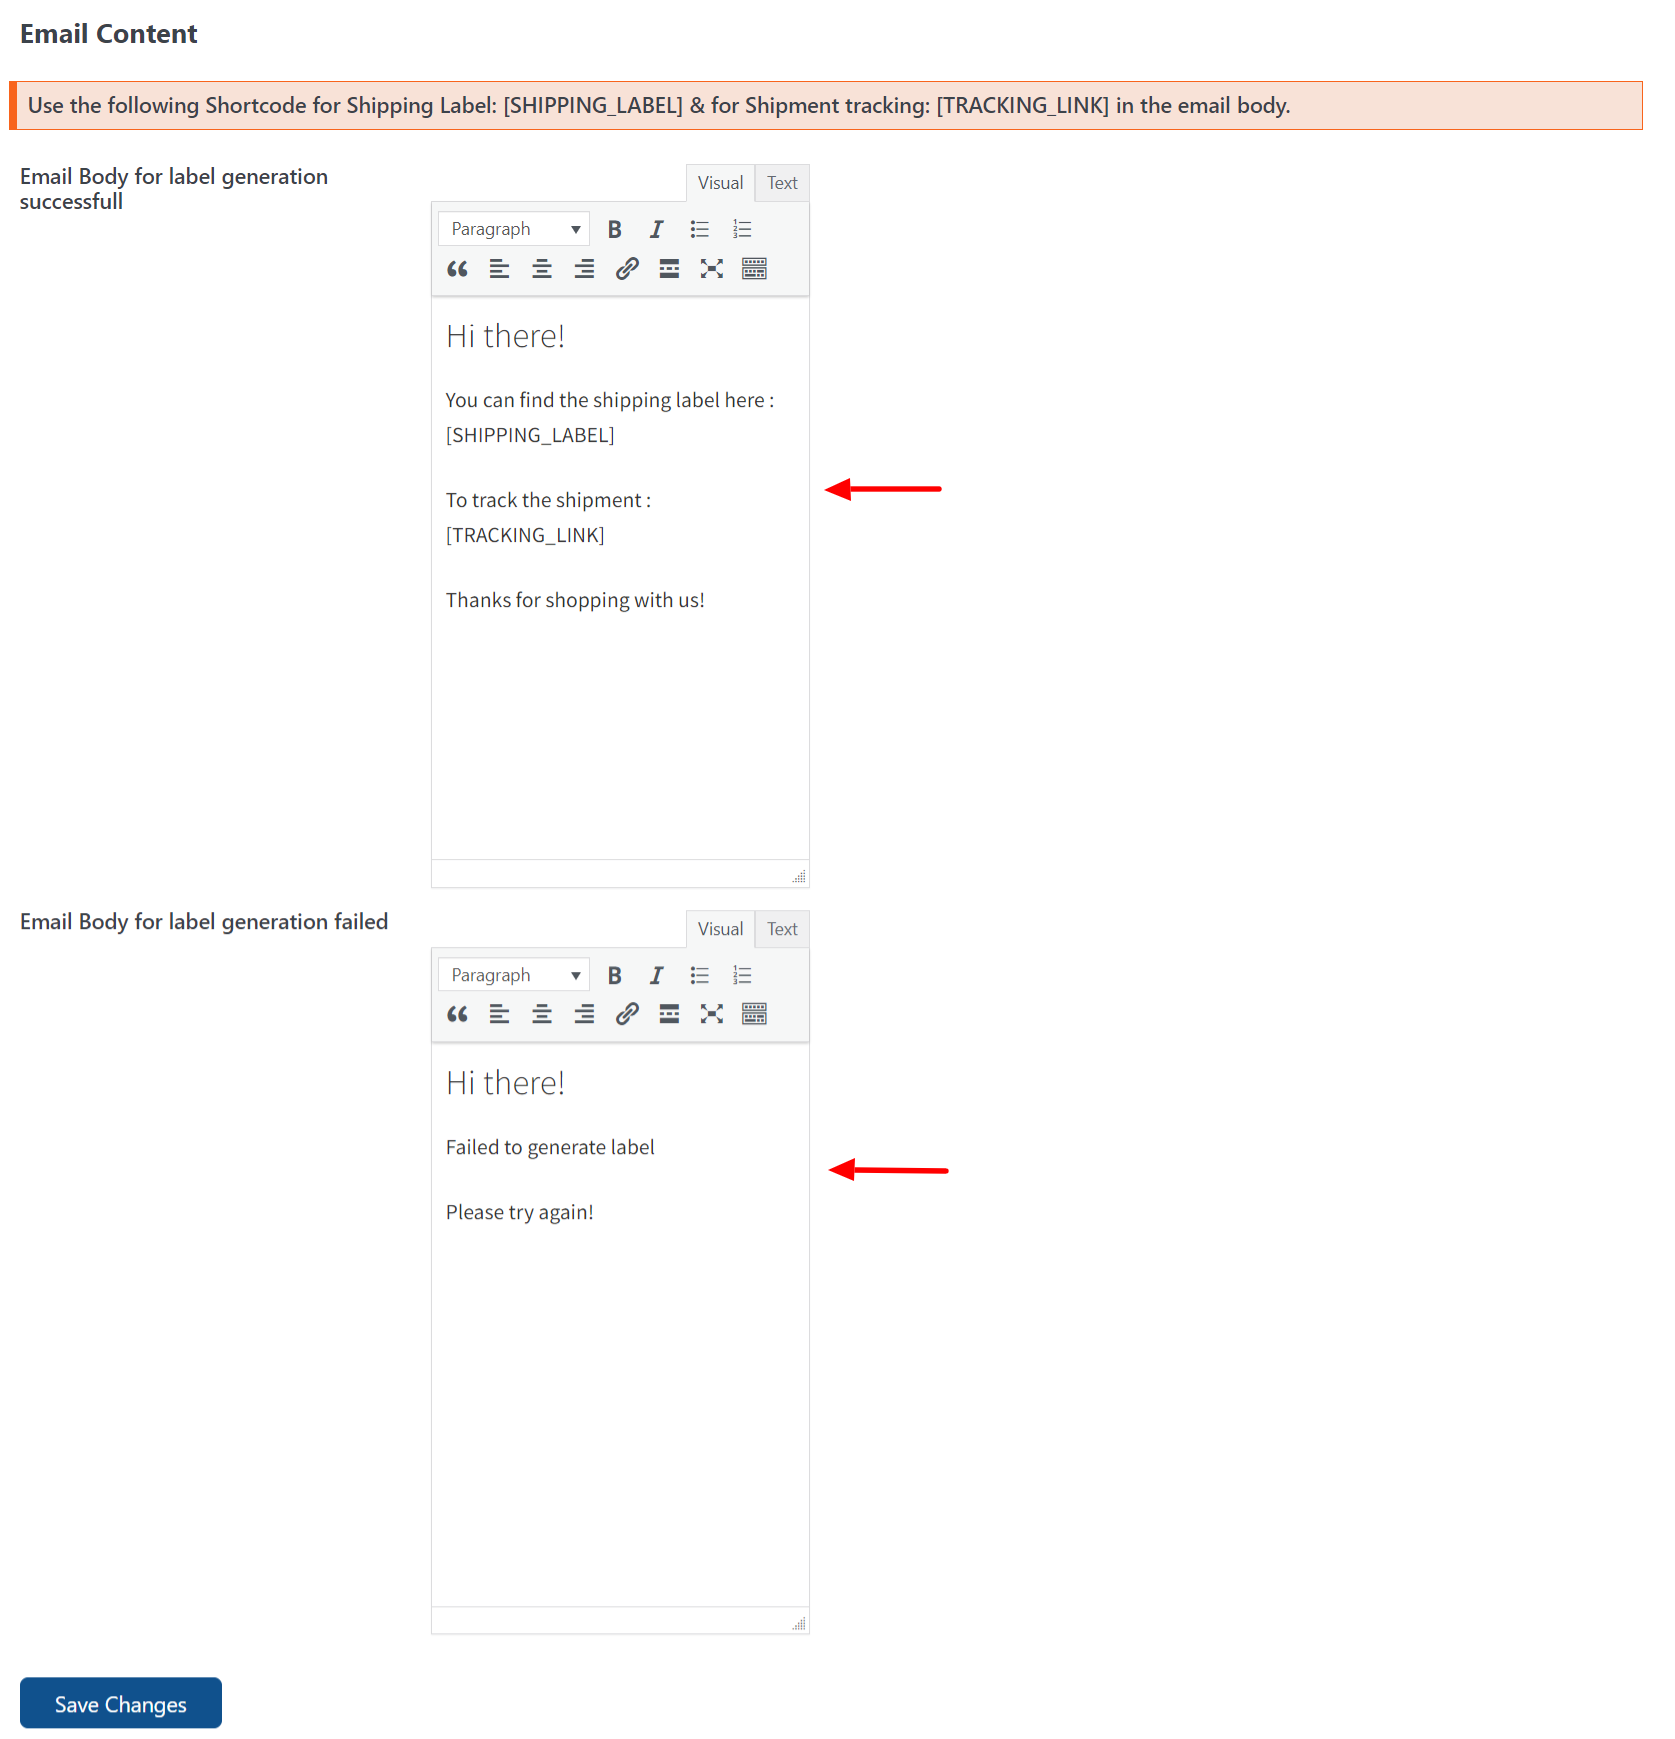
Click Save Changes after entering the required content.
Customize Frontend
Navigate to the WordPress Dashboard Sidebar > Shipping Calculator > Customize Frontend. This tab is to customize the text and colors of the frontend Shipping Calculator template.
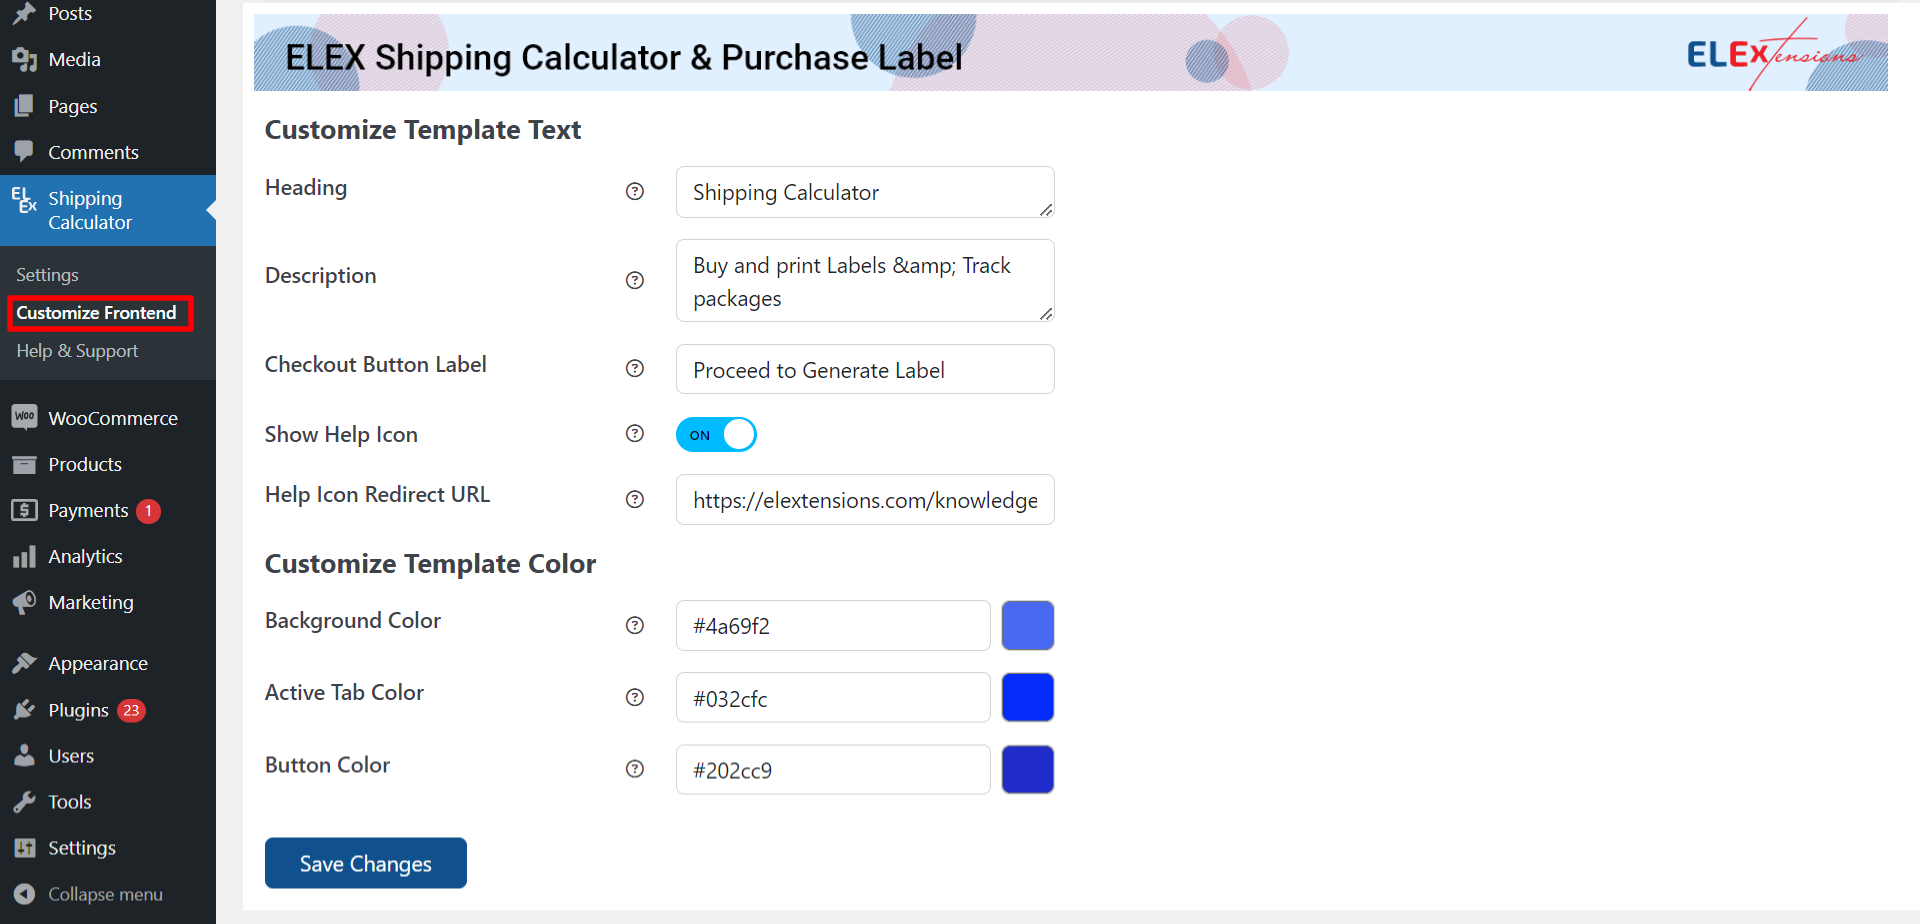
Customize Template Text
- Heading: Enter the heading to be displayed on the front end. You can either add it in HTML format or plain text.
- Description: Enter the description text to be displayed on the front end. Both HTML and plain text formats are supported.
- Checkout Button Text: Enter the text to be displayed on the Checkout button.
- Show Help Icon: Enable this option if you wish to add a help icon to the shipping calculator.
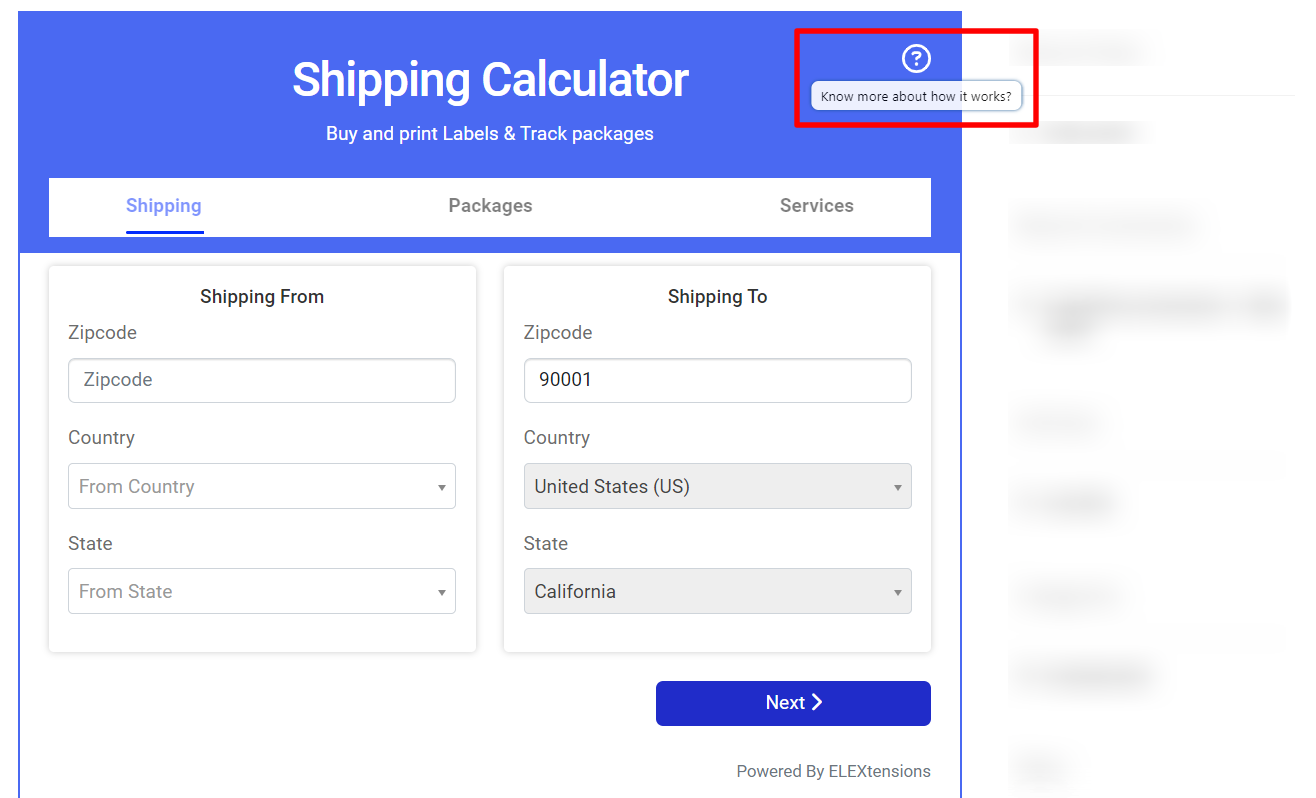
- Configuring Help Icon: Enter the URL of the page, article, or documentation in which you can display the entire process of the shipping calculator. Once you add a URL here, a help icon will be displayed on the front end.
Customize Template Color
- Background: Choose the background color.
- Selected Tab: Choose the color for the selected tab.
- Buttons: Choose a color for the selected buttons.
Check the template:

Demonstration
Let us now move to the Shipping Calculator page to see the configured features.
We shall go through it with an example.
Example: I need to ship my product from an address in New York to an address in Los Angeles. For that, I need to choose a package option according to my product’s weight and dimensions and opt for the most feasible shipping service by checking their rates and estimated delivery date. Then, I need to print the shipping label and get the tracking link.
So let us check how you can choose a shipping service, print the label, and get the tracking link with the example mentioned above.
For that, go to the Shipping Calculator page we have already created.
A new window will be opened with a tab SHIPPING.
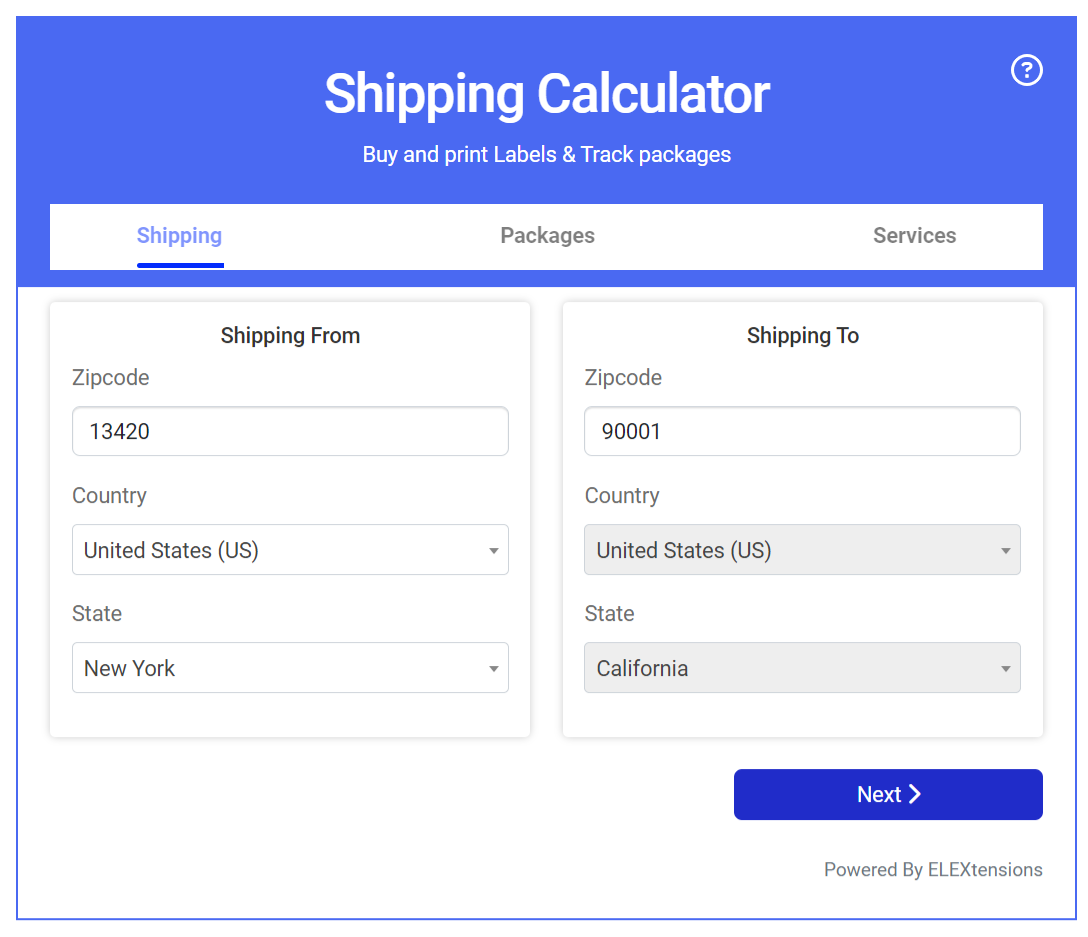
Enter the sender and receiver’s zip code, country, and state, and click NEXT.
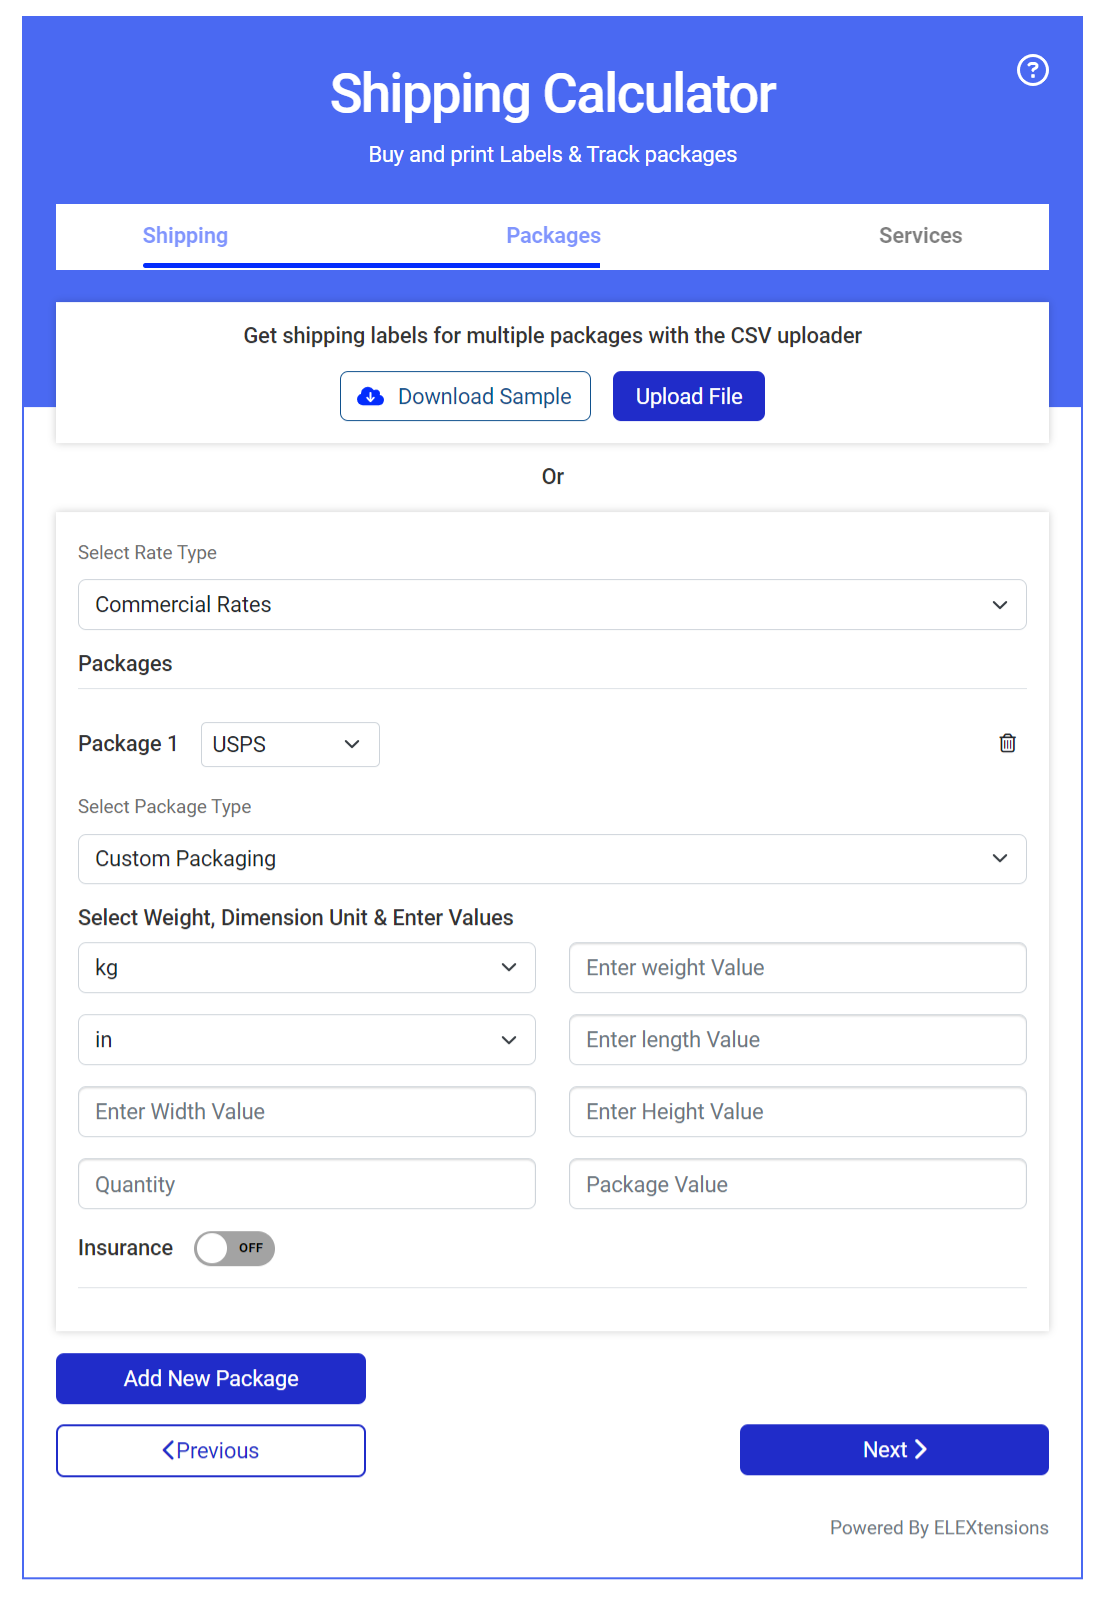
You will be redirected to the next tab – PACKAGES.
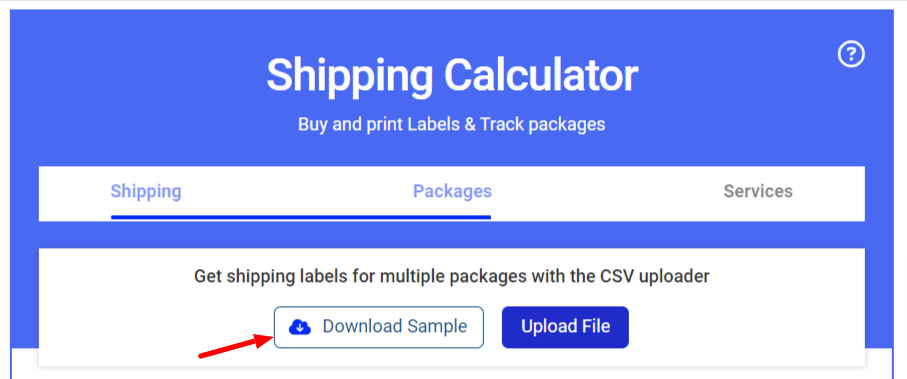
If you want to generate multiple labels together, enter the weight and dimensions of all the products in a CSV file one by one.
You can download the template by clicking ‘DOWNLOAD SAMPLE’. You can fill in the details on the template, save it, and upload it by choosing the file from your device.
Check an example of a downloaded CSV file template.
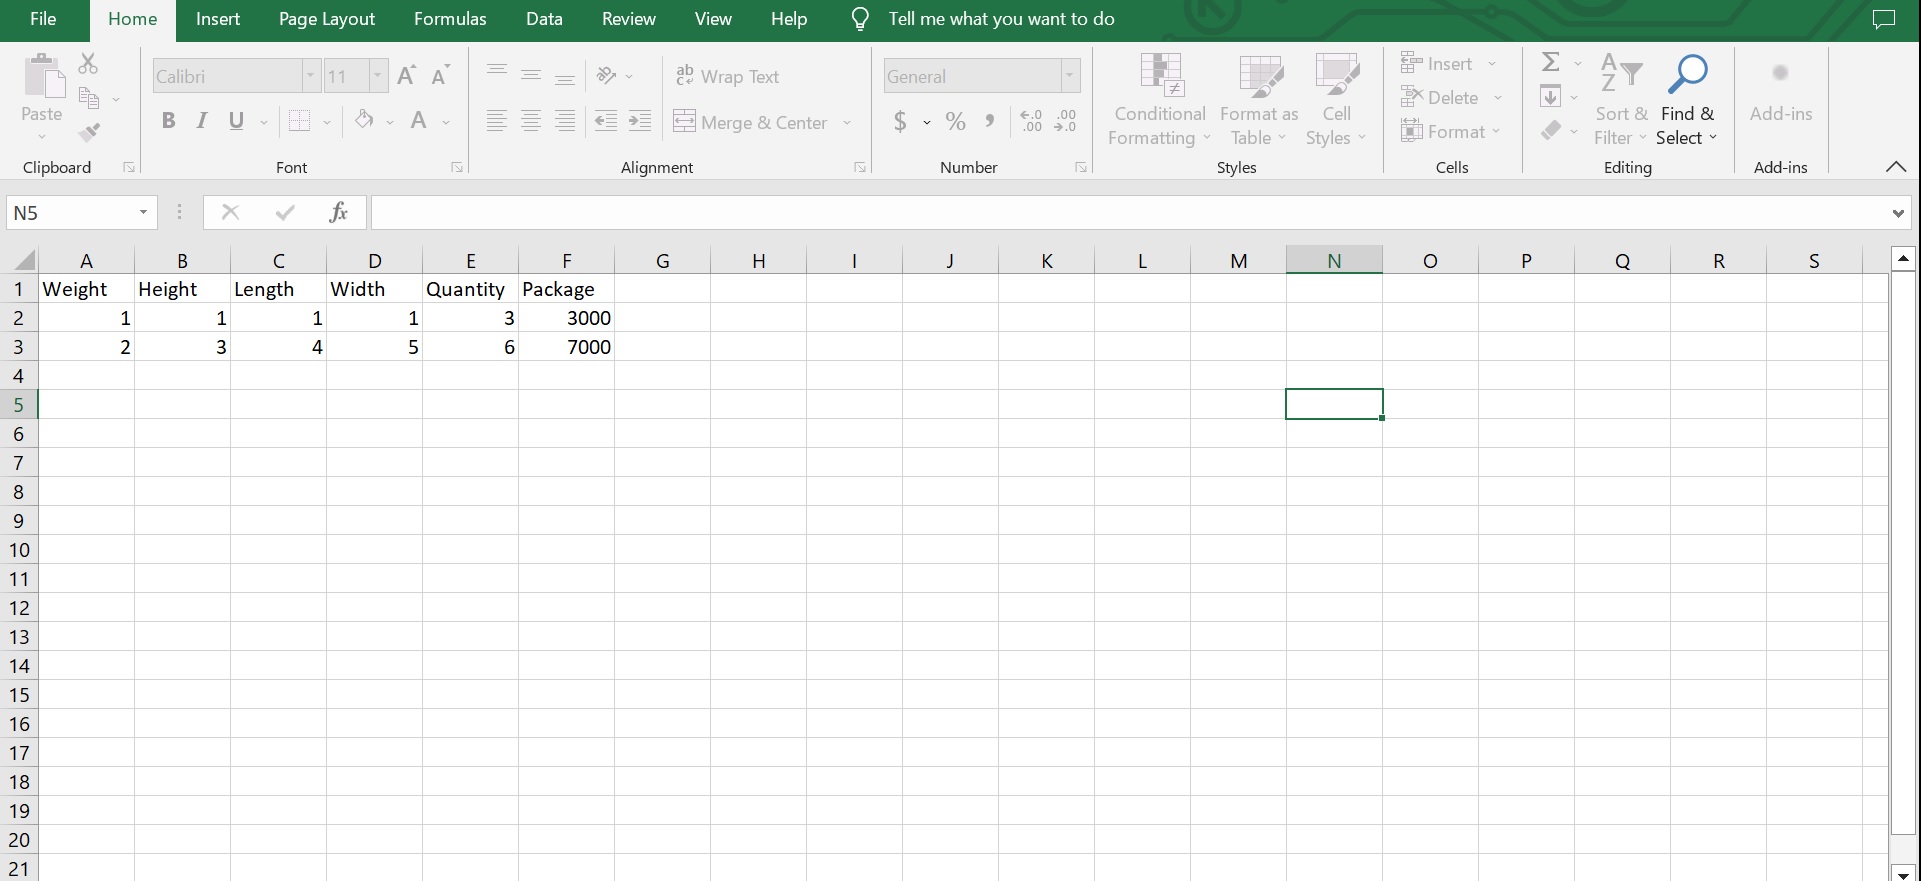
You can enter the weight, height, length, and width of the items one by one. Save and upload it.
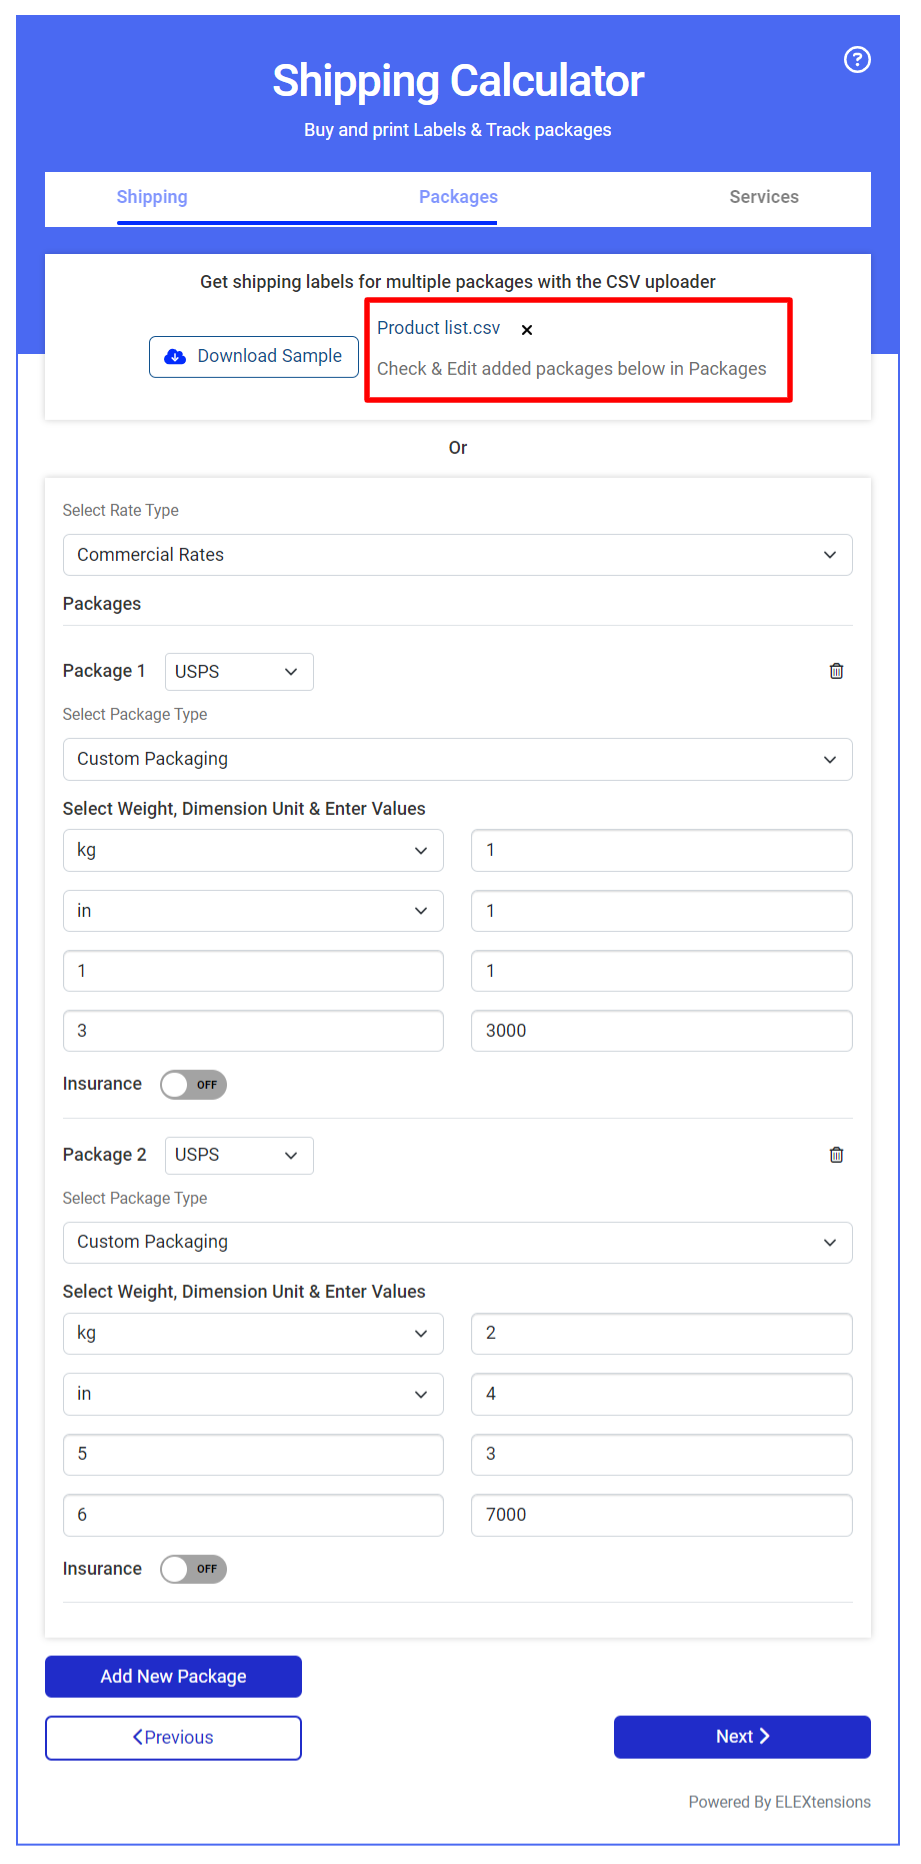
Once the file is uploaded, all the package details will be automatically added as demonstrated in the screenshot above. You can check and edit the details and click NEXT to proceed.
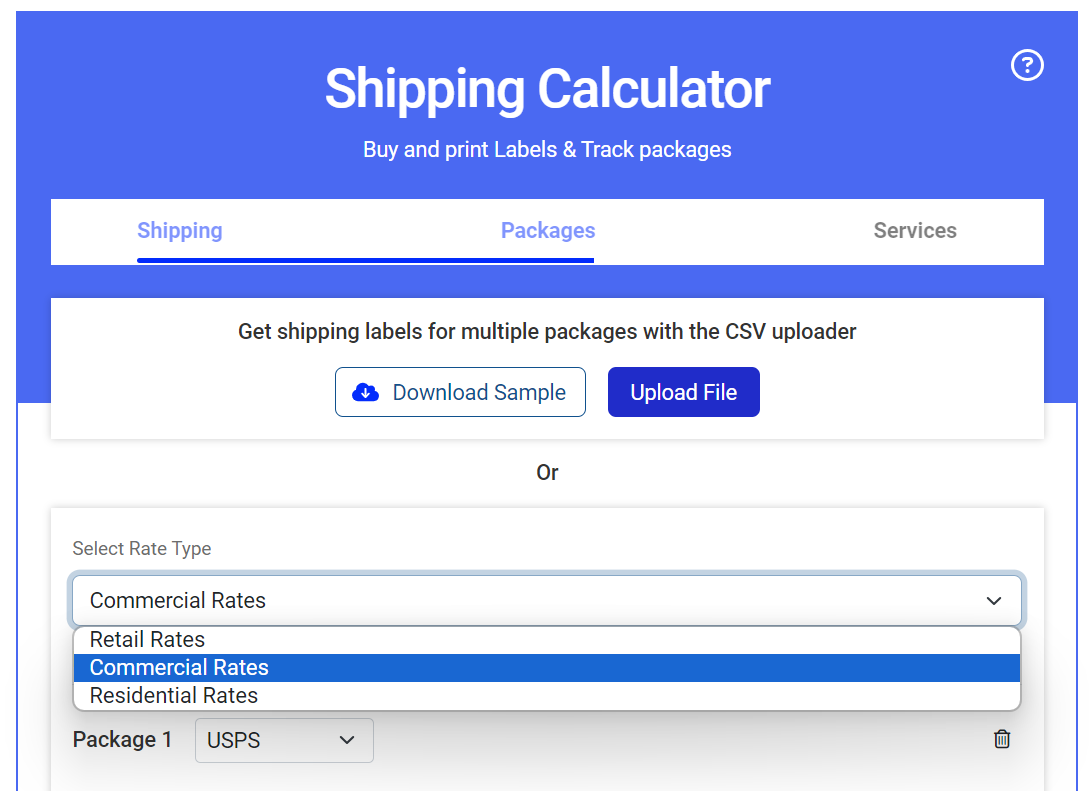
Alternatively, for adding packages manually, you can choose if you wish to go ahead with retail, commercial, or residential rates and choose the shipping carrier you want to go ahead with for that particular package. You also have the option to choose different shipping carriers for different packages, in case you are shipping multiple packages together.
Next, you can either choose an available carrier packaging option or a custom packaging option for individual products by entering their weight and dimensions for printing shipping labels. You can add a large number of products together by entering the weight and dimensions of each product in a CSV file and uploading it to generate packages separately.
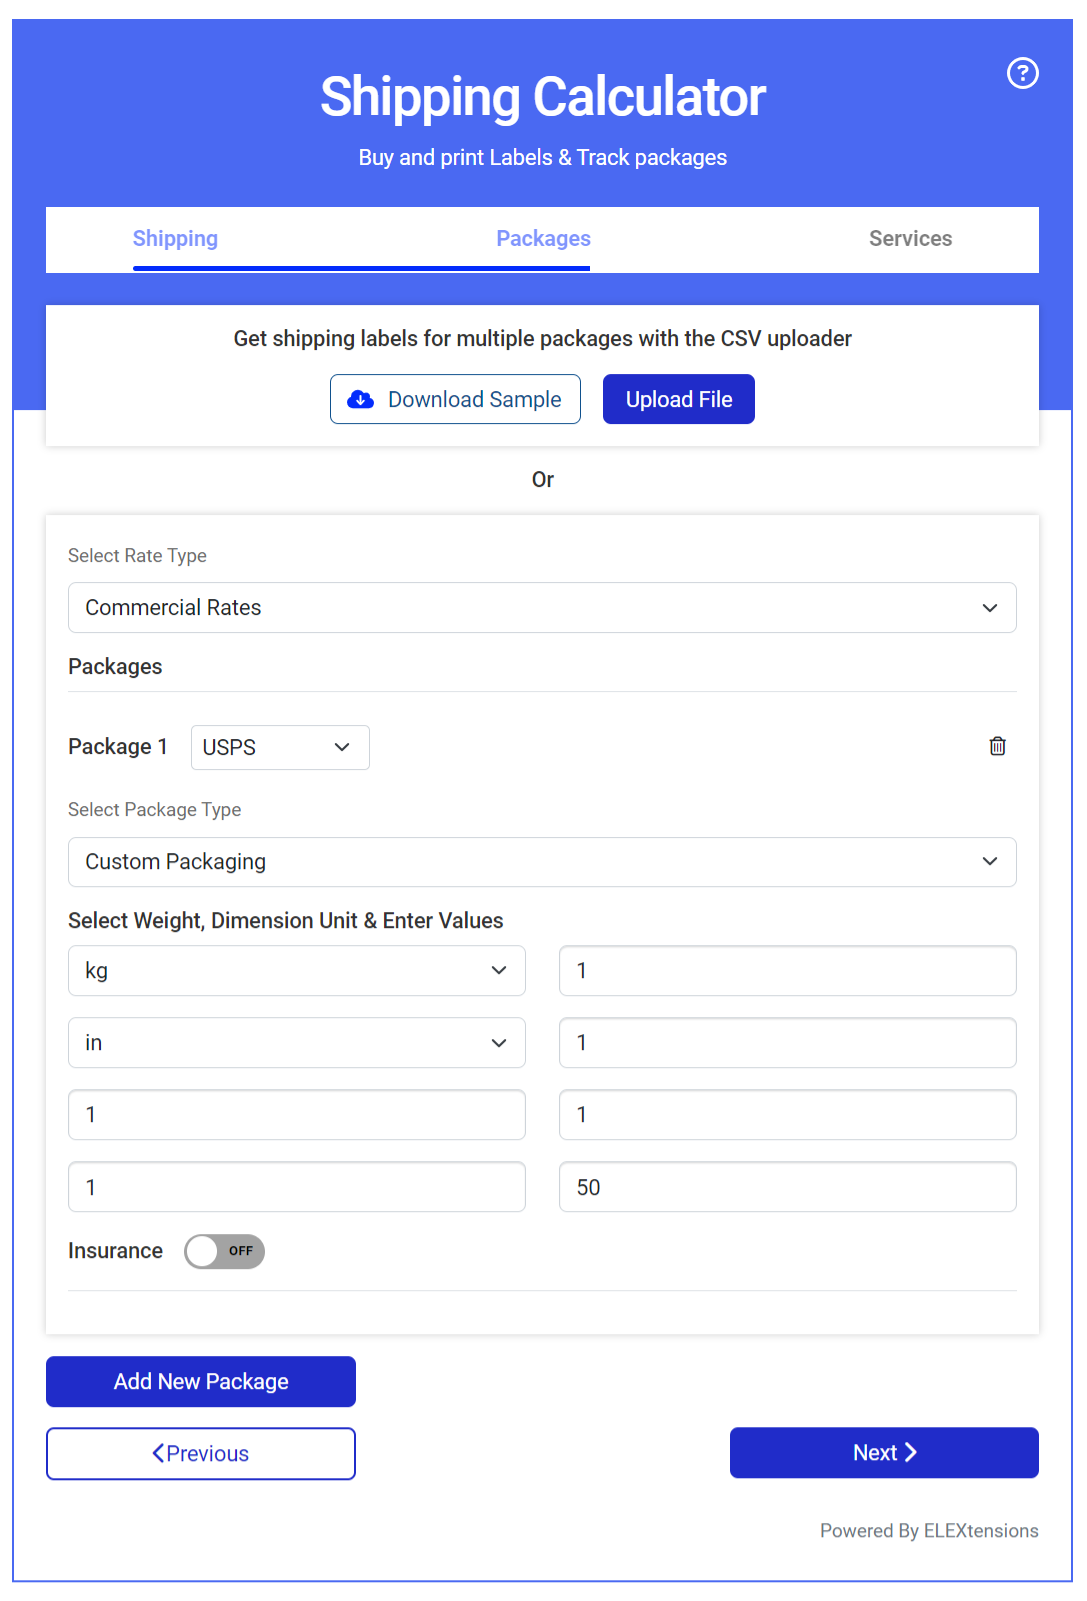
If you want to create a custom package, choose the Custom Packaging option from the drop-down pickup list.
Choose the weight and dimension units, quantity, and package value. You can also choose to add insurance if needed. The package value will determine the insurance value.
For weight, you have kg, lbs, oz, and g, and for dimensions, you have in, cm, m, and mm units.
You can choose the corresponding units of the product ordered by the customer.
Check the below screenshot of the ordered product’s weight and dimension.

I have entered the same details on the Shipping Calculator.
If you need to add more items, you can click +ADD NEW PACKAGE and add the details of the other products.
If you want to choose a carrier packaging provided by EasyPost services, you can choose Carrier Packaging from the drop-down pick-up list and select the required packaging.
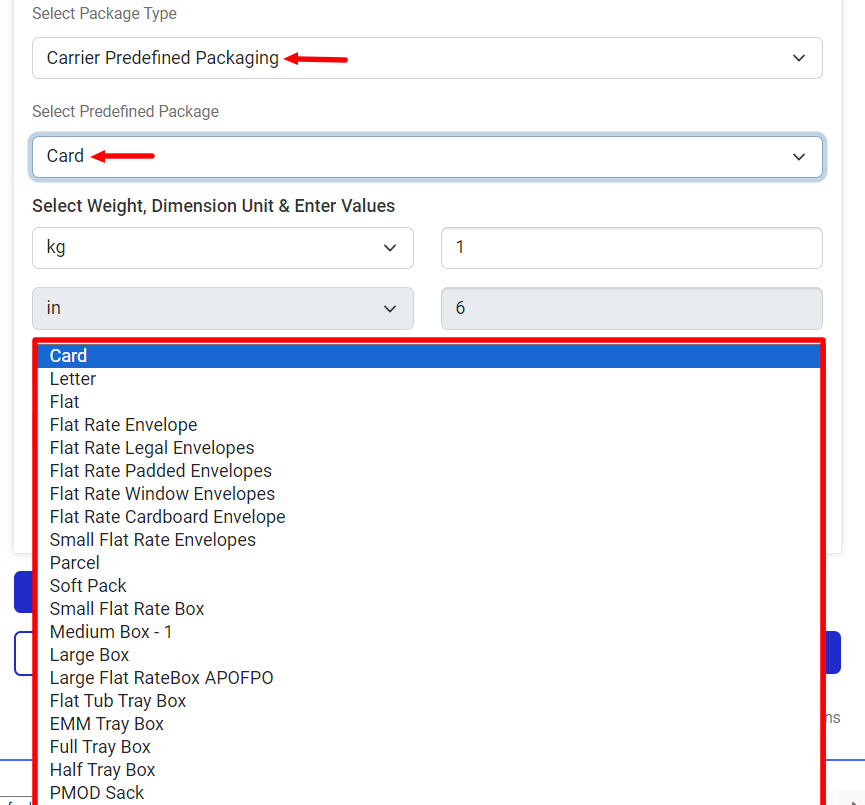
After choosing a required package, you can enter the weight of the item according to the requirements.
After that, click the NEXT button to move to the next step. If you want to go back to the previous step, click PREVIOUS
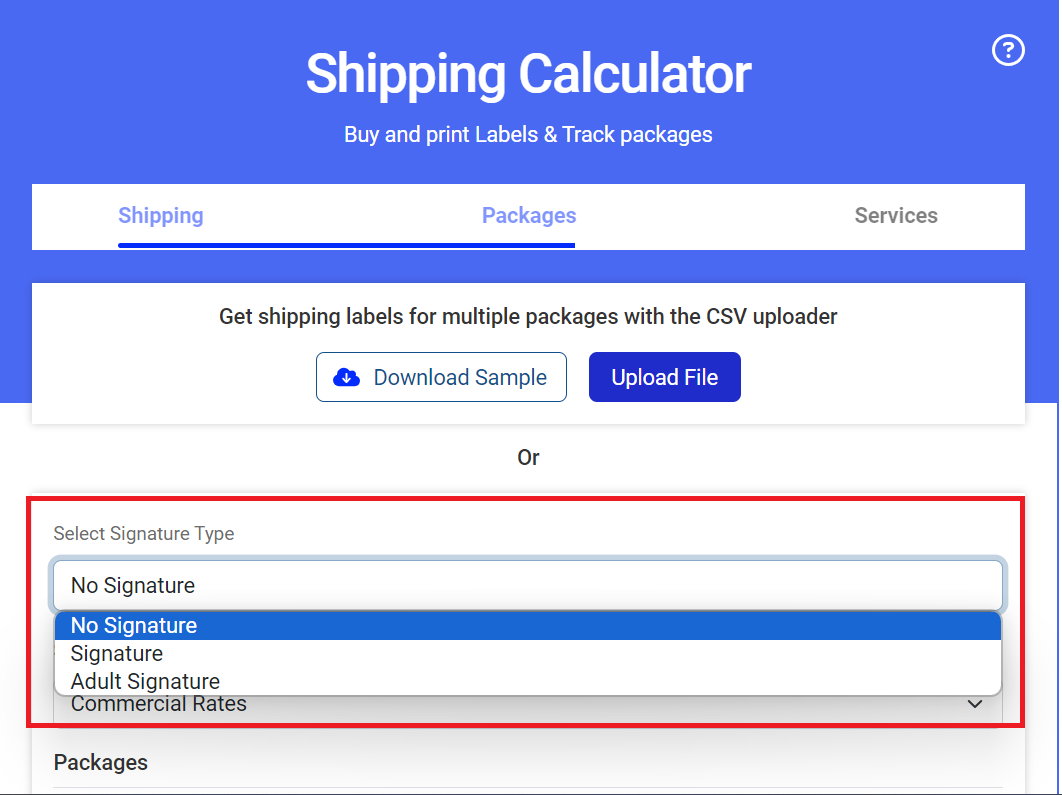
Upon clicking NEXT you will be redirected to the next tab – SERVICES.
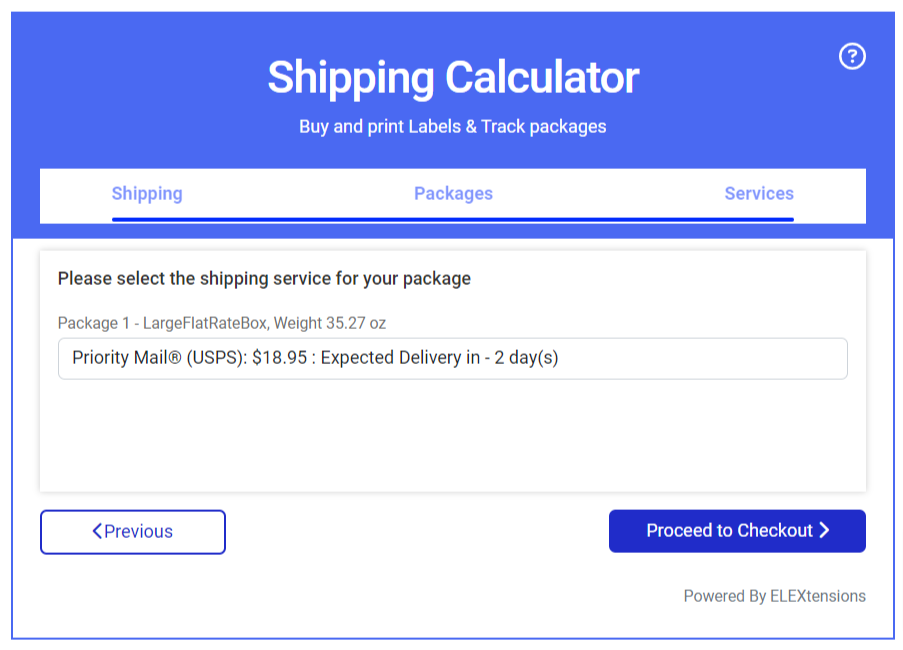
From this tab, you can choose a shipping service for the package(s) you have created.
Then, click PROCEED TO CHECKOUT.
You will be redirected to the Checkout page. Here you can proceed to place the order for generating the labels and getting the tracking links.
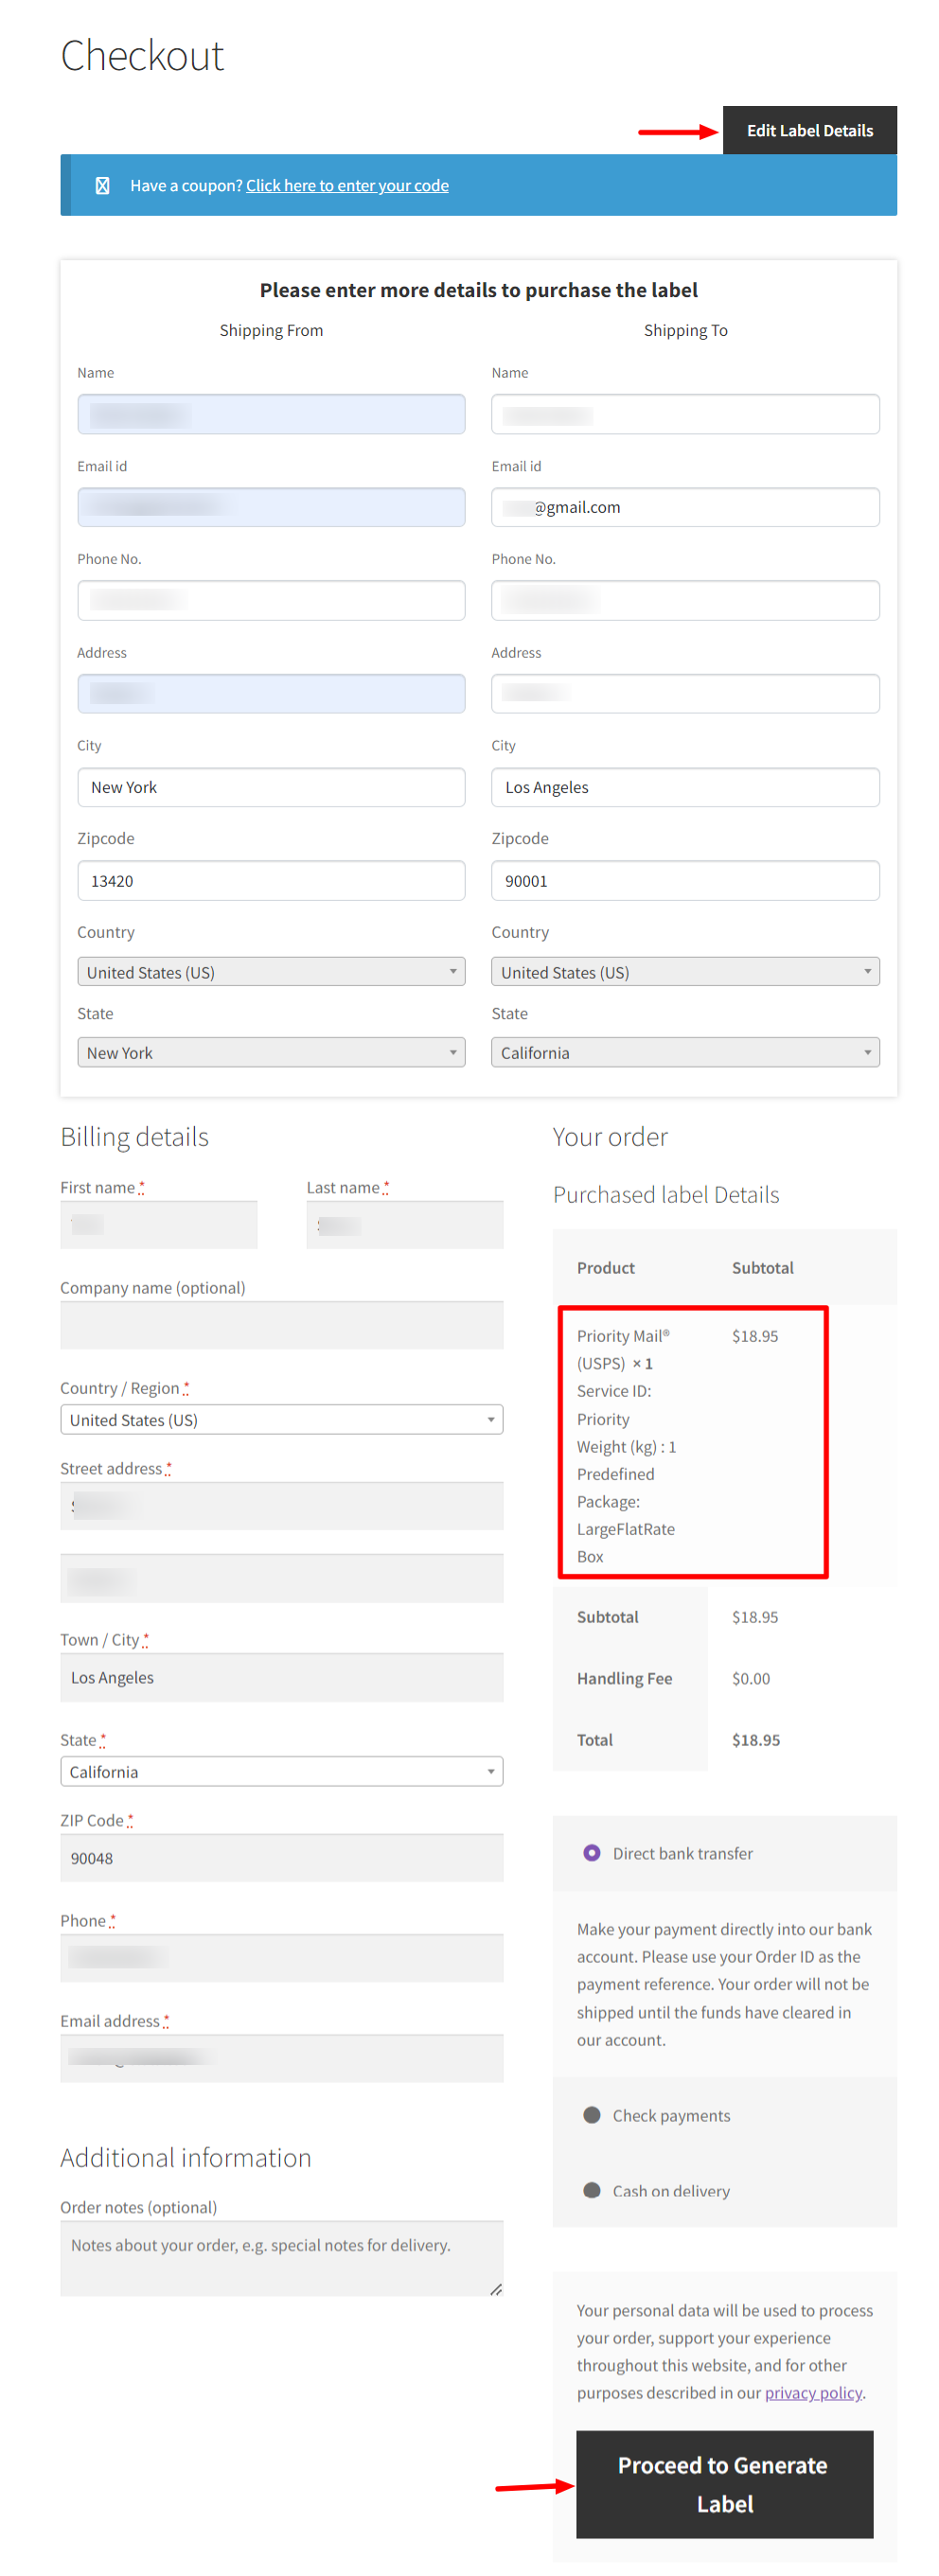
Please note, that the product here is the service you have chosen previously.
If you have added the handling fee under Rates & Services settings, it will be added with the subtotal (shipping rate).
If you need to go back and edit the previously added details before the checkout process, click the Edit Label Details button. It will redirect to the home page of the shipping calculator you have configured.
Click the Proceed to Generate Label button after entering the details for generating label(s).
If it has successfully generated the label, a new page will be opened as ‘Order received’ with the custom text you have configured for successful label generation. You can find the links to download labels and check tracking details at the bottom of the page.
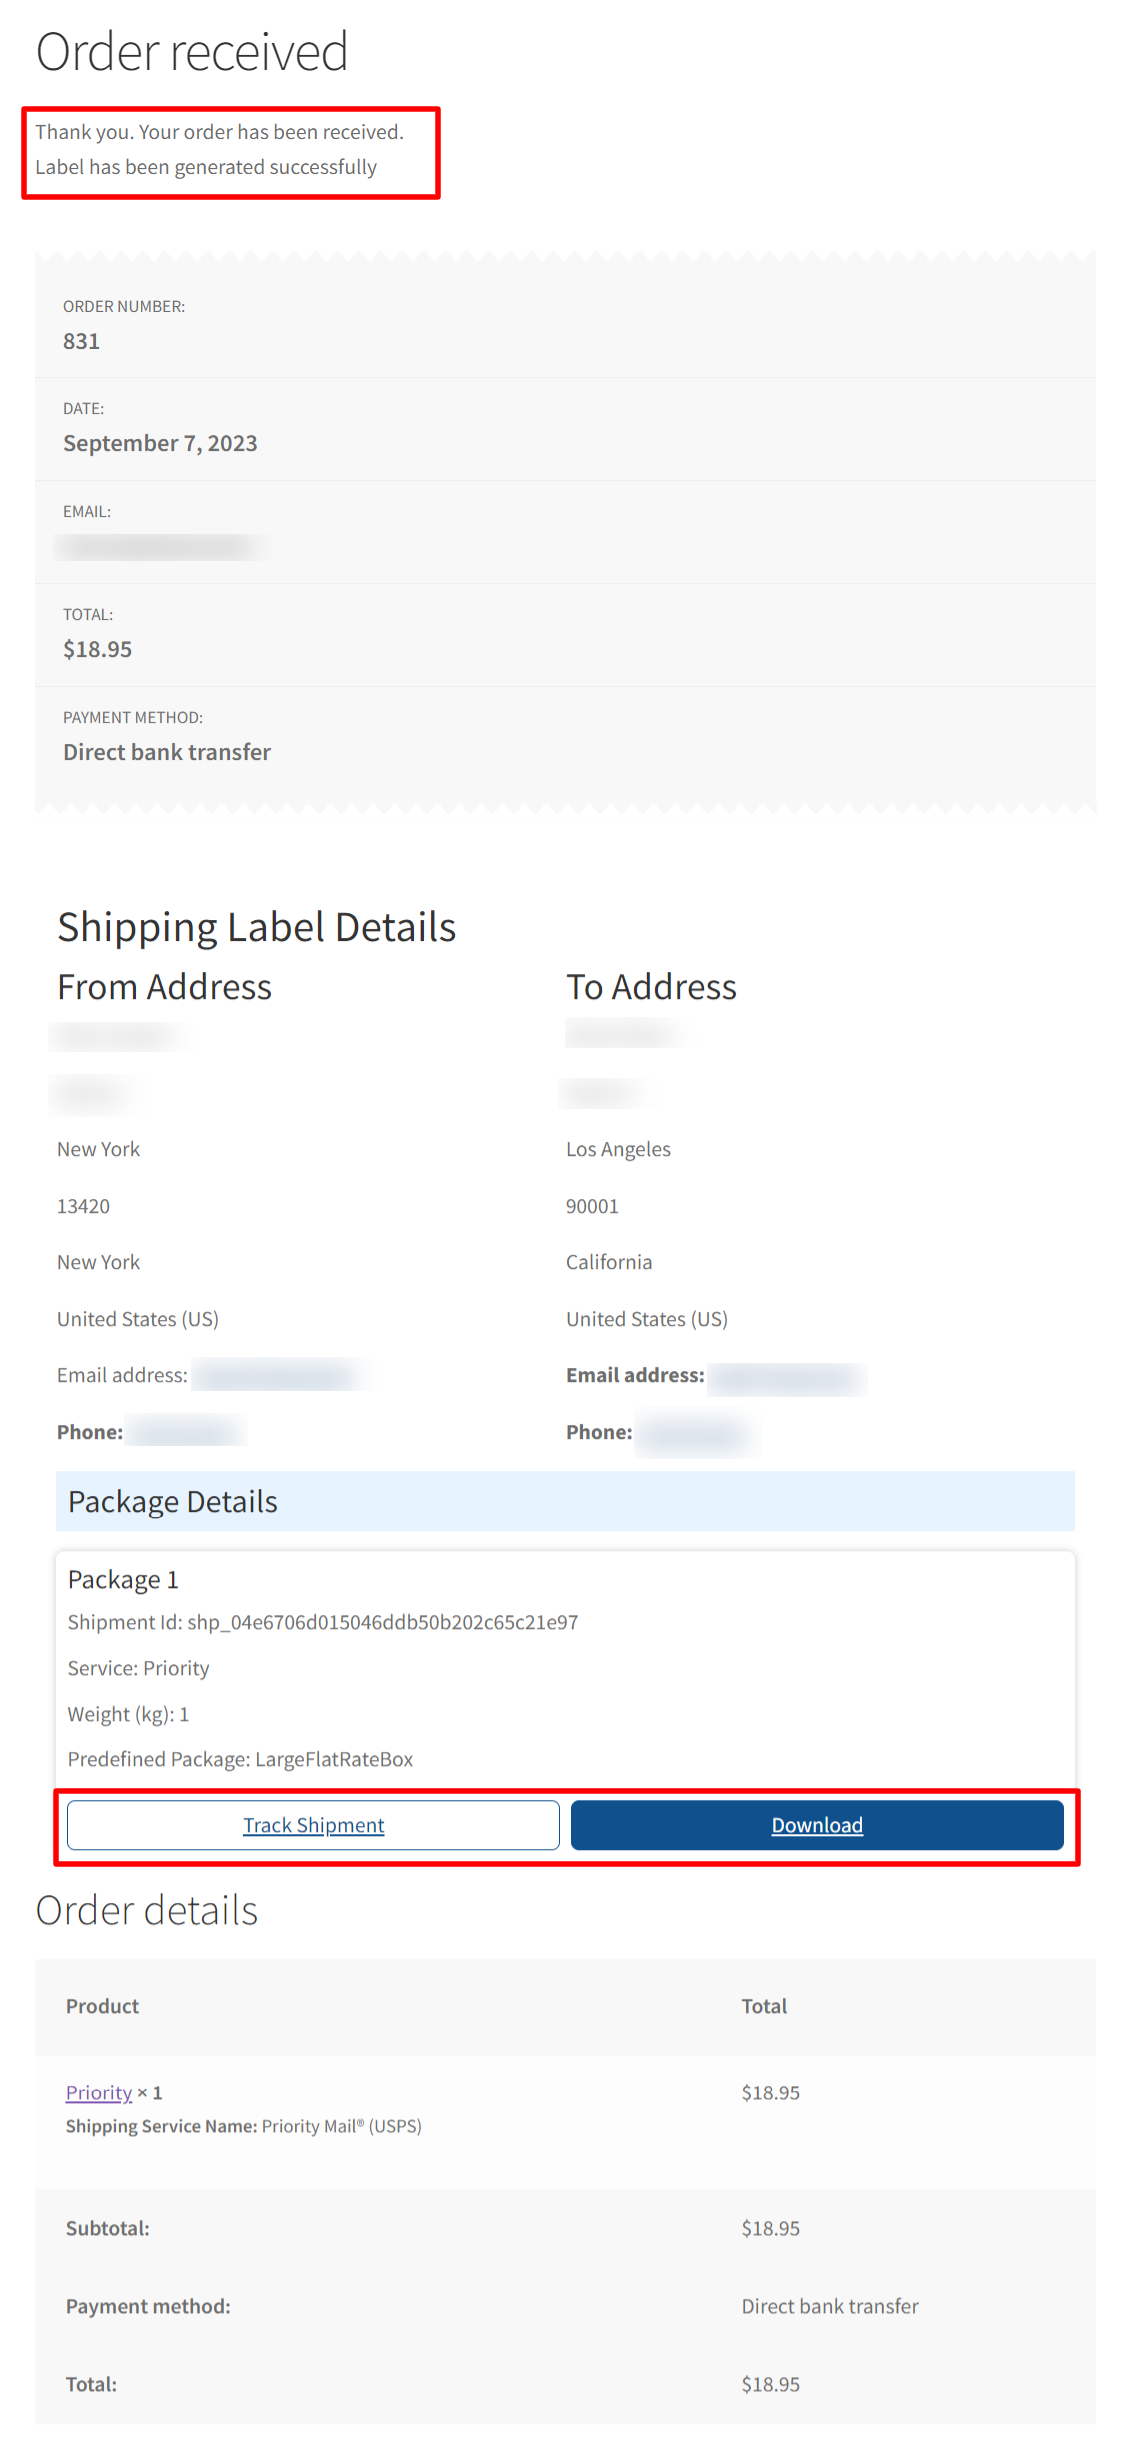
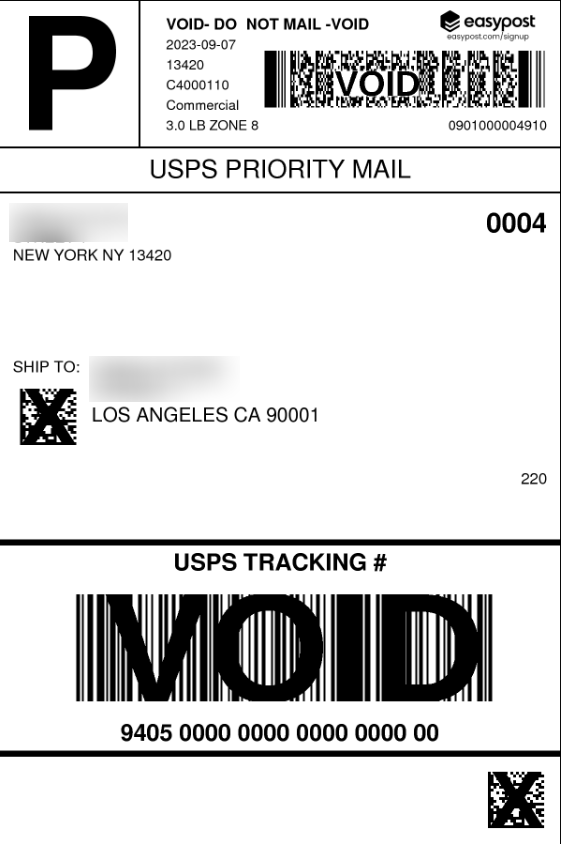
When you click the link to download the label, you will be redirected to a new page with the label, from where you can download the shipping label. Check the example of a generated label:
When you click the tracking link, you will be redirected to EasyPost’s tracking page. Check a sample tracking page.
Note: This is not a real tracking code and not a real order created by the customer. This screenshot is only for demonstration purposes.
![]()
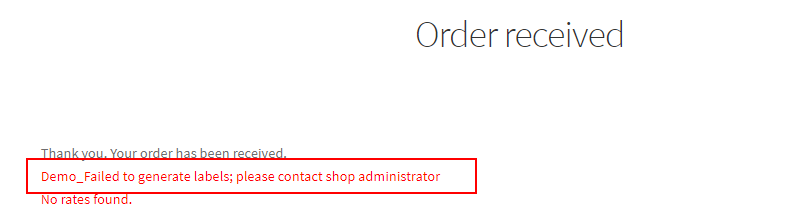
If the label generation fails, it will display the Label Generation Error Message.
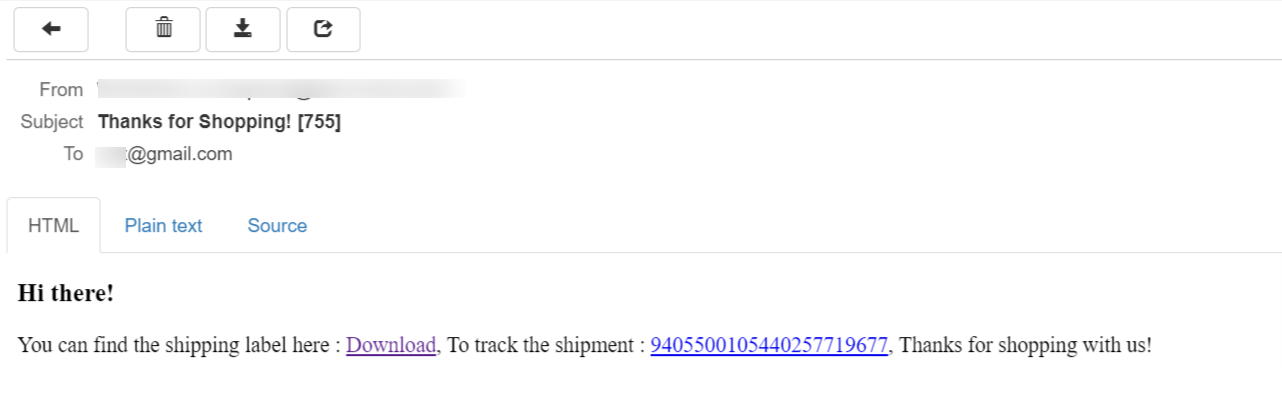
When the label has been created, the same link to download the label will be mailed to the sender’s and receiver’s mail IDs with the tracking number. To configure the mail with the links, check the Email Settings section in this document.
Check an example in the below screenshot.
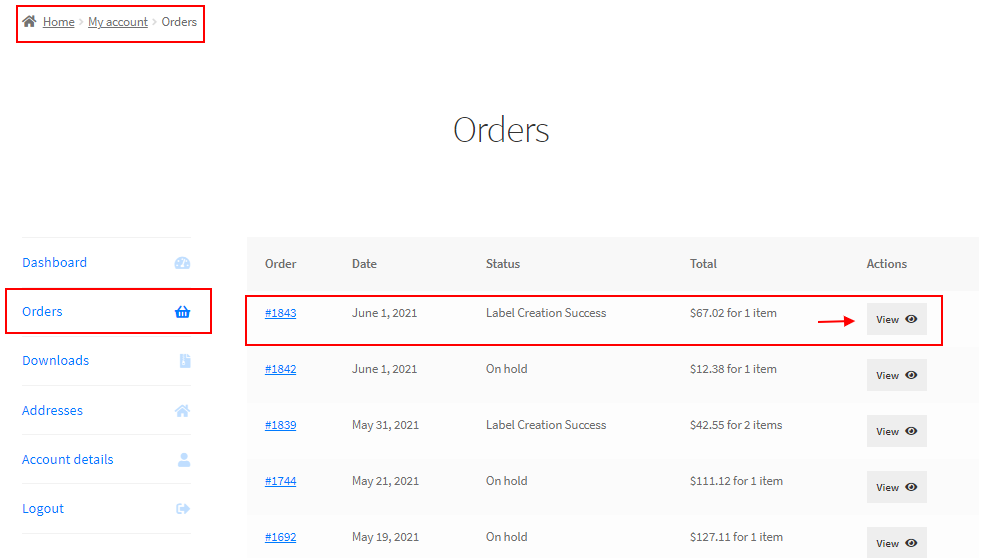
If the customer needs to check the generated label and tracking link whenever they need it, they can go to the My Account > Orders. They can view all orders they have made and click the view option to redirect to the individual order page from where they can download the label and get the tracking link.
This is how you can calculate shipping rates and generate labels using the ELEX WooCommerce Shipping Calculator, Purchase Shipping Label & Tracking for Customers plugin.
Check the below video to understand the benefits of the plugin and a few use cases:
To explore more details about the plugin, go check out ELEX WooCommerce Shipping Calculator, Purchase Shipping Label & Tracking for Customers.
You can also check out other WooCommerce and WordPress plugins in ELEX.
2 Comments. Leave new
Can you make an API connection to carrier companies directly with my contracts without easypost?
what I need,
For Belgium and Netherlands sender location: Bpost, dhl, gls, homerr, mondial relay, postnl, ups
For Turkey sender location: MNG Cargo, Surat Cargo, PTT
Hi Burhan,
Thanks for contacting us.The ELEX shipping calculator plugin currently integrates with the EasyPost API, offering support for USPS, FedEx, and UPS shipping carriers. Unfortunately, we are unable to fulfill requests for direct integration with additional carriers, as it is not a part of our planned roadmap right now.