What can we help you with?
How to set up ELEX WooCommerce Choose Your Delivery Date Plugin?
This article intends to provide detailed, step-by-step instructions that’ll help you set up ELEX WooCommerce Choose Your Delivery Date plugin. Refer to the product page to know more about other various features of the plugin.
With this plugin, you can provide a dedicated date field on the Checkout page for letting customers request a desired delivery date on which they need the products to be delivered.
The admin can view the requested delivery date on the Orders list and the individual dashboard. Also, they will have the complete control to set a minimum number of days it would take to deliver the products. And, there is an option to configure the holidays according to the shop owner’s requirements. To give more details to customers, the admin can display custom notes regarding store holidays and the option to choose a delivery date.
Overview
Some of the major highlights of the plugin include:
- Option to choose delivery date: Display a date field with a custom note on the Checkout page for customers to choose a delivery date according to their convenience.
- Set minimum delivery days: Add the minimum number of days to deliver the products to let customers not choose a date on those days.
- Add weekly holidays: Set the holidays according to your store schedule to restrict customers from choosing those days.
Getting started with ELEX WooCommerce Choose Your Delivery Date Plugin
To get started with the plugin, follow the below steps:
- Download the ELEX WooCommerce Choose Your Delivery Date plugin from its product page or WordPress.
- Log in as the WooCommerce admin of your online store.
- Go to Plugins > Add New to upload the downloaded ZIP file of the plugin.
- Activate the plugin.
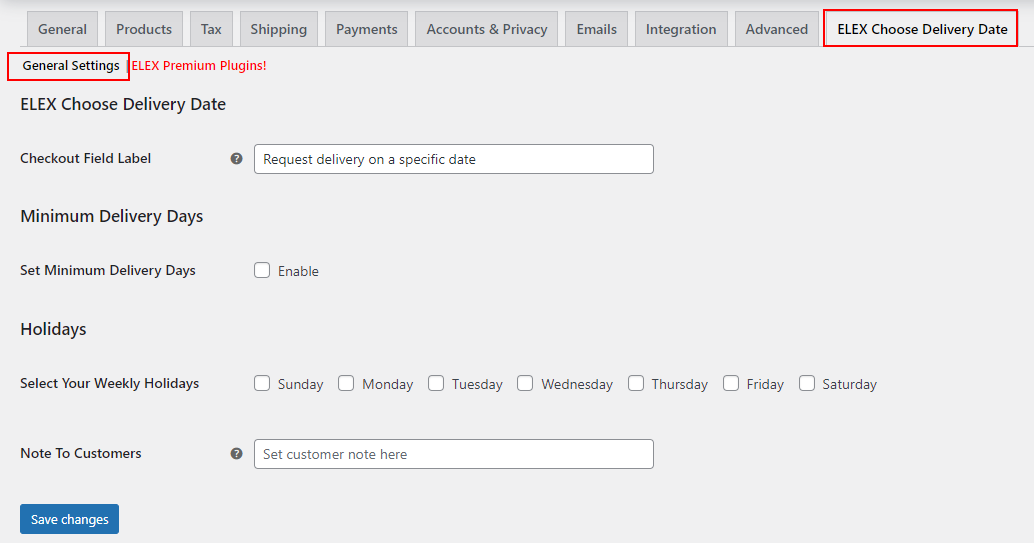
Once the plugin is installed and activated, you can go to the Dashboard > Plugins > Installed Plugins > ELEX WooCommerce Choose Your Delivery Date Plugin > Settings
Now let’s get down to configure the plugin.
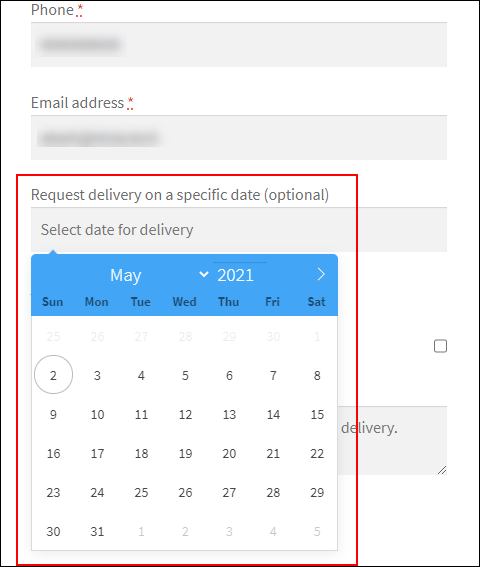
- Checkout Field Label: Enter a custom text label to prompt customers to choose a desired delivery date. By default it will be ‘Request delivery on a specific date’.
It will reflect on the Checkout page as in the screenshot below:
Minimum Delivery Days
- Set Minimum Delivery Days: Enable this option to set a minimum number of days it would take to deliver the products.
- Minimum days you take to deliver products: Enter the minimum number of days you would require for delivery. Customers will then be able to choose a date for delivery only after these specified number of days.
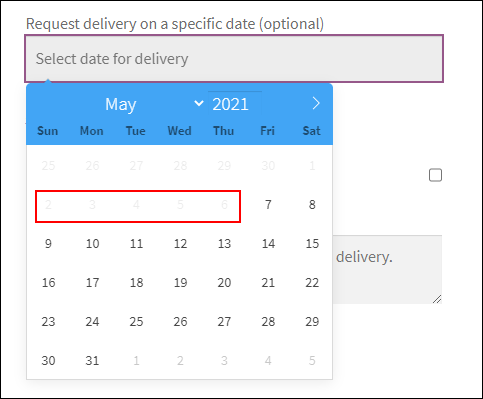
Based on the minimum delivery days that you configure in the plugin settings, the calendar will display the available dates for delivery on the frontend.
As you can see, the current date in the above example is 2nd May. As I have chosen 5 days to block, it has blocked 5 days from the current date. So, the customers can choose a date only from 7th May onwards.
Holidays
Choose the store holidays in a week when you don’t deliver. Customers will not be able to choose those days from the date field.
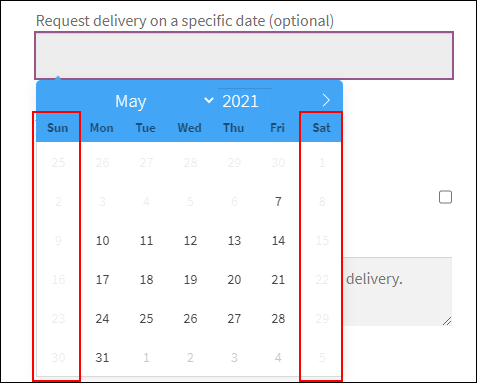
You can choose the days in a week as in the screenshot below:
In the above example, I have chosen Sunday and Saturday as holidays. It will block Saturday and Sunday as in the screenshot below:
- Note To Customers: Add a custom note to inform customers about your holidays.
The custom note that you have added in the plugin settings will be displayed on the Checkout page.
After adding the required details, click Save changes.
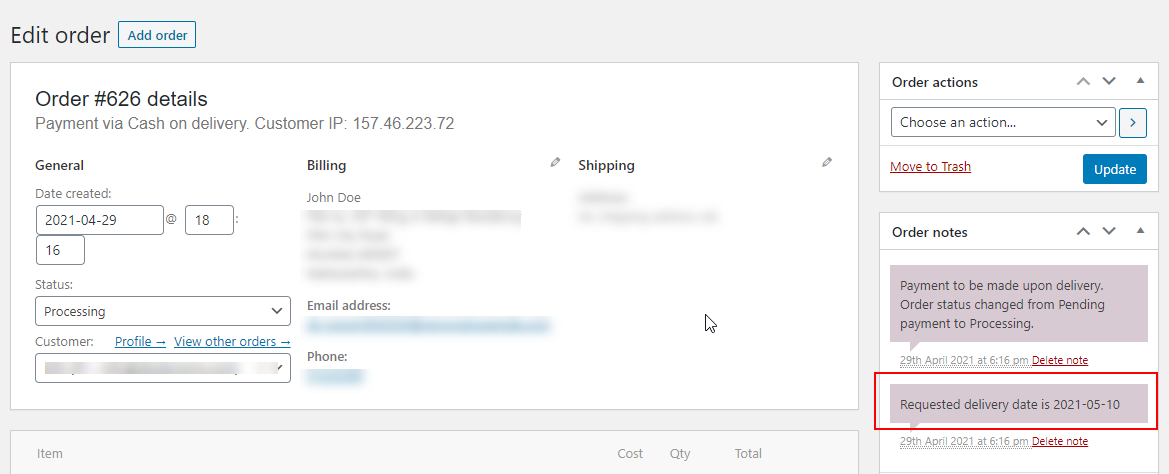
The date requested by customers will be displayed in the Orders list and individual order dashboard as in the screenshot below:
This is how ELEX WooCommerce Choose Your Delivery Date plugin works.
To explore more details about the plugin, check out ELEX WooCommerce Choose Your Delivery Date plugin.
You can also check out other WooCommerce and WordPress plugins in ELEX.

