What can we help you with?
How to print Australia Post return labels with ELEX WooCommerce Australia Post Return Label Add-On?
This article is a step-by-step tutorial that explains how to print Australia Post return labels with ELEX WooCommerce Australia Post Return Label Add-On. For more information on the add-on, refer to the product page.
Australia Post provides postal services in Australia and its overseas territories. This Add-On works only with ELEX WooCommerce Australia Post Shipping Plugin with Print Label & Tracking, which allows you to access real-time rates from Australia Post and StarTrack, print shipping labels, track shipments, and helps in packing items into boxes. With this add-on, you’ll be able to print Australia Post and StarTrack return labels.
Overview
Some of the major highlights of this add-on include:
- Printing Return labels: You can generate and print return labels with the Australia Post shipping service.
- Custom Return Address: You can set a custom address to process return shipments.
Prerequisites
For printing Australia Post return labels, you need the following:
Getting started with ELEX WooCommerce Australia Post Return Label Add-On
Read an article to know how to complete the checkout process on ELEX. You can also read how to download, install, activate ELEX plugins.
The core label printing process is determined with the ELEX WooCommerce Australia Post Shipping Plugin with Print Label & Tracking settings and not the add-on settings. Hence you need to set up ELEX WooCommerce Australia Post Shipping Plugin before proceeding with the return label add-on.
To know how to set up the plugin, refer to an article: How to set up ELEX WooCommerce Australia Post Shipping Plugin with Print Label & Tracking?
Hope you have got an idea of this add-on and have installed it. Now let’s get down to configure it.
Configuring Return Label Add-On Settings
Once the add-on is installed and activated, you can navigate to Dashboard > WooCommerce > Settings > Australia Post > Return Label OR
Dashboard > Plugins > ELEX WooCommerce Australia Post Return Label Add-On > Settings > Return Label
This section appears in the plugin only when the add-on is installed and activated.
Return Label Add-On Settings
This section allows you to enable return label generation, selecting label documents layout, and choose the return shipment address. Check the screenshot:
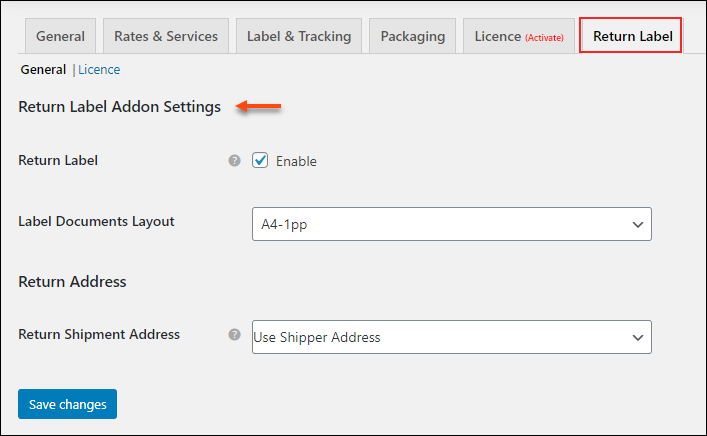
- Return Label – Tick this checkbox to enable the Australia Post return label option.
- Label Documents Layout – Choose a document layout from the drop-down pick-up list in which you need to print the return label. You have 5 options available here. They are:
- A4-1pp
- A4-2pp
- A4-1pp Landscape
- A4-2pp Landscape
- A6-1pp
Return Address
Choose the return address to which you need to receive the returned products from the customers. Usually, this address will be the shipper address. Or you can add a custom return address if required.
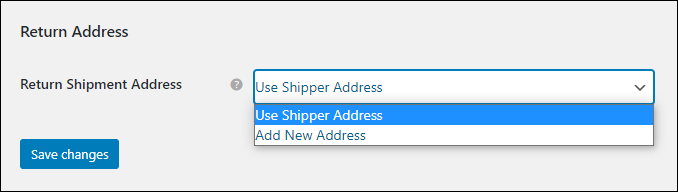
If you have chosen Use Shipper Address, it will choose the default shipper address you have set on WooCommerce. If you have chosen Add New Address, you can enter a custom address to which the items need to be returned. Check the screenshot:
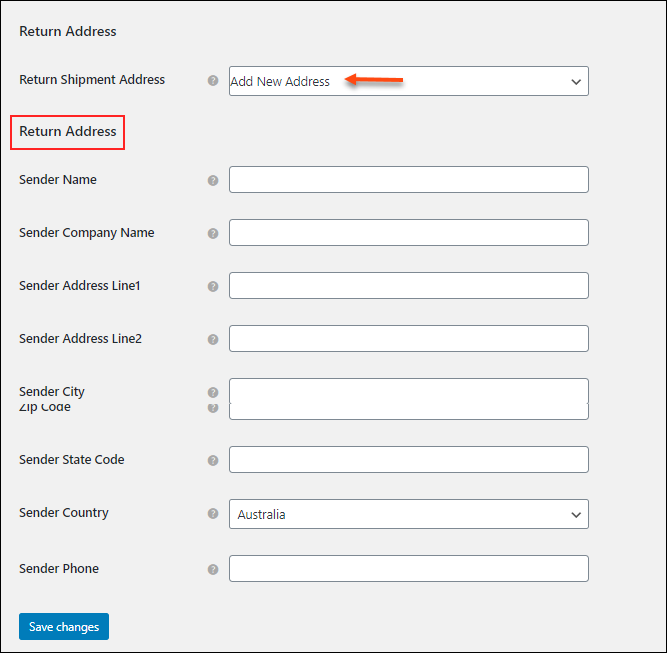
You can enter the name, company name, address, city, email address, zip code, state code, country, and phone number.
Click Save Changes after setting up the above features accurately.
Printing Return Labels
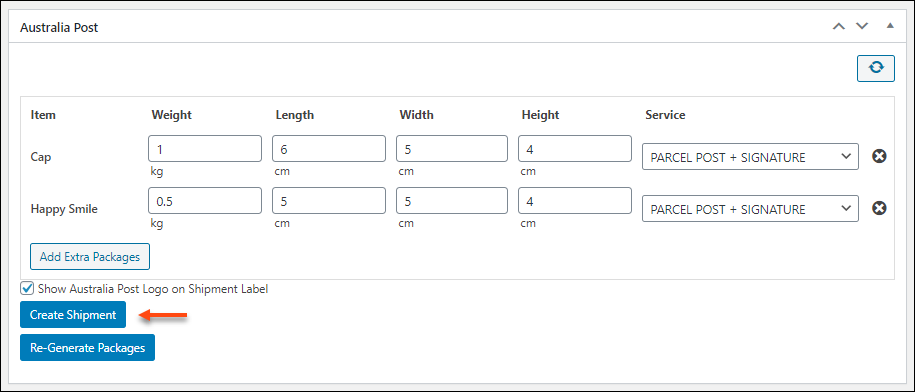
To print the return label, go to the WooCommerce Orders page > click the required order. The return label option will only appear once the shipment is created for an order.
Hence, click Generate Packages > Create Shipment.
You can also refer to the Label & Tracking section of the parent plugin to know how to create shipments and set up print labels.
After clicking Create Shipment, go to the Australia Post Return Label section. Check the screenshot:
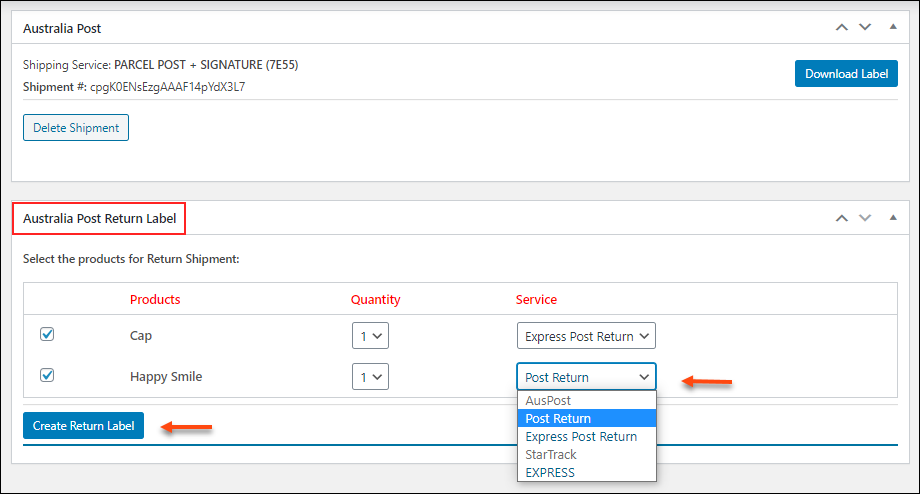
Select the products for returning the shipment, the quantity, and choose the shipping service of Australia Post to return the items.
You can choose the service of Australia Post or StarTrack accordingly. The Post Return and Express Post Return will be available by default for all the return shipment.
Note: The label will be printed for each item separately. Even though the customer needs to return more than one item of the same product, it will print separate return labels for each item individually.
Click Create Return Label.
You can see the generated labels of each item individually. Along with that, the tracking link will be returned from Australia Post. It will redirect to the tracking page of Australia Post. Check the screenshot:
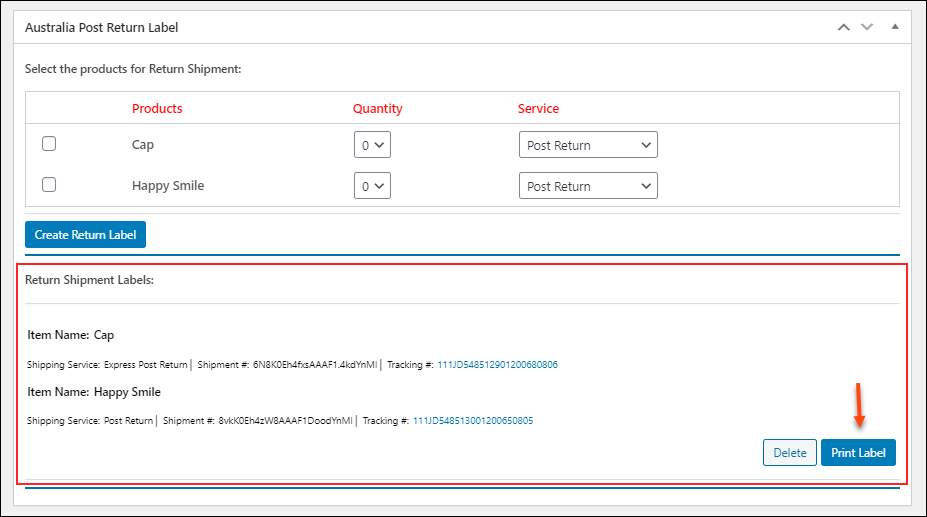
To print the labels, click Print Label.
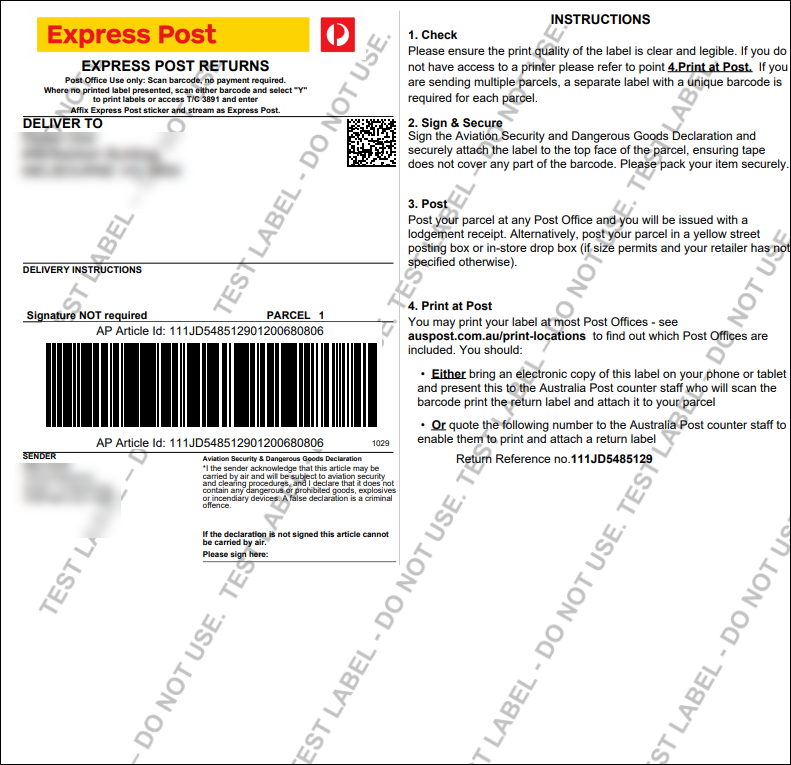
The printed label will look as in the below screenshots.
Check the screenshot of the return label of the product for which I have chosen Express Post Return service:
Check the screenshot of the return label of the product for which I have chosen the Post Return service:
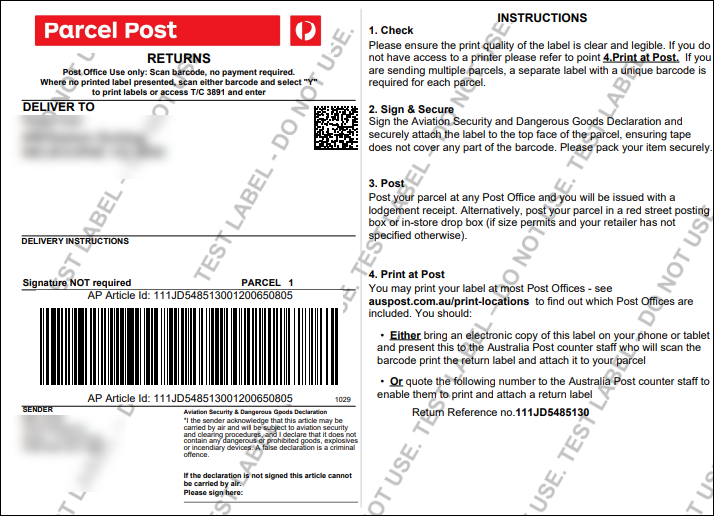
This is how you can print Australia Post return labels of items.
To explore more details about the add-on, go check out ELEX WooCommerce Australia Post Return Label Add-On.
Or check out the main product – ELEX WooCommerce Australia Post Shipping Plugin with Print Label & Tracking and its product documentation for a better understanding of the plugin.
You can also check out other WooCommerce and WordPress plugins in ELEX.