Are you an online business owner and want to convert all your potential customers into regular satisfied customers? If that is the case, then your customers need to be given the option of being able to request a quote on the products they are interested in and negotiate on the prices, if needed. This is where the ‘Request a Quote’ option on your WooCommerce Store comes into play. It is a complete quotation system that enables your customers to add multiple products to the quote basket and then request a quote.
What is a Request a Quote Plugin?
Compared to a normal eCommerce website, WooCommerce can be used as a ‘quoting engine’ with the help of a Request a Quote plugin. The ‘Request a Quote’ feature that will be added to WooCommerce enables your customers to have a seamless experience of buying. They would be in control of their buying in terms of being able to select the products and offer their price in the submitted quote. It can then be negotiated before they place the final order. Your customers can select and add specific products to the quote basket, which is similar to the ‘Add to Cart’ button and request for a quote for single, or multiple products and even variable products.
The purpose of the ‘Request a Quote’ plugin is to not only empower you as the business owner but also your customers. As the business owner, you will have the leverage of controlling the prices of your products, while your customers will have the option of negotiating the price of the products they choose and place in the quote basket before placing their orders. So it is a win-win situation for both you and your customer.
Highlights of the WooCommerce ‘Request a Quote’ Feature:
- It is a complete quotation management system
- Compatible with WooCommerce Product Add-ons and page builder plugins
- ‘Add to Quote’ can be displayed on selected products
- Quote button for selected user roles and also guests can be shown
- Multiple rules can be created to show the quote button for select user roles, products, and categories
- ‘Add to Cart’ button can be replaced with a new ‘Quote’ or custom button and link
- Quote button text can be customized
- Price can be hidden and /or replaced with custom text
- Multiple products can be added to the quote basket
- Can have the option of a mini quote basket for the customers, similar to a mini cart
- Multiple field types, such as text, email, number, dropdown, checkbox, etc., can be included
- All the fields in the field can be made either mandatory or optional
- Admin and customers can receive automatic email notifications
- Can assign quote status, such as pending, cancelled, in process, etc.
- Quotes can be created backend and the same emailed to customers
- Customers can be notified via email in case of status change
- Prices can be edited and quotes can be converted into orders
- Customers can offer their price for the selected products
- Standard price of products can be shown in the quote basket, my account, and quote emails
- Quote button can be disabled in case of specific product variation
- Email templates, quote basket, and quote detail page can be customized

How to enable a ‘Request a Quote’ plugin?
Listed below are the steps that need to be followed to get you started on the ELEXtensions ‘Request a Quote’ plugin.
Download the plugin
- The first step is to log into your ELEX account.
- Once logged in, move to the ‘profile icon’ located in the top right corner of the screen and click on the Dashboard.
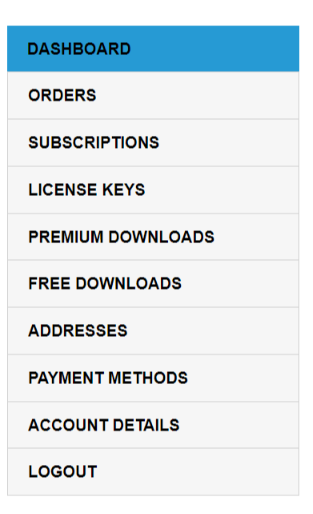
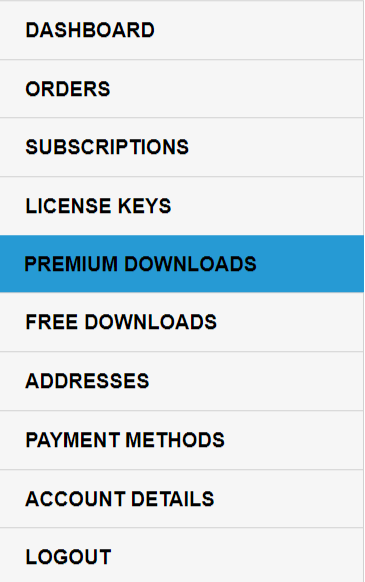
- The next step is to go to the PREMIUM DOWNLOADS section, where your purchased plugin would be available. To download the plugin zip file, click on the Download link.
Install the plugin
- The first step to install the plugin is to log in to your WordPress/WooCommerce website with admin credentials.
- Before installing the Premium version of the plugin, ensure the Basic version is deactivated and removed. The best part is that all the previous data, including plugin settings, will be retained.
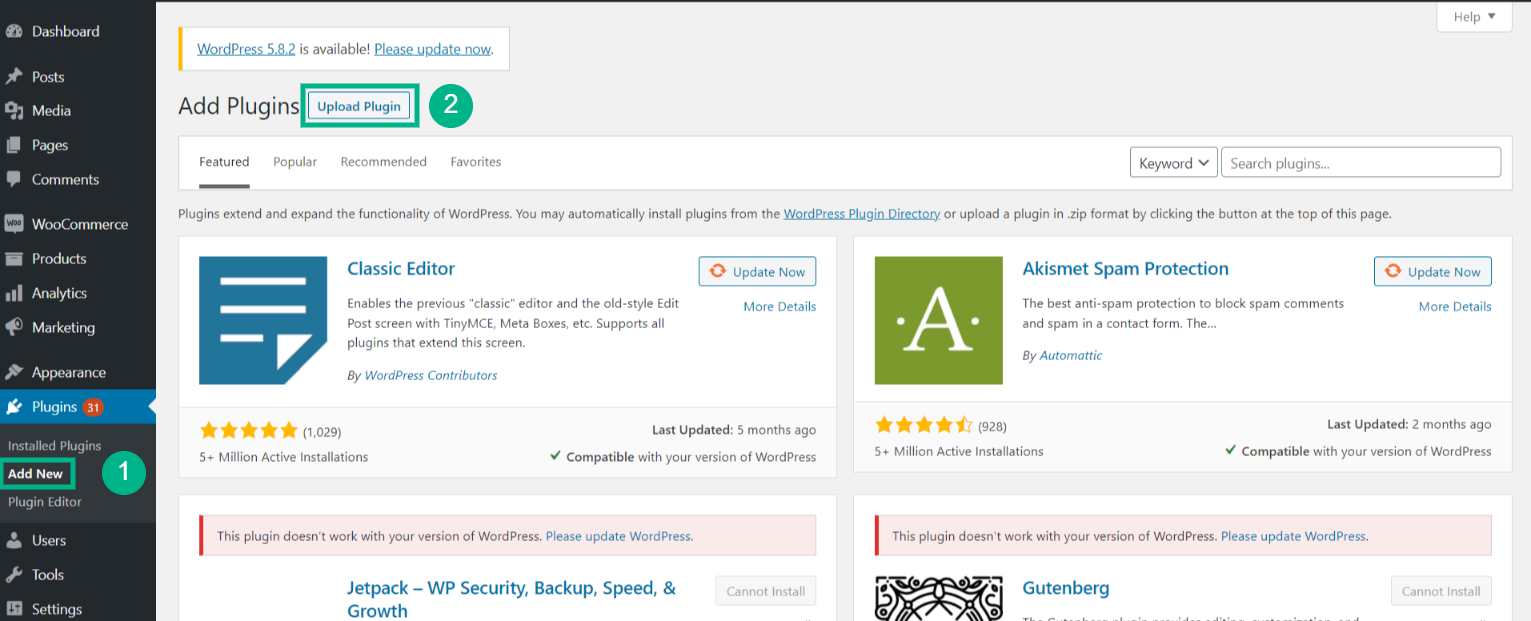
- The next step is to go to Plugins>Add New under the WordPress sidebar menu on your website’s admin page.
- Once the new plugin is added, click the Upload Plugin button, which is located on top of the dashboard.
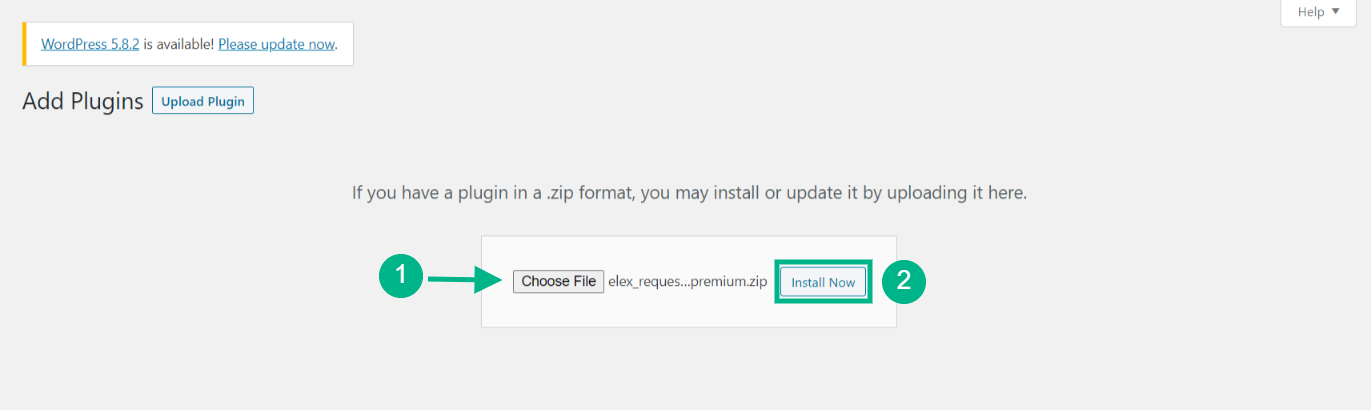
- After choosing the new downloaded plugin file, click Install Now.
- Once the ‘Install Now’ button is clicked, the zip file will be unpacked and installed on your WordPress site.
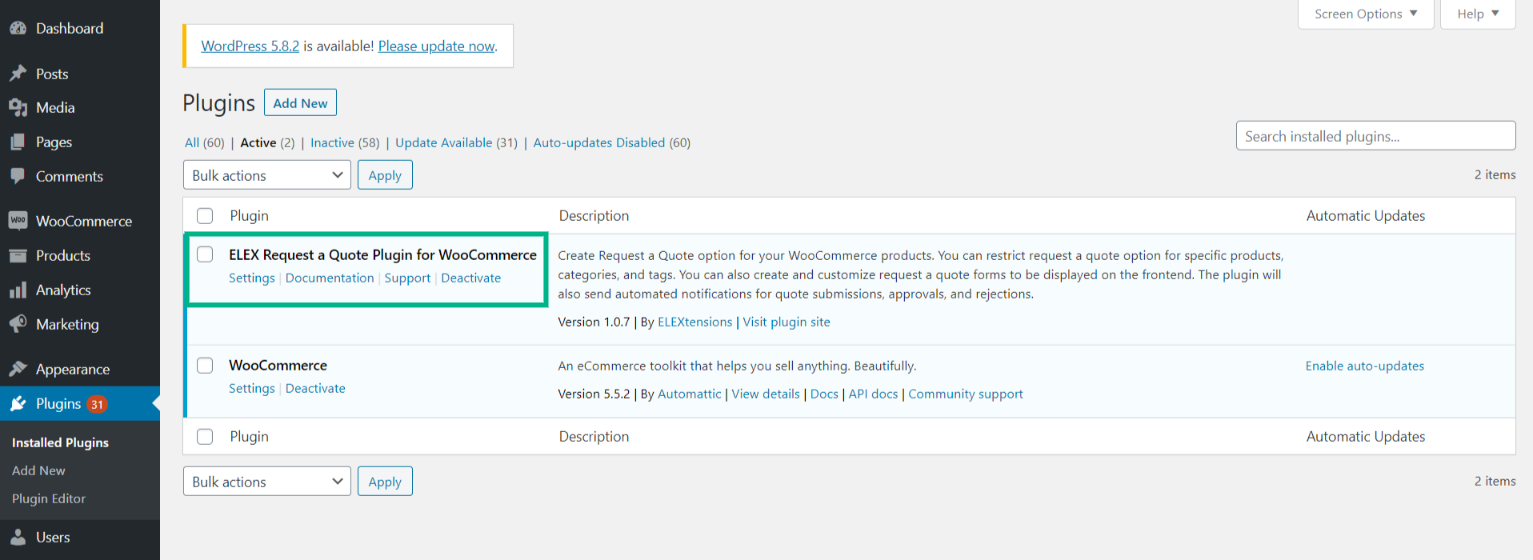
- Click the Activate button to activate the plugin. The plugin can be seen in the activated plugin list.
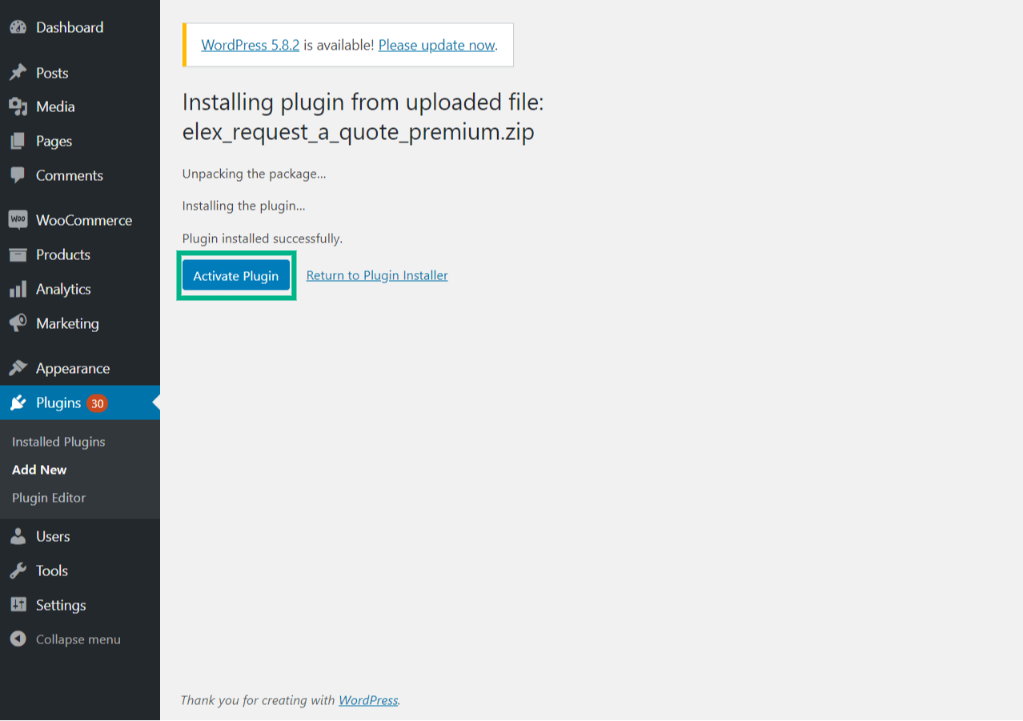
Note: The above activation is the general WordPress plugin activation step. It is not related to activating the plugin with your API key, which needs to be done manually (explained in the next step).
Activate the Plugin with API Key
As mentioned in the above step, the ‘Request a Quote’ plugin works well on WordPress, however, activating it with an API key helps receive future plugin updates.
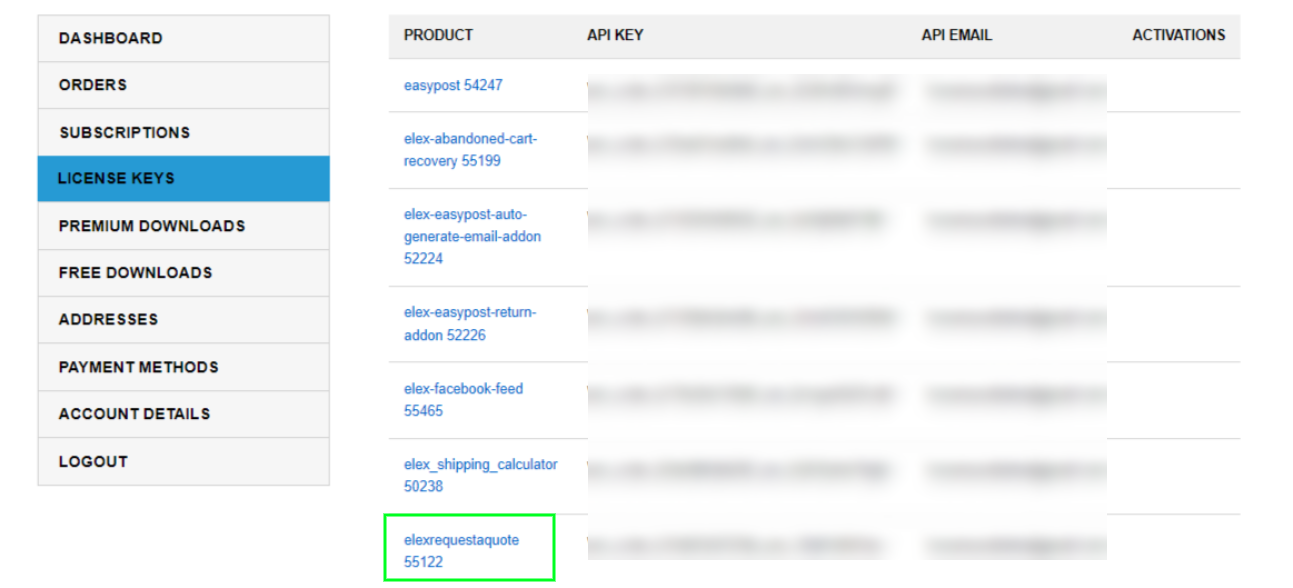
- The first step is to log in to your ELEX account and go to account settings. Click on API Keys to view the API keys. Along with API keys, you can also view the email address used for purchasing the plugin and the number of licenses activated (from the total licenses purchased).
- In order to activate the plugin using the API key and email address, the first step is to go to respective plugin settings (the plugin settings depend on the plugin purchased).
- Your plugin settings can be found under the WooCommerce>Settings section (based on the Address Validation plugin).
- The next step is to enter the API key and email address in the “License Activation” box and click on the Activate button. This would activate the plugin.
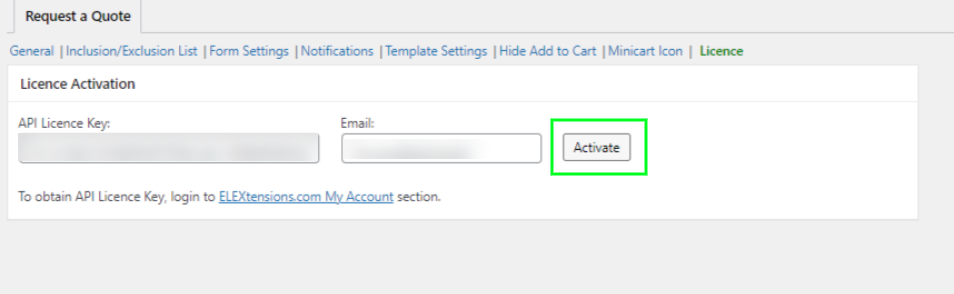
The ‘Request a Quote’ plugin is now all set and activated. You will receive regular updates and premium support for the duration of the license. You can view/manage your API key by checking in the API KEYS section of your ELEX account. The activated website URL and activation details can be seen once the key is activated on your site.
Now let’s see how to configure the ‘Request a Quote’ button.
Go to the Plugin’s Settings
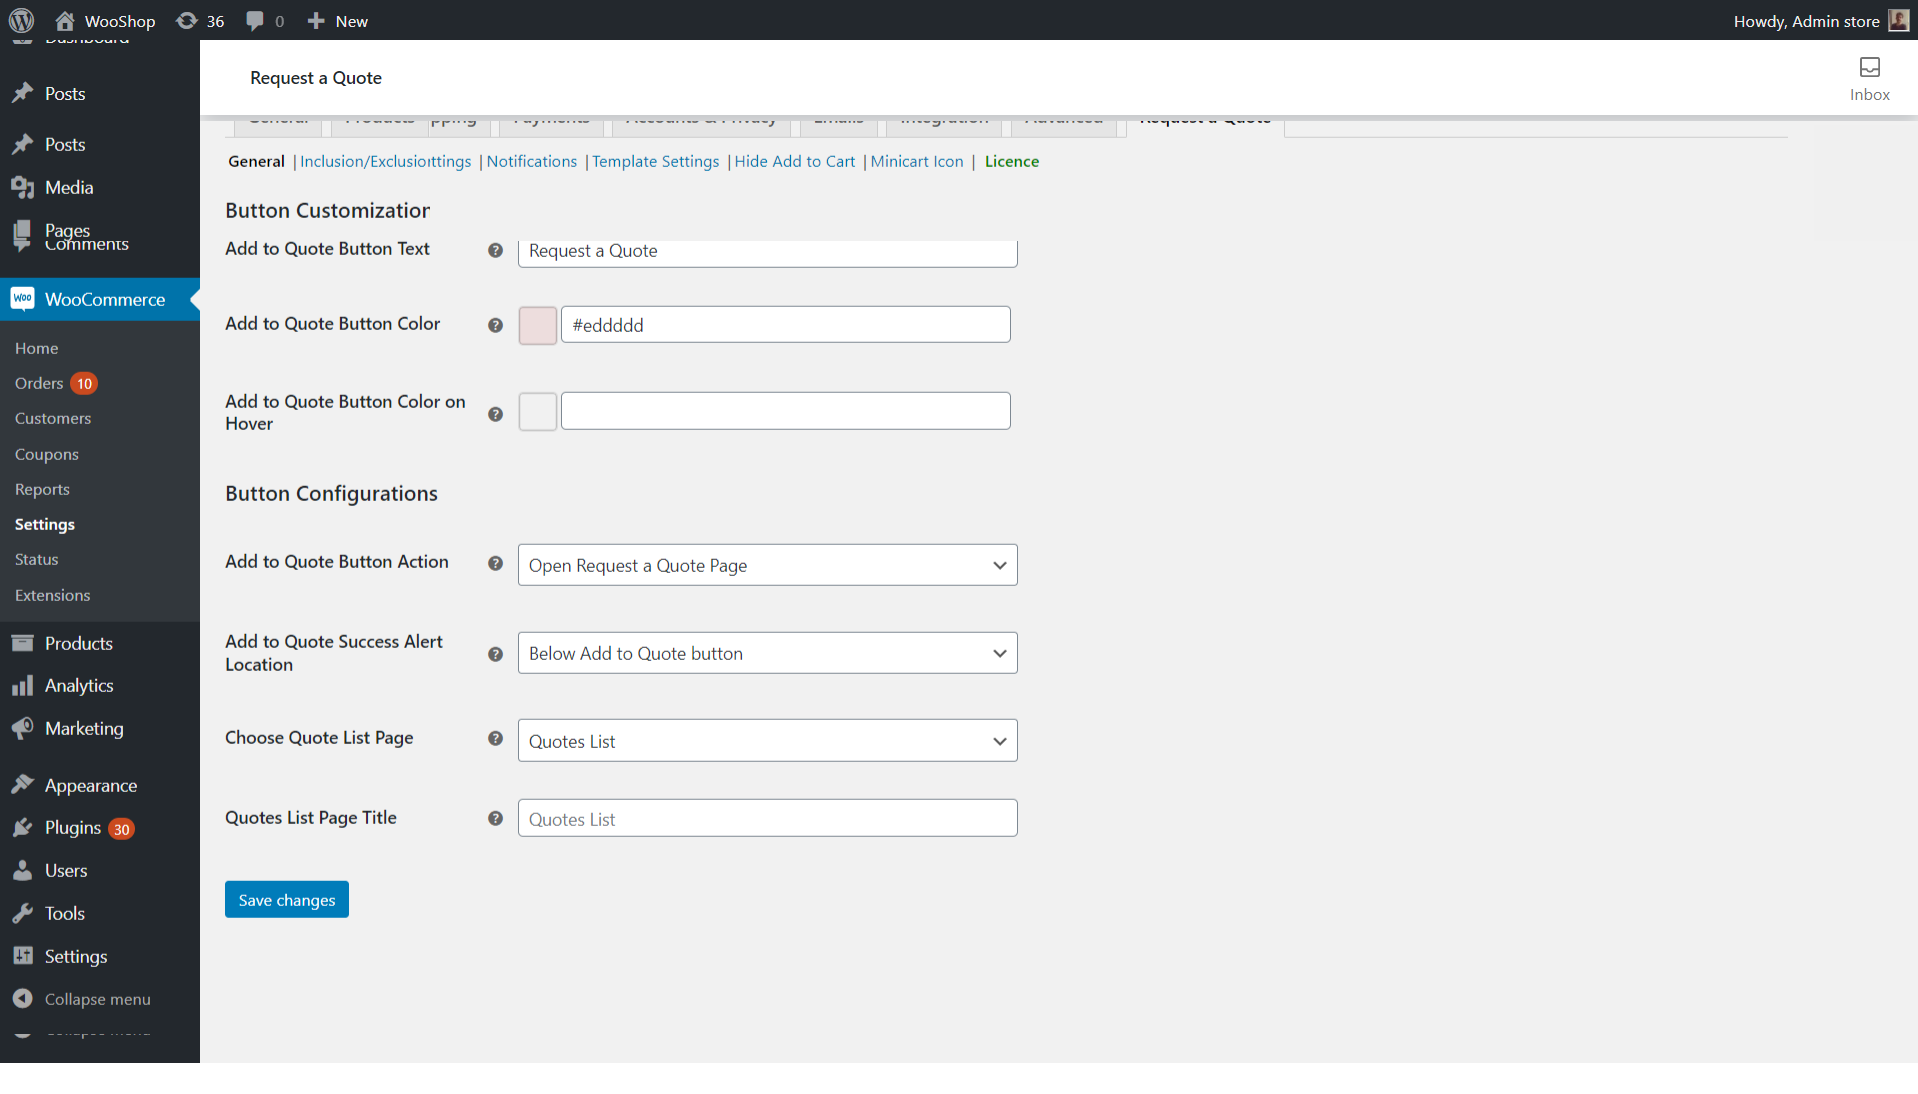
Once the plugin is installed, go to the plugin’s settings, wherein you can define how you want the ‘Request a Quote’ button to function for your store.
The following portrays the settings section for the ‘Request a Quote’ button.
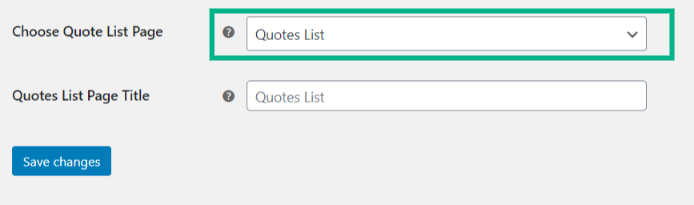
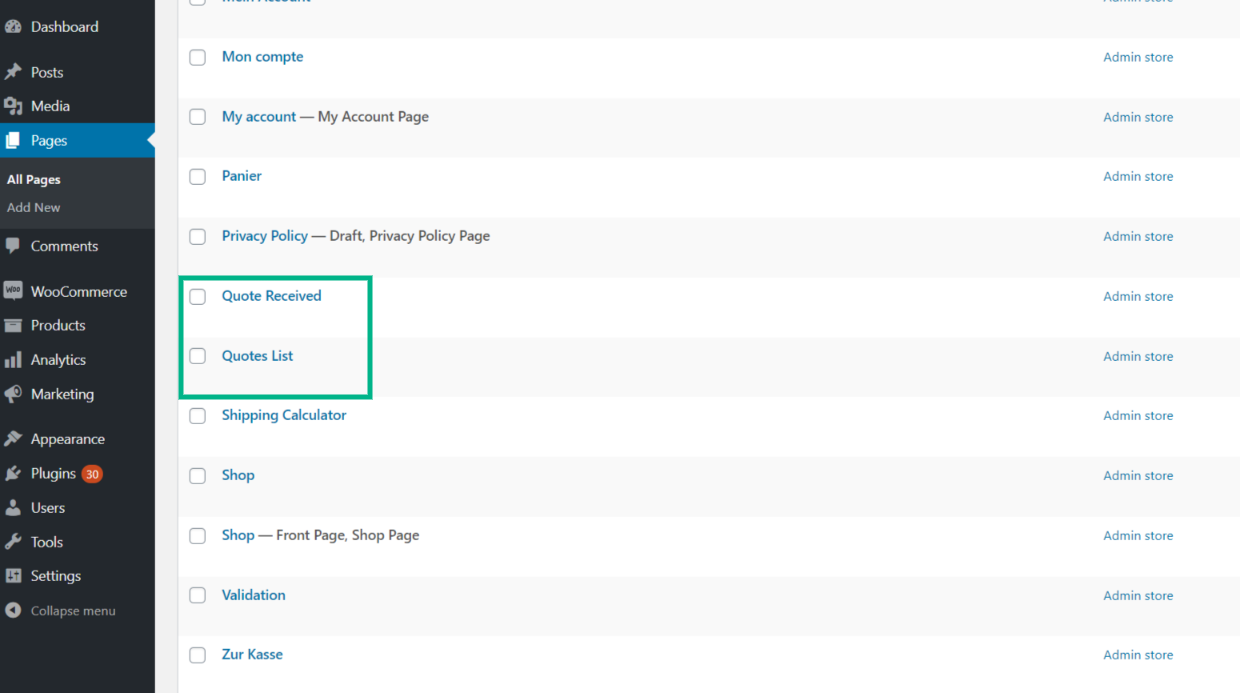
 Select a Page to Apply the ‘Request a Quote’ Feature
The plugin comes with the option of creating your own custom page, wherein the shortcode is provided that can be copied and pasted on the custom page. ‘Request a Quote’ page is similar to that of a shopping cart. The only contrast is that it provides a form that the customers can submit asking for a quote for the products they have selected.
Include and Exclude products
The following settings panel, under Inclusion/Exclusion list, provides you with features to enable or disable the ‘Request a Quote’ button for specific products and pages.

Set up the ‘Add to Quote’ Form
You can add the fields to be present in the form for the customers to fill up for requesting a quote. By default, there will be first name, last name, email, phone, and message. You can set each field to be ‘required’ by enabling it. If you do not enable it, it will be displayed as ‘optional’. And also there is an option to remove the fields.
 After filling in all the required fields and adding custom ones if needed, save changes.
Set up the ‘Add to Quote’ notifications
It is extremely crucial to set notifications, as it sends an email or SMS to the admin stating that a customer has requested a quote for a certain product and intern help provide swift responses to the customer and help boost sales and customer loyalty.
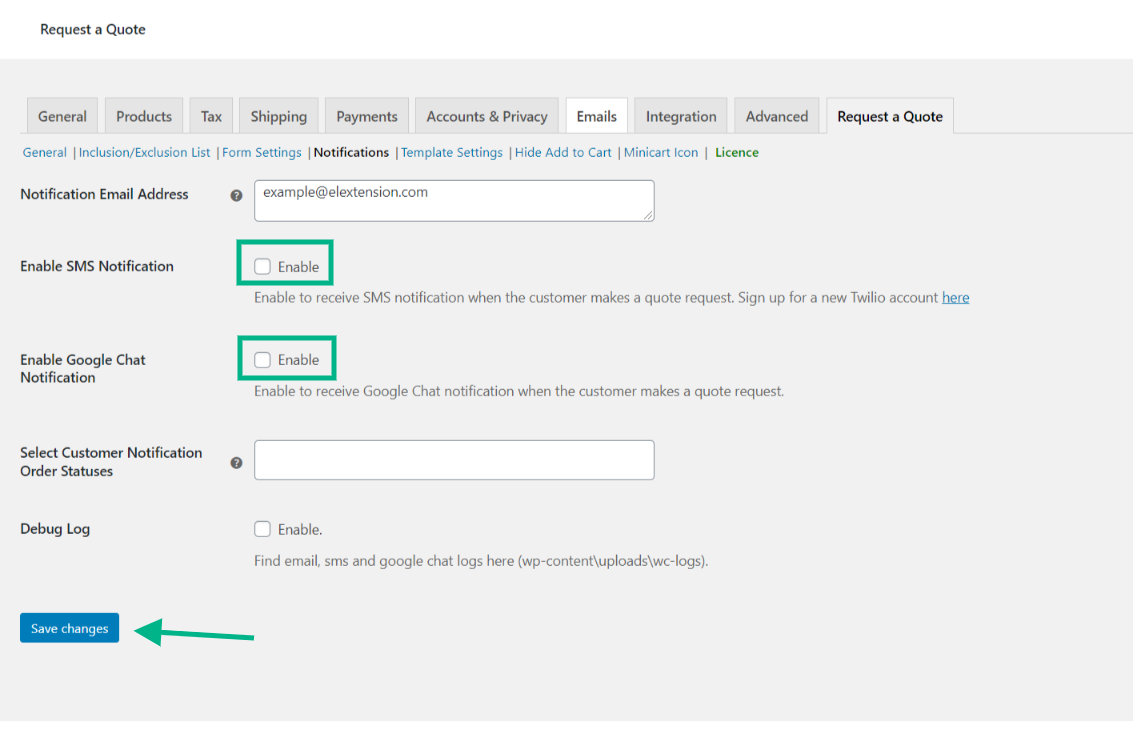
The default email ID will be that of the admins. If you want to add multiple email ID’s, you can do so by adding them in the Email Address box and separate each email ID by a comma.
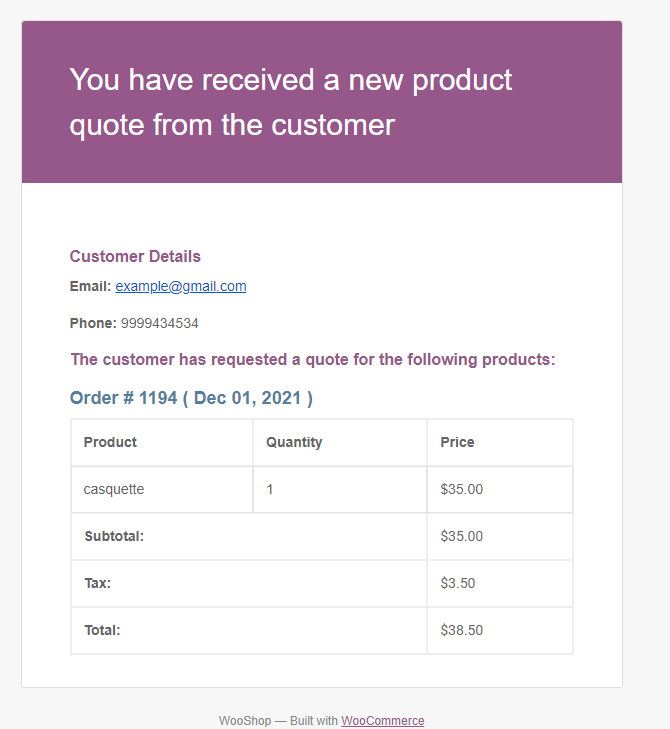
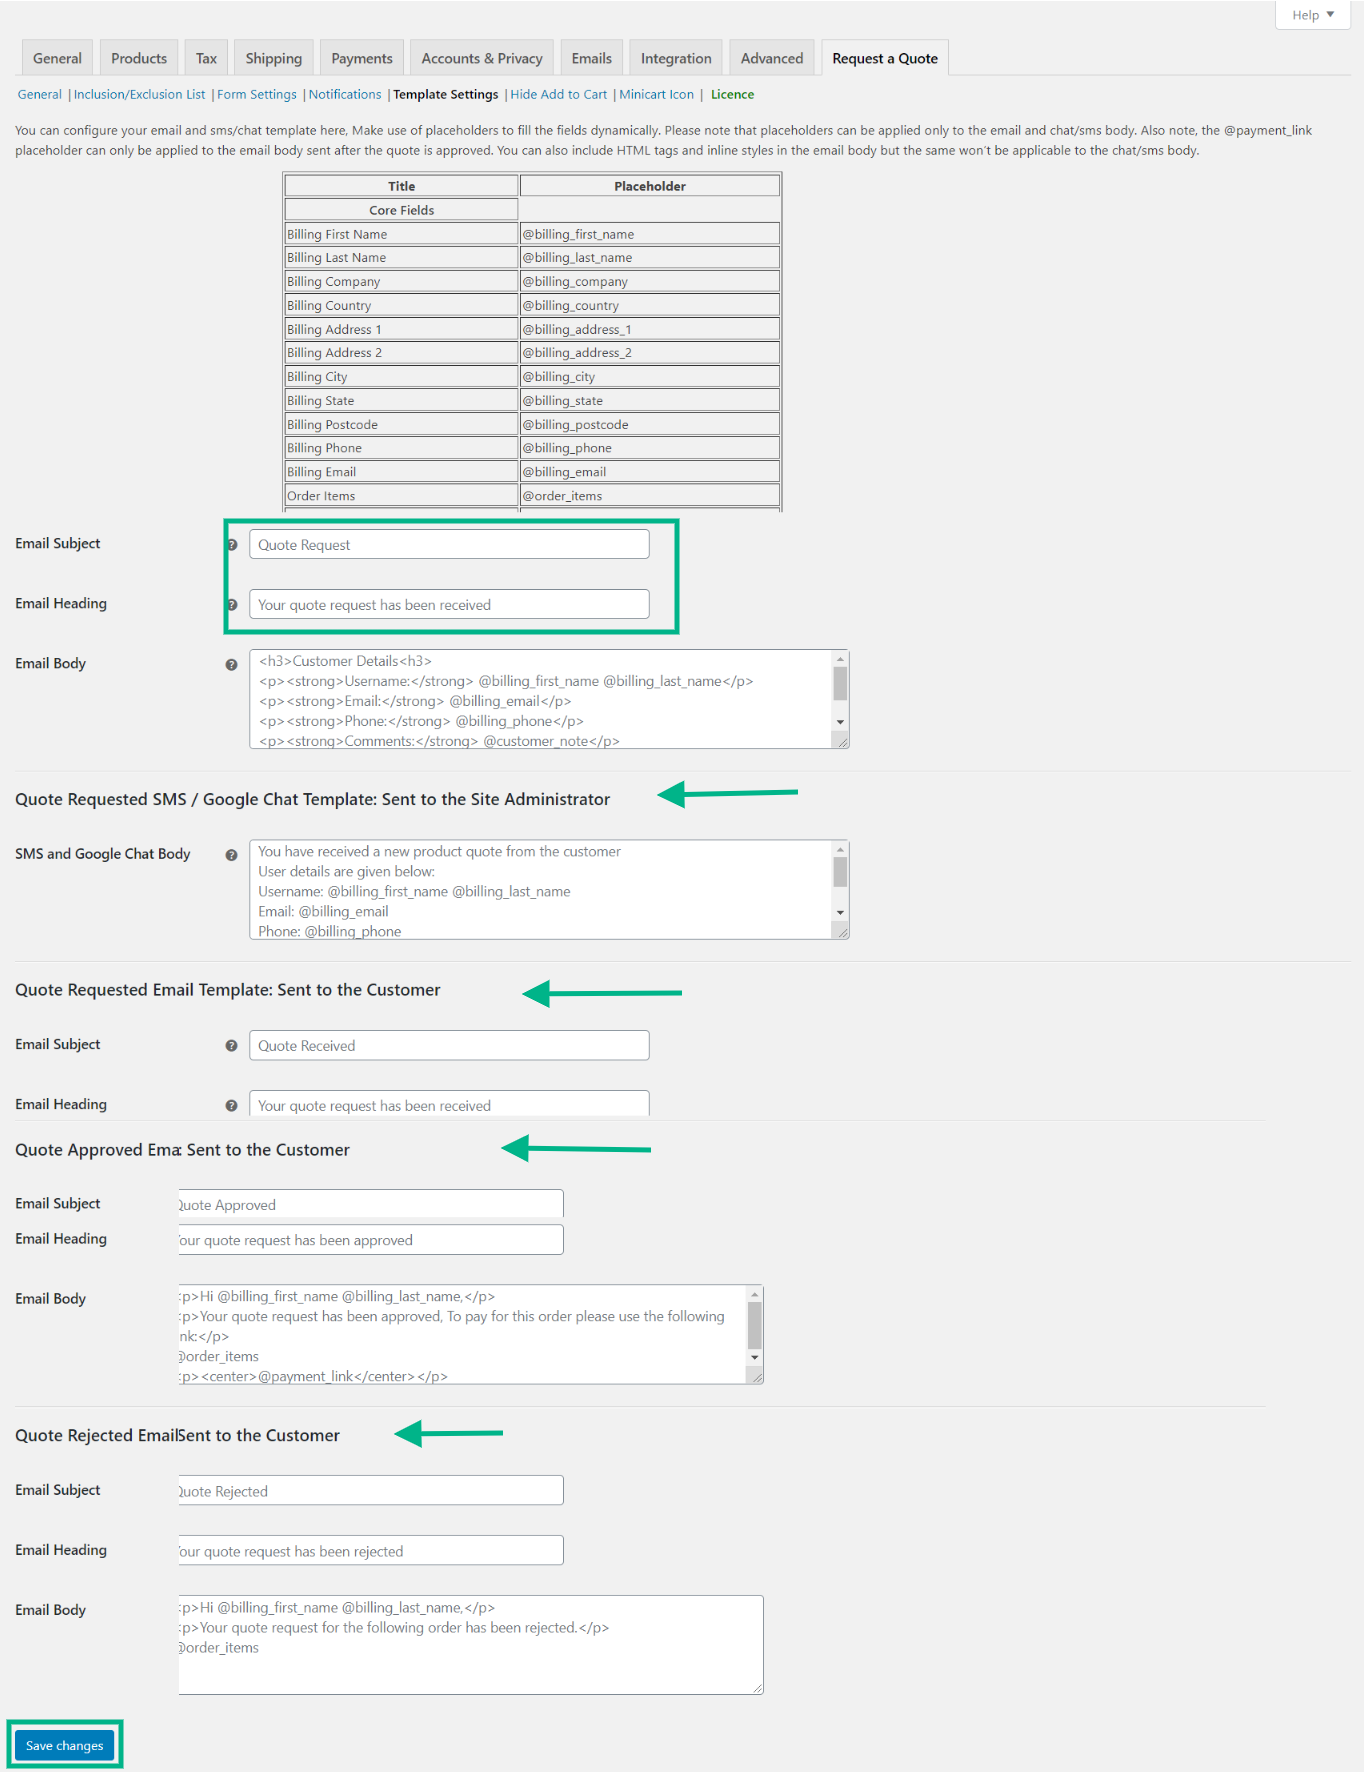
Set up Template Settings
The admin has the choice of customizing the template for your email, SMS, and Google chat notifications sent to the admin. You can change and customize the subject, heading, email body, chat body, and so on according to the requirements.
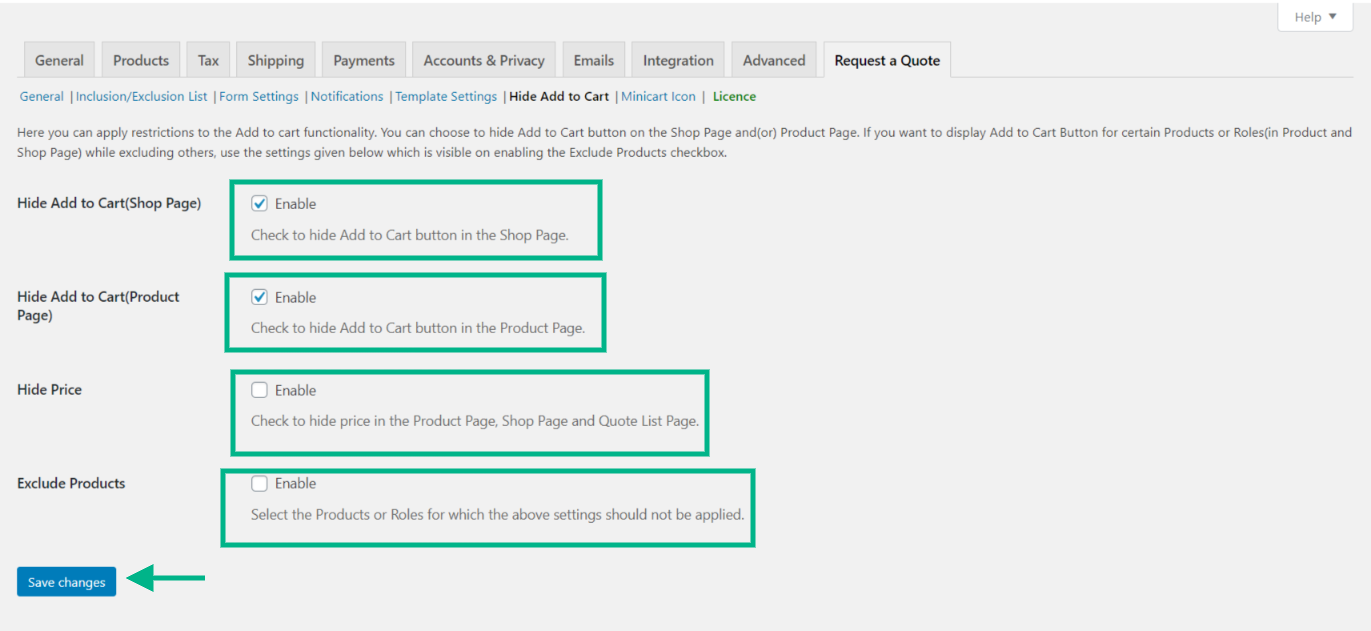
Hide Add to Cart
The ELEXtensions ‘Request a Quote’ plugin allows you to hide the ‘Add to Cart’ button on the shop page or product pages. You can display the ‘Add to Cart’ button for specific products based on their category, name, and tags and hide the ‘Add to Cart’ button for other products on the store page. If you want to include specific user roles for the availability of ‘Add to Cart’, select the user roles accordingly.
Enable AJAX Cart
By enabling this feature, you can display a quote cart icon on the right side of the page that shows the updated list of quotes that are added to the cart, when the cursor hovers over the icon.

Further Reading:
Export your WooCommerce Product Feed with the help of these Google Shopping Plugins
A Complete Guide to Add WooCommerce Catalog Feed to Facebook

