In this article, we will go over the steps involved in configuring DHL Express Live Shipping Rates for WooCommerce. We will use the ELEX WooCommerce DHL Express / eCommerce / Paket Shipping Plugin with Print Label to integrate DHL shipping services into WooCommerce.
Introduction:
When it comes to who you ship with, as a WooCommerce store owner, you have lots of options. But you’ll be hardpressed to find a better, more cost-effective international shipping solution than DHL Express. With DHL Express you can ship your products around the world. Moreover, with average transit times of 1-3 days, DHL Express is one of the fastest and reliable international door-to-door delivery services. Additionally, you can ship everything from a document to any product up to 600lbs.
Prerequisites:
To enable and configure DHL Express Live Shipping rates for WooCommerce, you will need the following:
1. ELEX WooCommerce DHL Express / eCommerce / Paket Shipping Plugin with Print Label to integrate DHL WooCommerce Shipping. Being an Official DHL Partner, the plugin lets you
- Access real-time rates from DHL Express, Paket and eCommerce services.
- Print WooCommmerce DHL shipping and return labels.
- Print Commercial invoices and Archive Air Waybills.
- Track shipments, Enable Estimated Shipping Dates,
- Pack items into custom boxes.
- Configure the price of the services using the Price Adjustment fields.
- Enable Shipping Insurance
- Generate bulk shipments and much more!
2. DHL Credentials: You will need DHL account credentials for the plugin to access DHL servers and data. To get these details you will need to create a DHL account and contact your DHL account manager to get Site ID and Site Password details.
Setting up DHL Express Live Shipping Rates for WooCommerce:
Step 1: Install and activate the plugin.
Step 2: Access the plugin settings from Plugins > Installed Plugins > DHL Express / eCommerce / Paket Shipping plugin with Print Label >DHL Express. Next in the General Settings Tab, paste the Account Number, Site ID and Site Password.
Step 3: Choose all the DHL services you wish to enable or disable. Importantly, make sure Real-time rates and Shipping Label are enabled.
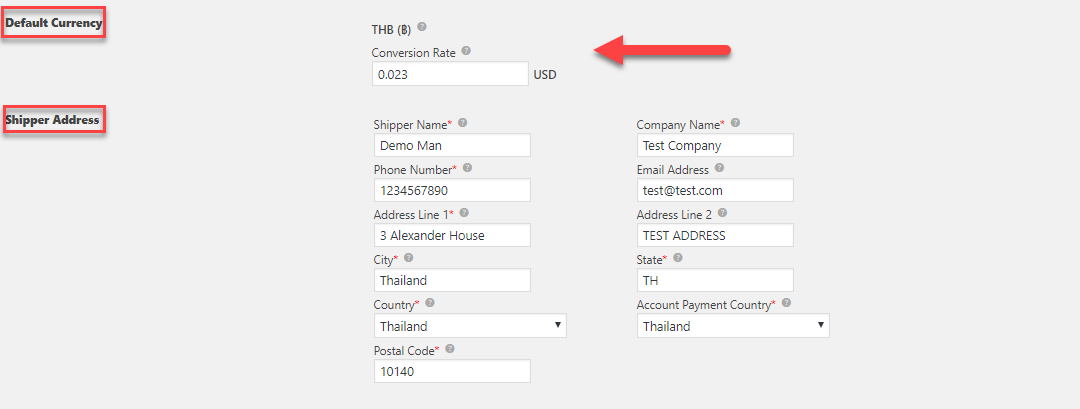
Step 4: In the General Settings tab itself, you need to enter the Shipper Address that will be used in DHL Express live shipping rate calculations as well as in setting the Default Currency and the conversion rate to USD.
Step 5: In the Rates & Services tab, choose which DHL services you wish to show or hide from your WooCommerce customers. Enable Show Delivery Time to display estimated delivery dates for DHL shipping options to customers at checkout. What’s more, you can also choose to show or hide DHL Account Rates.
Step 6: Using the Method Config section, you can give a prefix for shipping options displayed on the checkout page. Additionally, you can set the countries you wish to offer these options in. If you have enabled Shipping Insurance in step 3, you can configure the countries to which you wish to offer insurance using the Insurance for Specific Countries field.
Step 7: Fill out the Working Days and the Cut-Off time. This data is sent in the API request to DHL servers when an order is placed on your WooCommerce site.
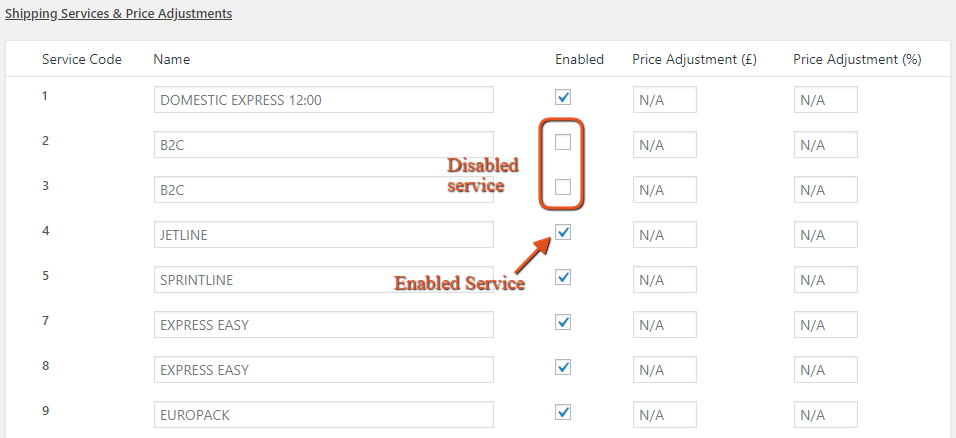
Step 8: In the Rates & Services tab, you can pick and choose which DHL Express services you wish to enable.
Using the Price Adjustment fields you can even increment or decrement the DHL Express Live Shipping Rates for your customers. 
Setting Up WooCommerce DHL Shipping Labels:
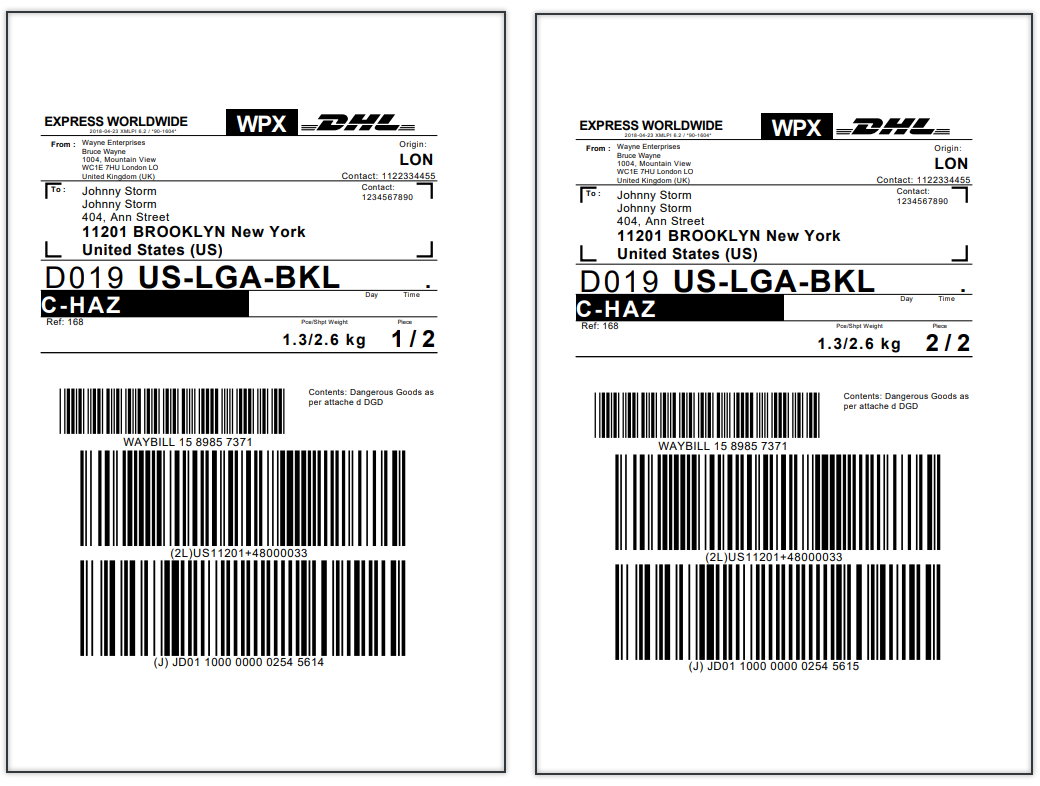
Step 1: After enabling DHL Express Live Shipping rates, configure WooCommerce DHL Shipping label generation from the Label & Tracking tab.
Step 2: In the Enable/Disable Section of the Label & Tracking tab, you can even choose to enable PaperLess Trade. More importantly, make sure the Direct Download option is enabled. This will download the generated WooCommerce DHL Shipping label directly onto your machine instead of opening in a new browser.
Step 3: Additionally, the plugin lets you choose the output of the generated label and the size for printing them.
Step 4: Moreover, you can include a company or brand logo on your WooCommerce DHL Shipping label. Use the Company Logo field to upload an image of the logo that will be printed on the label. Additionally, using the Shipping Content field you can include a short description of the package contents for customs.
Step 5: Using this plugin you can even send a request to download Archive Air Waybills for international shipments. Additionally, using the Bulk Shipment fields you can set default DHL Express services for both international and domestic shipments.
Once a customer places an order on your WooCommerce site you will be able to generate WooCommerce DHL shipping labels from the order details section of your Admin Page. 
Conclusion:
This is how you can set up DHL live shipping rates and Offering DHL shipping methods and options to your WooCommerce customers will ultimately result in increased customer satisfaction. The ELEX WooCommerce DHL Express / eCommerce / Paket Shipping Plugin with Print Label features seamless DHL integration into WooCommerce. Configuring WooCommerce DHL shipping options and services using the plugin is extremely simple. You can download the free version of the plugin from here.


