You might see that there is tight competition going on in the eCommerce industry. To keep up in this competition you need to keep an eye on various aspects which are sure to enhance the user experience. Even though there are many things to be considered, address validation is something that you need to look into. Here we present a step-by-step guide for WooCommerce address validation for New Zealand.
WooCommerce Address Validation for New Zealand – A step by Step Guide
Let’s see how you can easily validate the addresses for New Zealand for your WooCommerce store. To get this done, first, you need an ideal WooCommerce address validation plugin. Here we take the example of ELEX WooCommerce Address Validation & Address Autocomplete Plugin.
Step 1: Get the plugin
The very first step is to download the plugin and install it on your WooCommerce store. Learn more about installing and downloading the plugin from ELEX in detail to make it work easily.
Once the plugin is installed then go to WooCommerce > Address Validation & AutoComplete.
Step 2: Enter the API Credentials
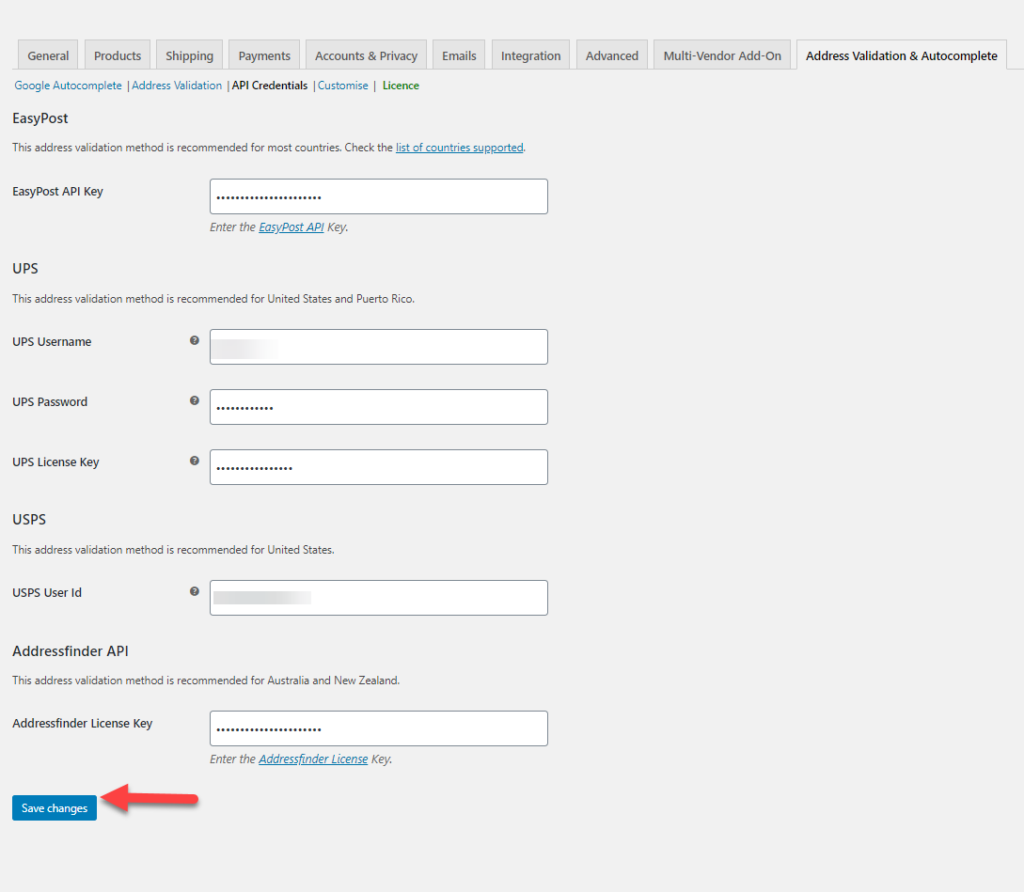
The very next step after installation and activation of the WooCommerce address validation plugin is to provide the API credentials. The API keys do play a vital role when it comes to the working of the plugin.
To do this, go to WooCommerce > Address Validation & AutoComplete > API Credentials.
These are the following API keys you need to obtain for the plugin to function.
- Google Autocomplete API Key
- EasyPost API key
- UPS username, password, and the license key, for UPS
- USPS user ID
- AddressFinder API, if you are using Australia Post services.
Read more about the same in the product documentation.
These API keys need to be obtained from their respective sites and provided here for the plugin to fetch the addresses correctly.
Step 3: Ease the process of address entry using Google Autocomplete
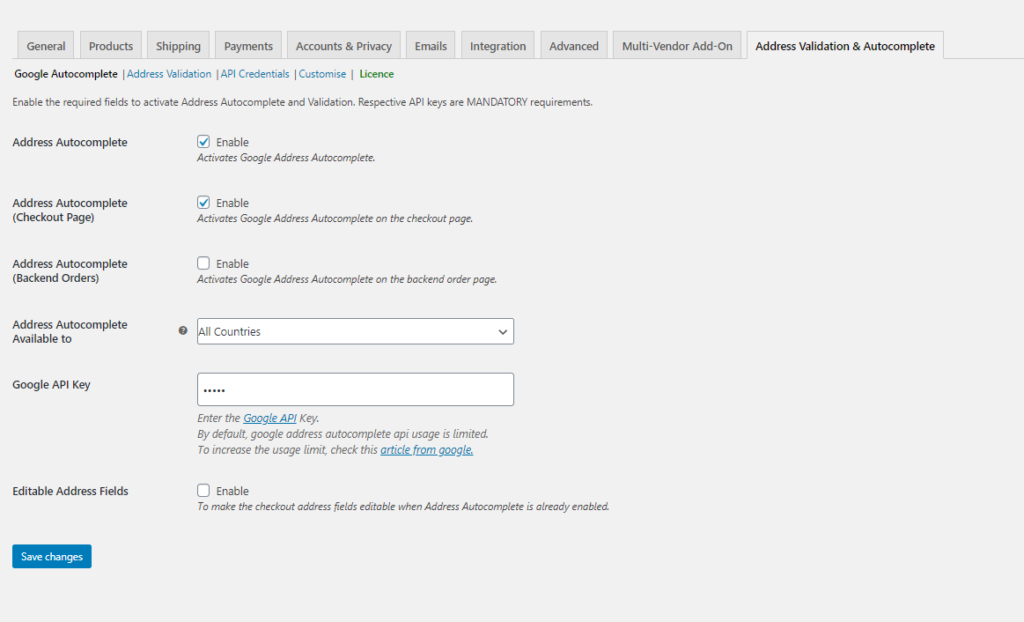
This step is quite important if you want to ease the process of address entry in your store. On providing the Google API, you can simply enter the desired characters and the addresses relating to those letters entered will populate in the address field. To get this working, you need to enable the Address Autocomplete feature in the plugin as shown in the image below.
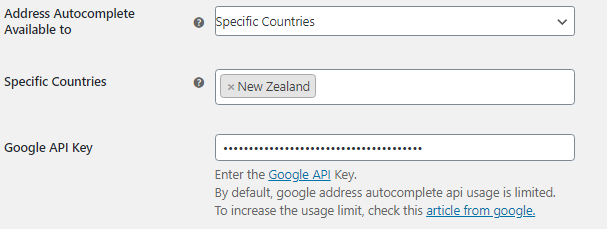
You can also enable the auto-populate feature for your orders created in the backend too other than the checkout page here by enabling the Autocomplete (Checkout Page) and Address Autocomplete (Backend Orders). If you are looking for specific regions then you need to choose the option for Specific countries in the Address Autocomplete Available to else you can choose All countries too. In our case, here we are choosing specific countries and entering New Zealand to validate the addresses for locations specific to New Zealand.
The plugin also uses Google Places AutoComplete to enable the auto-populating of addresses in the fields. To implement it, you need to provide the Google API Key. To make any changes to the address fields, you need to make them editable. For this ensure you check the checkbox for Editable Address Fields.
Step 4: Choose the appropriate API for validation
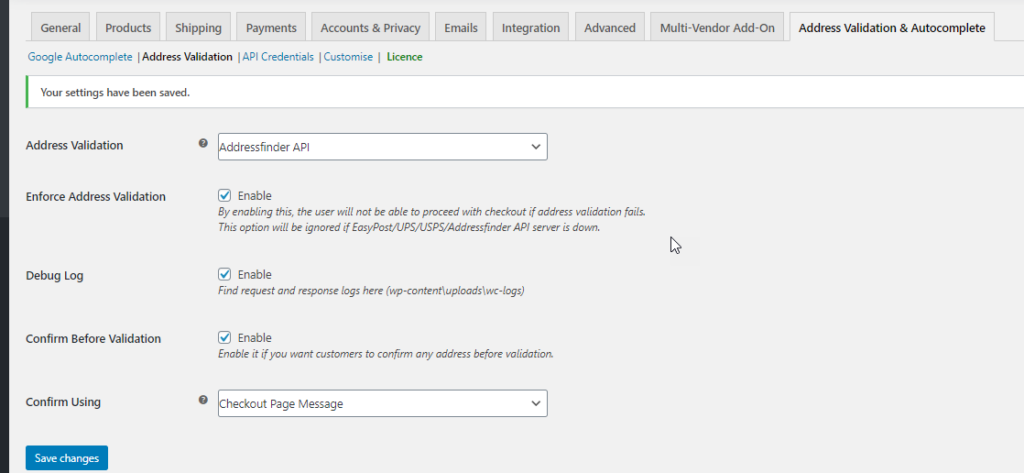
The next thing you need to do is choose the right API for address validation. To validate the addresses from New Zealand you need to choose the AddressFinder API as shown in the image below:
Also, there are other settings that need to be chosen to help the plugin validate the addresses entered in the address fields as shown in the image below:
Enforce Address Validation: Choose this if you want to enforce address validation, so that the customer cannot proceed without validating the addresses entered.
Debug Log: Always better to have your logs ready to analyze if something goes wrong.
Confirm Before Validation: This when enabled, your customers will have to confirm the address they entered before validation.
Confirm Using: Here we use this option to help the customers confirm the addresses before proceeding to the checkout process. Here we have two options as shown below:
One is a pop-up window:
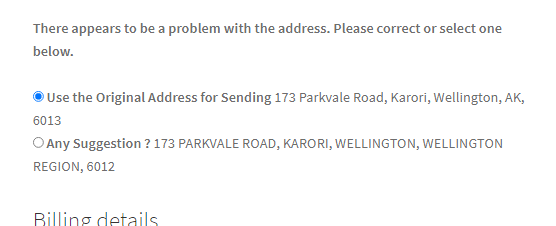
The next option is a message on top of the checkout page as shown in the image below:
In both cases, the addresses are to be validated by the customer before proceeding.
Step 5: Customize the Plugin
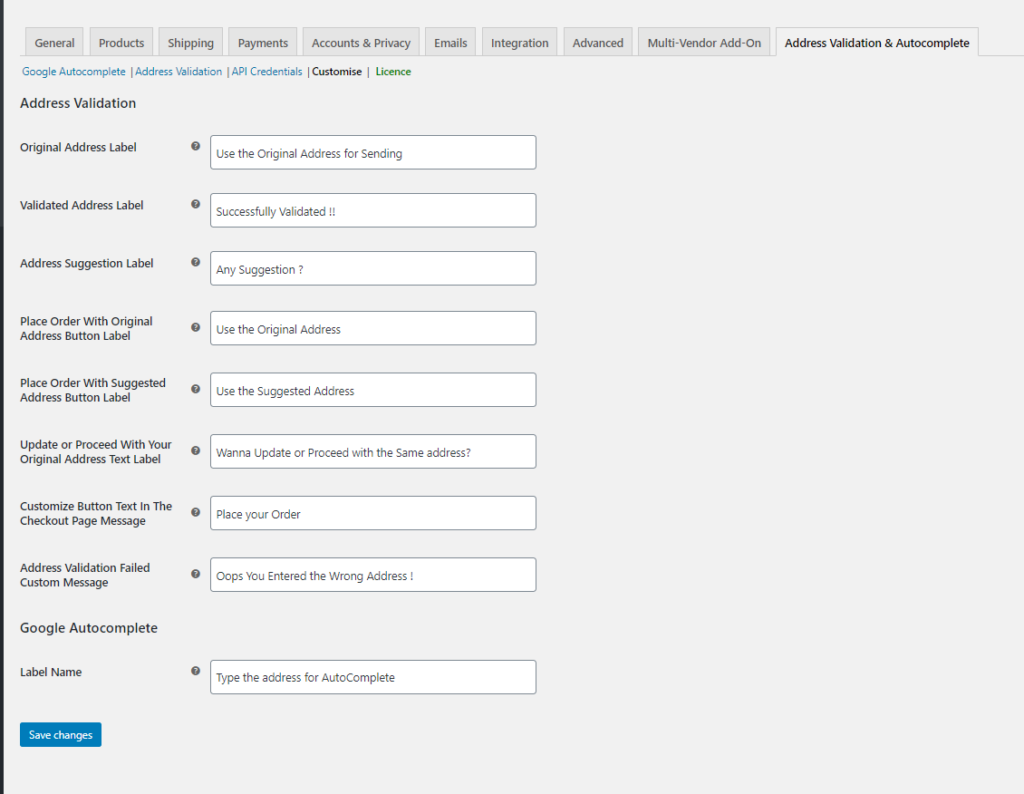
The final step is to customize the plugin as per your need. Every store has a different concept and design and has its own visuals on how they want the store messages or pages to appear to the customers. For better aesthetics, you can always customize the plugin using the following settings as shown in the image below:
WooCommerce > Address Validation > Customize
As Said above,
Once the above settings are baseline, your plugin works fine and helps you validate the addresses entered on your store. Simplify the address entry process and avoid wrong delivery with proper WooCommerce address validation for New Zealand using the ELEX WooCommerce Address Validation & Address Autocomplete Plugin.
Don’t forget to check out the plugin product page for more details.
Further Reading:
- WooCommerce Address Validation for South Africa- A Step-by-Step Guide
- How Address Validation Saves Your Sales?
- How to Set up WooCommerce Address Validation for France?
- How to set up WooCommerce Address Validation for Brazil?
- How to Set Up WooCommerce Address Validation for Canada?
- WooCommerce Address Validation for United States – A Step-by-Step Guide
- Avoid Lost Packages and Unhappy Customers using the Address Validation plugin
- WooCommerce Address Validation for Spain – A Step By Step Guide
- WooCommerce Address Validation for Netherlands – A Step By Step Guide

