Entering the wrong address on the Checkout page of an eCommerce store leads to the wrong delivery. Why cause such inconvenience when you can provide the right address without much difficulty? Are you tired of requesting your customers to enter the right address repeatedly? Here we have the right plugin to validate addresses – ELEX WooCommerce Address Validation & Address Autocomplete Plugin. Let’s see how to set up WooCommerce Address Validation for Canada location.
ELEX WooCommerce Address Validation & Address Autocomplete Plugin
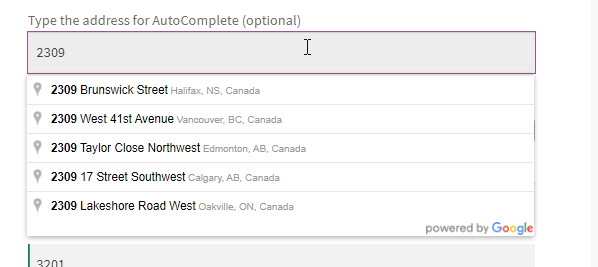
The plugin uses Google Place Autocomplete to enable the auto-populate feature in the address fields whenever a customer enters fragments of the addresses in the corresponding fields. The other features include:
- Using Google AutoComplete, you can auto-populate the addresses when the customers enter their address in the address fields provided. It works even when a fresh order is created in the WooCommerce backend.
- It lets address validation using various address validation APIs from UPS, USPS, EasyPost, and AddressFinder.
- You can choose to validate addresses based on all countries or specific countries too.
- Enforce address validation to avoid incorrect addresses entering into your address database.
- You can get confirmation on the addresses entered from the customer.
- Varied options are available to customize the appearance.
- Compatible with all WordPress themes and plugins.
How to Setup WooCommerce Address Validation for Canada?
If you want to set up WooCommerce address validation for Canada, you need to first customize the plugin to validate the addresses entered from Canada. Firstly, you need to download and install the plugin on your WooCommerce store. Once done you can find the plugin by going to WooCommerce > Address Validation & AutoComplete.
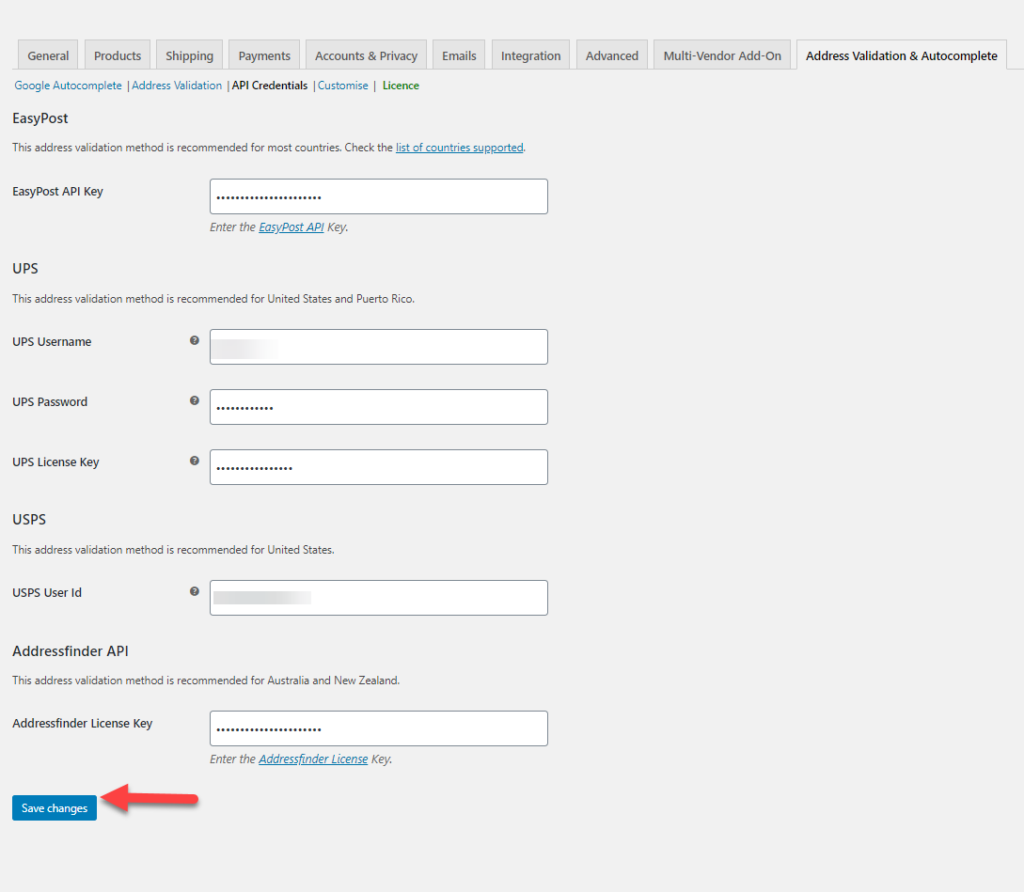
The first data you need to provide is the API keys for address validation to work.
Here you need to provide the necessary API keys that you got from their respective sites and the username and password, etc. These are the following API keys you need to get for the plugin to function without errors.
- Google Autocomplete API Key
- EasyPost API key
- UPS username, password, and the license key, for UPS
- USPS user ID
- AddressFinder API, if you are using Australia Post services.
Read more about the same in the product documentation.
For the Canada region, we can use the EasyPost API key, or UPS, or even USPS. Let’s consider using the EasyPost API here for instance.
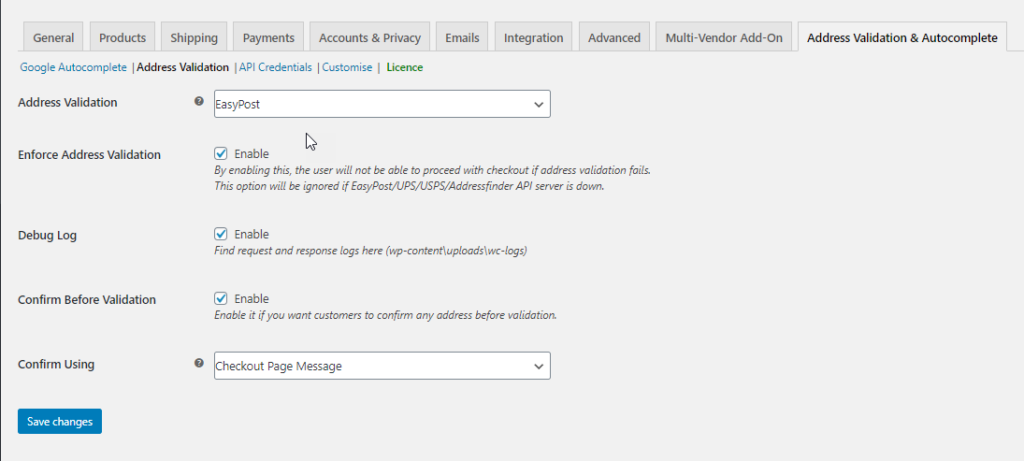
Choose the API to validate the address as per your need
Here you can choose EasyPost API for address validation and also enforce address validation. With enforcing the address validation on the address fields, your customer cannot proceed to checkout without choosing the right address.
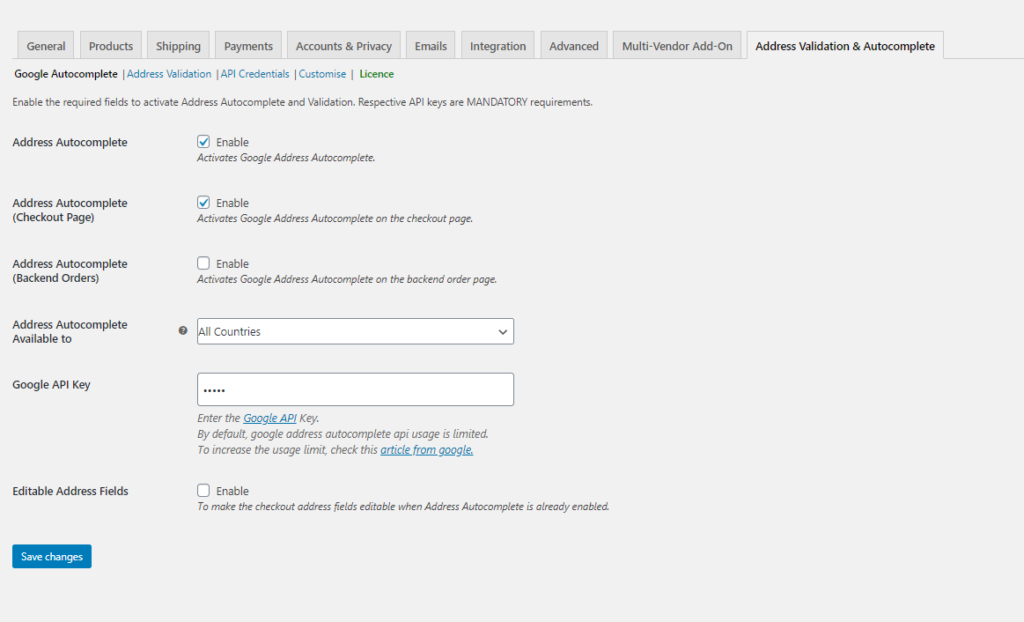
Enable the Address Autocomplete and provide the Google API key
Here, if you need to enable the Google AutoComplete for your addresses then you need to provide the Google API key in the plugin. On this settings page, you can enable the option to autocomplete the addresses, which helps to auto-complete the addresses whenever the customer enters fragments of addresses in the address field. You can also enable the auto-populate feature on the checkout page as well as in the backend. Also, remember to make the address fields editable by enabling the Editable Address Fields.
Also, you can choose either all countries or the specific countries for which you want to validate the address. Here we can choose Canada.
Customize the Plugin for better use
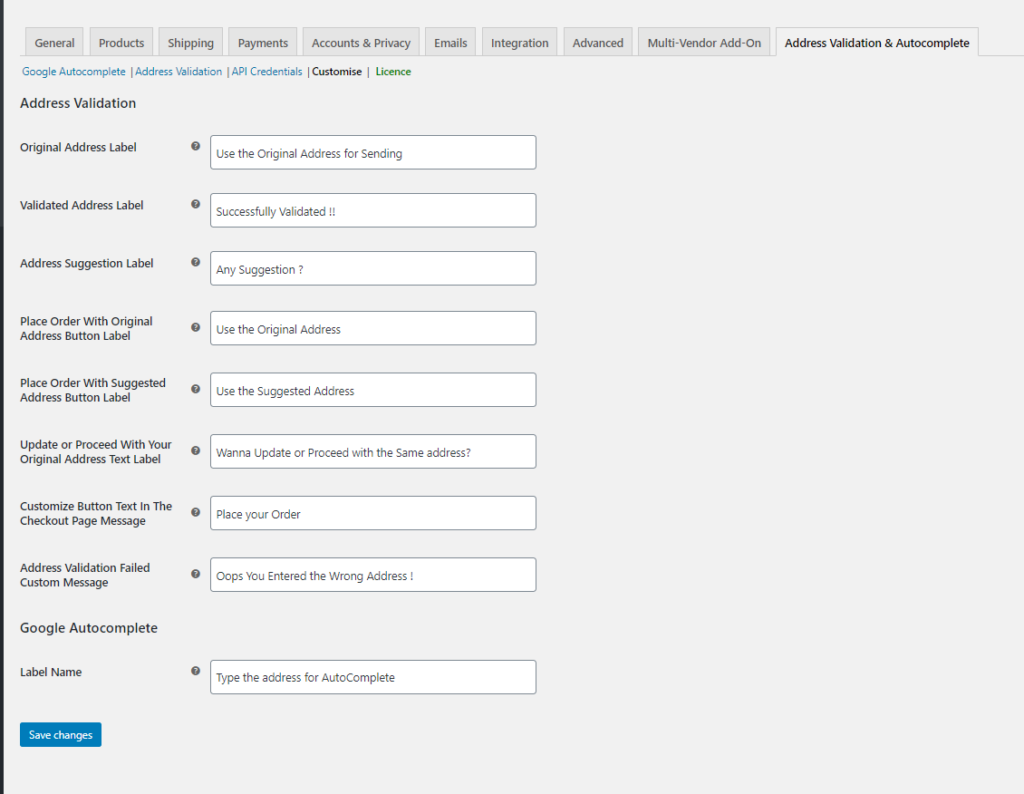
The customization features in the plugin help you customize the plugin for your store’s needs.
Here you can see various options, which can be customized as per your website including the messages that appear as well as the labels.
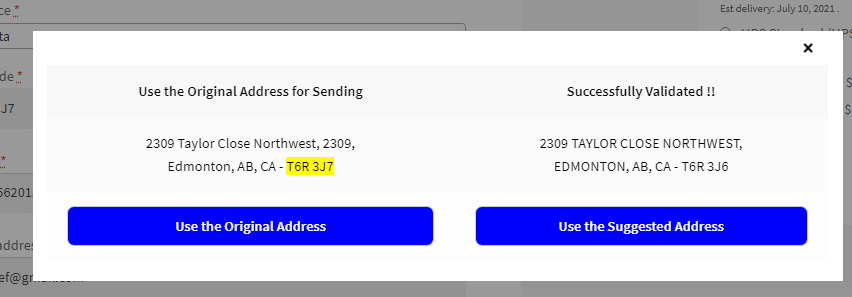
Yet another customization possible is how you want the validation message to appear on the screen. To do this, you can go to the Address Validation section of the plugin.
One option is like a pop up given below:
The next option appears right above the address fields:
Once these messages appear, your customer can choose the right options and then proceed to place the order.
To Conclude,
In this way, you can successfully set up WooCommerce address validation for Canada and avoid any kind of delays or wrong delivery of packages in the location.
Further Reading:

