This article explains the step-by-step process to enable USPS Flat Rate Shipping on WooCommerce. We will be using the ELEX WooCommerce USPS Shipping Plugin with Print Label to integrate and configure USPS Shipping on WooCommerce.
Introduction:
USPS International Flat Rate Shipping is extremely beneficial to WooCommerce owners. This holds especially true for those businesses that operate in Northern America. Flat Rate shipping boxes and envelopes offered by USPS can help reduce shipping costs significantly. Moreover, USPS flat rate shipping comes under Priority Mail, meaning your packages will usually get to your customers in two to three days. Additionally, the USPS shipping boxes and envelopes are free of cost. Meaning you can simply start shipping once you receive your shipping box/envelope.
Advantages of integrating USPS Flat Rate Shipping are:
- Simple Shipping Cost Calculation: There is no need to worry about weighing and calculating shipping costs for each package. As long as your package is under the 70 lb. limit, then you can ship it with USPS flat rate shipping. [ Compare the Shipping Cost & Estimated Delivery Date from Leading Shipping Carriers ]
- USPS Insurance cover included: Instead of having to purchase shipping insurance separately, it’s already taken care of to an extent. Every flat rate package is automatically insured up to $50. If the contents are worth $50 or less, your costs will be covered if lost. They also can include a certificate of mailing for even more peace of mind!
- Drop off at any USPS store: When your package is ready to go, you can drop it off at any USPS office to be shipped.
- Integrated USPS Tracking: Another e-commerce shipping essential, simply enter the package number into USPS’s tracker and you can follow its progress all the way to delivery.
How does flat rate shipping work? 3 steps
Flat rate shipping means the price of shipping is not connected to the weight, shape, or size of the shipped item, hence the term “flat rate.” It’s based on how much you can stuff into the USPS-issued box. E-commerce businesses ship products at a flat rate by following these steps.
1. Get a USPS flat rate box
Instead of packing items in your own box, choose from a variety of flat-rate boxes at your local USPS office. There are small, medium, and large flat rate boxes; And the bigger the box, the higher the price. The maximum allowed weight is 70 pounds.
2. Pack your items and address your box
Pack your items in the USPS flat rate box and address the package.
3. Ship your items
Bring your flat rate box to a USPS office and ship the box using Priority Mail.
How much is USPS flat rate shipping?
The cost of flat rate shipping depends on the size of the box. See the following chart for detailed pricing.
Flat rate box |
Commercial base price | Price at post office | Dimensions |
| Flat Rate Envelope | $6.95 | $7.35 | 12 1/2″ x 9 1/2″ |
| Small Flat Rate Box | $7.50 | $7.90 | 8 11/16″ x 5 7/16″ x 1 3/4″ |
| Medium Flat Rate Box – 1 (top loading) | $12.80 | $14.35 | 11 1/4″ x 8 3/4″ x 6″ |
| Medium Flat Rate Box – 2 (side-loading) | $12.80 | $14.35 | 14″ x 12″ x 3 1/2″ |
| Large Flat Rate Box | $17.60 | $19.95 | 12 1/4″ x 12 1/4″ x 6″ |
Integrating WooCommerce USPS Shipping:
Follow these steps to integrate USPS shipping products and services into WooCommerce,
Step 1: Connect to USPS
First, install and activate the plugin. Once it is done the plugin settings can be accessed from WooCommerce>Settings>Shipping>USPS
From the General Settings tab, we can enable or disable Real-time rates. Once enabled, based on the origin zip code and the destination zip code, the plugin fetches live shipping rates from the USPS servers and you can display them to your customers. 
In the common API settings, paste the USPS account user ID, origin zip code for the calculation of rates.
Choose the integration mode. If you want to test the service set it Test and when you’re ready you can switch to the Live mode anytime you wish. Moreover, the plugin also comes with a debug mode as well, though it’s not recommended to run it on a Live website.
Step 2: Configure Price
In the Rates & Services tab, first, choose a method title. By default, it is set to USPS. Using this field you can set a custom method title that you can show to your customers. 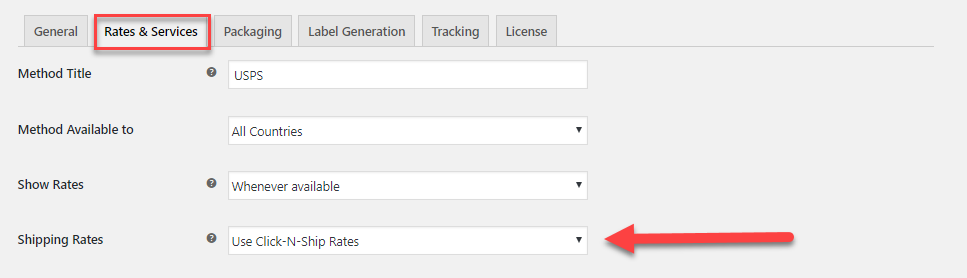
You can also select the countries that you wish to offer these shipping options to. Moreover, you can also enable or disable Live Rates and even how they are calculated. You can choose between Click-N-Ship rates or OfflineRates. 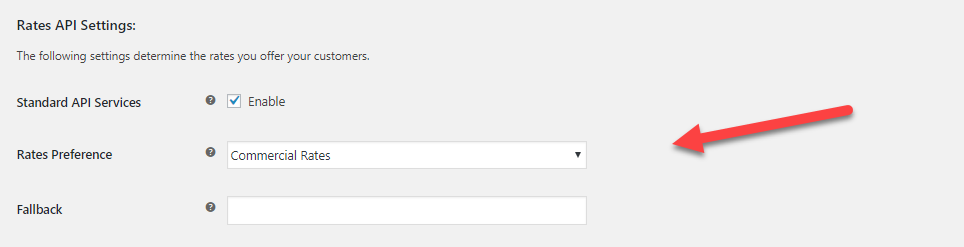
Using the Rates API Settings, you can configure the rates type (Commercial or Domestic) and a fall back rate as well.
Step 3: Configure Packing
The USPS Shipping plugin offers a ton of customization when it comes to packaging your products for shipment. Moreover, under the Packaging Tab, you can configure how the products in an order can be packaged. 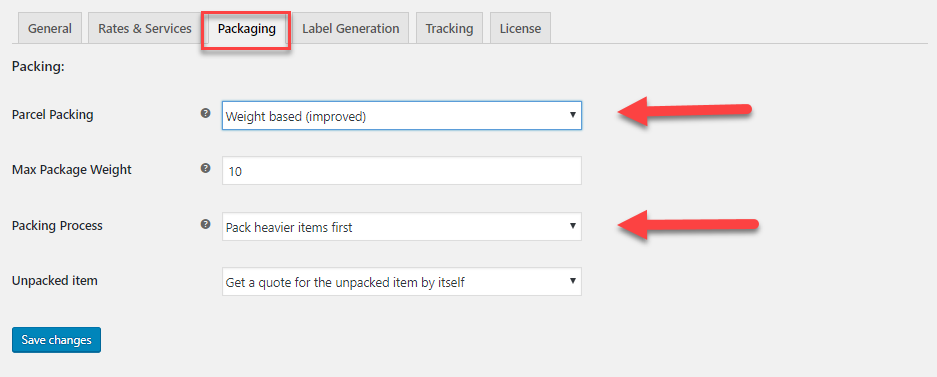
By default, it is set to package each item in the order in its own box. But, you can configure it to package items based on the weight and dimensions. Or pack based on weight, with packages whose size is less than 12 inches are grouped together. ![]()
Or you can use the improved weight-based system that lets you set the max weight of the box and whether heavier items are packed first or lighter ones. You can even configure the plugin to handle unpackageable items.
Step 4: Configure Tracking
In the Tracking settings tab, the plugin lets you configure USPS tracking on your WooCommerce site. You can enable or disable shipment tracking for customers. Additionally, by setting the Mode to enter Tracking ID to automatic, shipping labels generated from the plugin have the tracking ID automatically filled in. ![]()
You can even use set a custom shipment message to be sent to your customers. Additionally, using the text placeholders, you can craft the perfect shipment message to increase user engagement and brand awareness. Moreover, the message will contain the date it was shipped on, the service that was used as well as the tracking ID of the package
![]()
The tracking data then appears on the order page, where you can track the package during its transit.
![]()
Step 5: Configure Shipping Label Printing
You can find the settings related to printing USPS Shipping labels under the Label Generation tab. Here you can choose to enable USPS shipping label generation from WooCommerce itself and select a default shipping method 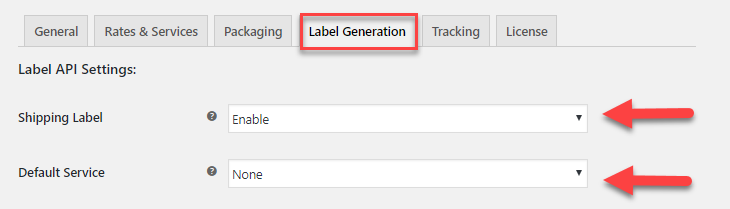
You can also choose the format the generated shipping plugin will be generated in, and the size as well.
Moreover, the plugin offers separate address fields to give a Sender Address that goes on the generated shipping label.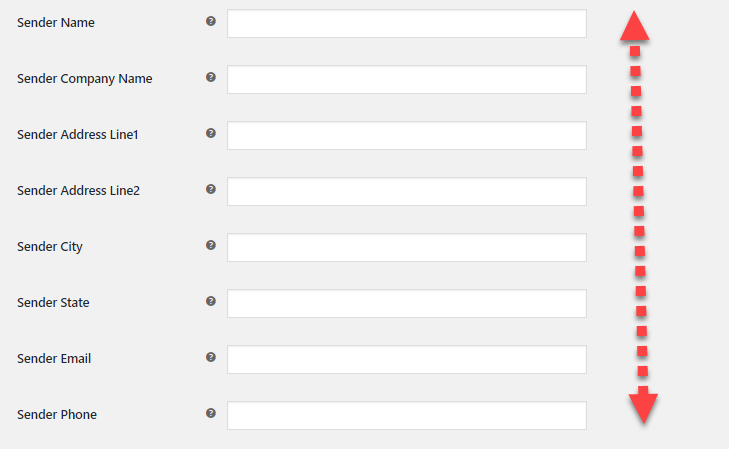
What’s more, the plugin offers a Customs Declaration field that you can use to declare the product for international shipping. You can even choose to include extra services from the Label Generation tab. These services include USPS Shipping Insurance, Signature Confirmation, Certified Mail service and more. After configuration, you can print USPS shipping labels and pay for postage as well (if configured to Live mode) 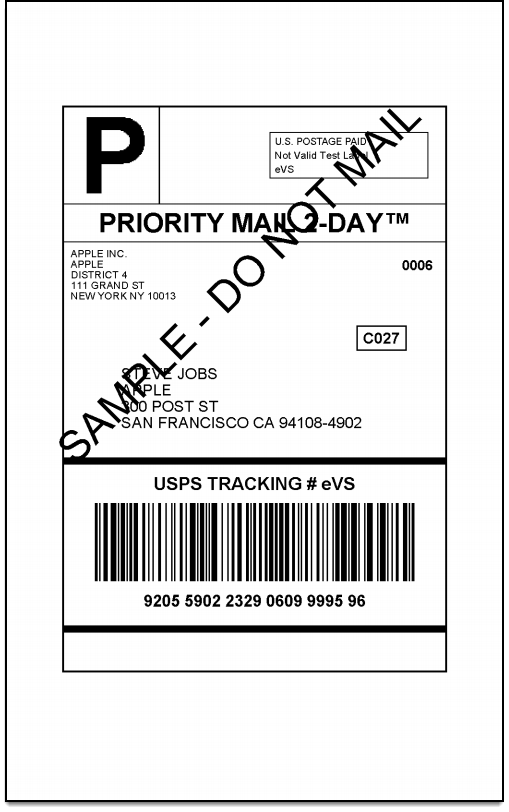
What’s more, the plugin is USPS approved and as mentioned earlier, can be used to print out even eVS international and domestic shipments.
Step 7: Configure USPS Flat Rate Shipping:
USPS international flat rate shipping is one of the most cost-efficient shipping options available to online retailers. USPS charges a flat amount to ship goods under 7lbs using one of the many USPS flat rate boxes. Moreover, USPS Flat Rate boxes cost the same irrespective of the item being shipped and where it’s being shipped from. 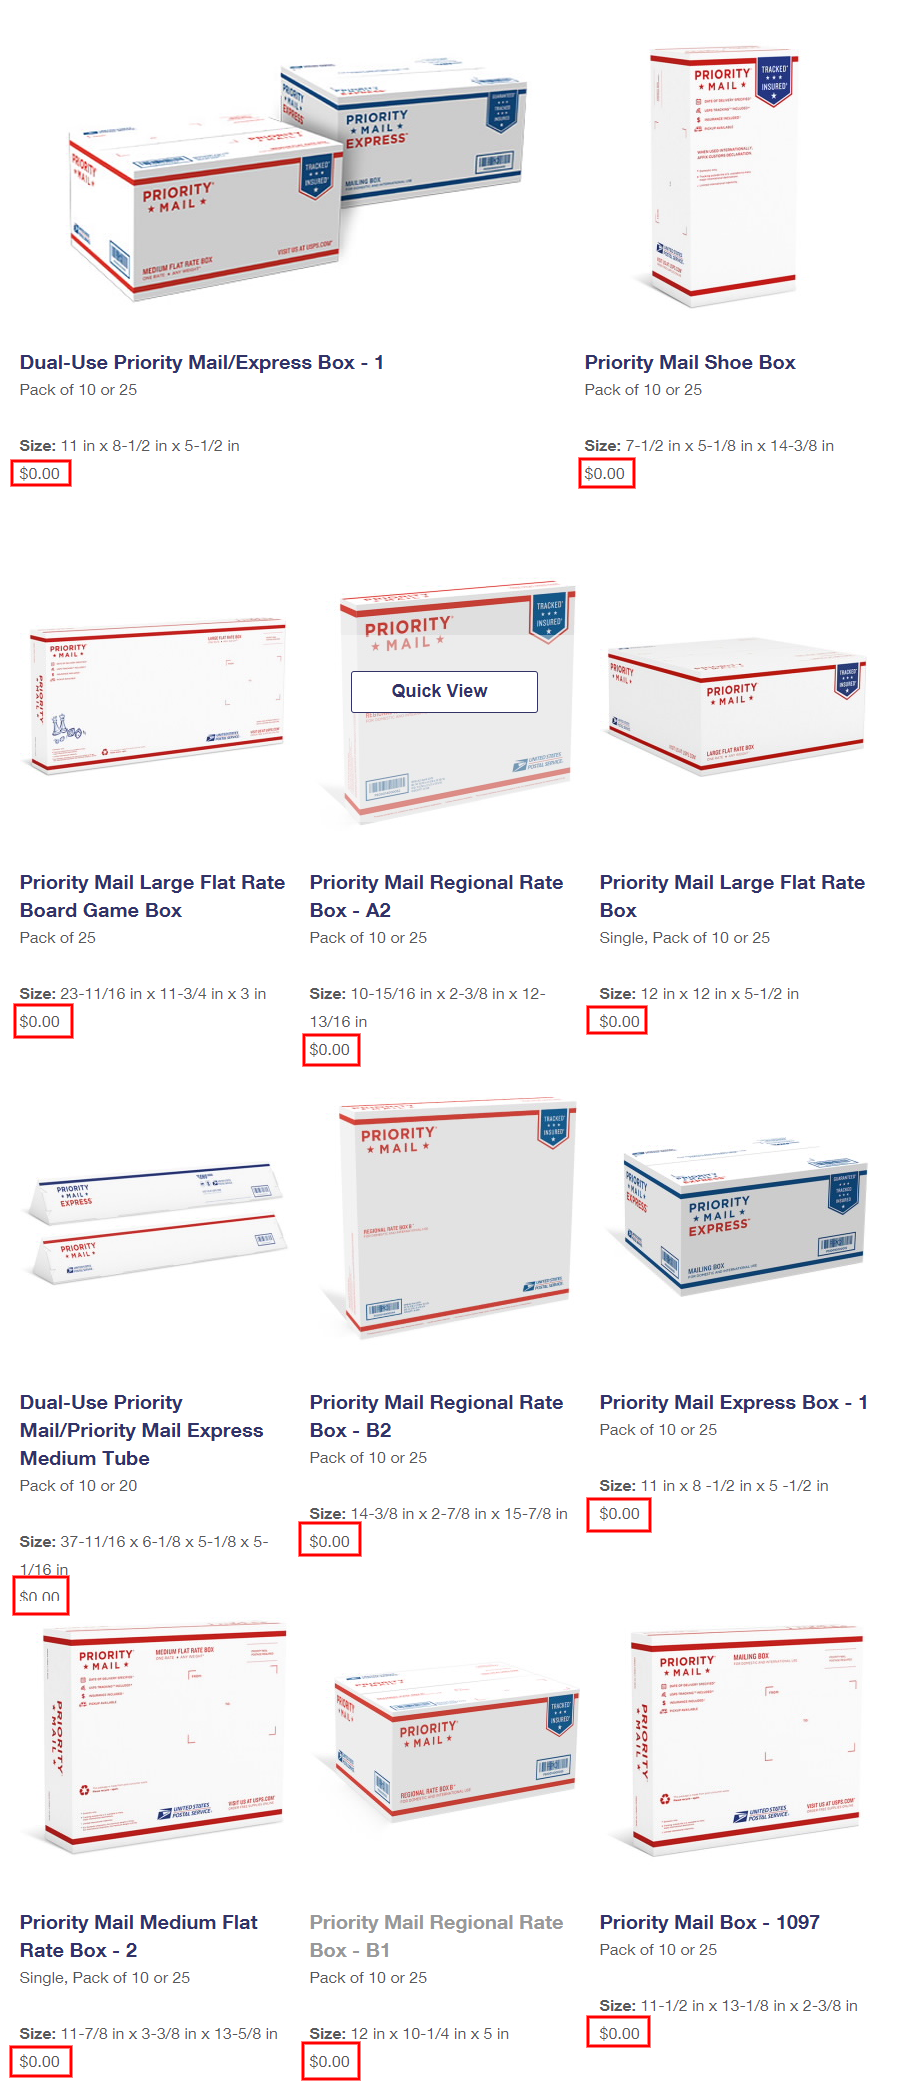
Moreover, USPS ships the packaging boxes to your location for free. Additionally, configuring USPS International flat rate shipping lets you forget about calculating shipping costs based on weight and destination.
You can find USPS flat rate settings under the Rates & Services tab. 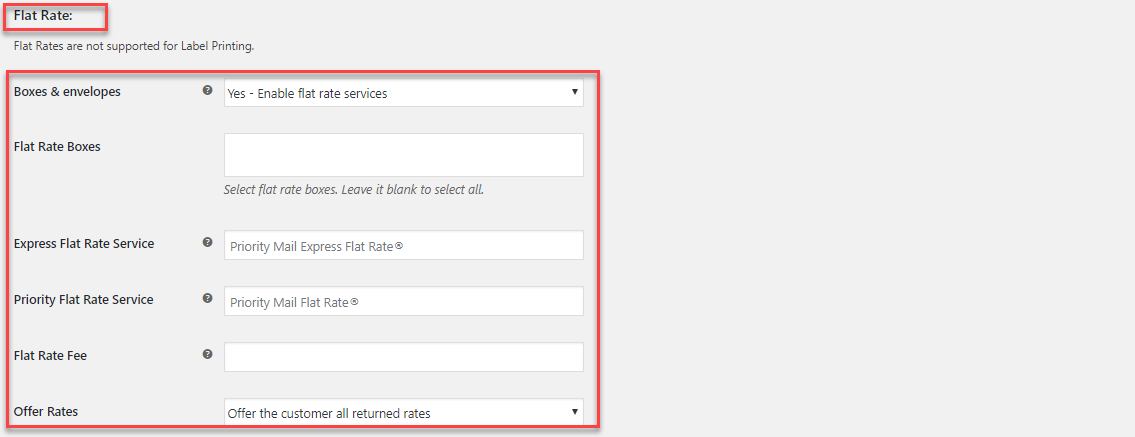
The plugin lets choose from a slew of options regarding enabling or disabling Boxes & envelopes. Additionally, you can pick and choose what Flat Rate box is used with the Flat Rate Boxes field. 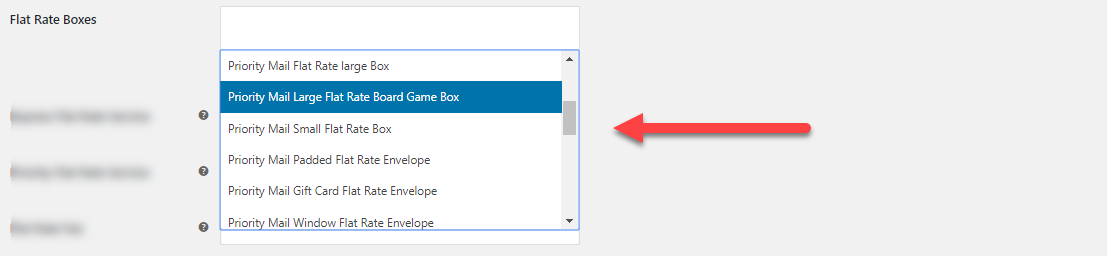
Moreover, you can even set custom titles for Express and Priority Flat Rate Service as well. You can adjust the price of the flat-rate service using the Flat Rate Fee field. Moreover, you can even set the plugin to show either all returned rates or just the cheapest one.
Conclusion:
This is how you can enable and generate USPS shipping labels from WooCommerce. The ELEX WooCommerce USPS Shipping Plugin with Print Label is the perfect tool to integrate shipping methods and options into WooCommerce.
The ELEX WooCommerce USPS Shipping Plugin with Print Label is a seamless solution for integrating USPS into WooCommerce. Apart from printing USPS Shipping Labels, the plugin can also help in
- Access domestic & international real-time rates from USPS
- Generate Order Summary/Manifest.
- Track shipments.
- Pack items into custom boxes.
- Generate International Shipping documents.
- Ensure packages with an Insurance options.
- Specify Commercial or Residential address type.
- Generate bulk shipment.
- Offer discounts or add a markup on shipping rates, with Price adjustments.
- Configure specific shipping services, for example, USPS International Shipping Flat Rate Boxes
- Show the estimated delivery time, and much more!
You can find more information about the plugin and a breakdown of its features here. To download and test the plugin out for free, you can visit this page.

