What can we help you with?
How to translate WSDesk using Loco Translate plugin?
Translating themes or plugins to a native language has always been one of the most sought-after customizations for websites, as well as for applications. With a list of powerful plugins, WordPress isn’t left behind. There are a lot of translation plugins that help you translate WordPress dashboard, and your website as well.
Loco is one of the most popular translation systems. It is platform independent and supports various file formats. It is available as an API, as well as a WordPress plugin. It is intended to manually translate parts of your software or application. You can read more about Loco, here.
With Loco’s WordPress plugin, you can translate WordPress themes and plugins to your desired language. In this article, I will explain how to translate our WSDesk plugin using Loco Translate WordPress plugin.
Steps to translate WSDesk using Loco Translate
1. Installing Loco Translate plugin
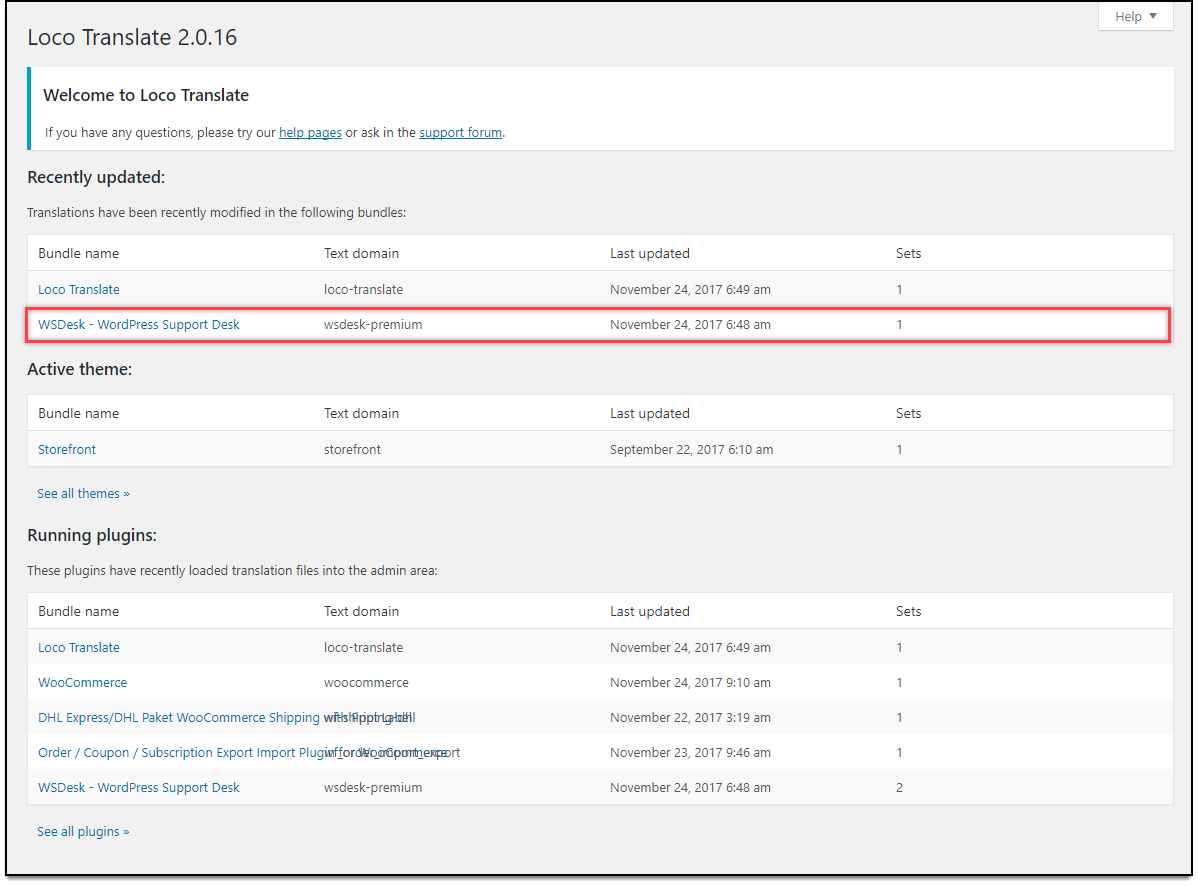
You can install the plugin from the WordPress repository, or download the plugin here. Once installed and activated, go to Dashboard > Loco Translate > Home.
A screenshot of the settings is as shown below.

The Home tab contains a list of themes and installed plugins in your WordPress site.
2. Setting up WSDesk with Loco Translation plugin
Click on WSDesk – WordPress Support Desk from the list of plugins, in the previous screen. An overview screen follows, which displays existing language translation files in WSDesk, as shown in the screenshot below.

Click on the Advanced tab to setup WSDesk for Loco Translation plugin. You should configure the settings as shown in the screenshot below.

3. Adding a new language for WSDesk
Before adding a new language, you first need to create a template for WSDesk. For this, move to Overview tab, and click Create template. Follow through the screens to create a new template.
To add a new language translation, click on New language option.
Let’s say you want to add Chinese language translation for your WSDesk plugin. Select the Chinese language from the list option, and choose the location where the language file will be stored, as shown in below screenshot.

4. Translate!
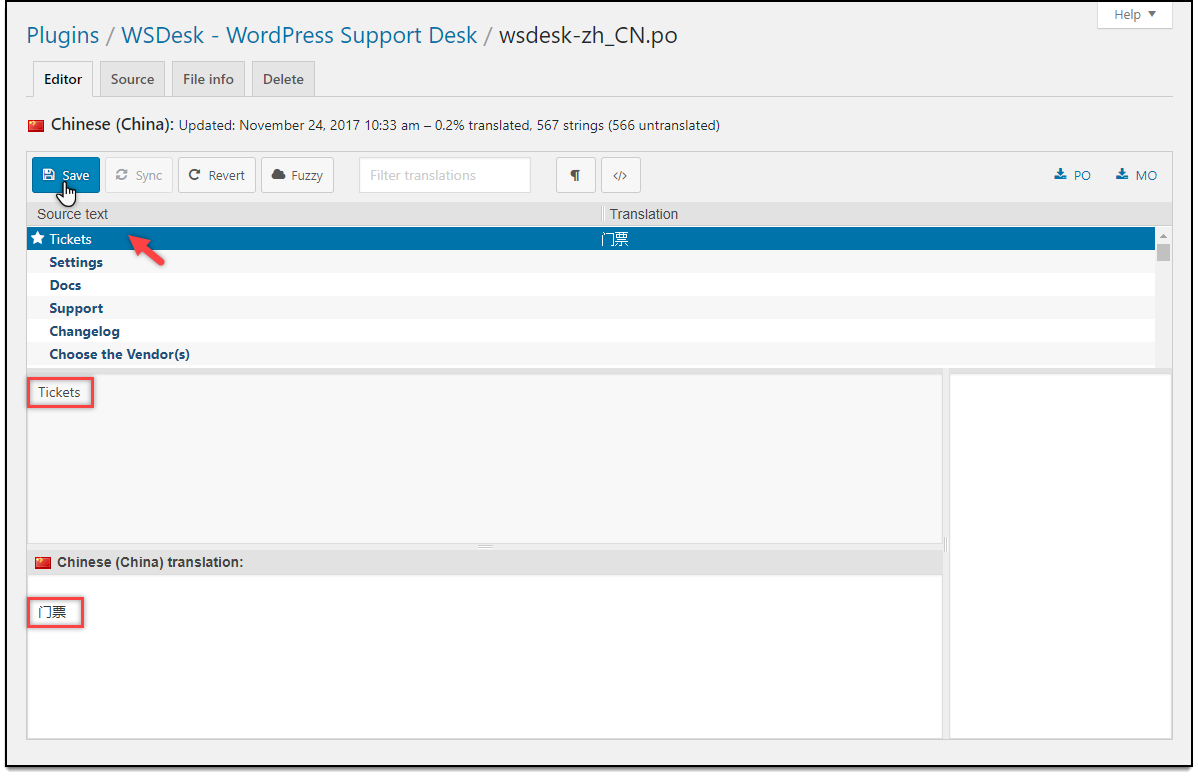
Once the selected language (in our demonstration, Chinese) is added, an editor window is displayed, which is used for translation.
The editor is divided into Source text section and language translation section. The source text section contains all texts, which are part of WSDesk plugin. You can click on the desired source text, and enter the equivalent translation in the language translation section below.
Tip: For language translation, you could make use of Google Translate or Bing.
For our demonstration, let us select the text ‘Tickets’, and enter the Chinese translation in the Chinese (China) translation section below. Click on the Save button to save the translation.
The settings are as shown in the screenshot below.

5. Viewing Translated text
To view the translated text, change the WordPress language to the translated language (Chinese), in Dashboard > Settings > General tab.
Following is a screenshot of WSDesk setting, with text ‘Tickets’ in the default language, English.

And here’s a screenshot showing the translated text ‘Tickets’ in Chinese, for WSDesk settings.

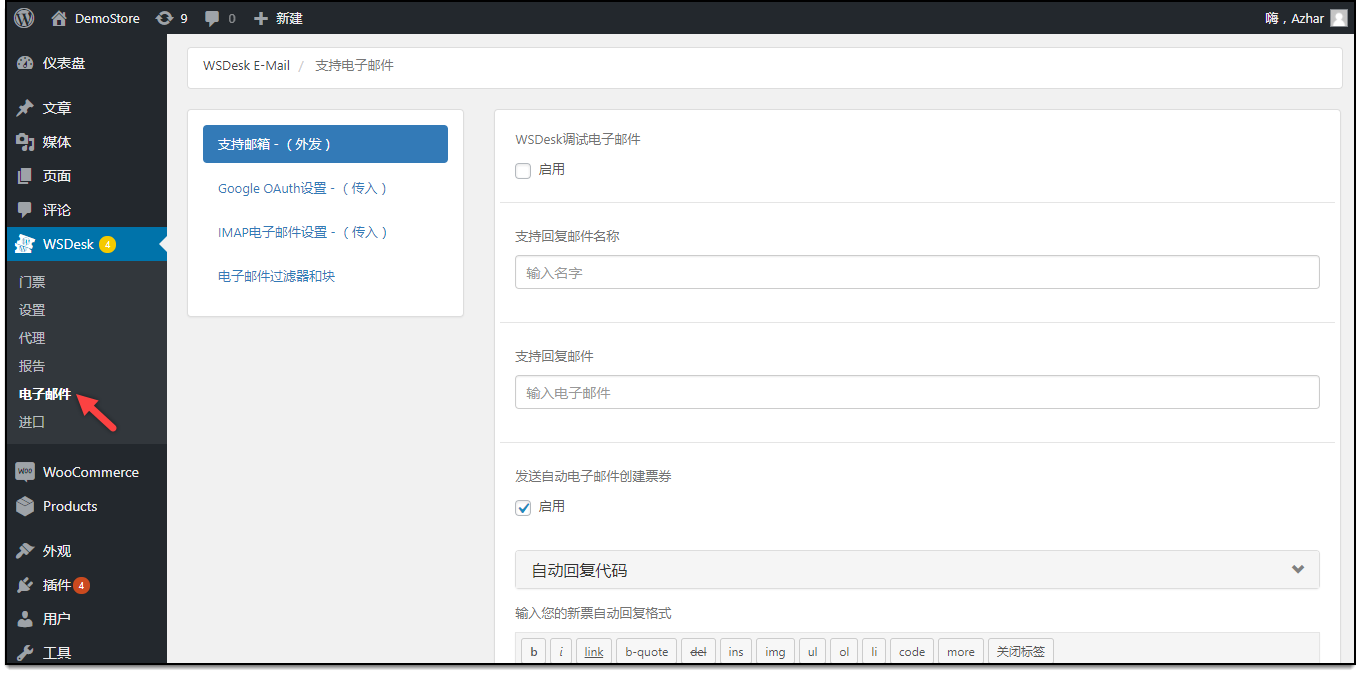
Here’s another screenshot showing WSDesk E-Mail settings, with Chinese translation.

In this article, I haven’t explained each detail of the Loco Translation plugin but rather focused only on the language translation process. To understand the Loco Translation plugin, get started here.
To explore more details about the plugins, go check out WSDesk – WordPress Helpdesk Plugin.
Read the product setting up article to understand the plugin, in detail. Or check out the product documentation section for more related articles.
You can also check out other WordPress and WooCommerce plugins in ELEX.
