What can we help you with?
How to set up Customer Satisfaction Surveys and Emails in WSDesk?
Here’s a quick video tutorial:
The WSDesk plugin consists of a feature known as Triggers, which can be utilized in many ways. Traditionally, these triggers are used to initiate events when certain actions occur. But with WSDesk, you can extend its functionality to setup satisfaction surveys from customers when certain triggers occur.
Following are the steps that will help you set up Customer Satisfaction Surveys and Emails in WSDesk:
1) Adding a trigger: To add a new trigger, move to the Triggers and Automation section in the WSDesk settings dashboard.
Next, move to Add Trigger section.
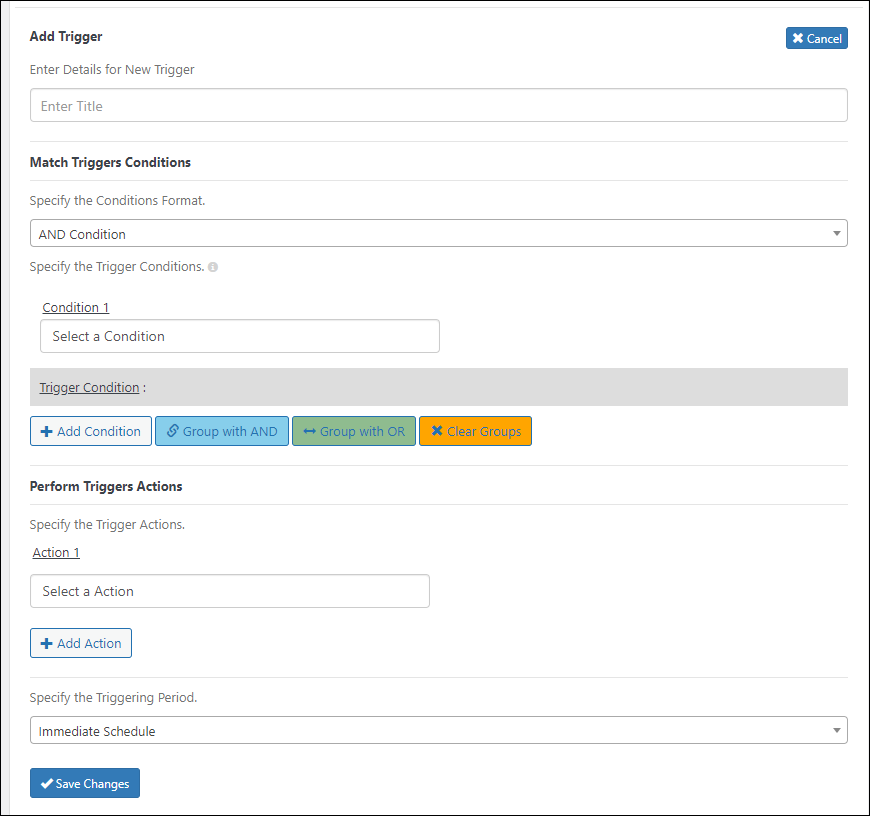
To know how to add, edit or remove a trigger in detail, read this article.
Scenario:
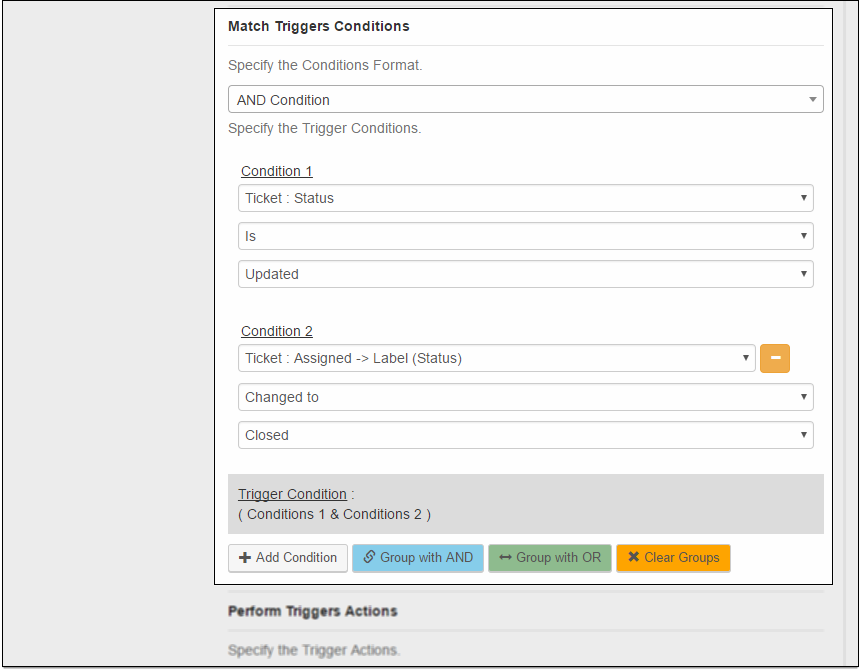
Let’s consider you want to add a trigger that sends customer satisfaction review email to customers when a issue is resolved and the ticket status is updated to closed.
For this, you should configure the settings as shown below:
- Enter Title: Enter a custom trigger title. For this demonstration, let’s keep it as Satisfaction Review.
- Match Triggers Conditions: Configure the required condition.
For our case, we need two conditions –- Condition 1 – Select Ticket: Status from the list of conditions and select Updated option from the condition drop-down (this means, perform trigger when the ticket is updated).
- Condition 2 – Select Ticket: Assigned -> Label (Status) from the list of conditions and select the Closed option from the condition drop-down (this means, perform trigger when the ticket label status is changed to closed).
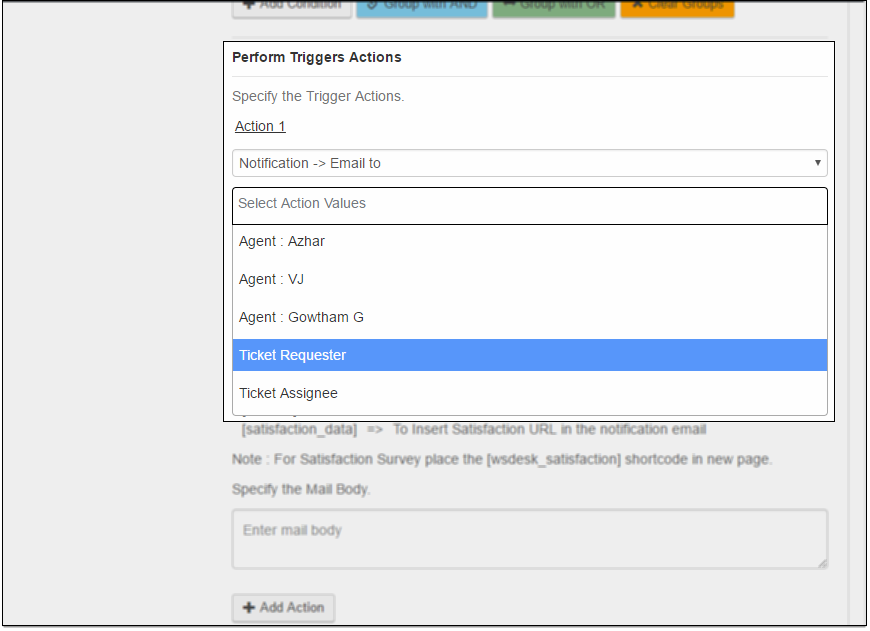
- Perform Triggers Actions: From the available actions drop down, select Notification->Email to option, and select the recipient(s) to whom the email has to be sent. For our demonstration, select Ticket Requester (customer).
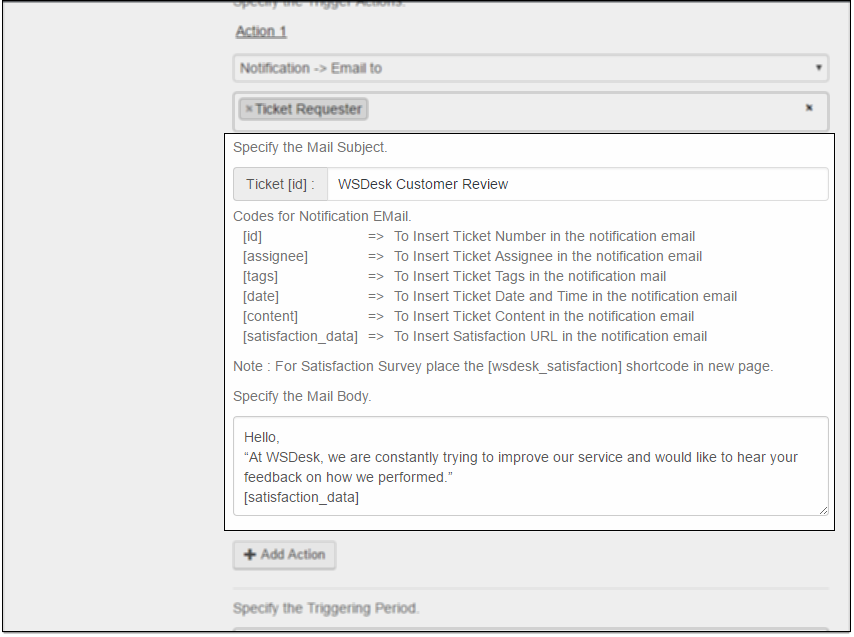
Moving to notification email settings. Enter the subject of the mail, which will include ticket id by default.
Next, select appropriate codes for the notification email. For sending satisfaction surveys, enter [satisfaction_data] short-code along with your custom body of the email, as shown in the screenshot below.
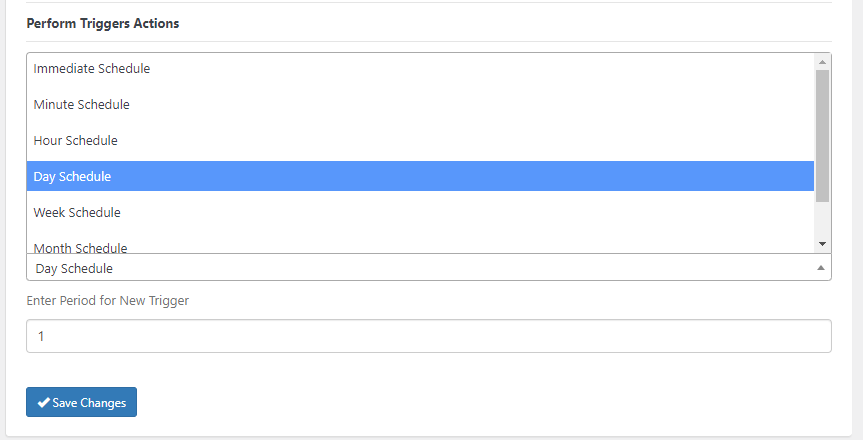
Finally, select the triggering period. Based on your preference, you can schedule the event. Let’s select Day Schedule, and enter the period value as 1, which means the email will be sent a day after the ticket is closed.
Once the settings are configured, click Save Changes. Further, move the trigger from Available Trigger column to Active Triggers column.
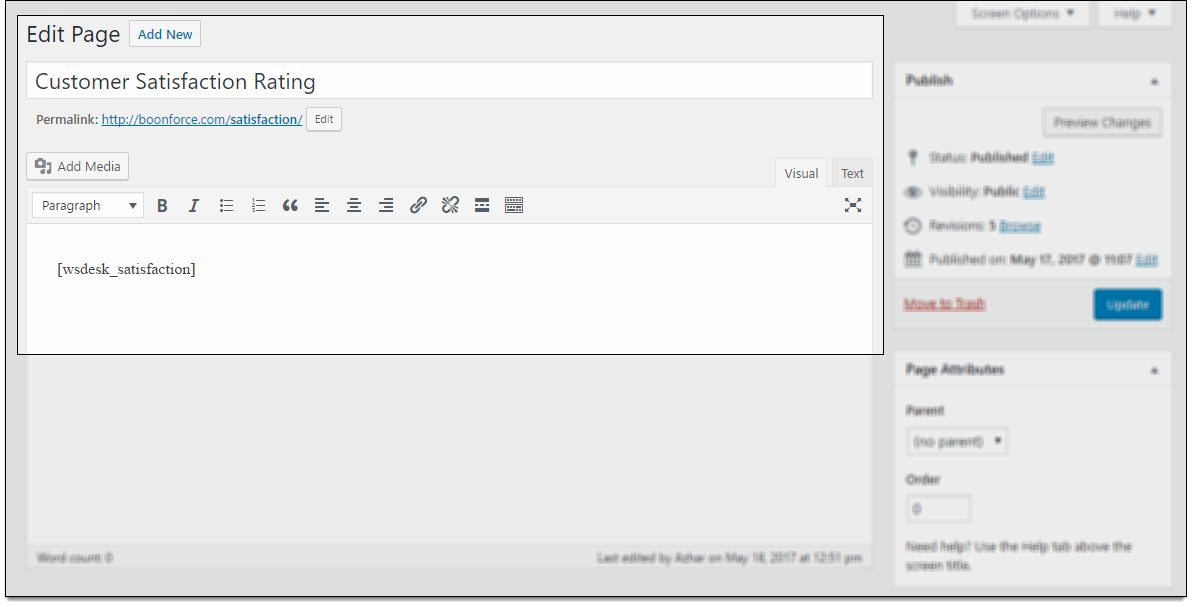
2) Creating a survey page: Once you have configured the settings, you should create a survey page where customers provide their feedback.
The process is pretty straight-forward. You have to create a new WordPress page from the Pages section in your WordPress menu. A slight addition here is the inclusion of the satisfaction short-code [wsdesk_satisfaction], as shown in the screenshot below.
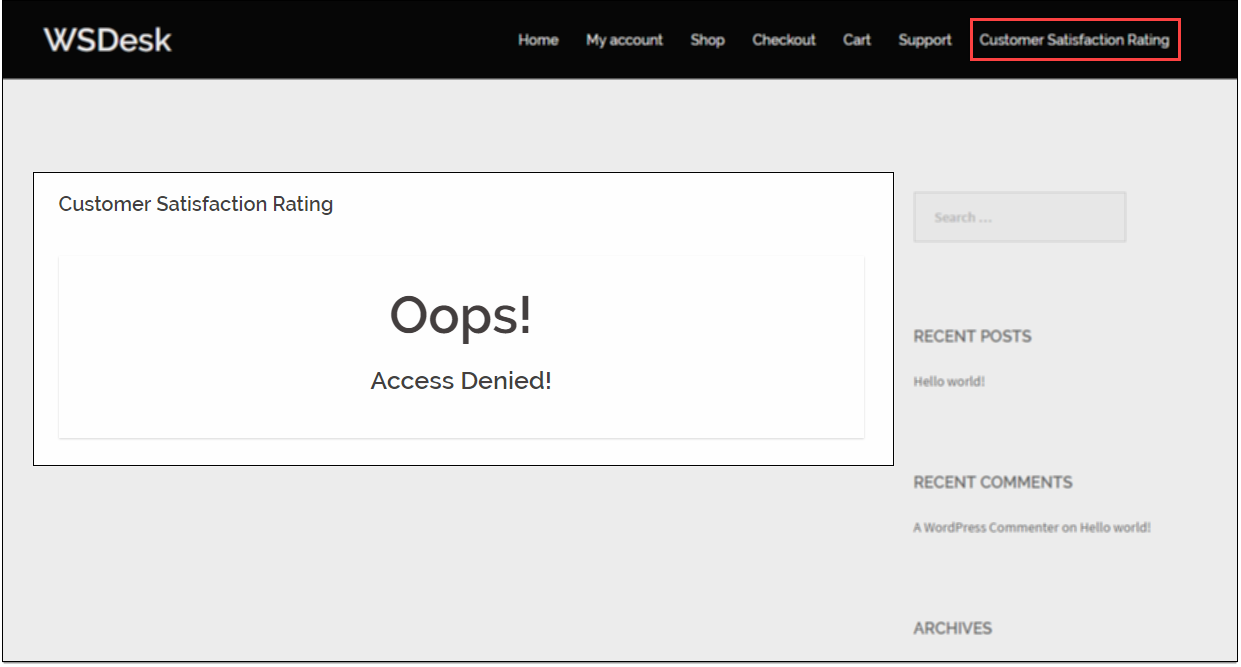
An important aspect to remember is that the created survey page is a result of a trigger and shouldn’t be accessed directly. If a user tries to access the page directly from the website, the following error occurs as shown in the screenshot below.
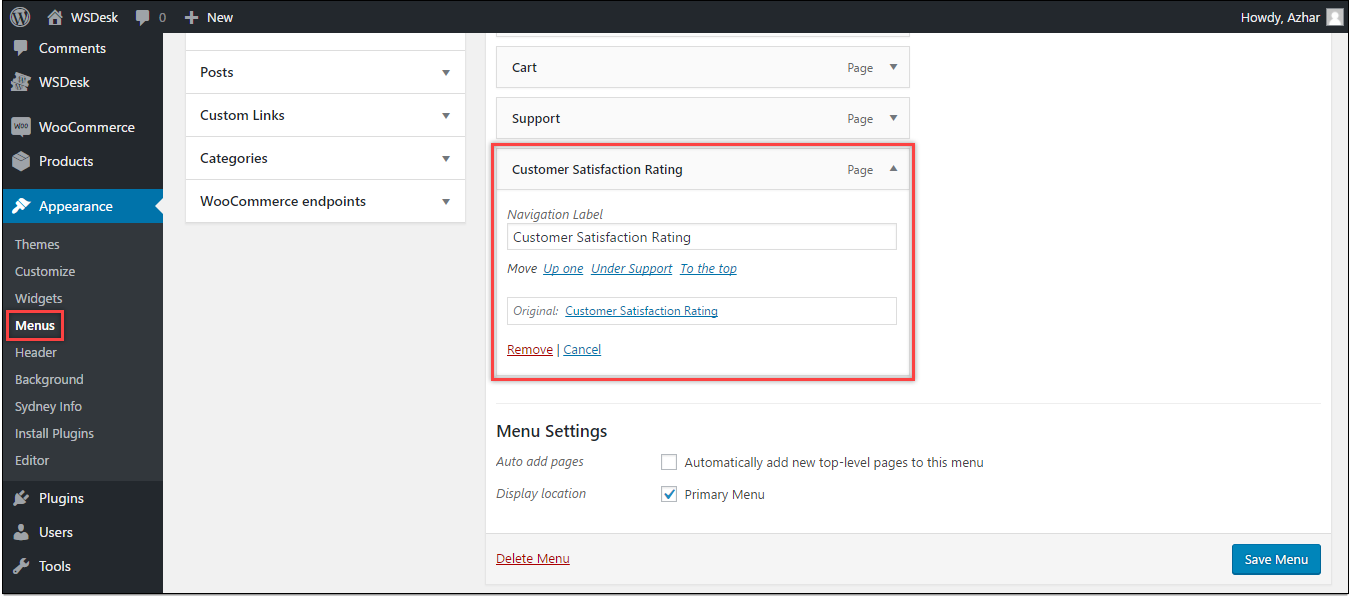
Hence, to avoid this, you should hide this page from the menu. To do this, head to Appearance -> Menus section. Open the Customer Satisfaction Rating page settings, click Remove, and save the changes, as shown in the screenshot below.
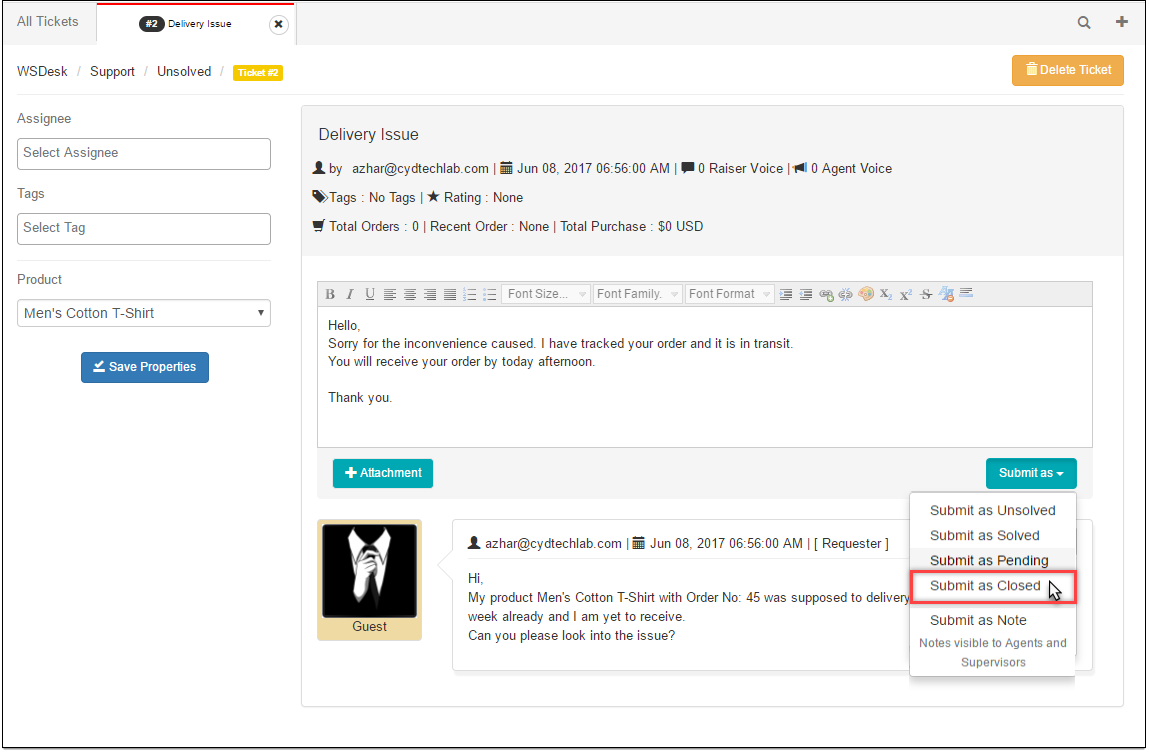
3) Updating a ticket status:
- Move to WSDesk > Tickets section.
- Select a ticket to reply and update the status, as shown below.
The ticket requester will receive a customer satisfaction review email, a day after the ticket status is updated (as configured). A screenshot of the email is shown below.
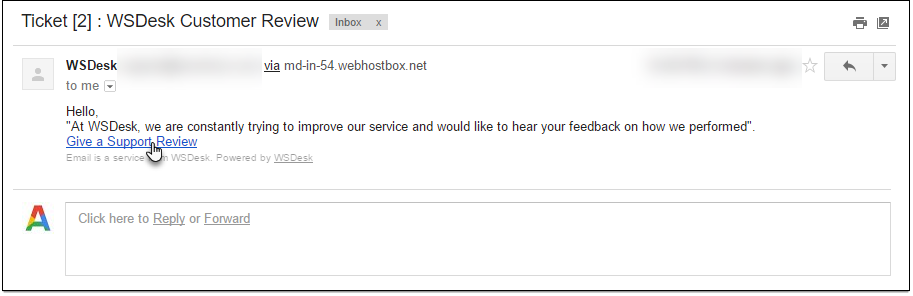
To give a satisfactory review, customers can click on the link at the end of the email, which will take them to the customer satisfaction review page on your website.
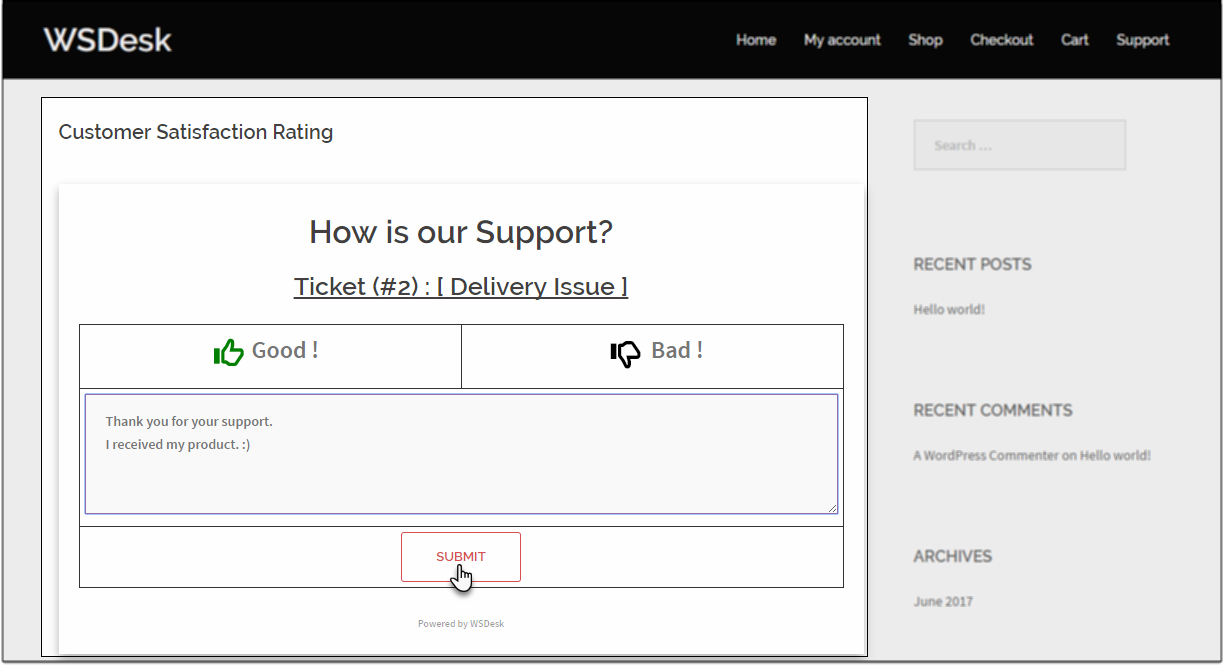
4) Customer Satisfaction Review:
The customer satisfaction page on your website consists of a rating and review option for your service. It is as shown below:
That’s it. You have now successfully configured a customer satisfaction survey with WSDesk.
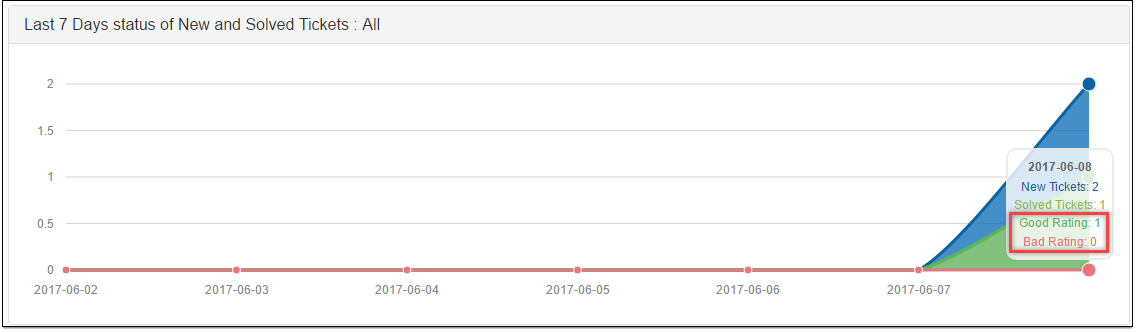
In addition to this, WSDesk also allows you to view statistics about these customer satisfaction ratings in the Reports section. You can view good as well as bad ratings of the last seven days, as shown in the screenshot below.
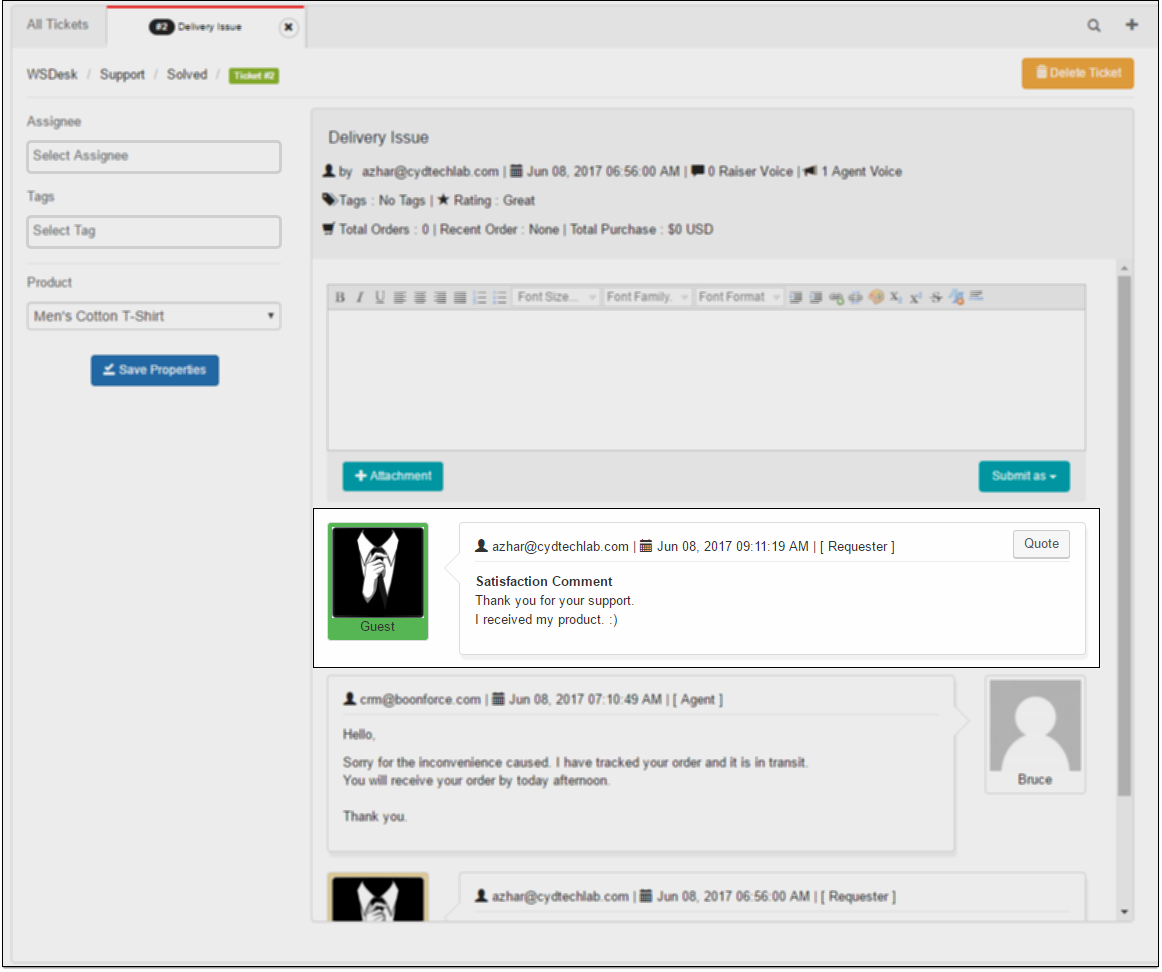
The ticket information is updated with the customer review as well. You can view the specific user ticket for which the review is given in the WSDesk -> Tickets section, as shown in the screenshot below.
To explore more details about the plugins, go check out WSDesk – WordPress Helpdesk Plugin.
Read the product setting up article to understand the plugin, in detail. Or check out the product documentation section for more related articles.
You can also check out other WordPress and WooCommerce plugins in ELEX.