It is rather difficult to deal with plenty of orders in a day when you are managing an eCommerce business.. It is indeed a tedious task to go to individual orders and then process it each time it arrives. Automating the process would be an ideal way to reduce the burden of creating orders and generating labels in just a click. With the ELEX WooCommerce EasyPost Auto-Generate & Email Labels Add-On, you can simply put the WooCommerce UPS shipping in auto-mode and then auto-generate emails for notification to the provided emails and also auto-generate labels for the orders.
Let us take a look at how we can achieve the same. Here we need two plugins for this.
- ELEX EasyPost (FedEx, UPS, Canada Post & USPS) Shipping & Label Printing Plugin for WooCommerce.
- ELEX WooCommerce EasyPost Auto-Generate & Email Labels Add-On
Introduction
When you are into shipping bulk amount of products every day, then managing it becomes rather difficult. When you are into an eCommerce business, you will need an ideal shipping plugin that can generate the shipping rates accurately as well as generate shipping labels for the orders. If you have a WooCommerce store, then make use of the ELEX EasyPost (FedEx, UPS, Canada Post & USPS) Shipping & Label Printing Plugin for WooCommerce. The plugin will help you fetch the live shipping rates for your orders in the store and also help you print labels for your orders from the store. Moreover with the plugin, tracking the information for your orders is easy with the tracking number generated for the order. In order to reduce the effort for processing the orders individually, you can make use of the ELEX EasyPost Auto-Generate & Email Labels Add-On, which helps you auto-generate the orders and also send an email notification for the orders generated in the store.
How to generate UPS shipping labels from your WooCommerce Store?
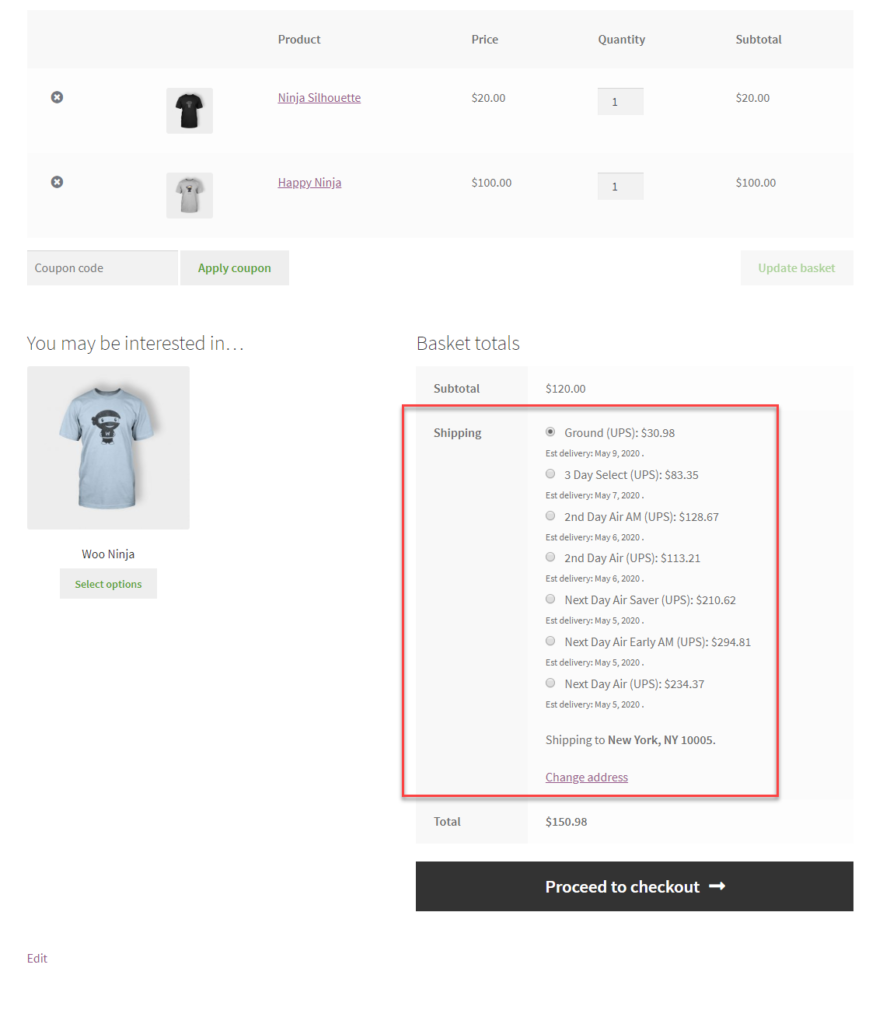
When an order is placed on your store by a customer, with the help of the ELEX EasyPost plugin, you can generate the UPS shipping rates for the order on the cart and checkout page.
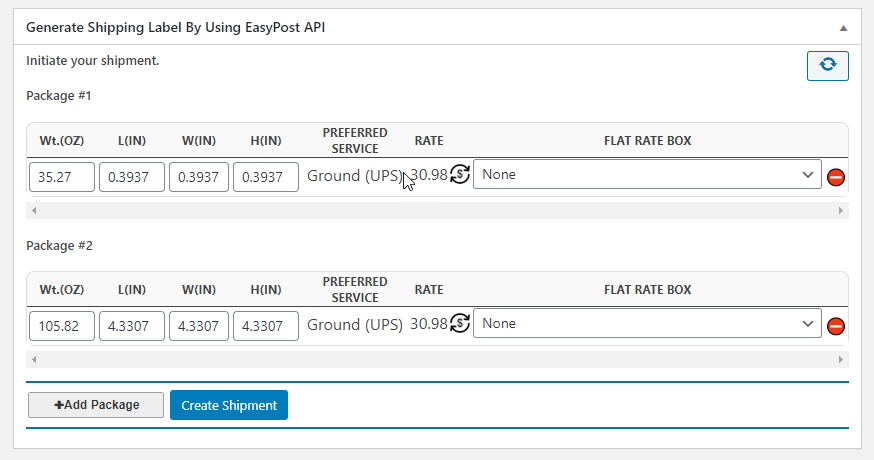
Upon checkout, an order id is generated for the order, which can be processed in the backend. Firstly you generate the packaging for the order and then create a shipment for the same.
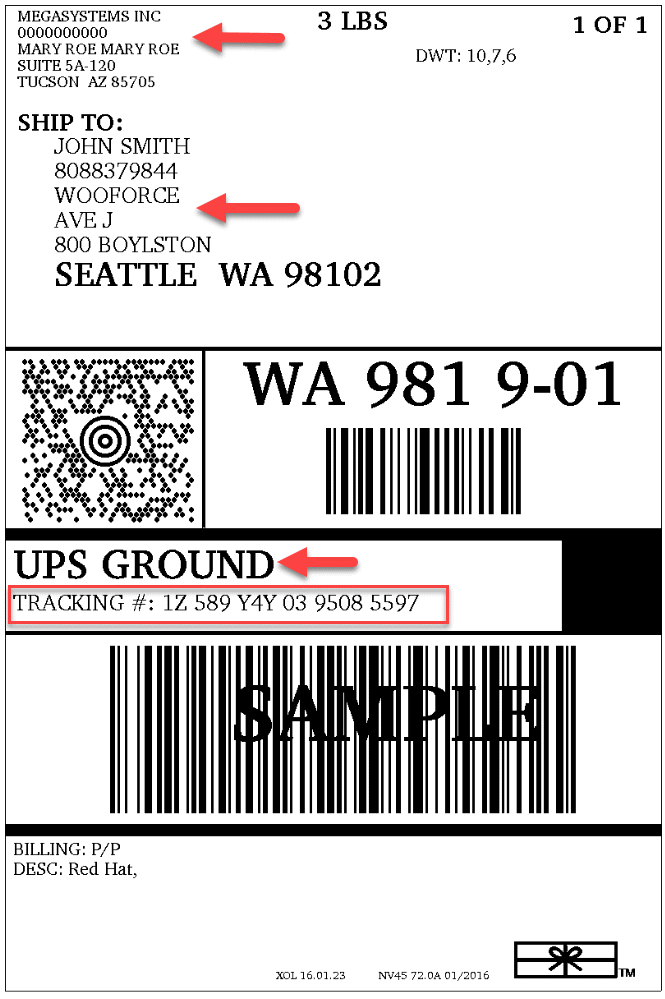
And then you get a label printed with a tracking number for the order.
This is a simple process when you consider single orders. But when you want to process multiple orders at a stretch then, it is indeed a cumbersome task.
How to put the UPS Shipping in auto-mode and save time?
In order to save time and automate the label generation process, we have the ELEX EasyPost Auto-Generate & Email Labels Add-On. This add-on will reduce the burden of generating shipping labels for each individual order from your store. Let us take a look at the steps to enable the auto-mode for UPS Shipping.
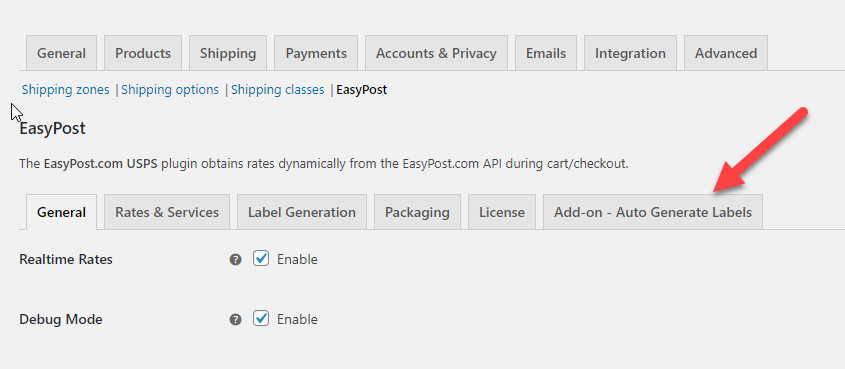
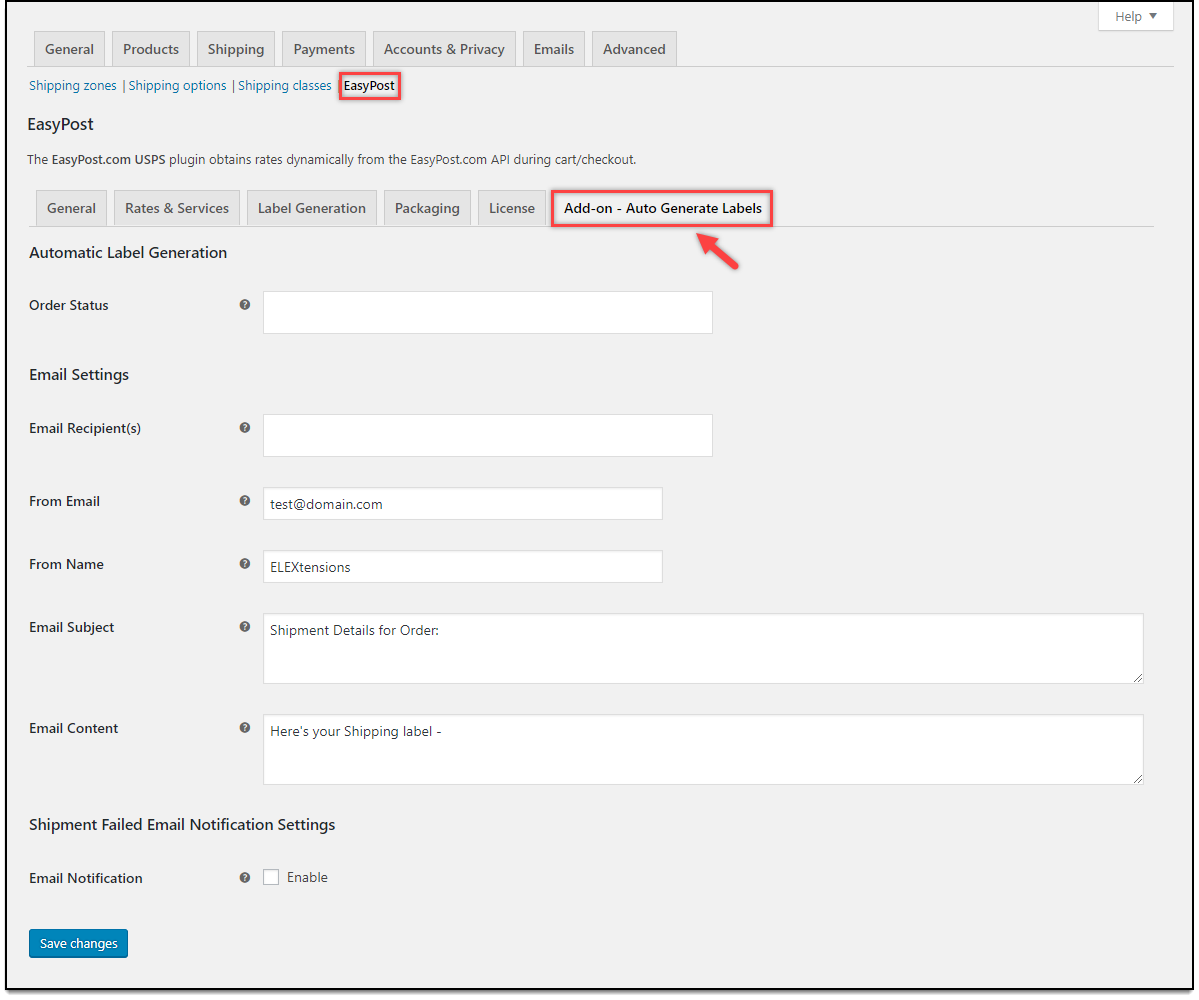
Firstly you need to install the add-on in your WooCommerce store. Once installed you can see the new tab appearing alongside the EasyPost settings.
In the Add-on Auto Generate labels, you can set the following fields to enable automatic label generation and email notification.
Here we need to fill in the following :
Order status – You can choose the by default order status from WooCommerce, like Processing, Failed, On Hold, etc. Upon choosing the order statuses here, whenever an order moves from one state to another, an email is generated.
Next is the Email settings. In the email settings, you can specify the email recipients like the customer, store owner, the custom email, etc. In the custom email option, you can set the custom email address to which the email notification needs to be sent. Upon choosing a custom email, you get the Add Email option in the email settings. Next, you can set the From email, From name which is basically taken from the store admins, email address, and name. You can also specify the email subject and email content which is used for email by default.
Configure Failed Order Message
You can also configure the failed message for orders in your WooCommerce store.
Upon enabling the email notification, you can specify the email subject and the email content for ease of use. Hence whenever a package is failed to deliver, an email with the same content is generated.
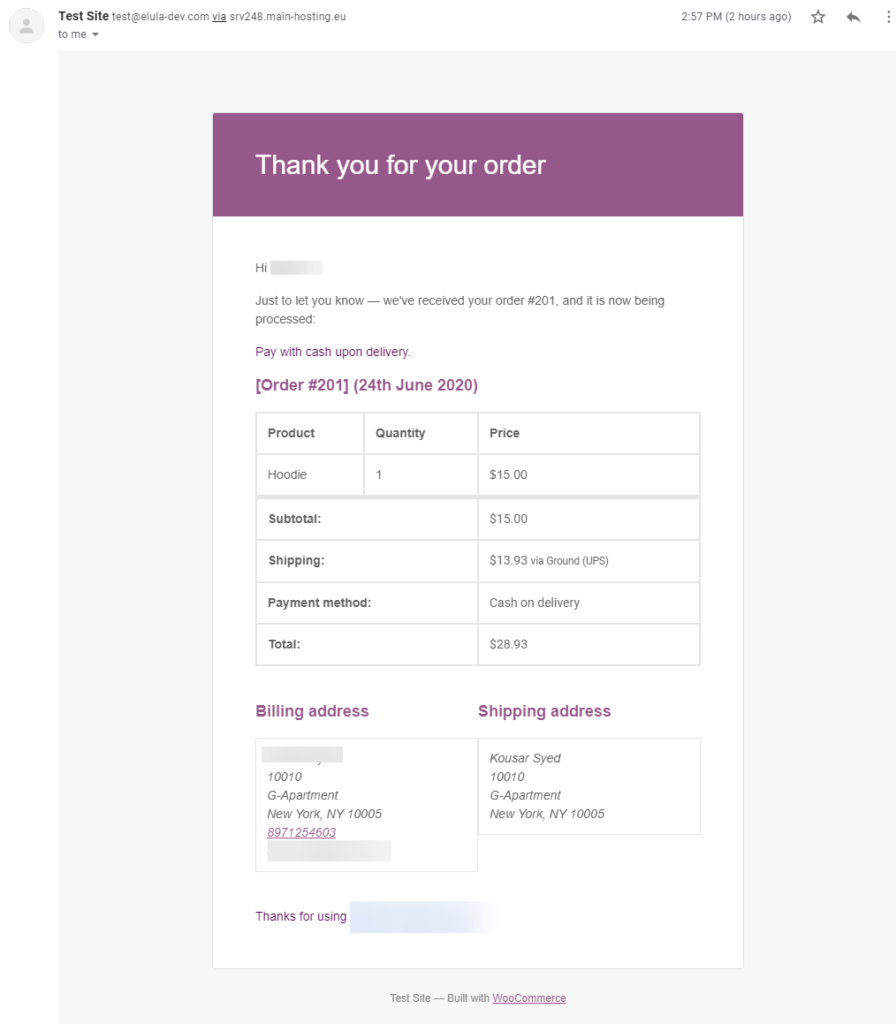
After setting the same, when an order is placed on your store and is processed, you get a notification for the order generated.
When the email is fired, at the same time, the label is generated for the order and attached to the email sent to the recipients.
The email will look like :
Upon clicking the link, you can obtain the UPS label generated for the order.
To Conclude
Using the plugin, you can simply automate the process of generating the shipment and obtaining the label as well as notifying the customers easily.

