FedEx Shipping is one of the prime shipping carriers across locations. Owning a WooCommerce store and then shipping for multiple orders arriving in your store, you need to manage many things that can be tiring when you have orders in bulk. To ease the job of generating the label and notifying the customers at the same time, you can make use of the WooCommerce FedEx Shipping plugin with the add-on, ELEX WooCommerce EasyPost Auto-Generate & Email Labels Add-On.
Using the plugin you can auto-generate an email and a shipping label that can be sent to the customer easily in just one click. Let us take a look at how we can achieve the same. Here we need two plugins for this.
- ELEX EasyPost (FedEx, UPS, Canada Post & USPS) Shipping & Label Printing Plugin for WooCommerce.
- ELEX WooCommerce EasyPost Auto-Generate & Email Labels Add-On
The ELEX EasyPost Shipping plugin is ideal for fetching the real-time rates for WooCommerce FedEx Shipping and also obtain tracking information as well as print shipping labels. Let us see how we can print FedEx shipping labels.
How to generate FedEx WooCommerce shipping labels from your WooCommerce Store?
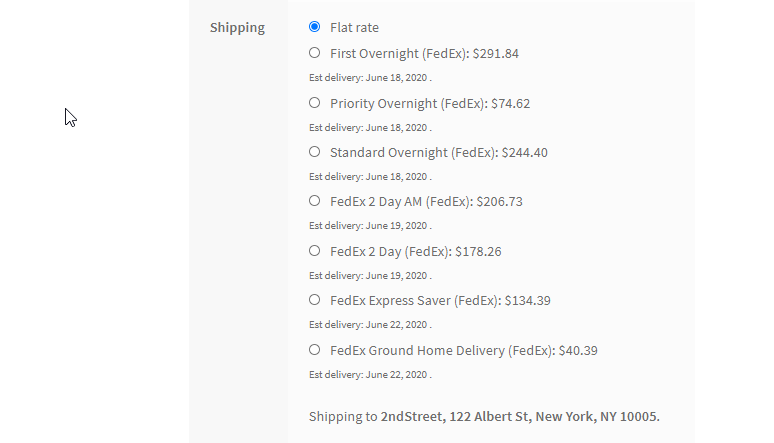
When an order is placed on your WooCommerce store, you can obtain the real-time rates from FedEx, in the cart and checkout page.
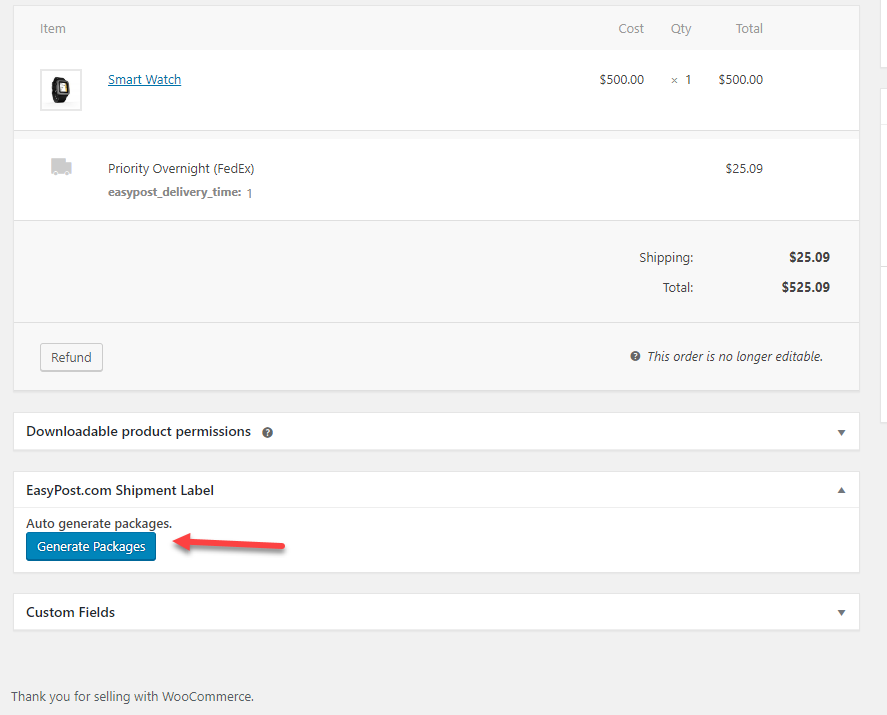
Then you generate the package for the order.
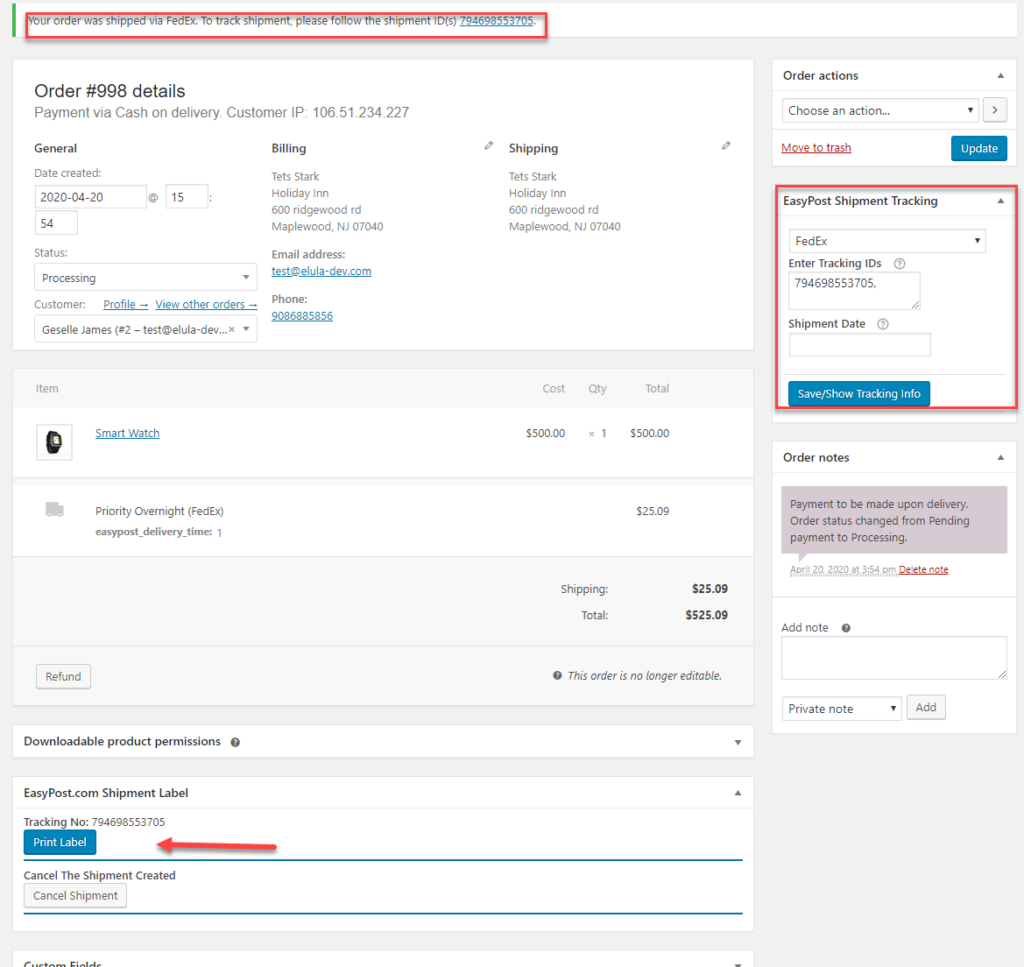
When you generate the package you can see the tracking id and label generated for the order.
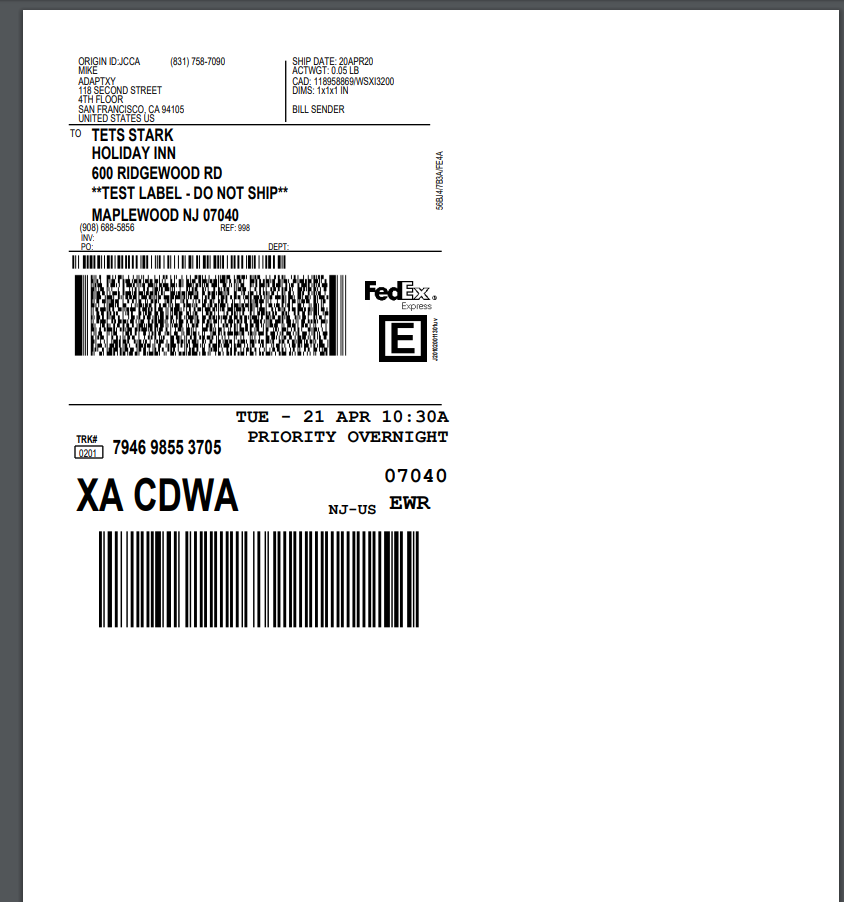
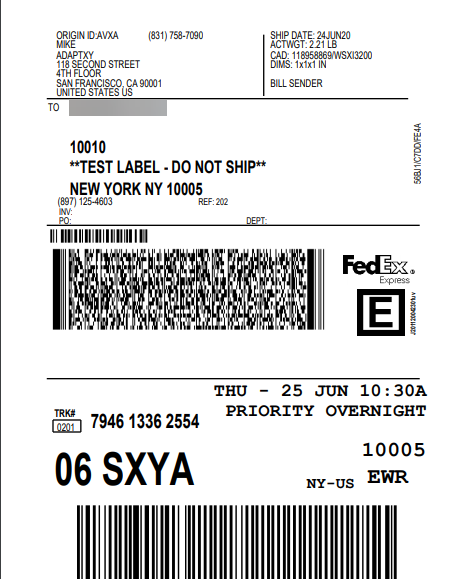
On clicking on the Print label button, you can see the WooCommerce FedEx Shipping label generated for the order.
Now when you have to generate multiple labels for bulk orders on your store, it becomes tedious to follow all these above steps. To simplify the process, you can make use of the ELEX EasyPost Auto-Generate & Email Labels Add-On.
How to put the FedEx WooCommerce Shipping in auto-mode and save time?
Using the ELEX EasyPost Auto-Generate & Email Labels Add-On you can easily generate a shipping label and then affix the same with the email sent to the customers. You can install the add-on in your WooCommerce store and then customize the same, as per your need.
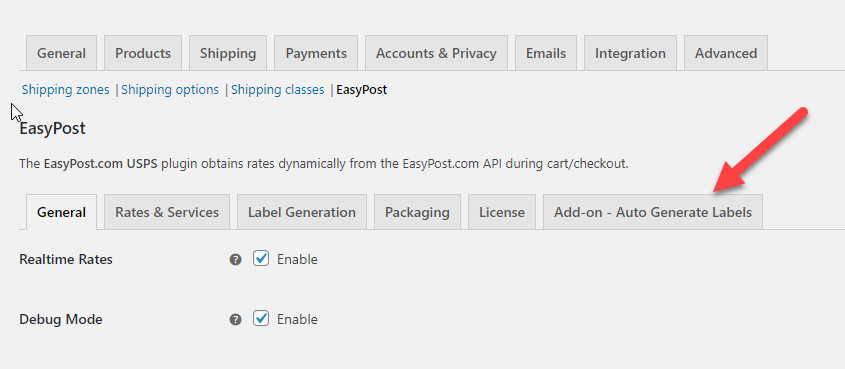
On installing the plugin you can see a new tab appearing in the EasyPost General settings.
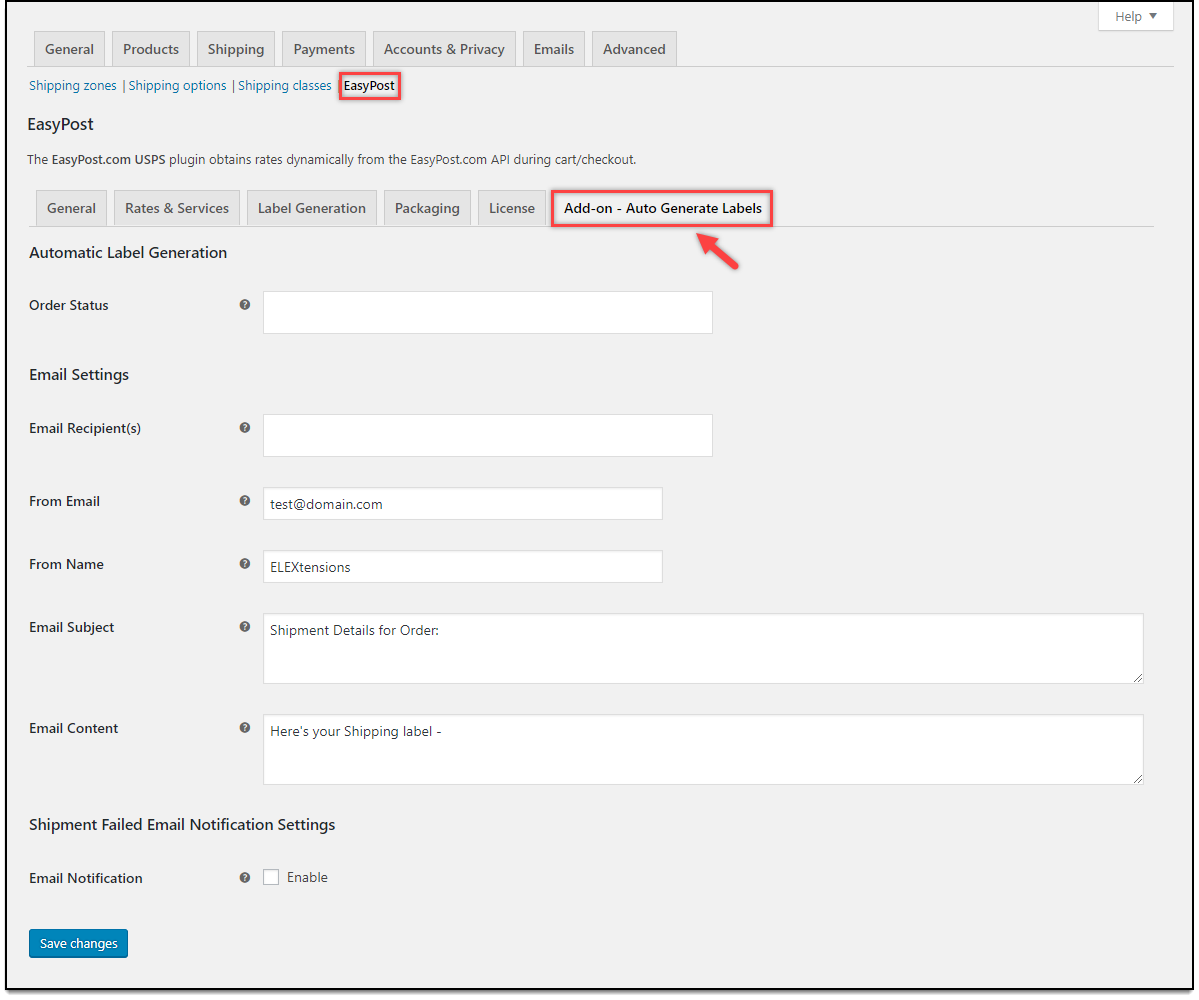
In the settings, you need to set the following things to ensure that the add-on works error-free.
Here, we give the general settings to ensure that the emails are generated for respective order generation and sent to the corresponding recipients mentioned in the settings.
Order status – Here you can choose the default order status from WooCommerce, like Processing, on Hold, Failed, etc. Here for the order statuses chosen, whenever an order moves from one state to another, an email is generated.
Next option is the Email settings. Here, you can specify the email recipients like the customer, store owner, etc. If the custom email option is selected, you can set the custom email address to which the email notification needs to be sent. On choosing the custom email, you get an Add Email option in the email settings. Next, you can set the From email, From name which is basically taken from the store admins, email address, and name. You can also specify the email subject and the sample email content which is used for email by default. It will make it easy to work on it.
Configuring Failed Order Messages
What happens when your order has encountered some problems during transit? To keep the communication intact, you can use emails. You can configure failed order messages in here.
You can enable the checkbox for email notification. Then specify the email subject and email content.
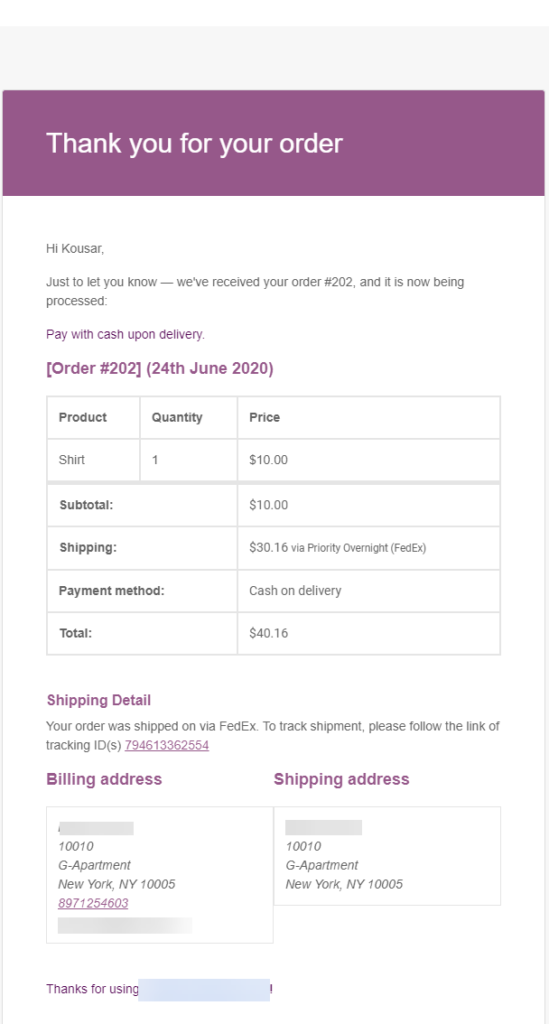
Once you set these settings when an order is generated, an email is triggered to the provided email recipients.
Also, another email, with the generated shipping label is sent to the recipients given in the settings.
On clicking the link provided you get the label generated for the order.
To Conclude,
Hence, using the plugin, you can put your FedEx WooCommerce shipping in auto-mode and generate shipping labels and notify the customers easily via email.

