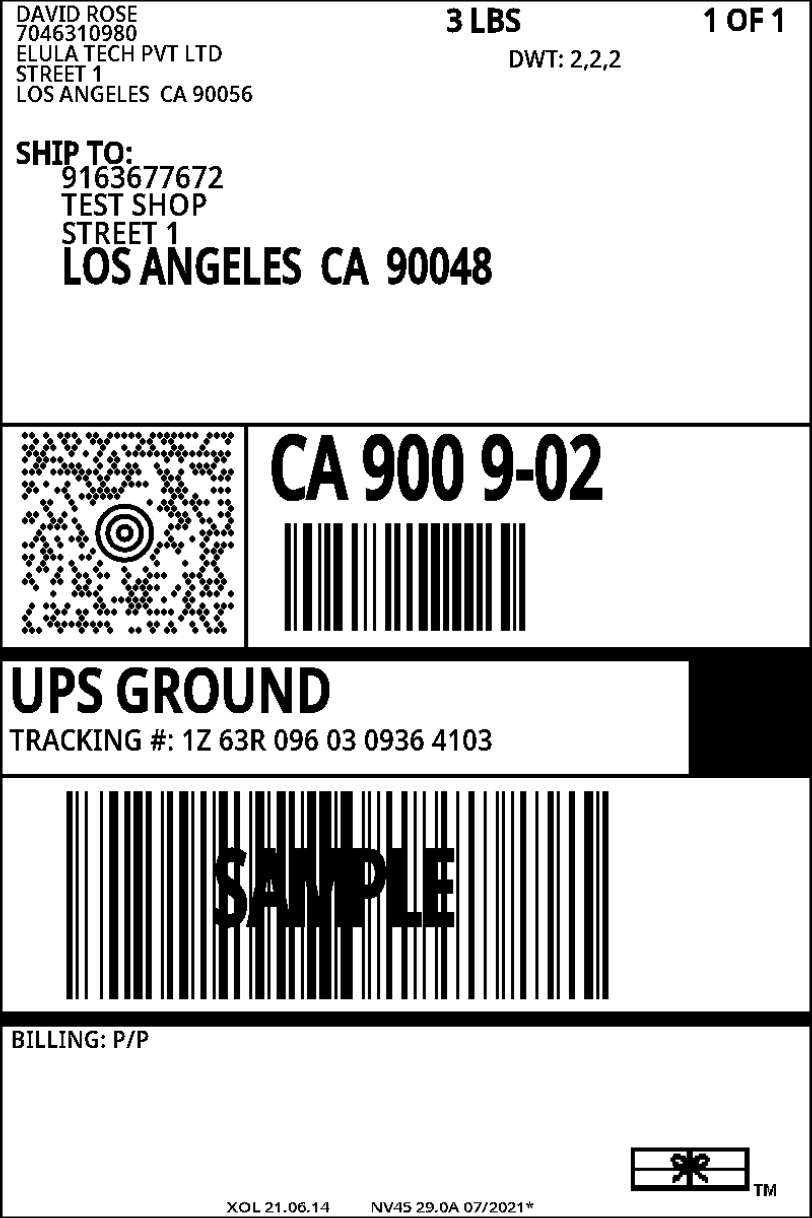
Shipping labels may appear to be a minor component of the eCommerce workflow, but they are essential for incoming and outward operations, as well as the profitability and fulfillment of your eCommerce store. Shipping labels communicate essential information to your logistics system, assisting both technology and humans in understanding the sources and destinations of your product.
Creating and printing shipping labels is a crucial element of the logistics chain. You can enter the order information on the UPS website to generate a UPS shipping label. Without a doubt, completing the entire procedure right from your WooCommerce dashboard is a faster and more efficient choice. In this article, we will demonstrate how to print UPS shipping label from your WooCommerce store using ShipEngine. So let’s get right to it and look at how to generate and print UPS shipping labels in WooCommerce.
What is a UPS Shipping Label?

A UPS shipping label will include accurate information that both people and computers can read. Packages might be delayed in transportation, sent to the wrong location, or lost entirely if they do not have a readable shipping label. Any of these circumstances could result in a monetary loss or a loss of client confidence, so the shipping label is crucial.
How to generate and print UPS Shipping Labels from your store’s backend?

The following UPS services are supported by the ELEX WooCommerce ShipEngine Shipping plugin:
- Ground
- 3 Day Select
- 2nd Day Air AM
- 2nd Day Air
- Next Day Air Saver
- Next Day Air Early AM
- Next-Day Air
- Express
- Expedited
- Express Plus
- UPS Saver
- UPS Standard
Configuring the Plugin Settings
Click here for instructions on how to purchase, configure, and activate the plugin. Let’s begin with a rundown of all the configurations you’ll need to specify in order to generate and print UPS shipping labels.
The plugin’s settings can be found under WooCommerce > Settings > Shipping > ShipEngine.

You can choose from Live and Test mode for the API, and then enter your ShipEngine API-Key.
Click Save Changes once you’ve finished making the changes.
Add a custom method title if necessary and provide the sender’s shipping information on the Rates and Services tab.

Then, if necessary, create a fallback rate under carrier and rate settings. If ShipEngine does not return shipping costs for whatever reason, the fallback rate will be utilized. Choose between commercial and residential rate types, and specify handling fees as necessary. Activate UPS from the shipping carriers dropdown menu, then enable all of the UPS services that you want to activate under services.
To proceed, click Save Changes.
Finally, specify the print label type to PNG, PDF, ZPL, or EPL2 under the Label Generation tab’s label printing API settings. If necessary, you can add insurance, change the label size to default or custom, and use the signature option for enhanced protection.

Click Save Changes after entering all of your shipping information under the origin address.
Generating and Printing UPS Shipping Labels
Let’s take a look at how to generate and print a UPS shipping label when a customer selects a UPS shipping service for their purchase. On the checkout screen, the customer selects a UPS Service and submits an order.

You’ll be able to see which UPS service was chosen by the buyer when they placed their order. To create shipping packages immediately, click Generate Packages under Generate Shipping Label Using ShipEngine API. The weight and dimensions of the shipment will be automatically filled in from the product details page. After selecting the UPS service that the customer has chosen for the order, click Create Shipment.


Wrapping up
If you have started your WooCommerce based eCommerce store from scratch, you know how cumbersome and time-consuming it is to visit the UPS website or even a physical office just to generate and print shipping labels in bulk for your orders. It takes up so much valuable time, resources, and energy, on a regular basis.
With the ELEX ShipEngine Multi-Carrier Shipping & Label Printing Plugin for WooCommerce, you can easily create packages, generate and print shipping labels, display live UPS and FedEx shipping rates on your cart ad checkout pages, and also track shipments, right from the backend of your store. It solves all of your shipping problems from one central location. We hope this article gave you a clear idea of how to print UPS shipping label from your WooCommerce store using ShipEngine. If you have any questions regarding the ELEX ShipEngine plugin, please let us know in the comments section below.
Further Reading
- How to Print FedEx Shipping Label from your WooCommerce Store using ShipEngine?
- What Is ShipEngine? How Is The ELEX ShipEngine Plugin Going To Improve The Shipping Process Of Your WooCommerce Store?
- How To Integrate ShipEngine API With Your WooCommerce Store?
- How to Get a UPS Account Number? Step By Step Instructions
- How to Ship Dry Ice Frozen Items using UPS?


