If you are already running a successful WooCommerce store with amazing products you can make your store more manageable by printing the order number on the WooCommerce shipping label. Your shipping label can be pasted onto the package to identify the product delivery instructions for both the customer and the shipping service provider. Let’s see what changes you need to print order numbers on WooCommerce shipping label.
What do you need to get started?
- Firstly, you need a WordPress website; you can get detailed information on How to Build a WordPress Website in 7 Easy Steps.
- After you are done you can read this article on How to Get Started with a New eCommerce Business Idea using WordPress and WooCommerce?
- Install the ELEX WooCommerce DHL shipping plugin with the print label.
What is a print order number?
When the shipment is confirmed by the E-Commerce store owner it generates an automatic unique number to track the delivery details. It can be used to track the progress of your order such as delivery location and the estimated time of delivery.
What is the WooCommerce shipping label?
WooCommerce shipping label is the detailed information that is stuck onto the package to easily identify the delivery address of the customer and product instructions. It contains the name and address of the store and customer details, order instructions, barcode, print number, shipment service provider details, etc.
What is the ELEX WooCommerce DHL Shipping Plugin with Print Label?
This plugin is handy for both customers and the WooCommerce store owner to display shipping service information in the cart and the checkout pages. Easily print automatically generated shipping labels by just following the instructions provided in this article. Customers and store owners can track their shipments from the WooCommerce order page. You can customize your package and label instructions using this plugin.
How to install and activate the plugin?
When you have successfully purchased the plugin you can go to the WordPress dashboard and go to Plugins > Add new. Using the Upload New button you can just upload the zip file which you downloaded. When the plugin is successfully installed you will see a button to Activate the plugin. Now, go and set up all the available options in the DHL express settings option according to your product type and required delivery instructions. You will have to insert your email address and API key to use all the features of this plugin on your published website.
Detailed guide to print order numbers on WooCommerce shipping label
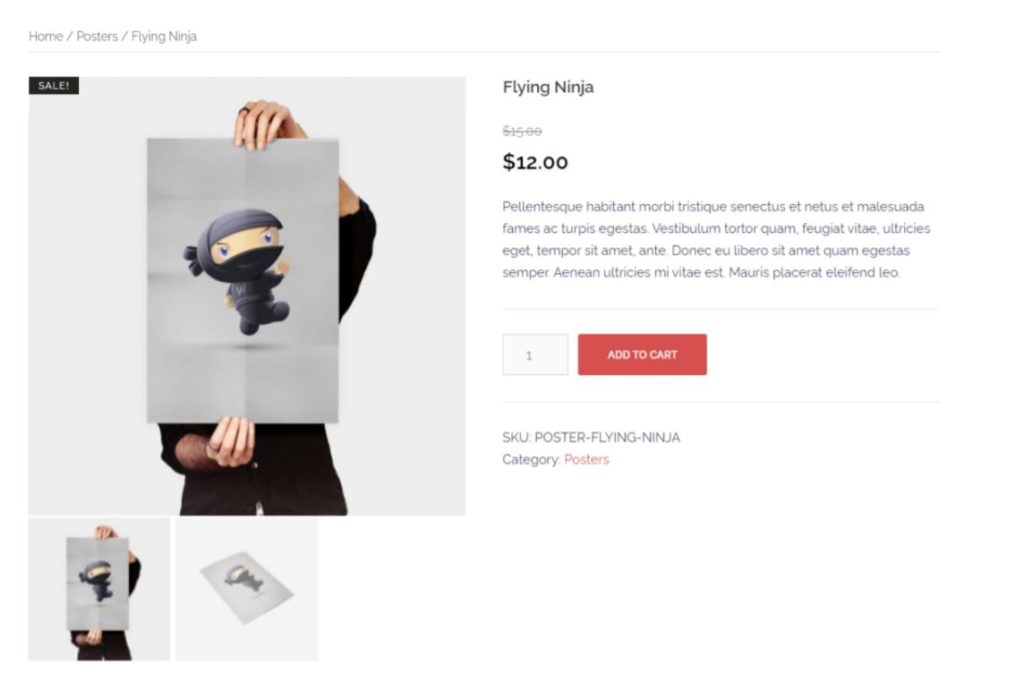
After you have successfully created your WooCommerce store and configured the above plugin you can upload your products. Now, let’s head over to your store and order a product.
Let’s select the cash on delivery option and place an order. You can also try other payment methods.
Enter a delivery address as shown below. I have entered Spain’s address for the demonstration. Once your site is published your customers can easily order products to any country by simply going to the Checkout page and selecting a delivery address. If you have successfully configured the ELEXtensions WooCommerce DHL Express plugin, you will see shipping details just like given below.
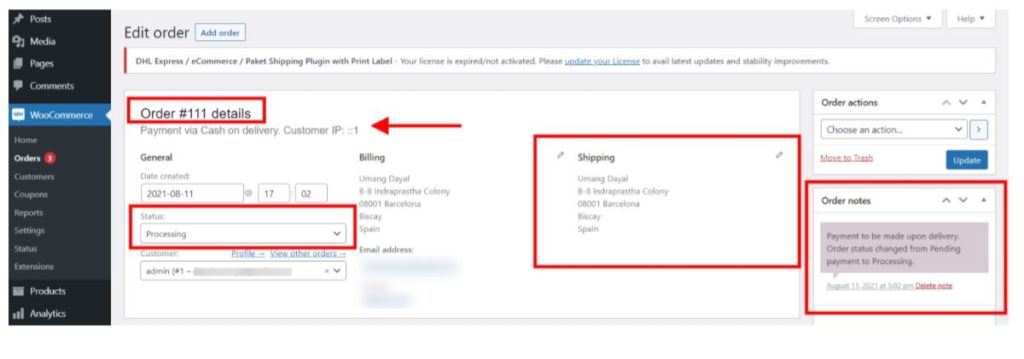
When you have placed your order you will receive an update. To check and complete your shipment you can go to WooCommerce > Orders. Select the latest order. You will see a screen like below.
Here you can see the order number at the top and below it, you will see the payment method, which is selected by the customer. In Status, you can see that the shipment is still in progress. You can change the status to completed once you have verified all the details correctly. When you change the status to completed your customer will receive an auto-generated email that their product has been successfully shipped.
You can also see the Billing and Shipping details which can be customized if required. And in the right bar, you will see order notes. Once you generate a label you will see more options here.
How to print order numbers on WooCommerce shipping label
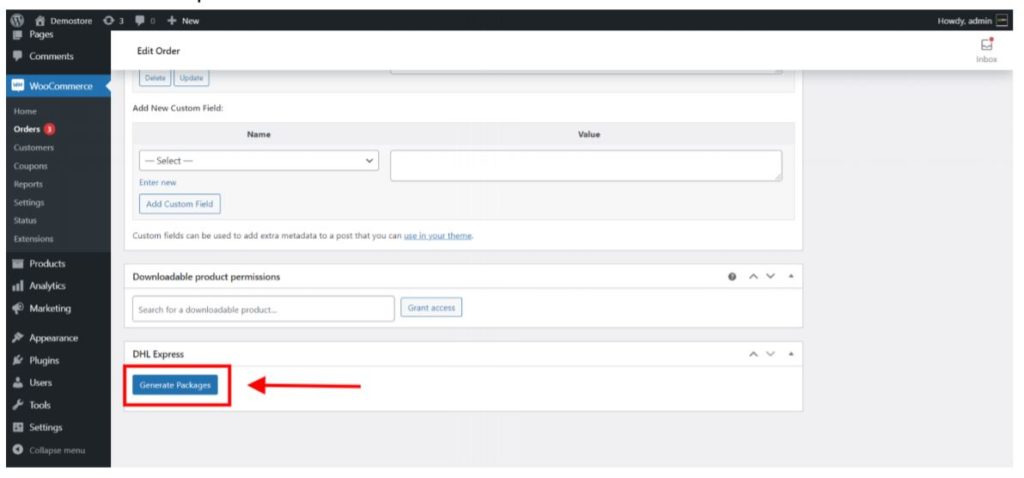
After checking the above details you can scroll down and you will see a Generate Packages button. Click this option.
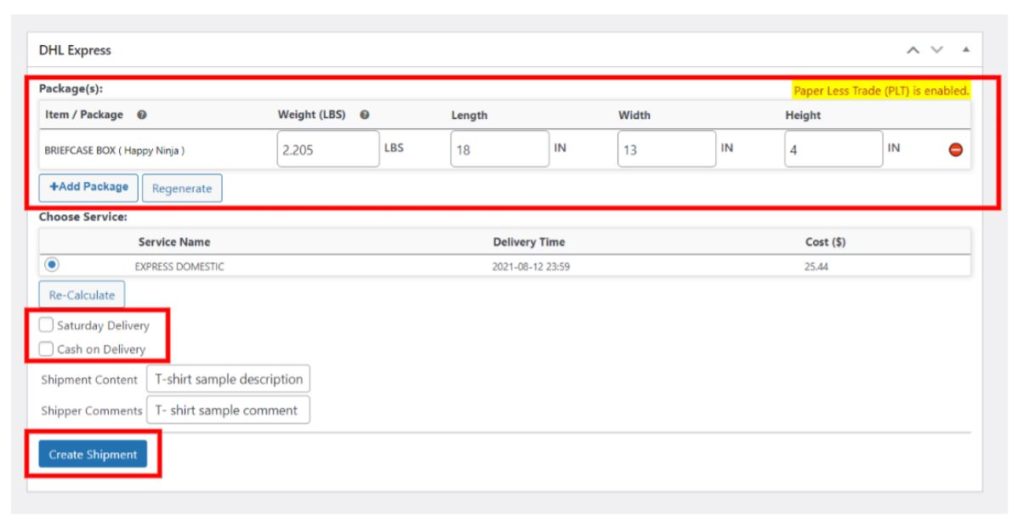
After clicking the above button you will see further options like below.
In the Package(s) tab you can see the dimensions like weight, length, width, and height that will be used to package. You can also re-edit these dimensions if required.
Below that, you will see the delivery service name, delivery time, and total cost applicable for shipping.
If you also deliver on Saturday and allow cash on delivery you can tick the available 2 options. Once you are done, click the Create Shipment button.
Your shipment is successfully created and you will be able to view the below options.
Shipment Number: You will receive an automatically generated shipment number just like shown above. This number can be used to track your shipment location and progress. By clicking this option you will be redirected to the official DHL website where you can view the shipment details.
You can create a Commercial Invoice or click the Reset Shipment button if you want to repeat the above process and make any previous changes. If you want to Create a Pickup Request you can click the option on the right.
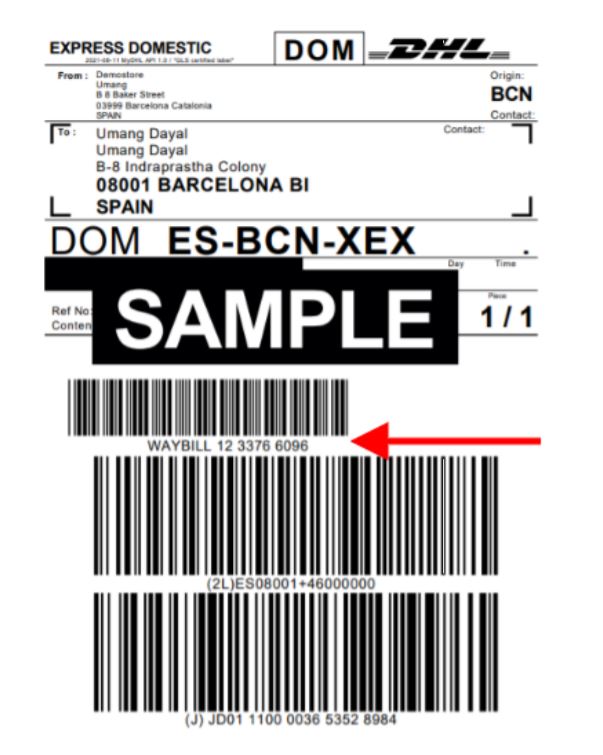
Shipment Label: When you click this option you will be redirected to a new tab window like below. You can see that your WooCommerce shipping label is successfully created. Directly below the Sample text, you will see the barcode. The number besides WAYBILL is your print number that was generated in the earlier step.
Here you can view all the Shipper details. And directly below it are the receiver’s contact details and address. You can also see the shipment service code and product details. In Shipment details, you will see the reference number, customs value, and content that you provided. Product weight and the total number of pieces are also displayed. You will see a barcode that is automatically generated for your shipping label.
Now, go and configure these options on WordPress using the above plugin and print order numbers on WooCommerce shipping label. The order number is handy for the store owner and the customer to track the shipping product. If you have any questions, doubts, or new ideas you can leave a comment below.
Further reading

