Many eCommerce store owners find it difficult to generate and print FedEx shipping labels. Many new eCommerce businesses that have recently started, generate and print each shipping label by manually going to the FedEx website and creating individual shipments. They process each order manually, copying and pasting or exporting the order details before uploading it to the FedEx shipping label website. This entire procedure is not only laborious, but it also takes a long time.
Gone are the days when you had to go through the entire process manually. With the right tools in place generating and printing shipping labels will not even take you more than a few minutes. In this article, we’ll show you how to create FedEx shipping labels quickly using the ELEX ShipEngine Multi-Carrier Shipping & Label Printing Plugin for WooCommerce. You’ll also be able to see the various steps involved in printing the shipping label. Let’s see how!
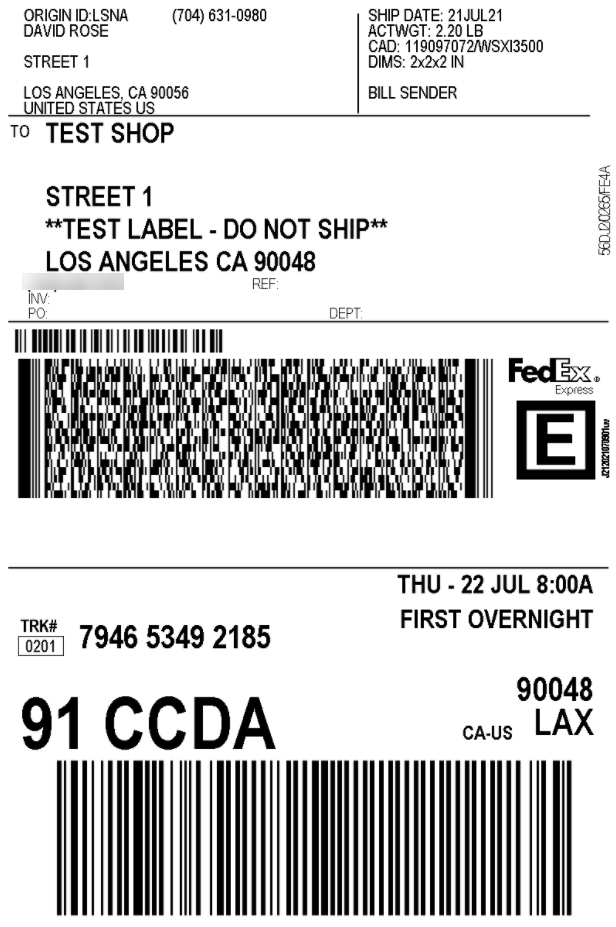
What is a FedEx Shipping Label?
How to create and print FedEx Shipping Label from your WooCommerce dashboard?

Configuring the Plugin Settings
To know how to buy, install, and activate the plugin, click here.
Let’s start by going over all of the settings you’ll need to configure to generate and print FedEx shipping labels.
WooCommerce > Settings > Shipping > ShipEngine gives you access to the plugin’s settings.
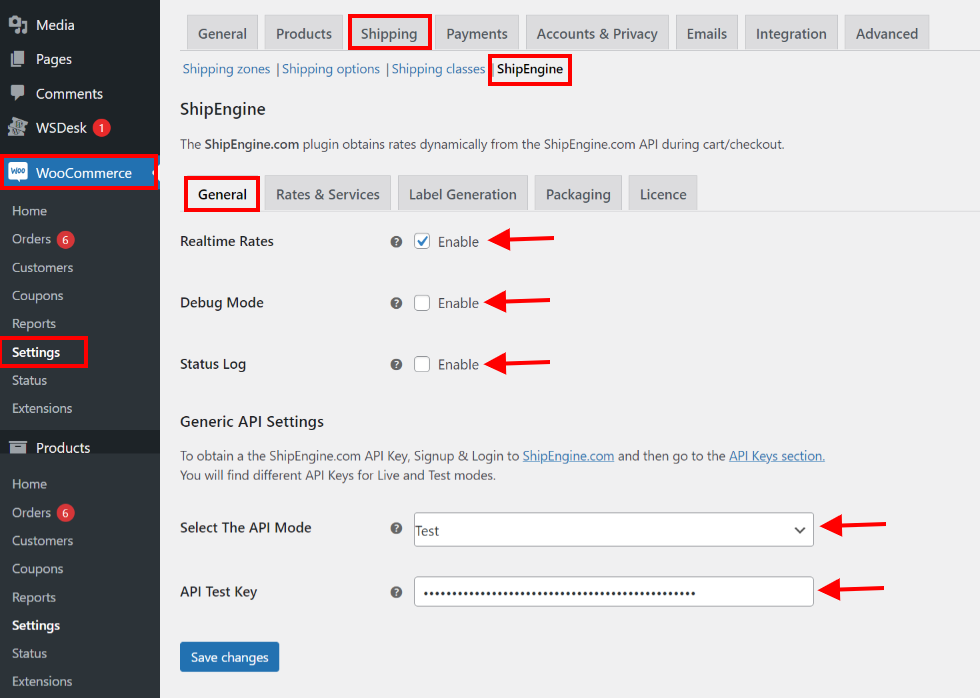
You may select the API Mode between Live or Test mode and enter the API-Key from your ShipEngine account.
After you’ve made your adjustments, click Save Changes.
Next, on the Rates and Services tab, add a custom method title if needed and enter the sender’s shipping details.

After that, under carrier and rate settings, set a fallback rate if needed. The fallback rate will be applied if ShipEngine fails to return shipping costs for any reason. Select the rate type between commercial and residential, and set handling fees if needed. From the shipping carriers dropdown menu, enable FedEx and under services, enable all of the services available from FedEx that you want to enable.
Click save changes to proceed.
Lastly, under the Label Generation tab, in the label printing API settings, set the print label type to whichever format you want to go ahead with from PNG, PDF, ZPL, and EPL2. You can add insurance if needed, set label size to default or custom, and enable the signature option for added security.
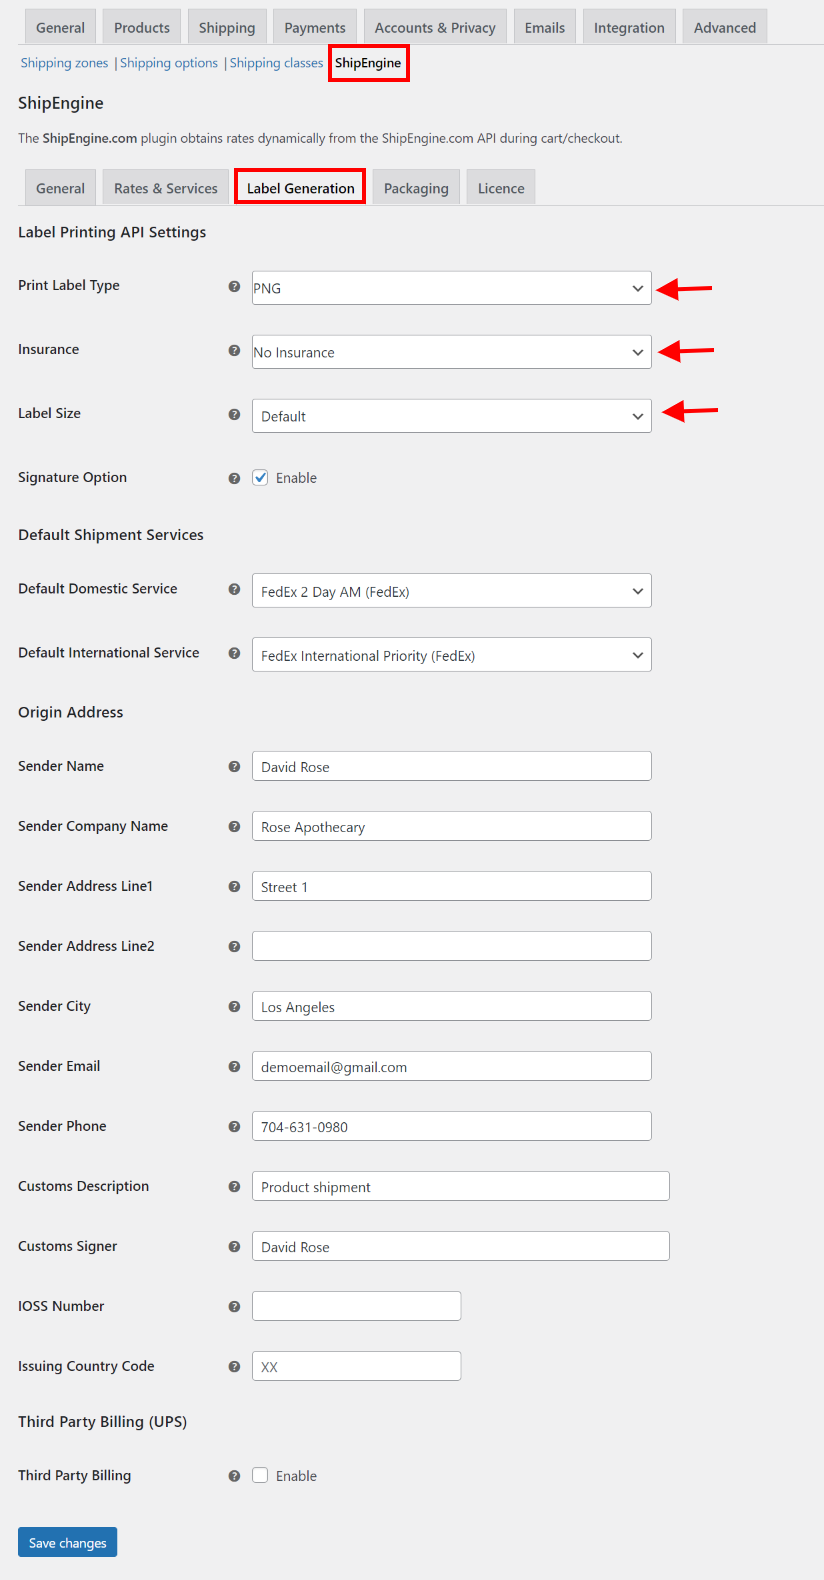
Add all your shipment details under origin address, and click Save changes.
Generate and Print FedEx Shipping Label
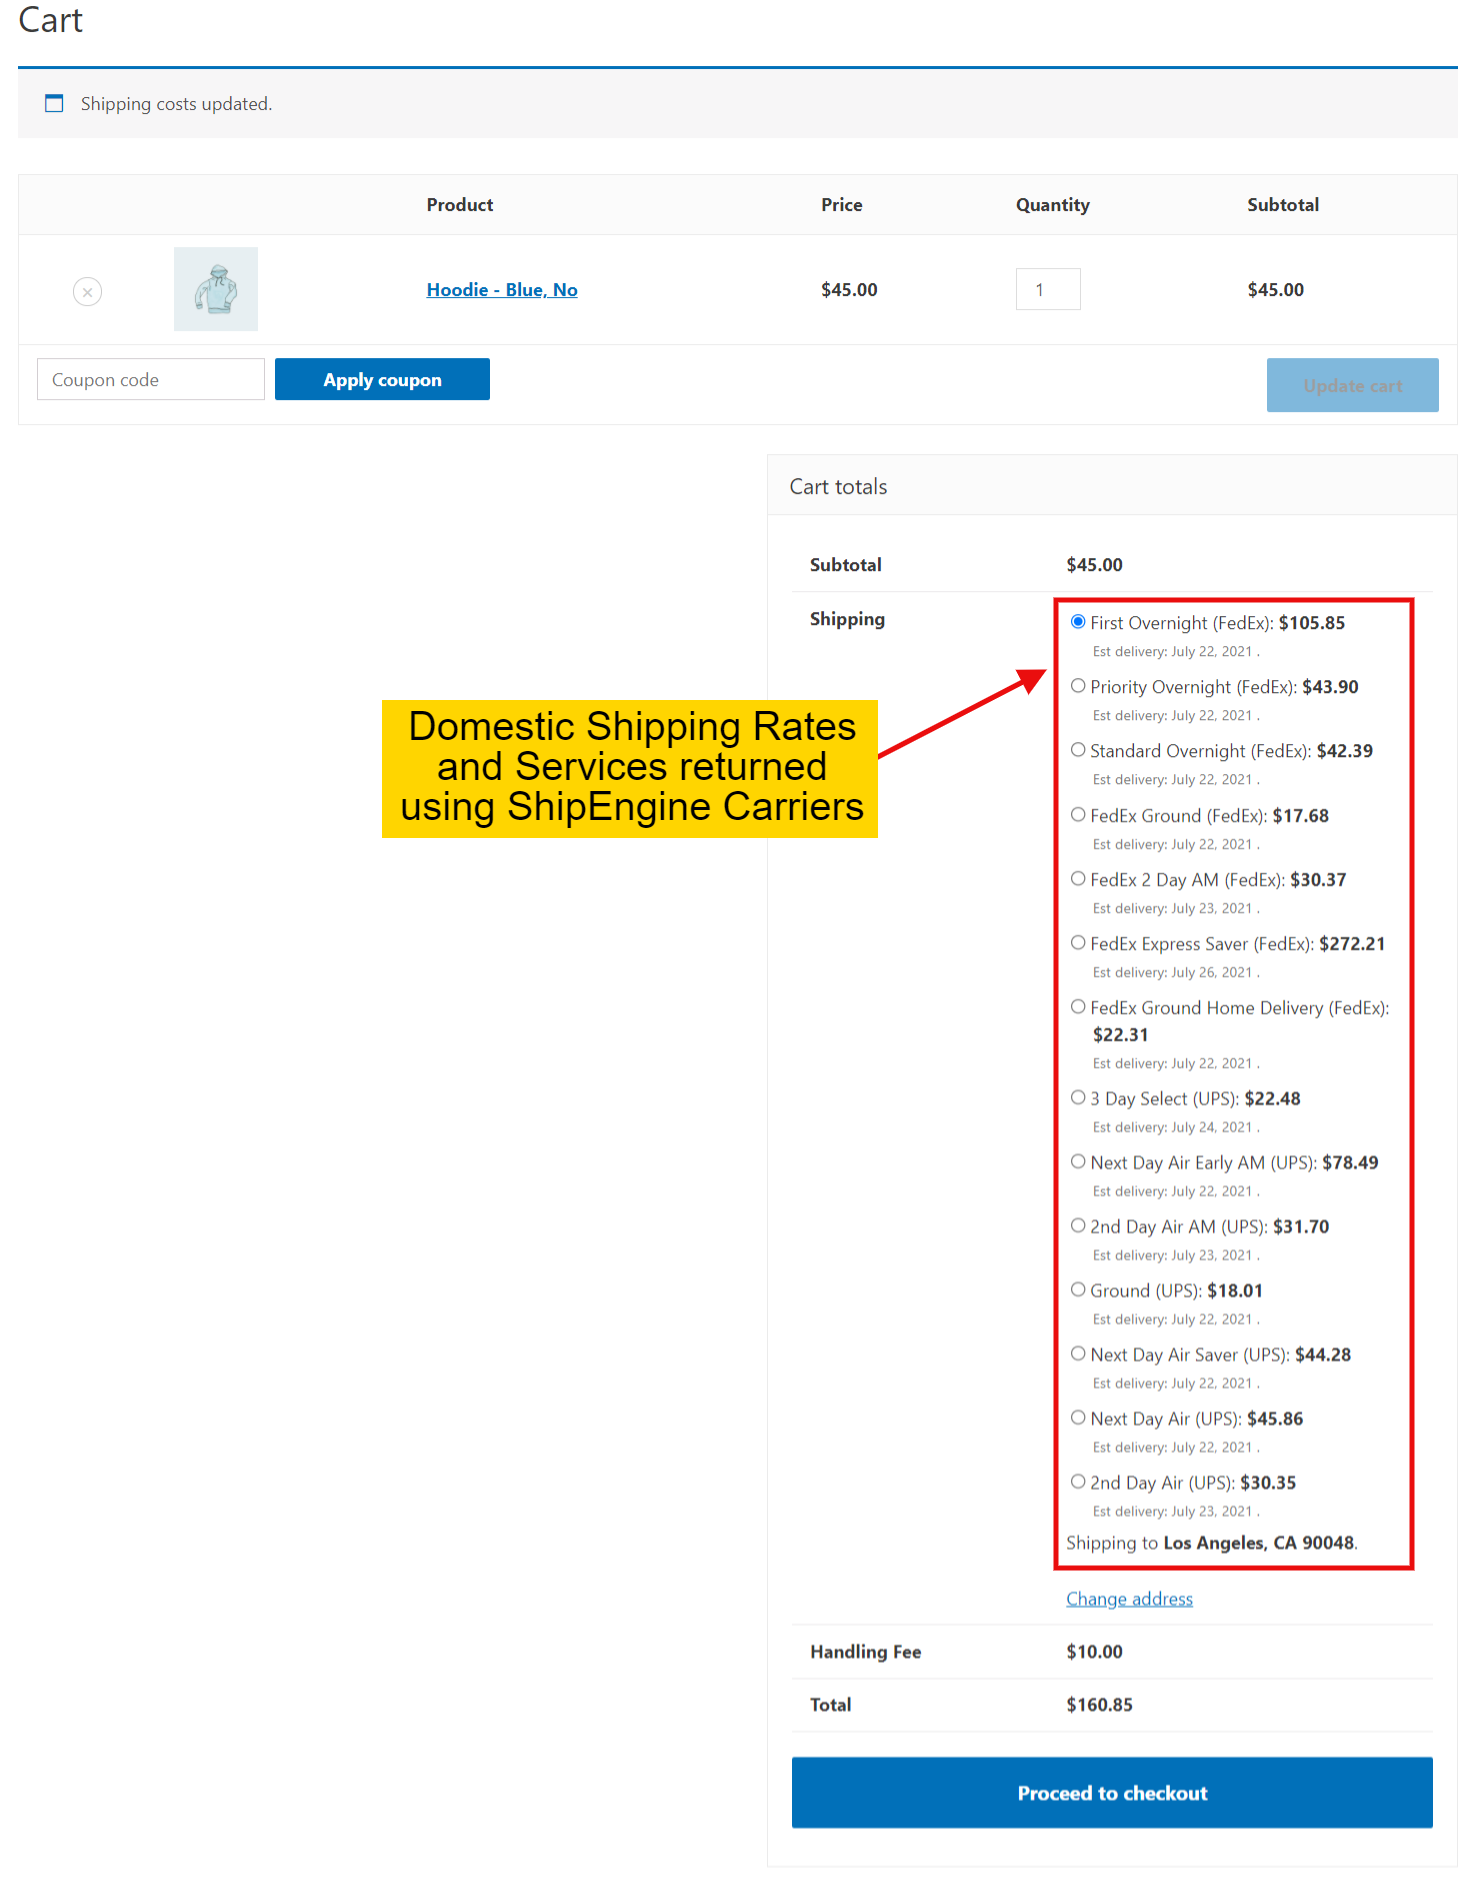
Let us now look at how to create and print FedEx shipping label when a customer makes a purchase using one of the FedEx services. The customer chooses a FedEx Service and places an order on the checkout page.
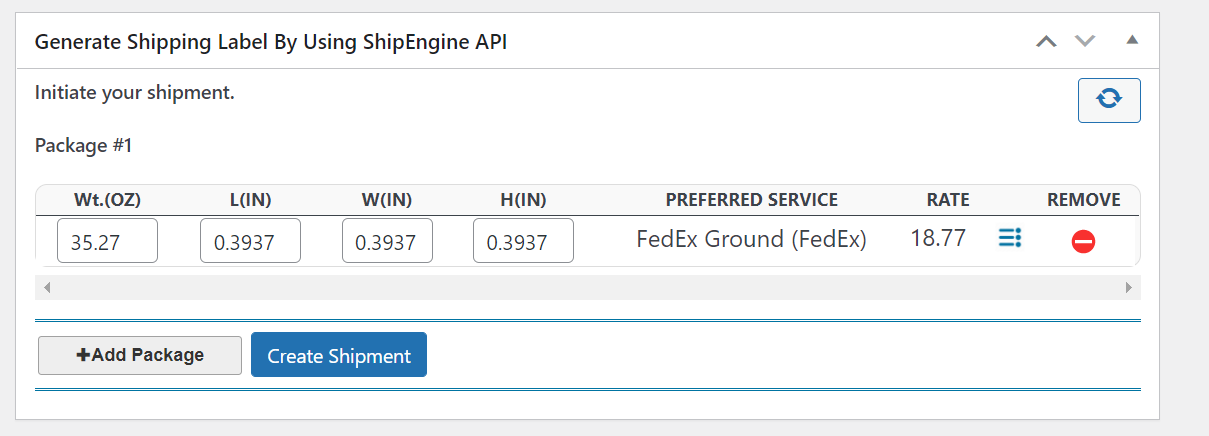
You’ll be able to see the specific FedEx service that the buyer selected while placing their order. Click the Generate Packages button under Generate Shipping Label Using ShipEngine API to generate shipping packages instantly. From the product details page, the package’s weight and measurements will be automatically filled in. Click Create Shipment after selecting the FedEx service that the customer has selected for the order.
If you have any questions about the plugin, please contact our support team.
Wrapping up
Creating shipping labels directly from the backend of your WooCommerce store is the best approach to boost efficiency in your eCommerce business. We hope this article has clarified How to Print FedEx Shipping Label from Your WooCommerce Store Using ShipEngine and you can now print FedEx shipping labels without having to go to post offices. If you have any questions about the ShipEngine plugin, please leave them in the comments section below.


