What can we help you with?
How to make WSDesk work with WordPress Multisite?
WordPress Multisite is one of the most popular offerings from wordpress.org. With this feature, a user can create a network of sites using only one WordPress installation. This, in turn, empowers users to administer multiple sites under a single area. The super admins can install themes and plugins that can be applied(or used) to all the websites in the network.
When it comes to providing customer support with WSDesk, the plugin can be installed by the super admin to be used by all sites in the network. One cool advantage is that the WSDesk tickets and settings for each site will be separate from one another, giving you proper segregation and control.
In this article, I’ll explain how to create WordPress Multisite and configure WSDesk for all the sites in the network.
Making WSDesk work on a WordPress Multisite environment
There are two scenarios before you get down with process:
- You are installing WSDesk on a multisite for the first time.
- You have already installed WSDesk on your single site and are moving to multisite.
1. Installing WSDesk on a Multisite for the first time
First, you need to create WordPress multisite, you can refer this link for creating a network of sites.
For this demonstration, I have created two sites titled; The DemoShop and Demo ToyStore as shown in the screenshot below.
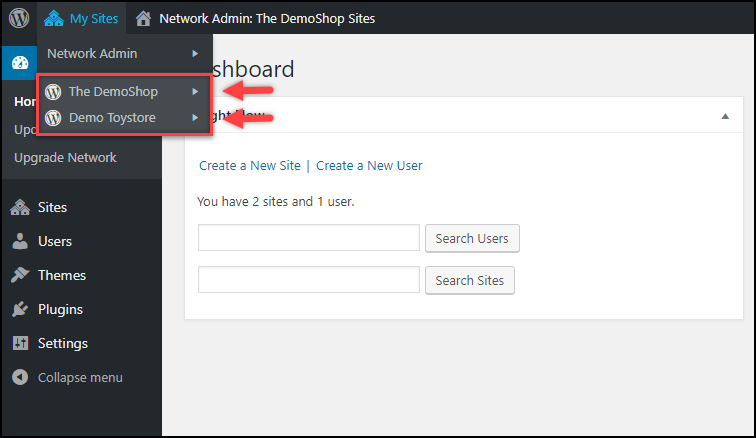
To install WSDesk, click on My Sites menu located on the top left corner and move to Network Admin > Plugins. The themes, plugins, and users created(or installed/activated) under Network Admin dashboard are applied to all the sites in the network.
Once you are in the Plugins page. follow the general method of installing and activating a plugin for WSDesk. After the installation, you can notice the new sub settings of WSDesk for the network as shown in the screenshot below.
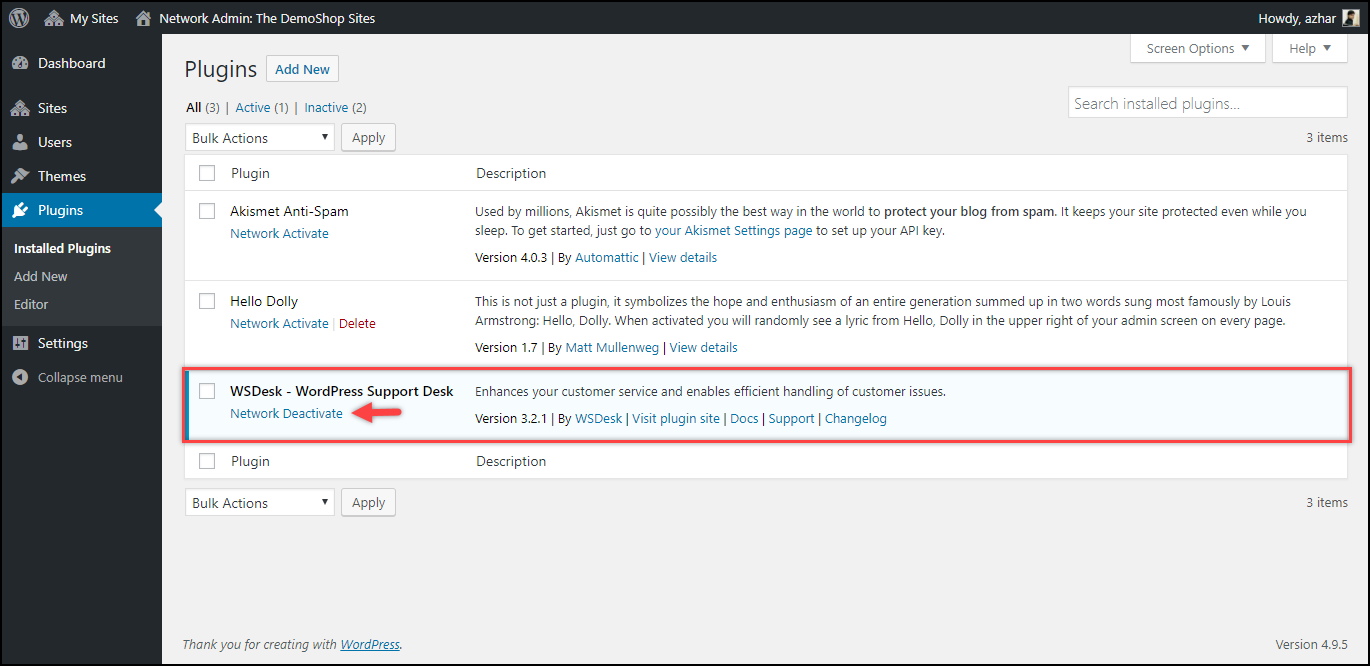
If you click on Network Deactivate setting, WSDesk will be deactivated for all the sites in the network.
Quick Note: You need to activate WSDesk in the root site instead of the sub-site to receive plugin updates.
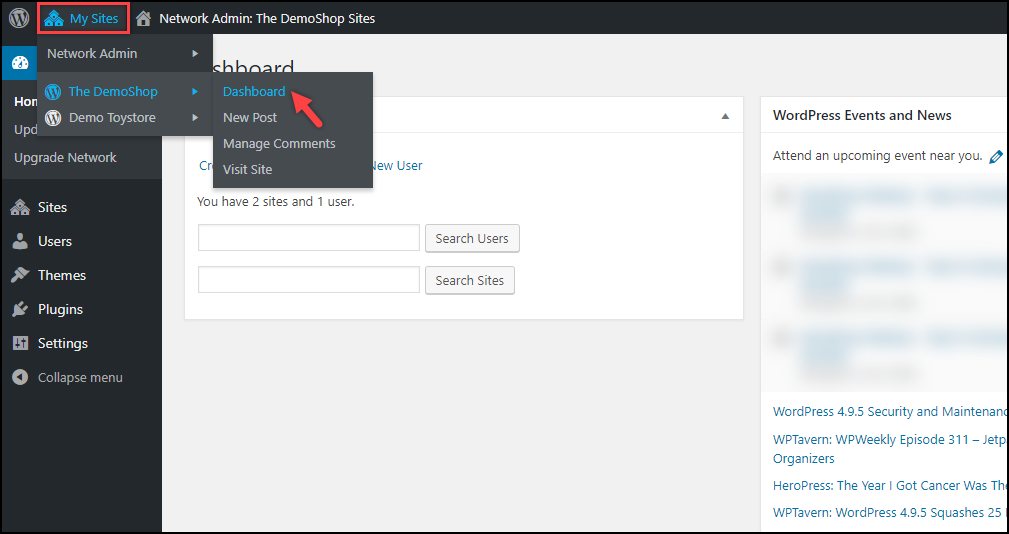
That’s not it! You need it to configure WSDesk for each site as well. For this, move to the dashboard of one of the sites. For our demonstration, let’s move to our first site The DemoShop as shown in the below screenshot.
Next, you will be prompted with WSDesk quick setup as shown in the screenshot below.
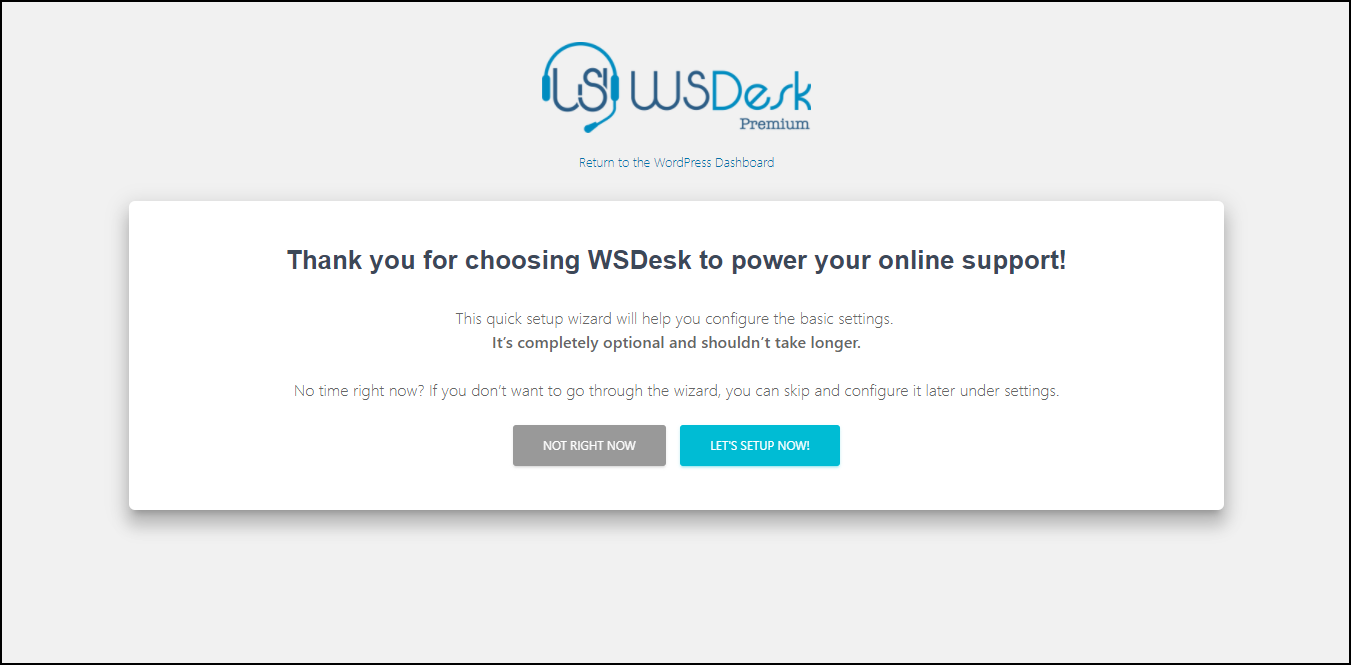
Follow the general steps to configure WSDesk Helpdesk plugin. You can refer the documentation for the setup process.
2. Installed WSDesk on a single site and moving to Multisite
If you have installed WSDesk on a single site and are moving to multisite, you’ll lose all the WSDesk tickets and settings data. But fret not, as you can take a backup of all the tickets and settings with WSDesk.
Let us take WSDesk tickets and settings backup of our The DemoShop site. This setting is provided in the Backup & Restore tab as shown in the screenshot below.
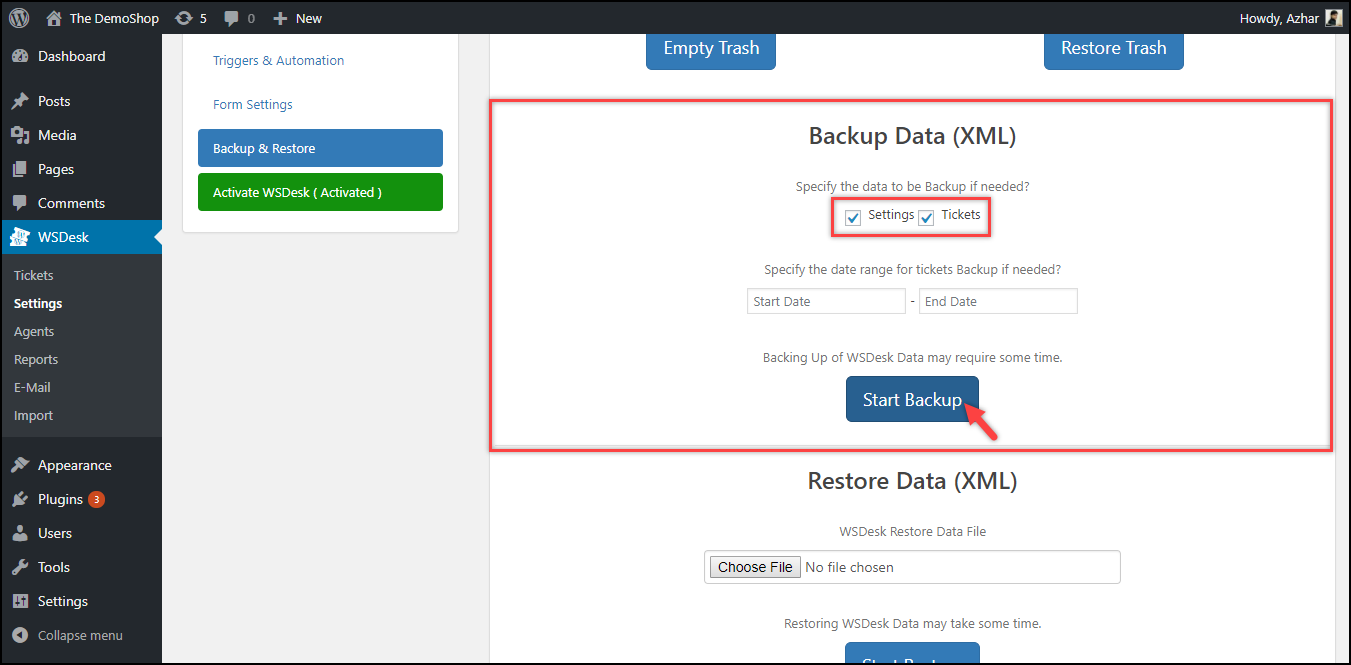
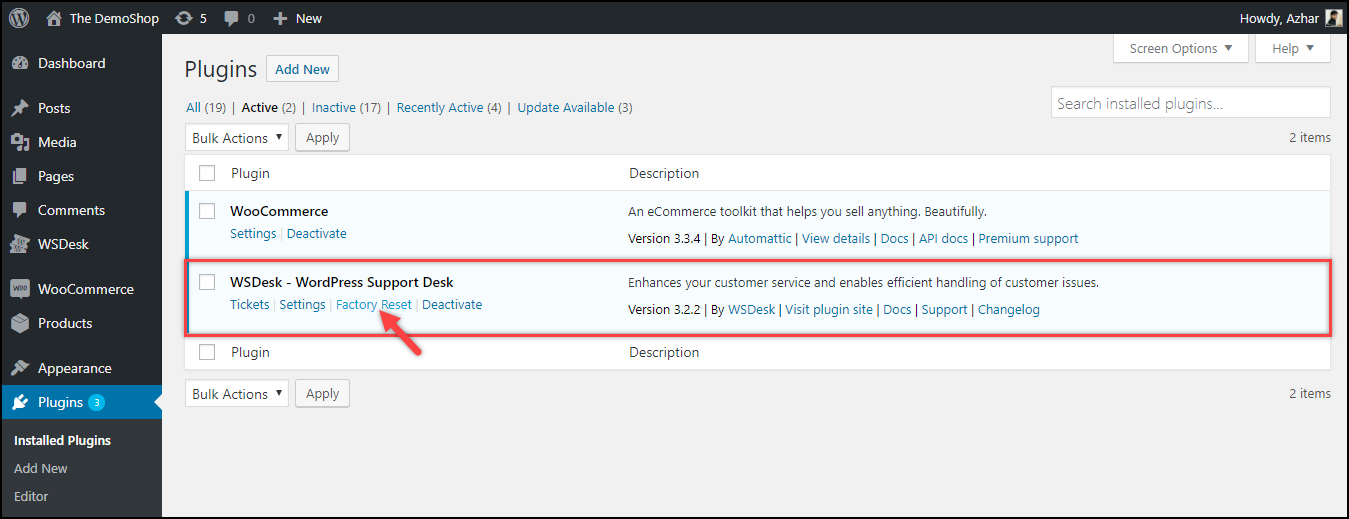
Once you have downloaded the XML file, perform a factory reset on WSDesk. This is because the information stored in the database has to be cleared before installing WSDesk all over again.
The factory reset setting in WSDesk is as shown in the below screenshot.
Next, deactivate all the plugins and proceed with creating a multisite. Once the multisite is created, you can follow the previous case explained in this article, to install and configure the WSDesk plugin. Once the configuration is done, move to the WSDesk settings of the site that you took a data backup of.
Now, move to WSDesk Backup & Restore tab of the same site (The DemoShop, in our case) to restore all our tickets and settings.
Select the previously downloaded XML file and click on Start Restore button, as shown in the screenshot below.
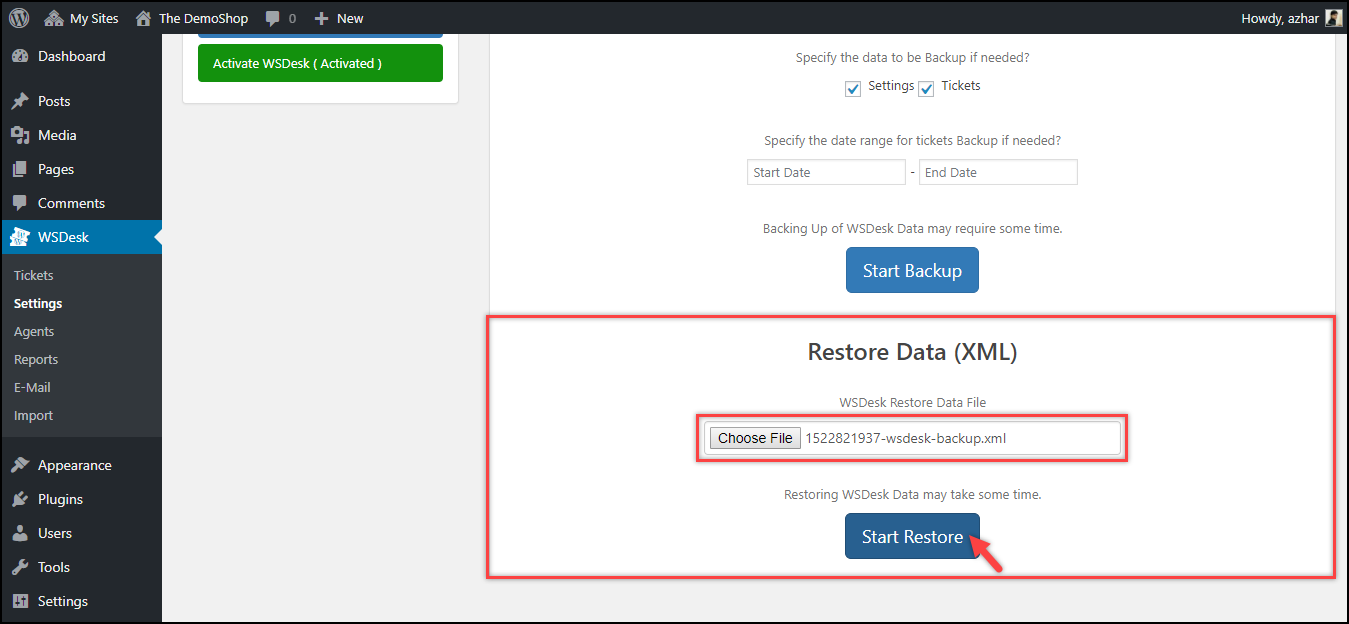
Once the restoration is successful, we’ll get back all our previous WSDesk tickets and settings.
The following screenshot shows all the WSDesk tickets restored.
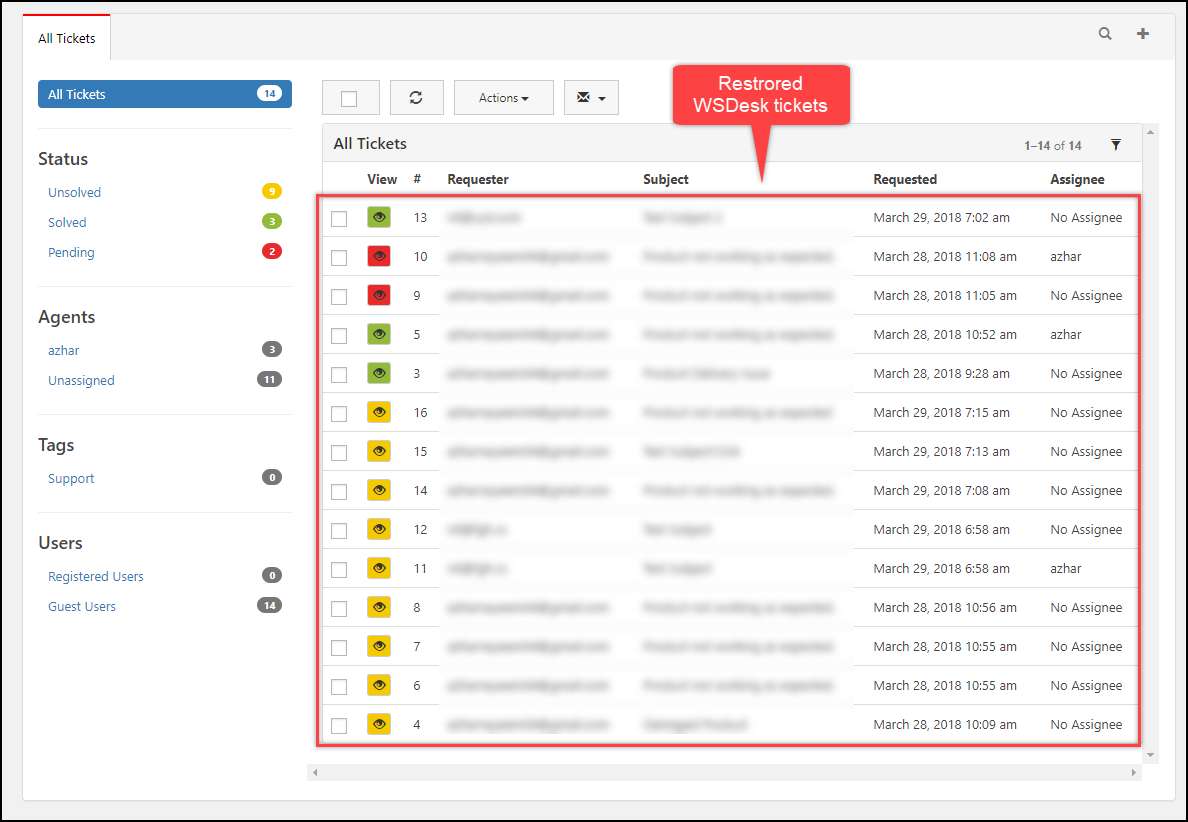
Hence in this way, you can make WSDesk work with WordPress multisite.
To explore more details about the plugins, go check out WSDesk – WordPress Helpdesk Plugin.
Read the product setting up article to understand the plugin, in detail. Or check out the product documentation section for more related articles.
You can also check out other WordPress and WooCommerce plugins in ELEX.
