What can we help you with?
Get your WordPress HelpDesk ready in Less Than 5 Minutes using WSDesk Quick Setup Wizard
Okay, you have purchased WSDesk HelpDesk Plugin and activated in the WordPress Plugins page to streamline your support process. Now, let’s see how you can move ahead with the configuration quickly.
You can access the plugin settings in two ways:
- Go to WordPress left sidebar menu > WSDesk.
- Go to WordPress left sidebar menu > Plugins > Installed Plugins > WSDesk – WordPress Support Desk.

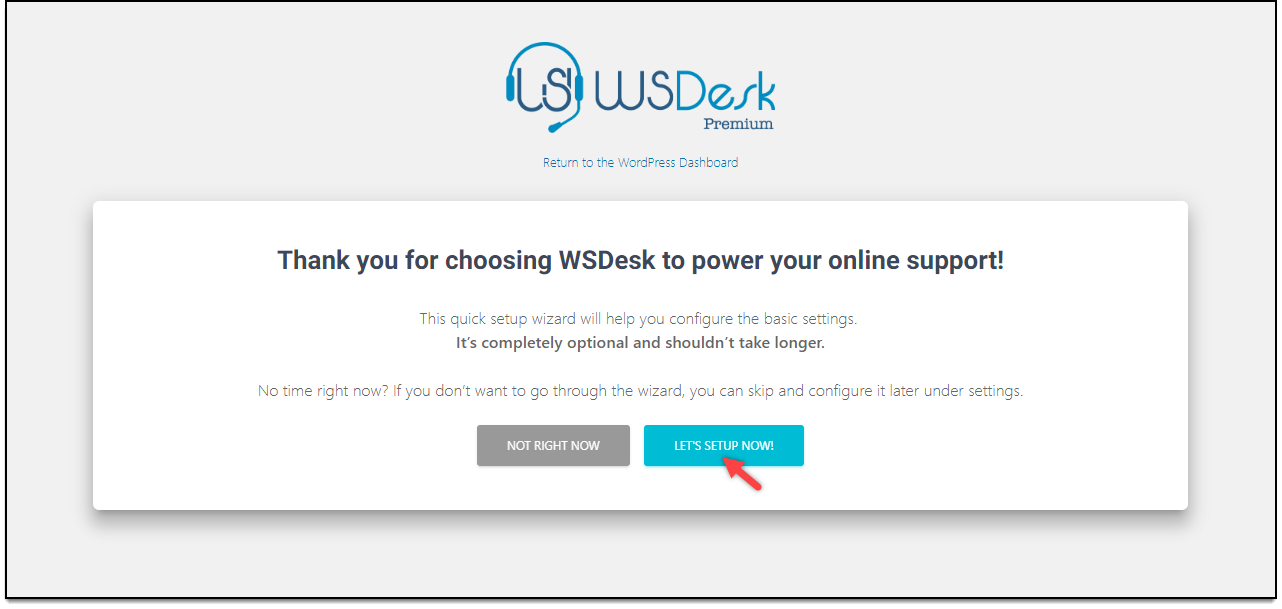
First, you will be shown the WSDesk Quick Setup Wizard. This wizard helps you configure some basic settings that will help you get started with WSDesk. You can also choose to skip this quick wizard setup, read the product documentation, and then configure the plugin in detail, or you can choose to quickly set up the plugin.
The WSDesk Quick Setup Wizard is simple and straight-forward that does not require additional knowledge. In this article, I’ll explain this quick 5 minutes setup in 5 simple steps.
Configure the WSDesk Quick Setup Wizard
You can get started by following the 5 steps explained below.
1. Set Support Email, Starting Ticket ID, and Page titles
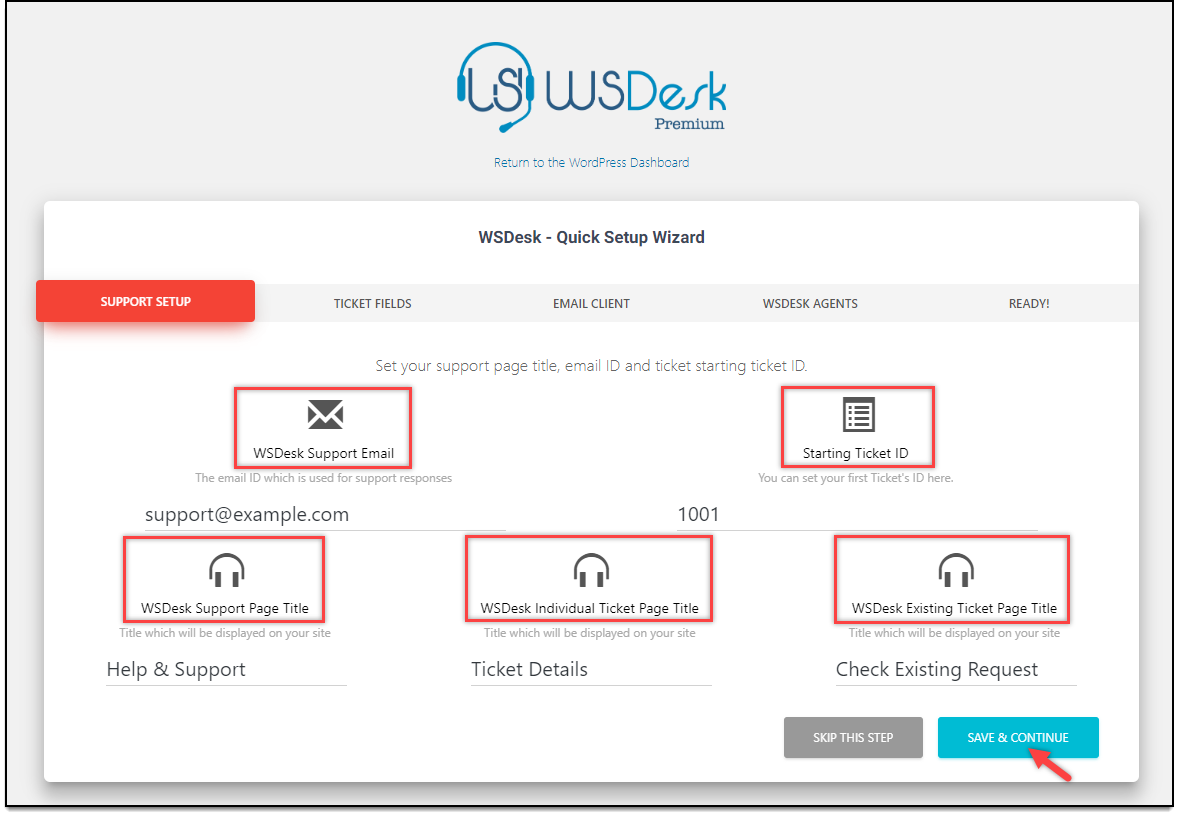
In the first step, you can configure five basic settings:
- Support Email: Enter the email ID that you want to use for support responses.
- Starting Ticket ID: You can set a custom starting ticket number as required. By default, the starting ticket ID is “1”.
The plugin automatically creates three pages; a support page, individual ticket page (to view single ticket conversation), and existing ticket page (to view existing or previous tickets).
- Support Page Title: This title will be shown at the top of your support page.
- Individual Ticket Page Title: Shown on top of the individual ticket page.
- Existing Ticket Page Title: Shown on top of the existing tickets page.
Below screenshot shows the settings with sample values.

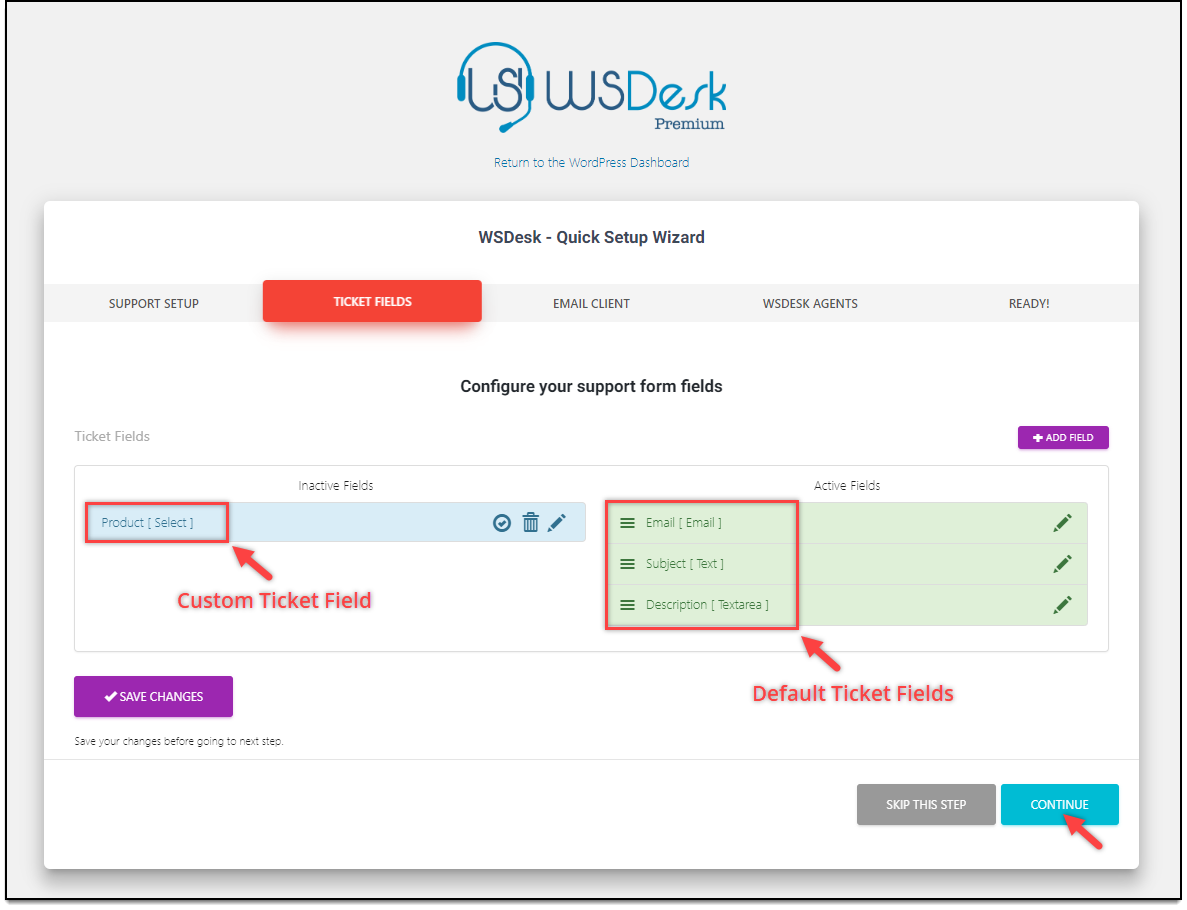
2. Customize your Support Form with Ticket Fields
The ticket fields help customers provide information about their issue/problem.
The support form will contain three fields, by default:
- Email: Email address of the ticket raiser.
- Subject: Subject line of the ticket.
- Description: The detailed description of the issue.
You can add new fields based on your requirement and rearrange them accordingly.

More on WSDesk Ticket fields, here.
3. Link your email address with WSDesk using IMAP
Once email integration through IMAP is done, your emails will be automatically converted to WSDesk support tickets. You need to enter details like IMAP Server SSL URL & PORT, email address and respective password from which emails have to be fetched.

To understand more about configuring IMAP integration, read our article on the same.
If you want to use Google GSuite account for integration, read how to set up Google OAuth for G Suite. For using a personal Gmail account, read the respective article.
Tip: If you choose to skip the setup wizard at any point, you can configure these settings manually later. Our detailed documentation should help you in such a case.
4. Add WSDesk Support Agents and Supervisors
And we are almost done!
Add unlimited support Agents and Supervisors to manage all the emails that you just converted to tickets in the previous step. You can also manage their roles and responsibility in this step.
You can either use the existing WordPress user profiles to make them WSDesk agents and supervisors or create new profiles by clicking on the ADD AGENT/SUPERVISOR button on the top right corner.

5. Create a Ticket!
The last process shows you that the setup is complete. Since there will be some time left out of 5 minutes, you can create a sample ticket to see how things are working. Click on CREATE A TICKET! button to get started.

The plugin will redirect to your support page. You can notice that the support page has the same title that you configured in the quick setup wizard.

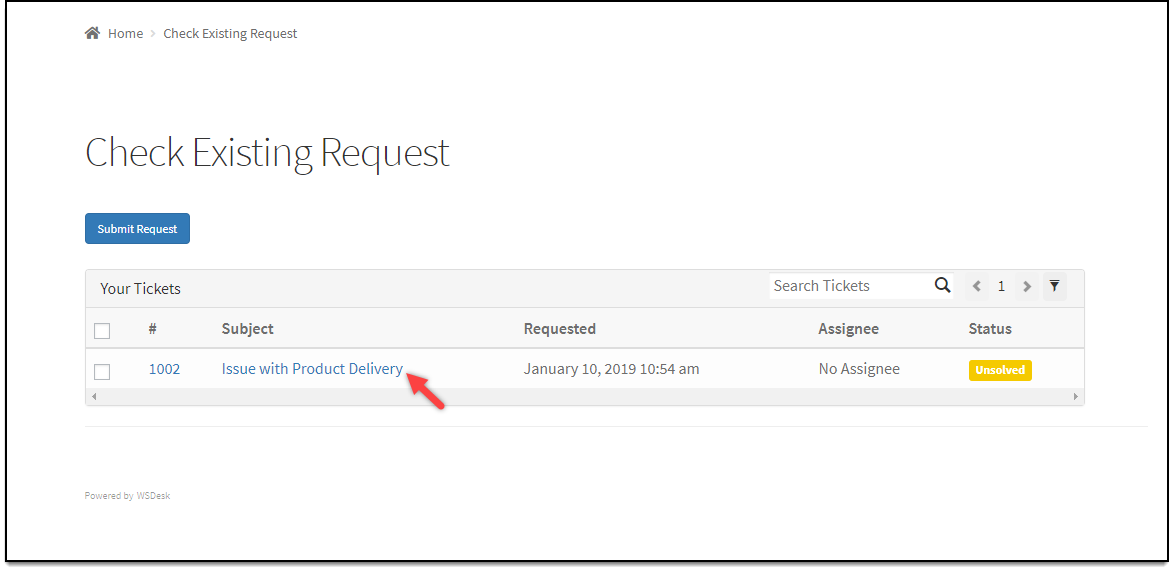
You can enter information in the ticket fields and submit the ticket. Once the ticket is submitted, you can check the status by clicking on the Check Existing Request button. The Check Existing Request page will show the customers (you, in this demonstration) all the tickets that they have submitted.
A sample existing ticket is shown in the screenshot below.

The customer can choose to view or reply to a specific conversation by clicking on the ticket number or ticket subject line.
A sample ticket conversation is shown in the screenshot below.

That’s It! Your WordPress Helpdesk is ready to go!
To explore more details about the plugins, go check out WSDesk – WordPress Helpdesk Plugin.
Read the product setting up article to understand the plugin, in detail. Or check out the product documentation section for more related articles.
You can also check out other WordPress and WooCommerce plugins in ELEX.
