What can we help you with?
Steps to Import Tickets from Zendesk to WSDesk
Here’s a quick video tutorial:
Zendesk Inc. is an American customer service software company based in San Francisco, California. Zendesk builds software for better customer relationships
This article is intended to explain the simple steps of importing tickets from Zendesk to WSDesk.
Here it goes –
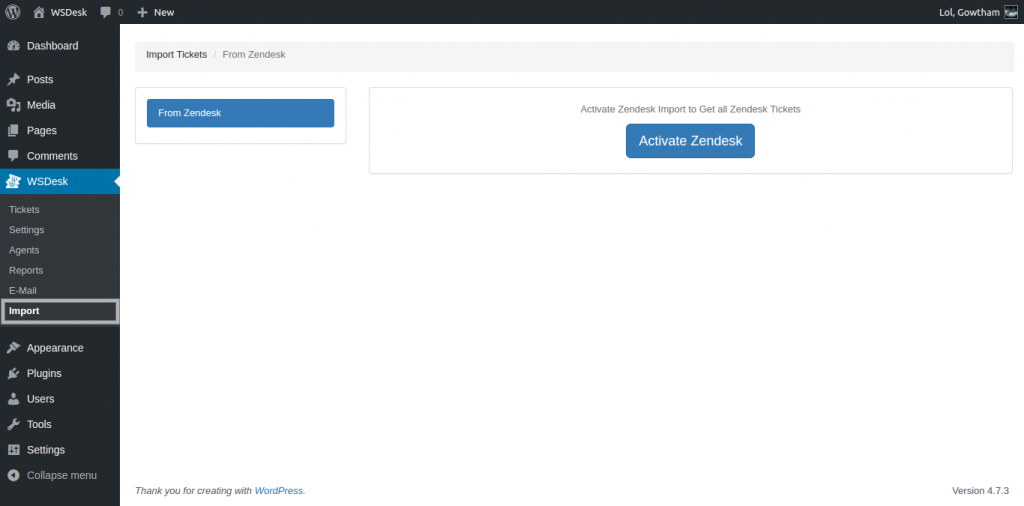
- Go to Import Section under WSDesk Menu and Choose From Zendesk Tab.
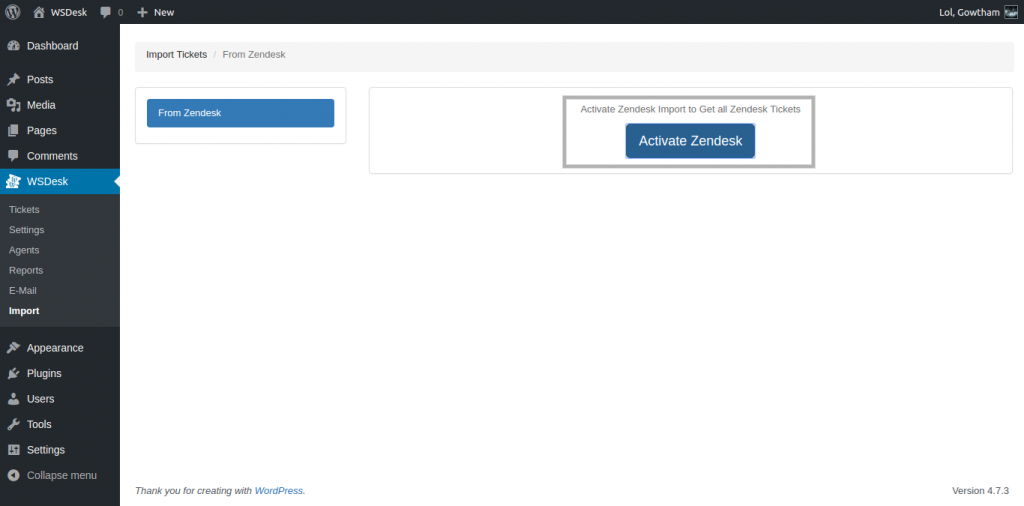
Import Section - Now click on Activate Zendesk.
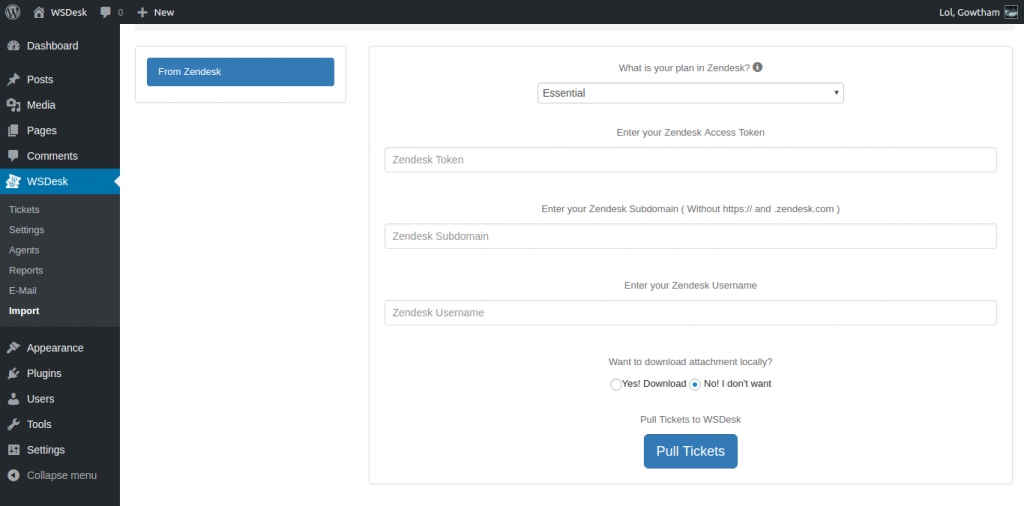
Activate Zendesk - After Clicking on Activate Zendesk wait for some time to display Credential Page.
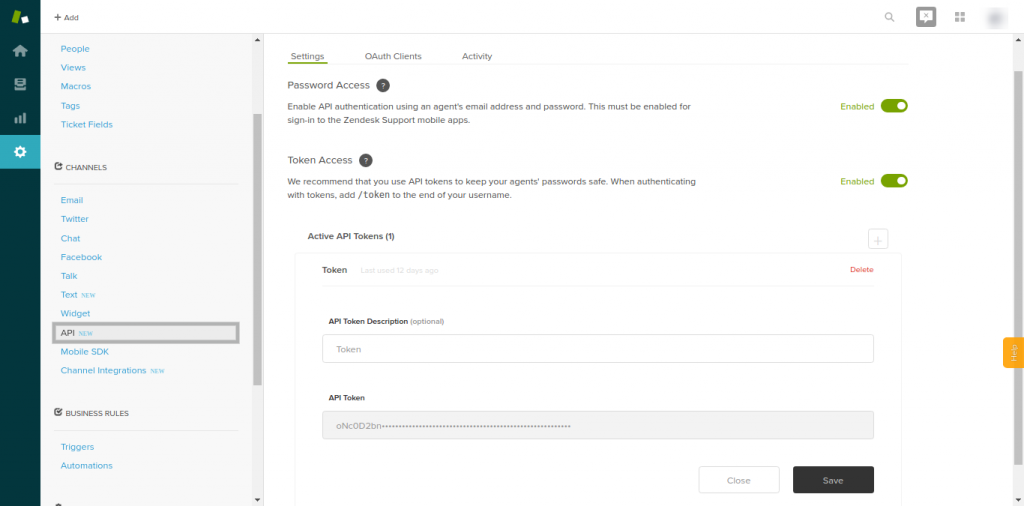
Zendesk Credentials Page - Login to your Zendesk Account and go to API section under Settings.
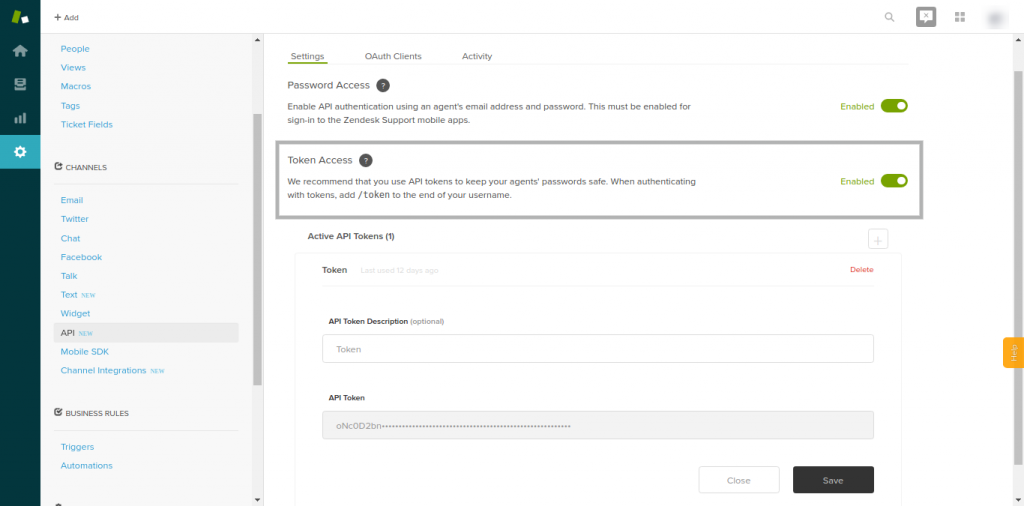
Zendesk Settings Page - Then Enable Token Access from Settings Menu.
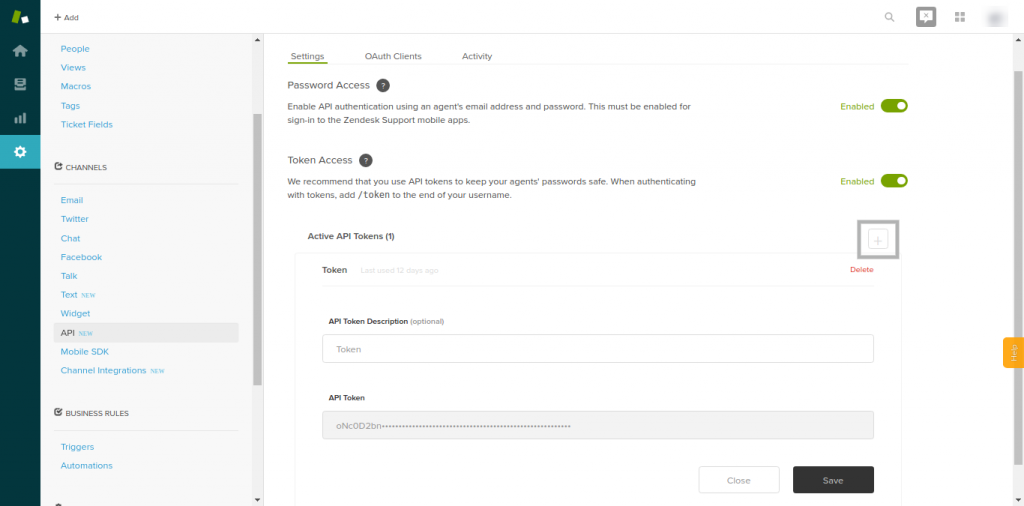
Enable Token Access - Now Click on + Add Token button.
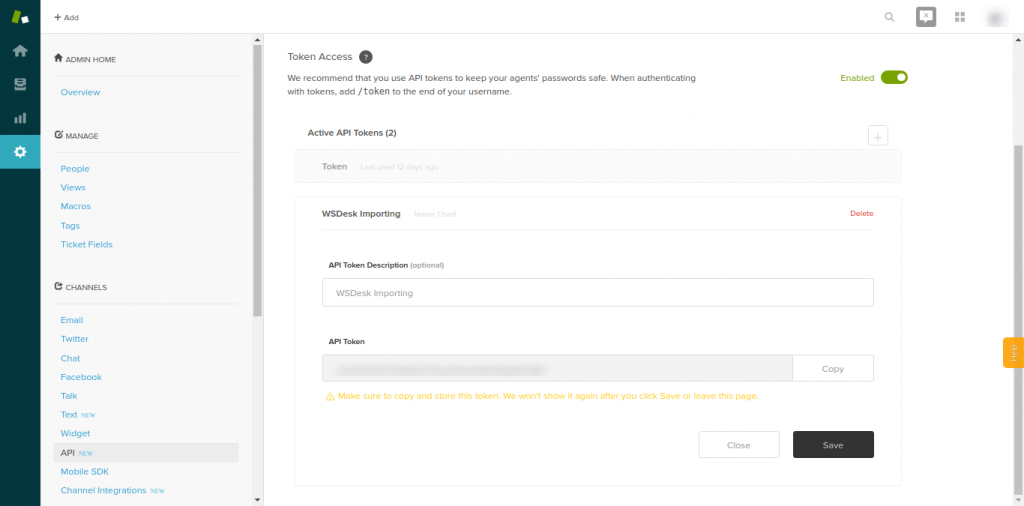
Add Token - Give API Token Description as “WSDesk Importing” then Copy your token and Save it.
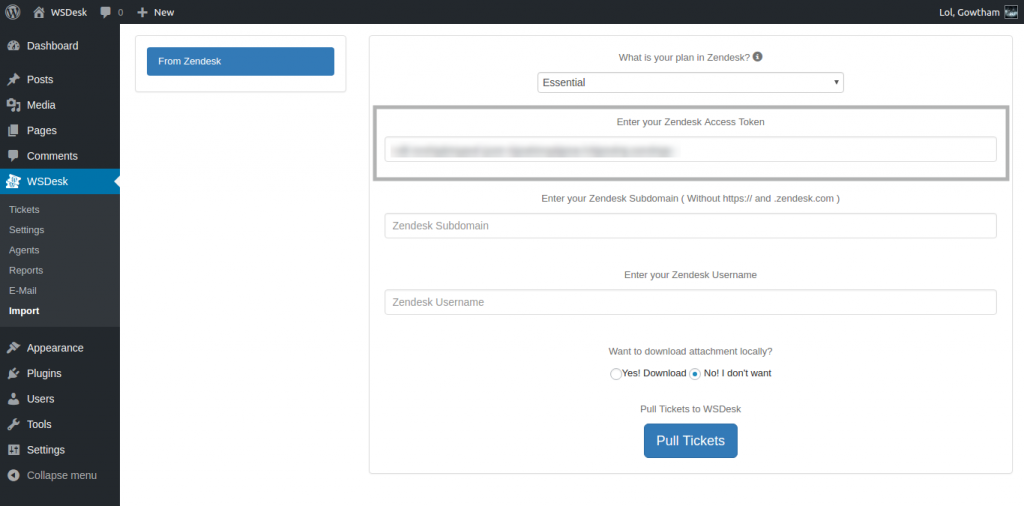
API Token Details - Paste your Token in Import Page of WSDesk
Paste your copied Token - Next Choose your Subscription Plan on Zendesk. Depends upon the plan your importing will be slow as per the Rate Limit of API request by Zendesk
Subscription Plan on Zendesk - Enter your Zendesk Subdomain in Subdomain textbox ( Eg: subdomain.zendesk.com ) and also enter you Zendesk Organization Username in Username textbox.
Fill all Credentials - If you need the ticket attachment then select Yes! Download. Now Click Pull Tickets.
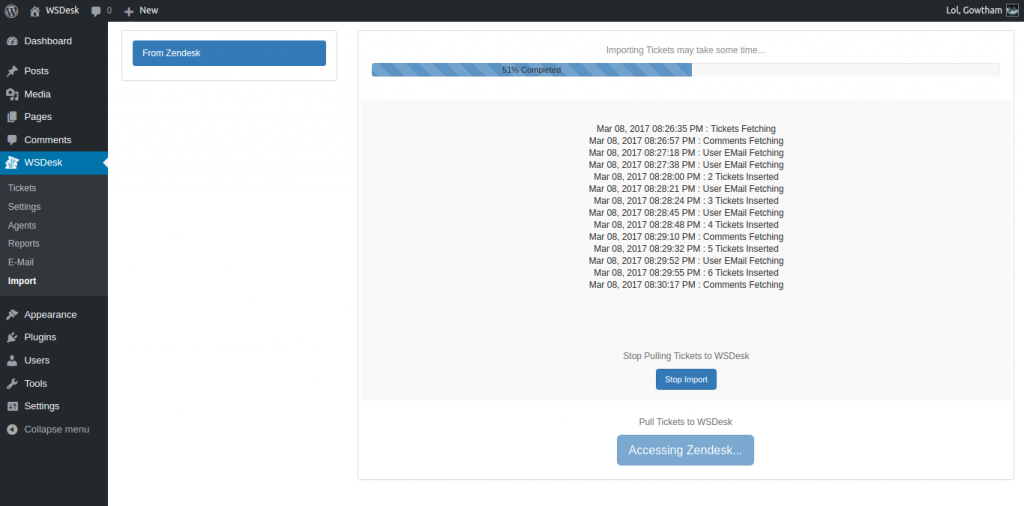
Live Log Status of Importing
Hope it Helps!
Cheers, Proceed with Importing tickets from Zendesk to WSDesk.
To explore more details about the plugins, go check out WSDesk – WordPress Helpdesk Plugin.
Read the product setting up article to understand the plugin, in detail. Or check out the product documentation section for more related articles.
You can also check out other WordPress and WooCommerce plugins in ELEX.

