What can we help you with?
How to Use the Stamps.com USPS Shipping Plugin for WooCommmerce in Test Mode?
I’ve got multiple requests with this same query, How to test the ELEX Stamps.com Shipping Plugin with USPS Postage for WooCommerce without being charged by Stamps.com for labels? In this article I’ll talk about how to get the test credentials for Stamps.com USPS Shipping Plugin and what are the requirements and whom to contact.
Since Stamps.com provides prepaid labels, you don’t have to pay for postage in the postal office while dropping off the packages or when the packages are being picked up. To use the plugin, you need to open Stamps.com account and use the credentials in the plugin settings to link it to your account. When you need to add funds to your Stamps.com account, you can do so in the orders page or login to stamps.com and add funds there as well. So when you create shipment and get the labels, the shipping charge is deducted from your stamps.com account directly. And while using the stamps.com login credentials you need to use the plugin in live mode. When you change the API mode to ‘Test’, the credentials will not work and you’ll get authentication failure message or the message “Could not connect to host”. So how to use the API in test mode and not be charged for shipment while testing?
Read on to find out…
Requirements:
ELEX Stamps.com Shipping Plugin with USPS Postage for WooCommerce
First you need to purchase the plugin from the above link and install it on your site. The set up is pretty simple if you’re using the live mode. You only need to open Stamps.com account and use the login credentials in the plugin settings username and password field. Once that’s done you just need to enter the shipper’s address under the label and tracking tab. Make sure you fill all the fields under the shipper’s address. Use the plugin in Live mode and check if you’re getting the shipping rates. Make sure you have weight and dimensions added in your product. With this current set up you’ll be getting the live rates and also be charged for labels when you create shipment. When you try to change the API to test mode you’ll get an error since the test mode require the test credentials and your site and computer’s IP address needs to be white-listed by Stamps.com to use the Stamps.com test API servers.

You need to have weight and dimension in your products and also in the variations for the plugin to work. And for International shipments you need to enter the Country of manufacture and HS Tariff code while editing the product under Shipping tab.
SOAP Client
You need to install the SOAP Client in your server to use the Stamps.com plugin. It is used for information exchange with the Stamps.com API server and your site. You can check on WooCommerce > Status to see if you have a working SOAP client installed on the server. If its not a working SOAP client or if its not installed or expired it will show in a red line. Its always best to install the latest version of SOAP client so that you’ll not face any issues.
How To Get The Stamps.com Test Credentials And White-list The IP Addresses?
To use the Stamps.com plugin in test mode you need to get the test credentials from Stamps.com. You can request the credentials by contacting the Stamps.com support team by sending a mail to sws-support@stamps.com. Mention that you’re using a plugin by ELEX and need to test the plugin. Request for the test credentials and also provide the IP addresses for the site and the computer. Example: Site IP Address: 111.11.11.111 and list of computers IP address where you’ll be using the admin panel for the WordPress site:
123.12.12.123
111.11.11.111
111.11.11.112
Why do you need to provide your IP addresses?
You need to provide the IP addresses to the stamps.com team to white list them so that you can have access to their Test API servers. The test credentials will authenticate you in the server but to get access to their server your IP needs to be white-listed. Without white-listing the IP address you’ll be blocked automatically from accessing their server. The white-listing of IP addresses is required only for the API in test mode. For API in Live mode you don’t need to do this process; it should work fine without it. The site ID’s IP address need to be white listed so that you’ll get the stamps.com shipping rates and be able to create shipment. And Stamps.com need to white-list the computer’s IP addresses so that you’ll be able to access the labels once the shipment is created.
Add Funds To The Stamps.com Test Account
Once the above requirements are set make sure you enter the test username and password in the plugin settings and choose the API mode as Test. Even in Test Mode you need to add stamps.com funds to be able to create shipment labels, you can add from the WooCommerce order page. But if you have multiple WP-admin panel running on different computers you’ll get the error message ” Conversation out of sync” in that case you need to log out all other admin sessions and add funds to the test account or contact the support team to add funds for your Stamps.com account.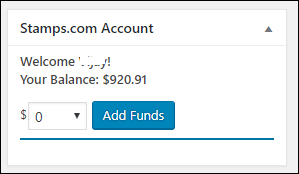
Will You Be charged For Shipping While Adding Funds?
The funds in the test account are dummy values, so you’ll not be charged actual money for the test shipments. The funds will be deducted on creating shipment but you can keep on adding it if the funds start running low.
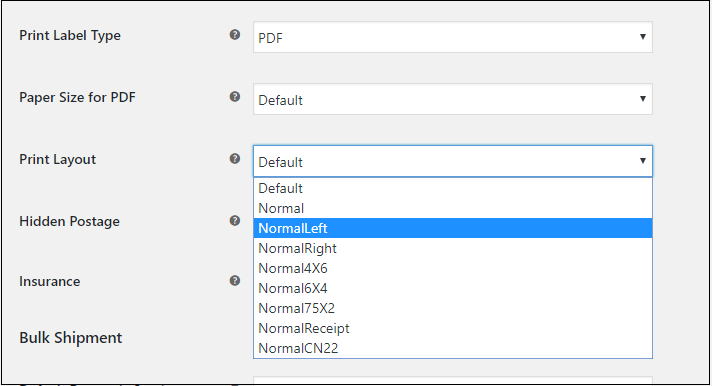
Once the plugin is configured with the test account details and funds are added, you can now test the rates and also the labels. Most customers want to test the labels so that they can get the correct label format or layout. You can change the layout in the plugin settings under the label generation tab. The print layout option works only with the PDF label format, so there are few options that you can choose. The default and normal gets you the full page regular label,
- Normal Left – Prints the label on the bottom of the page horizontally in case you want to print two labels per sheet. You can choose either normal left or normal right and print one label on the bottom horizontally, and print the next label on the top. Also, you can just flip the label sheet so that it will print the label on the other half.
- Normal Right: This will print the label on the top of the page horizontally.
- Normal Receipt: Prints even the shipment receipt along with the label so you have one page label and one page receipt.
Other things you might want to test while using the plugin in test mode:
- Am I getting the correct number of packages while creating the shipment?
- Are the shipping charges correct?
If there’s any error message while creating shipment you can share it with our support team and we will be happy to help. Please note the label url on the print label button expires after a few days. So make sure you download and save, or print the labels as soon as it is created.
Hope this article has helped you use our Stamps.com plugin in test mode
Do let us know if you have any queries or if you’re facing any issues.
To explore more details about the shipping plugins, please check out the product pages.
- ELEX WooCommerce DHL Express / eCommerce / Paket Shipping Plugin with Print Label,
- ELEX WooCommerce Australia Post Shipping Plugin with Print Label & Tracking,
- ELEX WooCommerce USPS Shipping Plugin with Print Label,
- ELEX Stamps.com Shipping Plugin with USPS Postage for WooCommerce,
- ELEX EasyPost (FedEx, UPS & USPS) Shipping & Label Printing Plugin for WooCommerce
You can also check out other WooCommerce and WordPress plugins in ELEX.