What can we help you with?
How to Set Up Two DHL Accounts for Domestic Shipping and International Shipping?
This document will guide you to set up two different account settings – for domestic and international DHL shipping. Refer to the ELEX WooCommerce DHL Express / eCommerce / Paket Shipping Plugin page to know more about its various features.
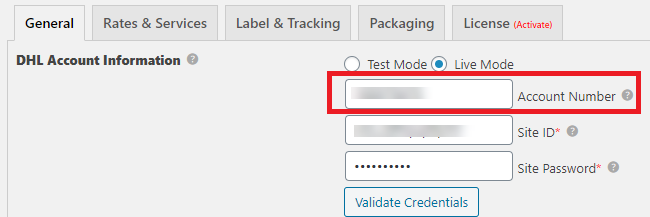
The plugin requires your account number, site id, and site password as API credentials in order to fetch the real time rates.
Here we are discussing the solution for the issue that arises when you have two different accounts – one for domestic, and the other one for international shipping. The plugin has only one field to enter your account number.
The developers have come up with a solution to use a code snippet to handle two different DHL account numbers. This code snippet will allow you to use both accounts at the same time and you can set one for domestic and the other one for international.
For example, if you want to use your international DHL account number for shipping from Spain to a different country, you need to input the Account Number, Site ID, and Site Password in the plugin settings. Also, you can input your domestic account number in the code snippet (given in the later section of this article).
Follow the below steps to input the snippet into your website.
- Navigate to the Plugins tab in the website dashboard.
- Select Plugin Editor option.
- Select the ELEX WooCommerce DHL Express / eCommerce / Paket Shipping Plugin with Print Label from select plugin to edit option.
- Input the code snippet at the bottom of the editor.
- Update file.
Code Snippet To Switch DHL Accounts for Domestic and International Shipping
/*Filter to switch account numbers for domestic and international */
 add_filter('switch_account_number_action_express_dhl_elex', 'switch_account_number_express_dhl_elex', 10, 1);

    function switch_account_number_express_dhl_elex($switch_account_numbers_input){
    $stored_vendor_account_number = '111111111';
    $stored_vendor_country_code = 'ES';
    $stored_vendor_payment_country_code = 'ES';

    if(($stored_vendor_country_code === $switch_account_numbers_input['destination_country_code'])){

    return array('payment_account_number' => $stored_vendor_account_number, 'payment_country_code' => $stored_vendor_payment_country_code);
    }else{
    return array('payment_account_number' => $switch_account_numbers_input['account_number'], 'payment_country_code' => $switch_account_numbers_input['payment_country_code']);
    }
    }
You have to make the following changes in the code snippet accordingly:
- $stored_vendor_account_number = ‘111111111’; – change the account number to the export account number, which your DHL account manager has provided.
- $stored_vendor_country_code = ‘ES’; – Change the country code to the shop’s country code. It should be a two-character country code.
- $stored_vendor_payment_country_code = ‘ES’; – Change the country code to the shop’s country code. It should be a two-character country code.
This is how you can use two different DHL accounts at the same time. For more creative snippets, visit elex-snippets.
To explore more details about the plugin, check out ELEX WooCommerce DHL Express / eCommerce / Paket Shipping Plugin with Print Label.
Read the product documentation for more details.
You can also check out other WooCommerce and WordPress plugins in ELEX.