What can we help you with?
How to set up Google OAuth for Personal Gmail Account? And how to configure Google OAuth credentials in WSDesk?
Google OAuth allows users to share specific data with an application while keeping their usernames, passwords, and other information private. For example, an application can use OAuth to obtain permission from users to fetch Email from their Google Email
The Google OAuth can be set up for both G Suite as well as your personal Gmail account. If you have a G Suite account, you should read how to configure Google OAuth credentials in WSDesk.
In this article, I’ll show you how to set up Google OAuth for your personal Gmail account and how you can set up Google OAuth settings in WSDesk.
Here it goes –
-
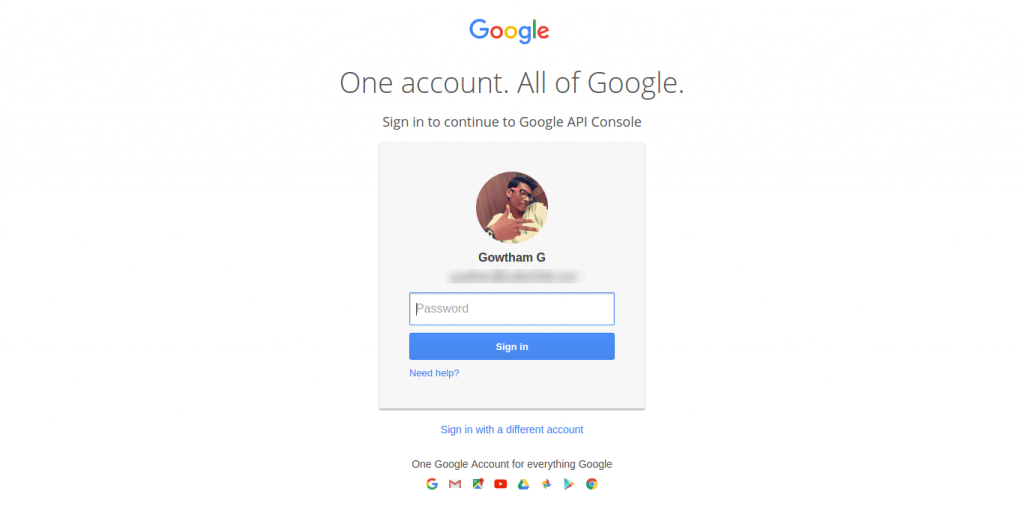
- Go to Google Console.
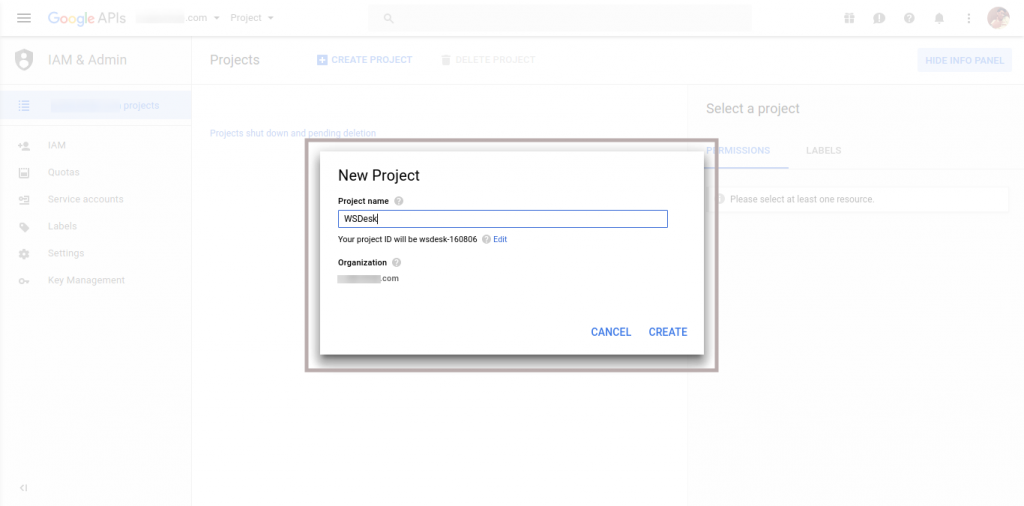
Login Page - After you are Logged in. Click on CREATE PROJECT at the top.
Create Project - Create a project named “WSDesk” and Click on CREATE.
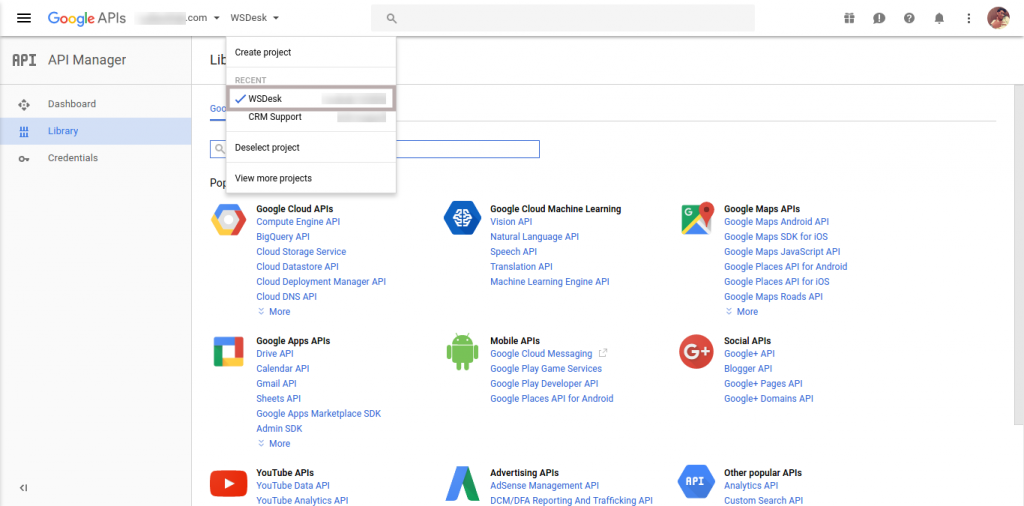
New Project Details - Now select the WSDesk Project from your available projects.
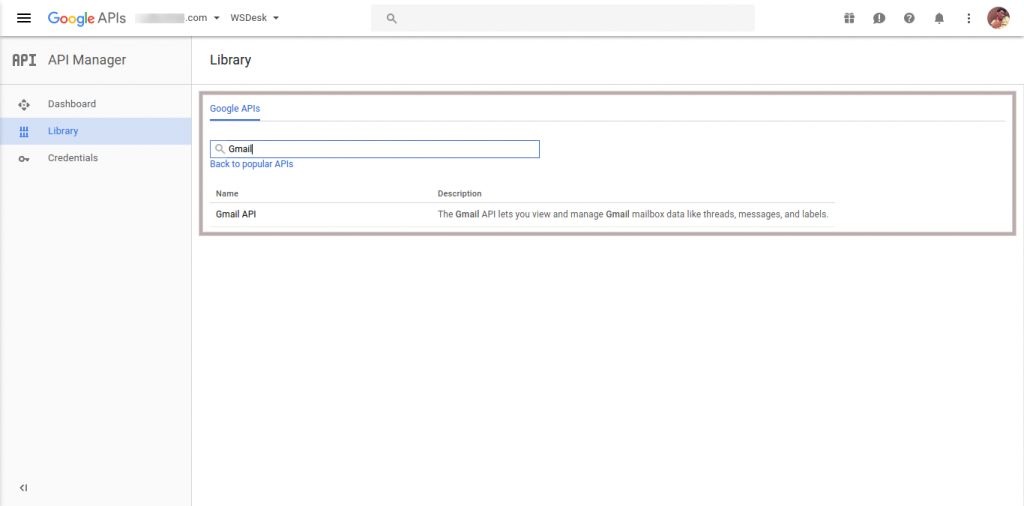
Choose WSDesk Project - After choosing the WSDesk Project, Click on Library Tab on the left sidebar. Then type Gmail into the search box that appears.
Gmail Library Search - Now Click on the title Gmail API that resulted from your search. Click on ENABLE that appears by the side of Gmail API
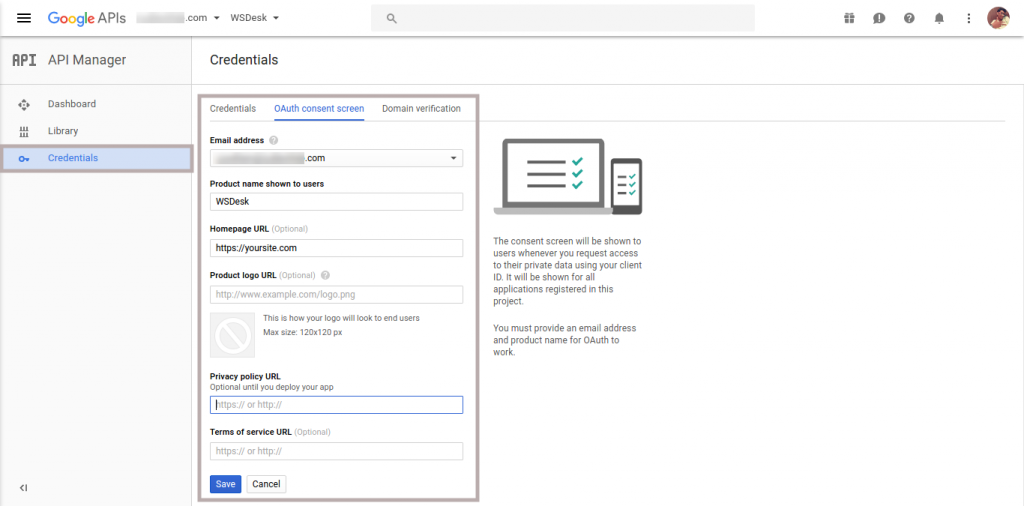
Enable Gmail API - Now go to the OAuth Consent Screen tab which is under the Credentials tab, then fill the required details and Save it.
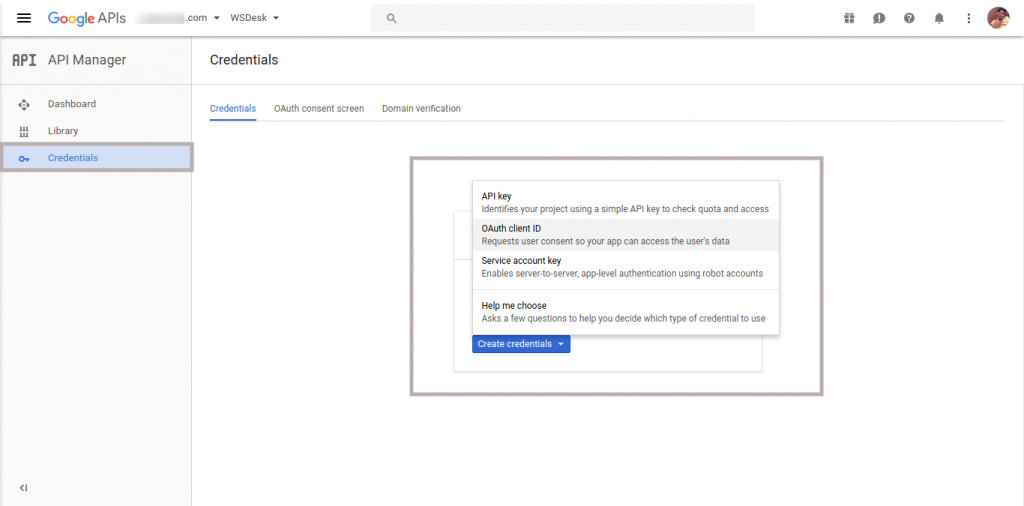
OAuth Consent Screen - After that is done, click on the Credentials tab which is under Credentials tab, then click OAuth Client ID from Create credentials.
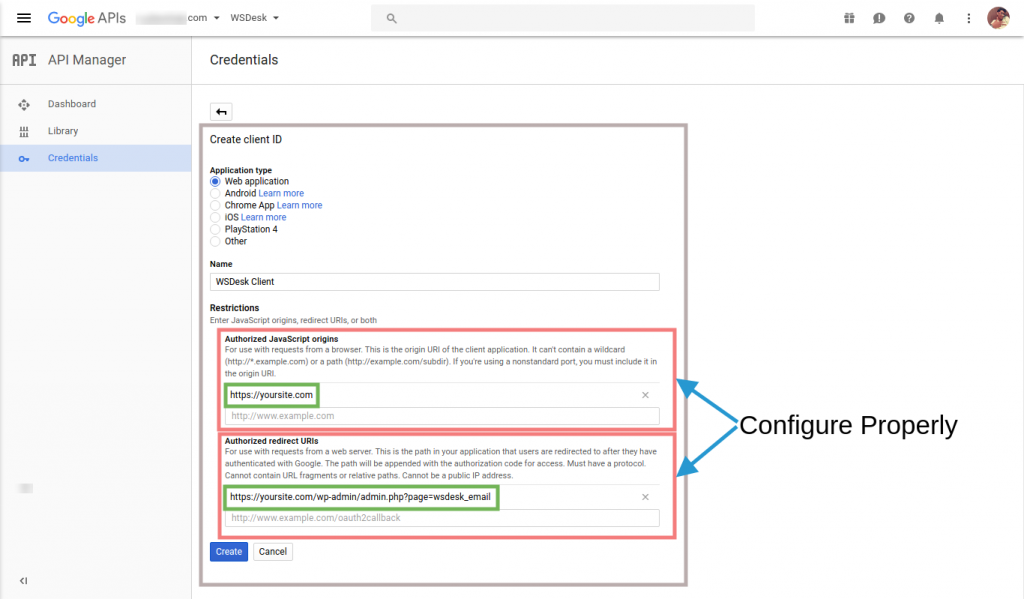
Create OAuth client ID - Now Configure the Client ID properly and Click Create.
- Choose the Application Type as a Web application.
- Name it as WSDesk Client.
- Under Restrictions, configure the following correctly.
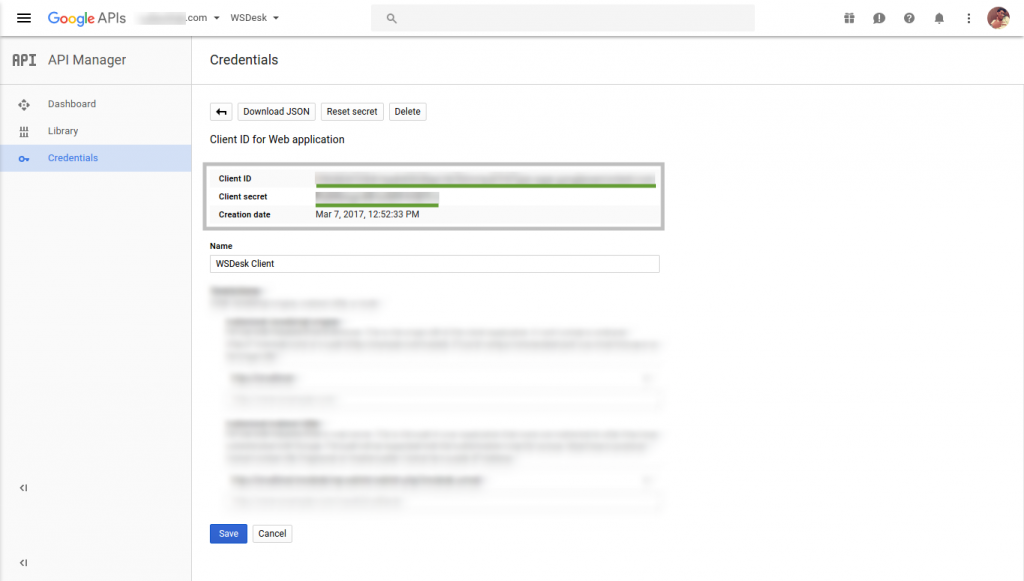
Create Client ID - After clicking on Create, you will be able to see the Client ID listed. Click on it.
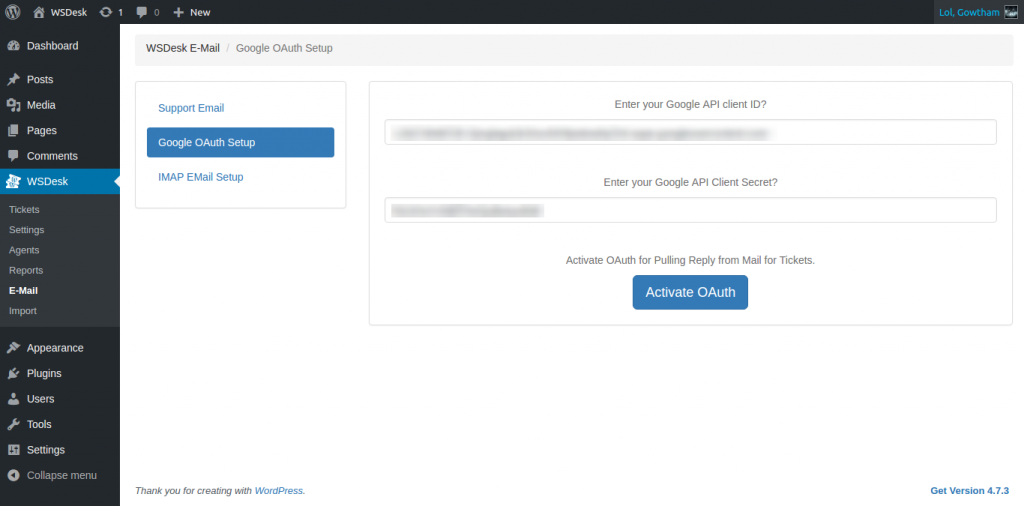
Created Client ID Listed - Copy your Client ID, Client Secret and paste it into the respective fields in Googe OAuth Setup Tab of the WSDesk Email Page.
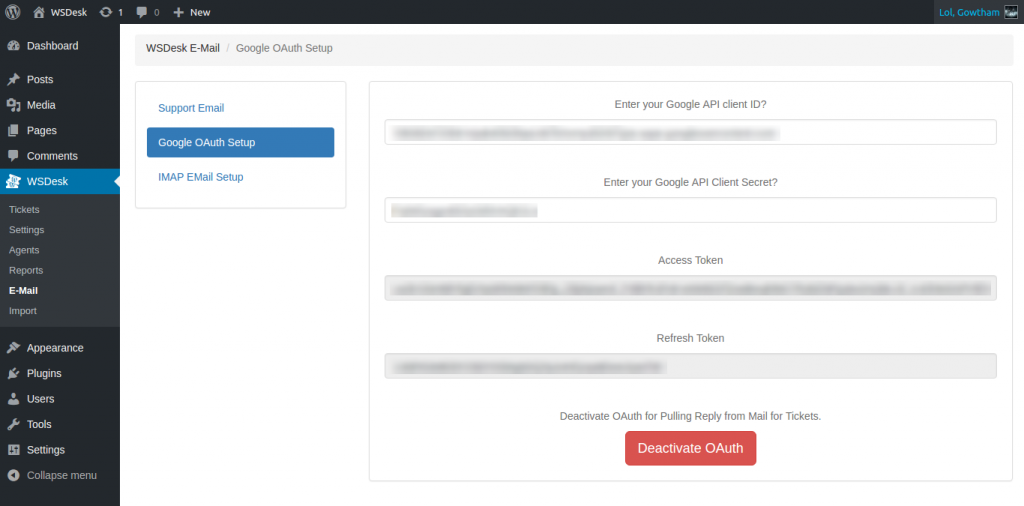
Copy Keys Paste Keys - Now Click on Activate. If your Procedures and Keys are correct then you will see your tokens appear in this Email Page. If you can’t see the tokens that would suggest a mistake in your configuration and you are required to re-configure the previous settings.
Clicking on activate button will prompt you to login to google account. You have to log in to the support e-mail account, from which you want to pull the emails from.
Your Support tickets will be pulled from your Gmail once your Google OAuth is Configured and Activated properly.Google OAuth Activated
- Go to Google Console.
Hope it Helps!
Cheers, Proceed with Google OAuth and WSDesk.
To explore more details about the plugins, go check out WSDesk – WordPress Helpdesk Plugin.
Read the product setting up article to understand the plugin, in detail. Or check out the product documentation section for more related articles.
You can also check out other WordPress and WooCommerce plugins in ELEX.

