What can we help you with?
How to send Customer Support SMS Notifications using WSDesk SMS Notification Add-On? (with Video)
This article explains the step-by-step tutorial to send Customer Support SMS Notifications using WSDesk SMS Notification Add-On. For more information on the plugin, refer to the product page.
You can watch the video tutorial below.
Overview
This add-on lets you send SMS notifications to Ticket raisers, Agents, and Ticket assignee. The SMS notifications can be sent for all the WSDesk trigger conditions like ticket submission, ticket status update, a ticket is assigned to a specific assignee, a ticket is received from a specific channel and so on. Read more about triggering conditions in the Triggers & Automation section of the WSDesk documentation.
Prerequisites
For sending WSDesk SMS notifications, you need the following:
Getting started with WSDesk SMS Notification Add-On
Read an article to know how to complete the checkout process on ELEX. You can also read how to download, install, activate ELEX plugins.
The core configuration depends on the WSDesk – WordPress Helpdesk Plugin settings and not the add-on settings. Hence you need to set up WSDesk first and then proceed with configuring SMS notifications.
Obtaining credentials from Twilio
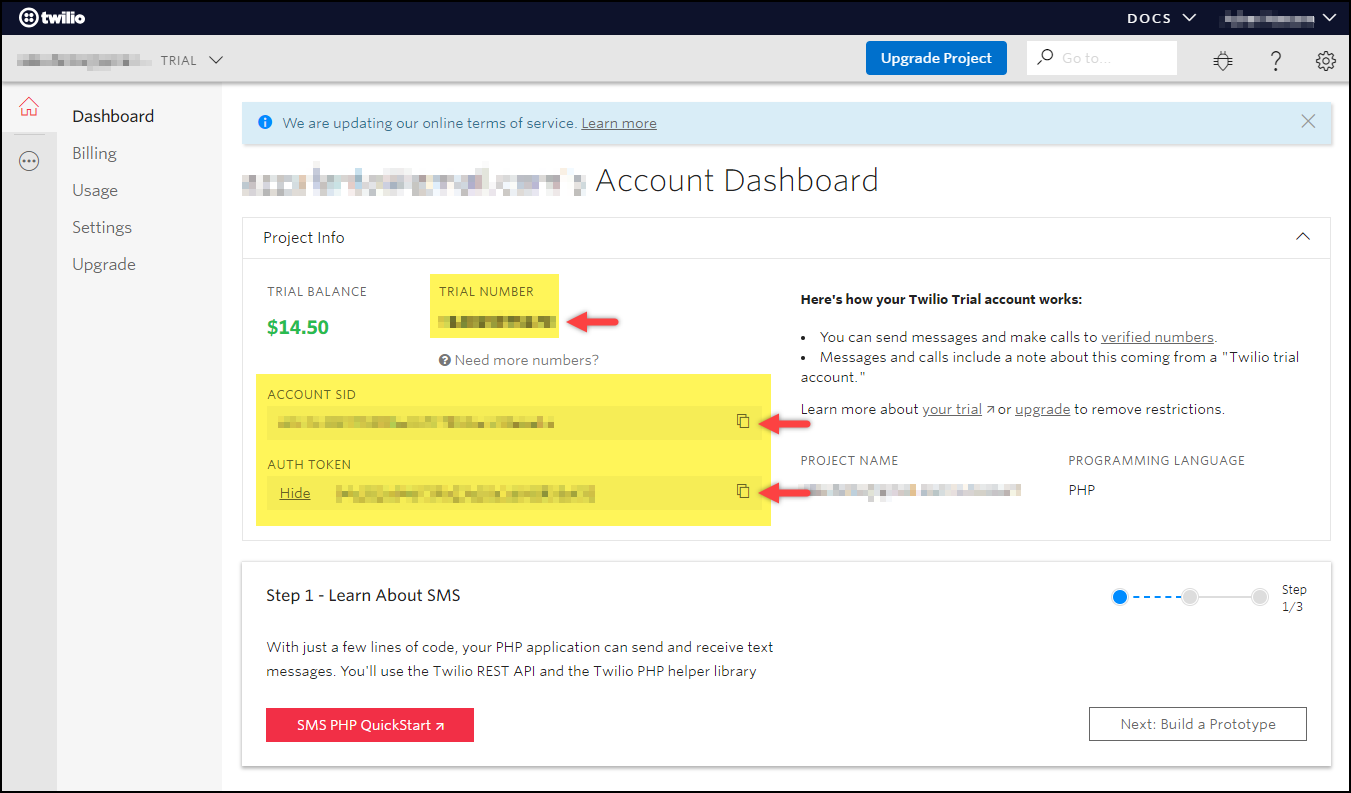
You need three credentials from Twilio to use in WSDesk SMS Notification Add-On.
- Account SID
- AUTH Token
- Phone Number
Once you have successfully registered for the account, move to the Twilio dashboard. You can see the Account SID and Auth Token. In addition to this, you need a phone number. The messages will be sent from this given number. To get your own custom number, click on the Get a Trial Number button, as shown in the screenshot below.

Next, a random phone number is provided to you. If you do not like the number, you can search for a different number, else click on Choose this Number button to proceed further.

You will then receive a success message with your phone number. Click Done.

You now have all the three credentials you need for our WSDesk SMS Notification Add-On.

Let us now configure the add-on settings.
Entering Twilio credentials in the Add-on settings
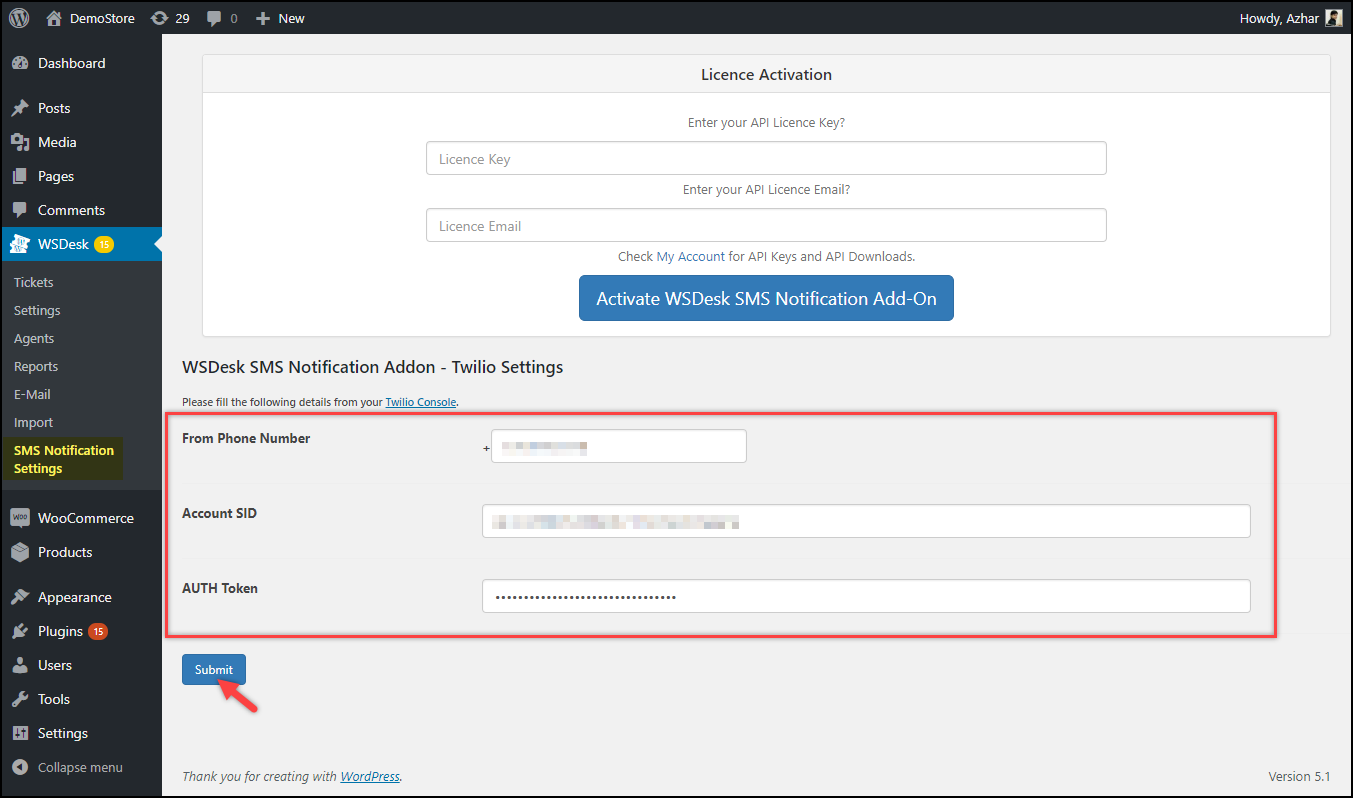
After you have installed and activated the WSDesk and the add-on, go to WSDesk > SMS Notification Add-On.
Enter your Twilio credentials; Phone Number, Account SID, and AUTH Token, in the respective text fields, as shown in the screenshot below.

Creating a WSDesk Trigger for SMS Notifications
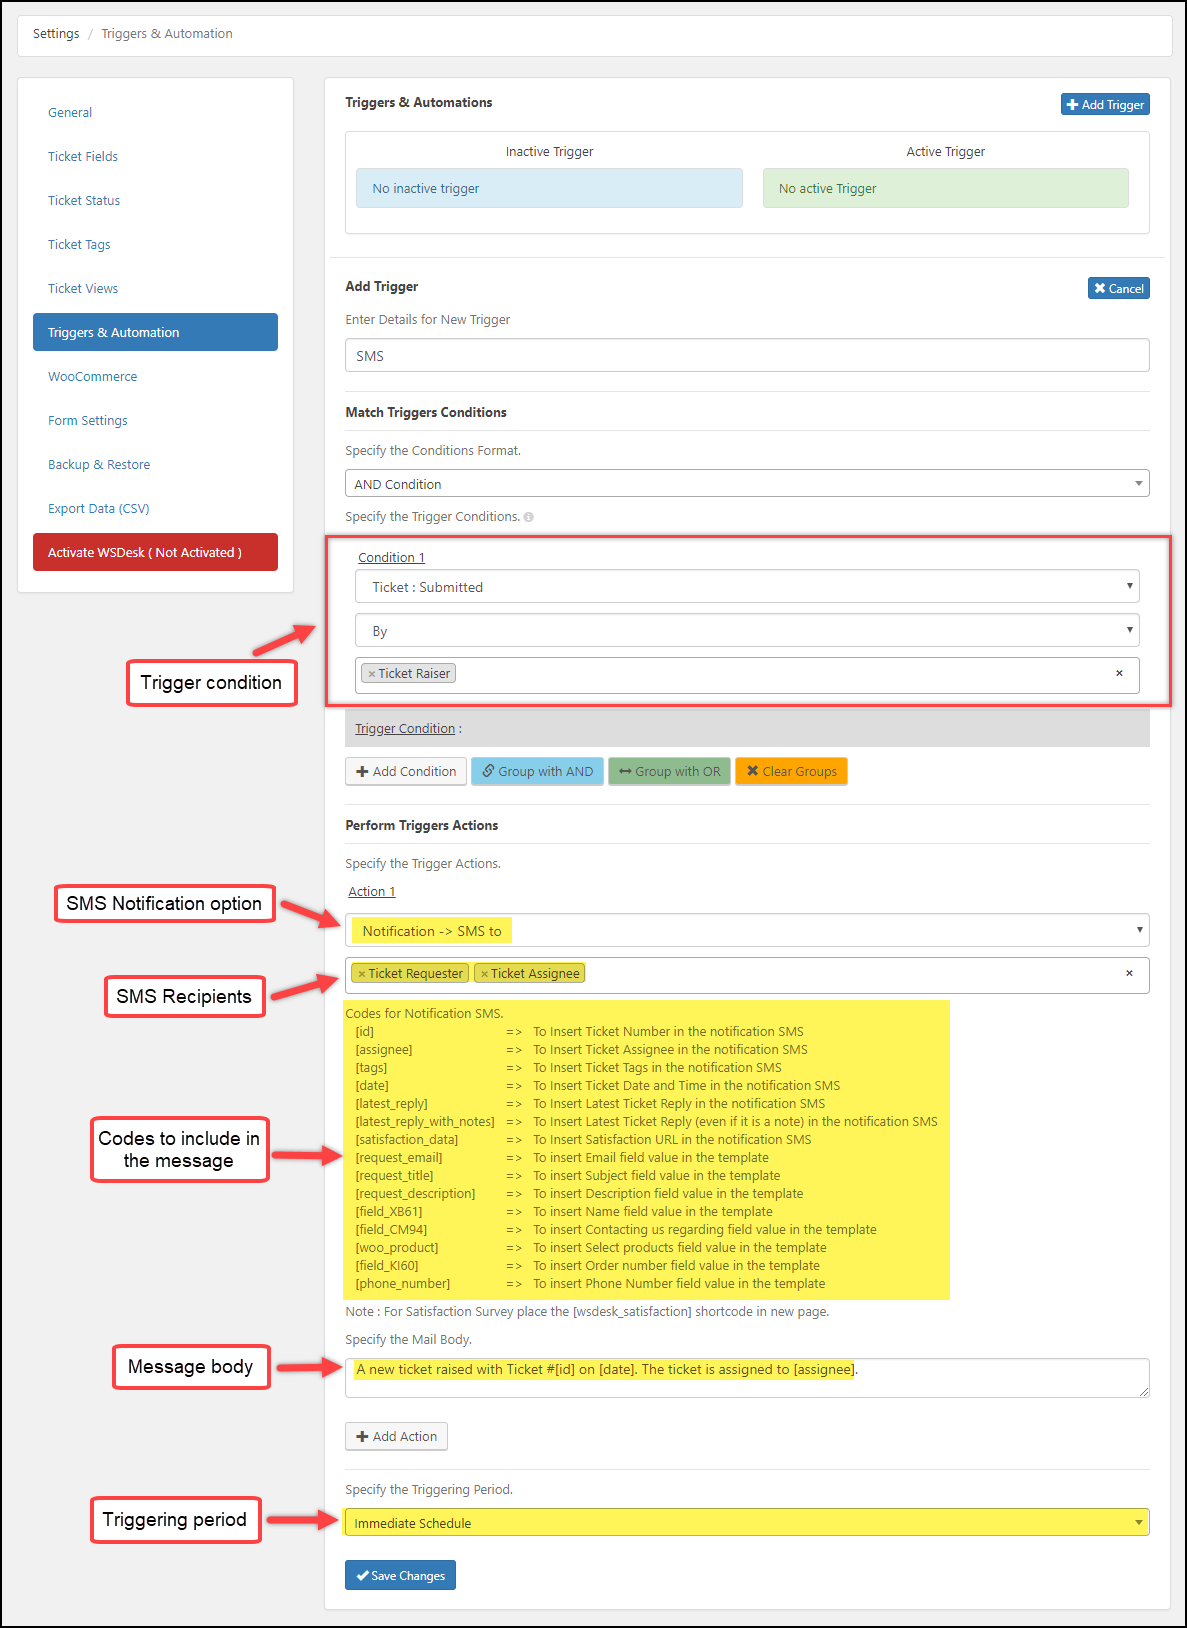
Go to WSDesk > Settings > Trigger & Automation section.
For demonstration purpose, let us create an SMS notification trigger for Ticket raiser and the Ticket assignee when a new ticket is submitted by the ticket raiser.
Click on Add Trigger button on the top right corner and configure the following settings.

Tip: Read Adding a Trigger section to know how to add a new WSDesk trigger in detail.
Once you have created the trigger, activate it.
Receiving SMS Notifications
If you are using the Twilio free trial account, you need to verify every recipient’s phone number in your Twilio account. For the premium account, there is no need for verification and the Twilio trademark text will also be removed.
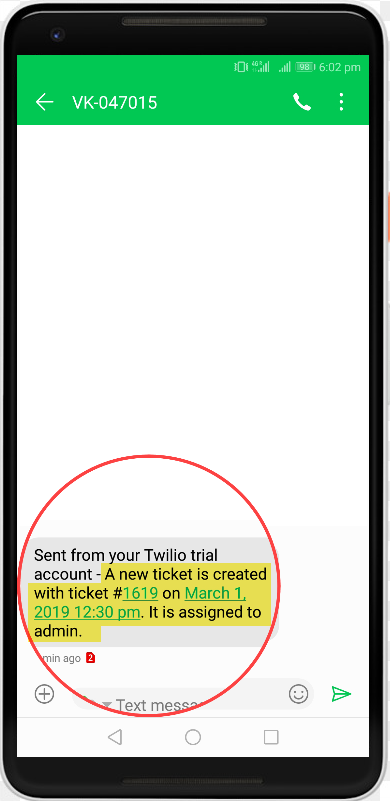
When a ticket raiser submits a ticket on your website, the recipients are notified via SMS.
Below screenshot shows a text message received by the Ticket raiser.
The same message will be delivered to the Ticket assignee.
In this way, you can send Customer Support SMS notifications with WSDesk SMS Notification Add-On.
To explore more details about the plugin, go check out WSDesk SMS Notification Add-On.
You can also check out other WooCommerce and WordPress plugins in ELEX.

