What can we help you with?
How to Obtain Real-time Rates & Print Shipment Labels for UPS, USPS & FedEx using a Single WooCommerce Plugin? (with video)
When you are managing a WooCommerce store, it is really important to get your shipping strategy right. There might be several aspects to consider when you try to optimize the shipping options that you provide to the customer. The speed of delivery, the quality of the service, choice to opt for a convenient delivery time, etc., might be concerns of your customers. Based on different considerations specific to your store, you might want to feature the services of a specific shipping carrier. However, there might be times you wish to offer services of multiple shipping carriers at the same time. Generally in the WooCommerce ecosystem, you will have to get multiple plugins to manage this. However, our ELEX EasyPost Shipping plugin helps you display real-time rates & print shipment labels for UPS, USPS and FedEx on your WooCommerce store. In this article, we will demonstrate how you can manage this.
Prerequisites
To use this plugin, you need to have the following prerequisites.
- An EasyPost Account
- A UPS Account
- A USPS Account
- A FedEx Account
- ELEX EasyPost Shipping Plugin (premium version -$69 for single site license)
How to get real-time rates & print shipping labels for UPS, USPS & FedEx?
Let us look into the process of displaying real-time shipping rates for UPS, USPS & FedEx.
Watch the video below:
Or keep on reading…
Access the plugin settings through WooCommerce > Settings > Shipping > EasyPost.
Under the General tab, enable real time rates as well as enter the relevant API Mode and the EasyPost API key.

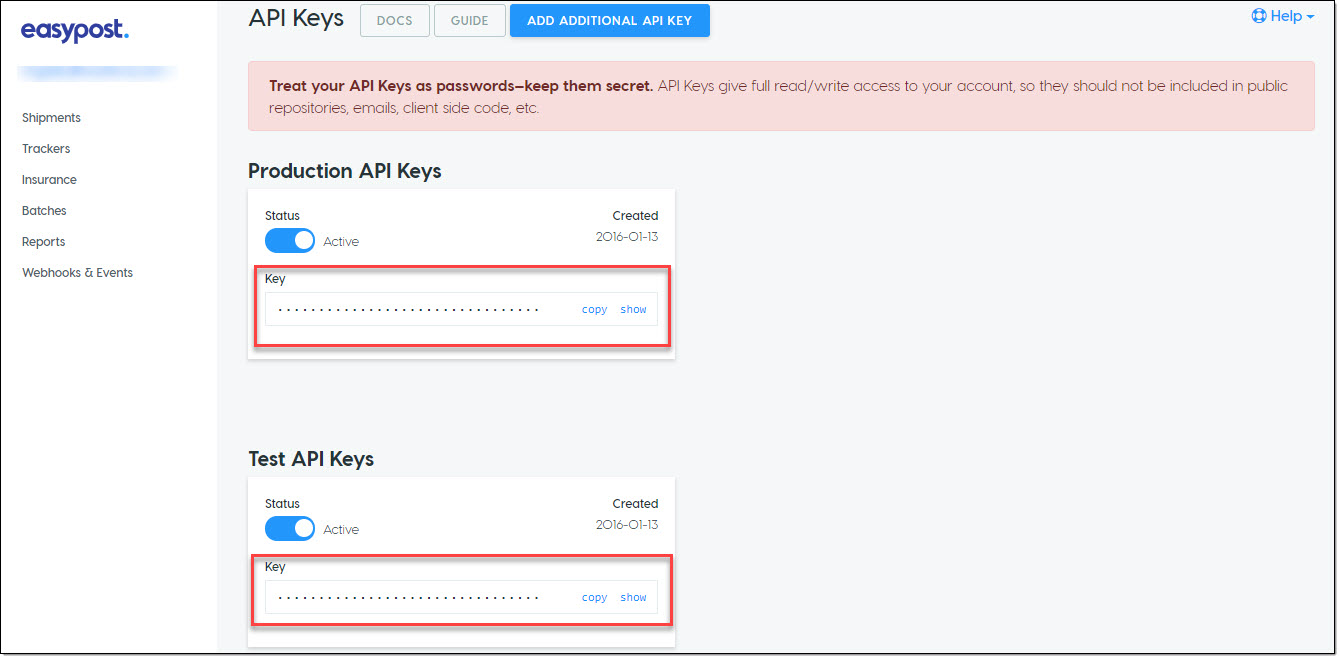
Both the production and test API keys will be available on your EasyPost account settings. You will see there are two API modes on the plugin settings page – Live and Test. When your site is live (you are displaying the real time rates to customers), use the Production API keys. For testing purposes, use the Test API Keys.
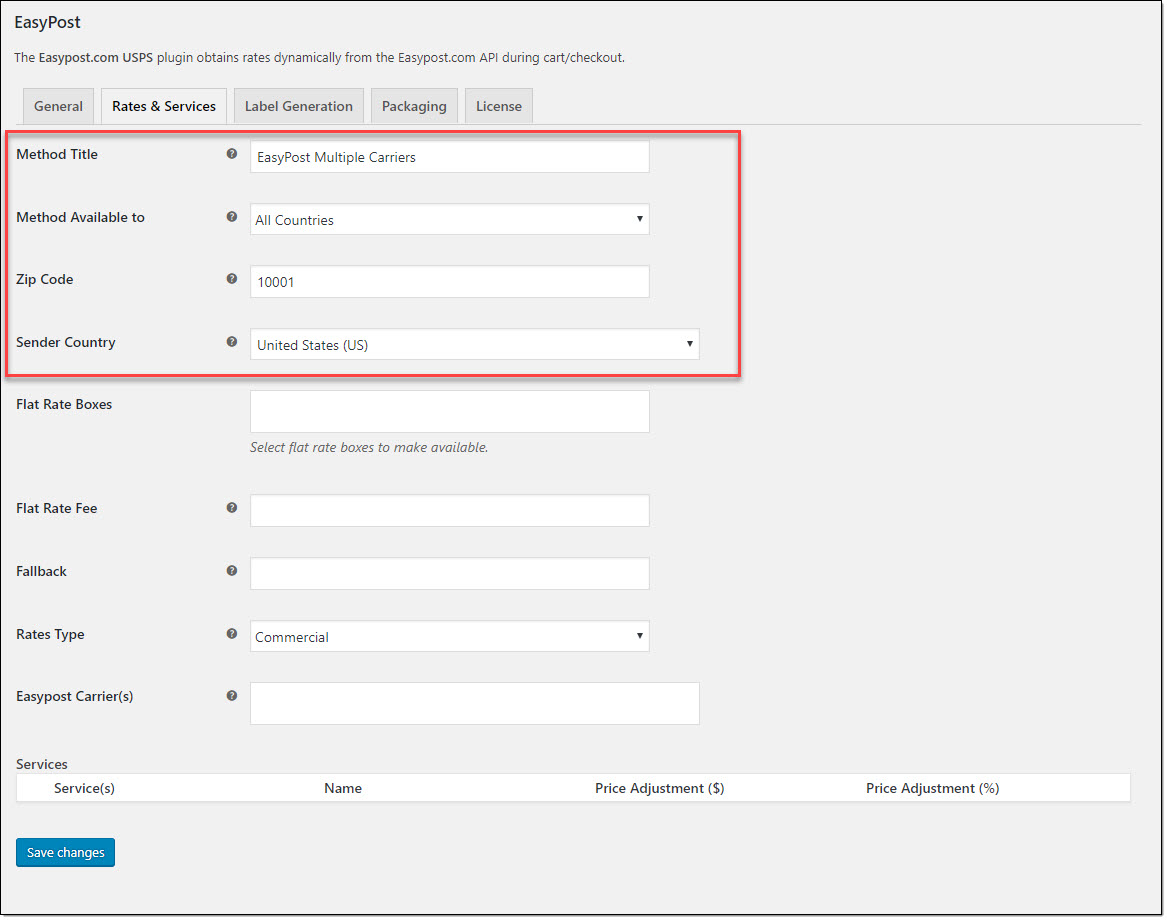
Now, click the ‘Rates and Services’ tab.
Here, you can enter a Method Title, and choose which all countries the method will be available to. You also need to enter the origin zip code and the Sender Country here, which is important to display the correct shipping rates.
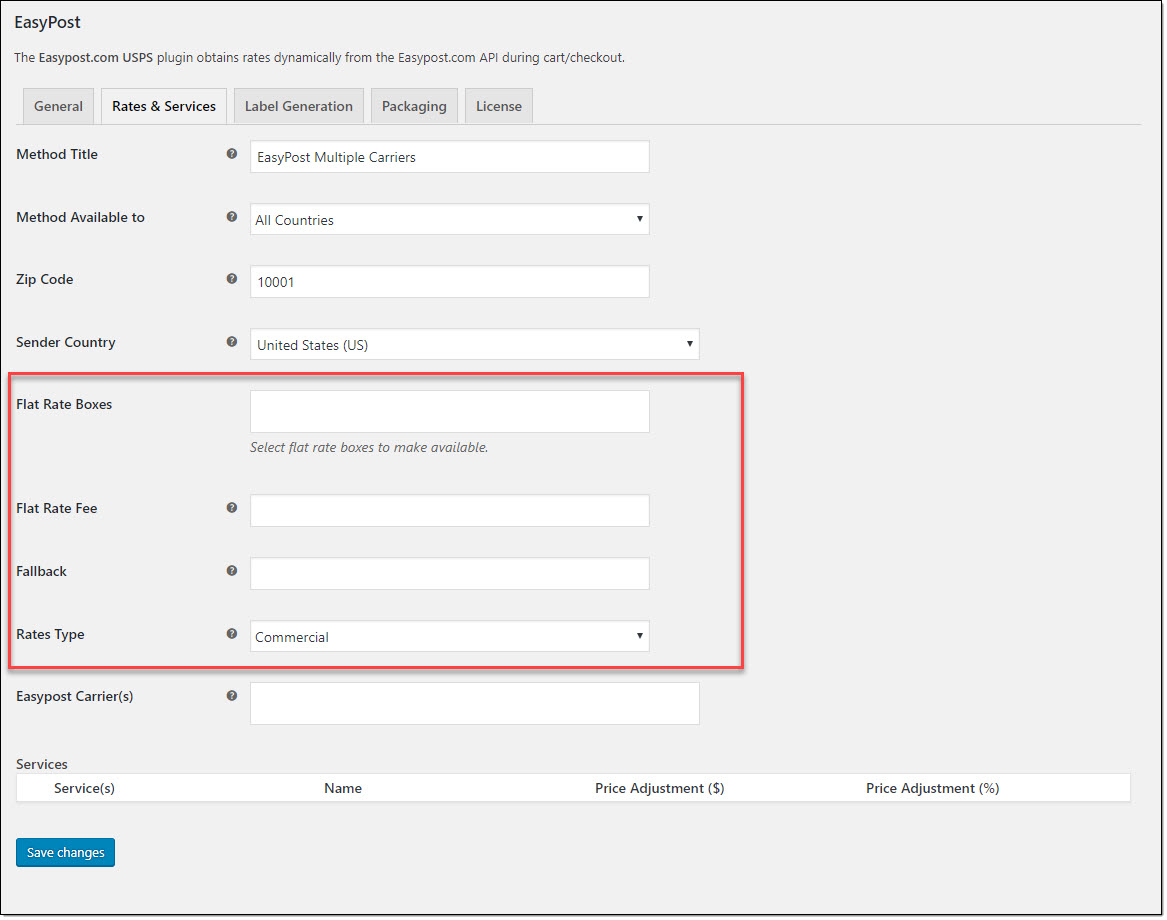
USPS Flat Rate Boxes can be a great option to reduce your shipping costs, if you are selling heavy products with relatively smaller dimensions. The plugin allows you to select the specific flat rate boxes that you want to use. You can also set up rates for the flat rate boxes that you choose in the Flat Rate Fee field.
In case the EasyPost API doesn’t return a rate, you can display a ‘Fallback’ rate, so that your customers can go ahead with the checkout process.
You also need to choose whether you want to display Commercial or Residential rates. There will be differences between both types of rates. Choose the relevant option based on your customer base.
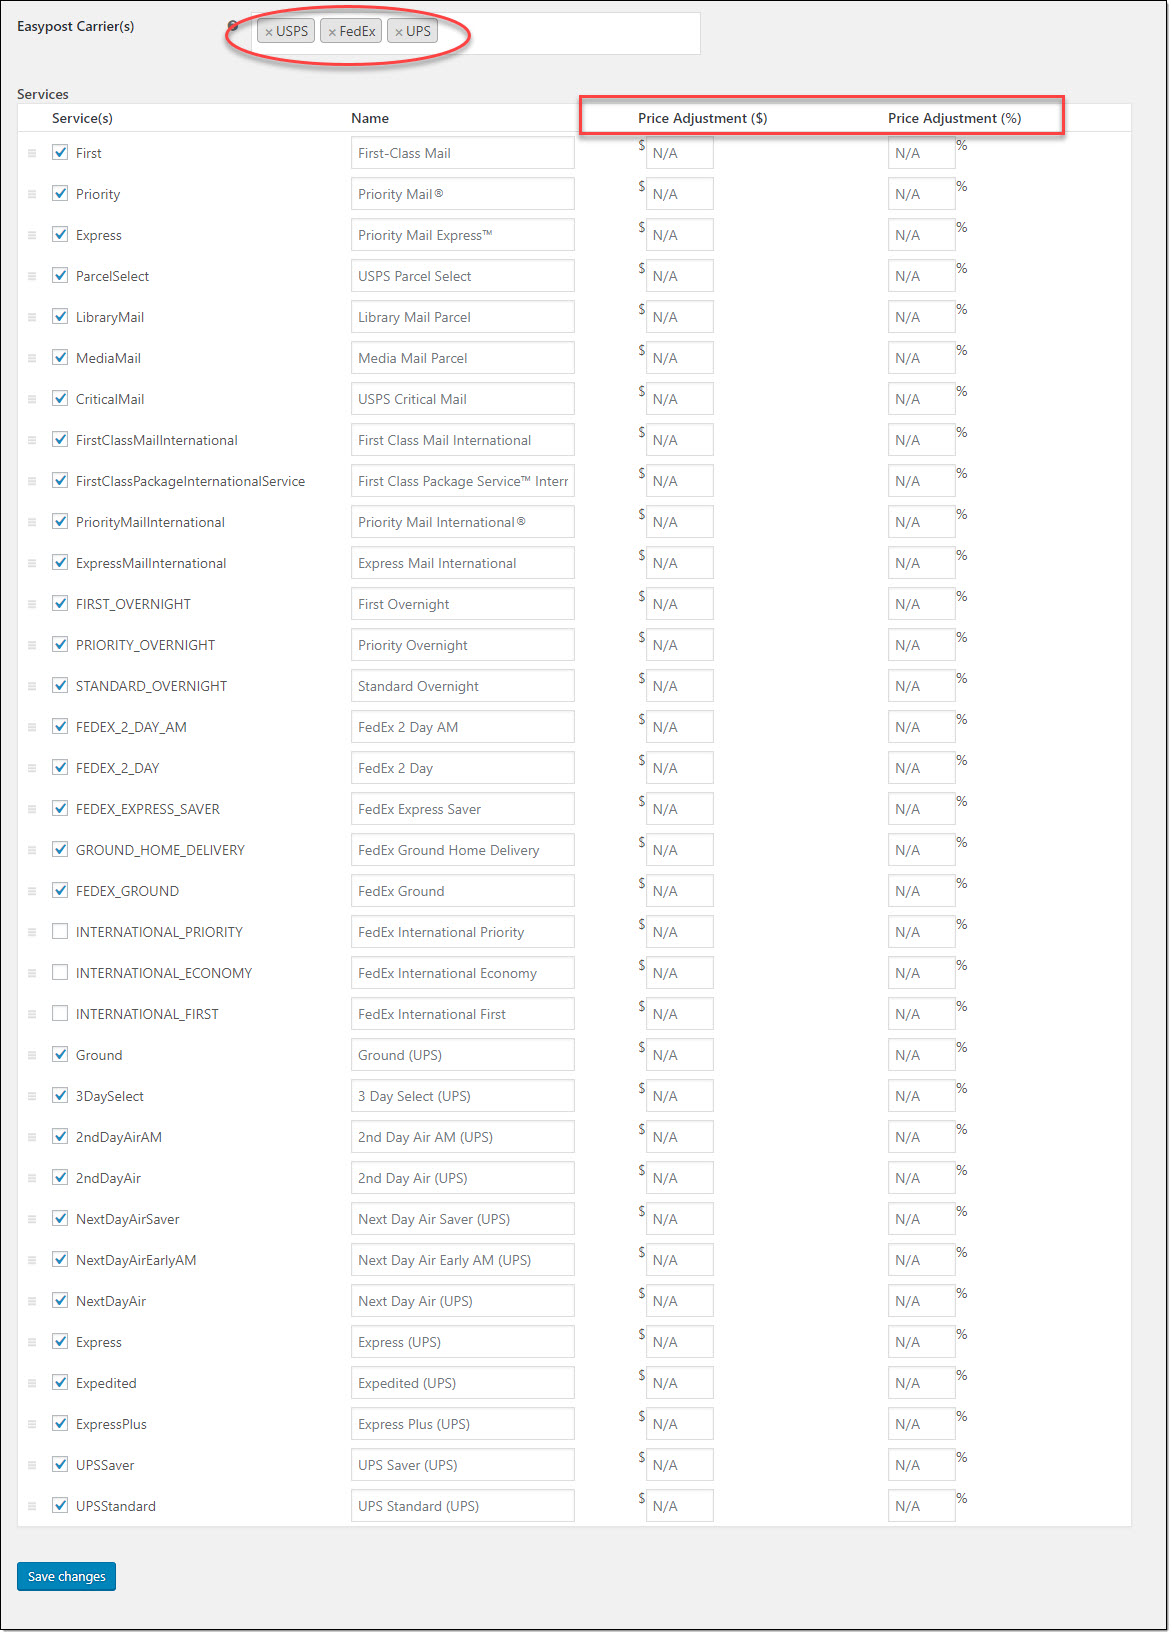
Finally, you can choose the shipping carriers to display real time rates. When you select the carriers, all the available services will be displayed below. You can enable or disable specific services according to your requirement. Also, you can apply price adjustments to each of these services, if necessary. The plugin also allow you to modify the display order of services on the Cart and Checkout pages. Simply drag and drop services using the hamburger icon (on the left side of each service, to order the available services according to your preference.
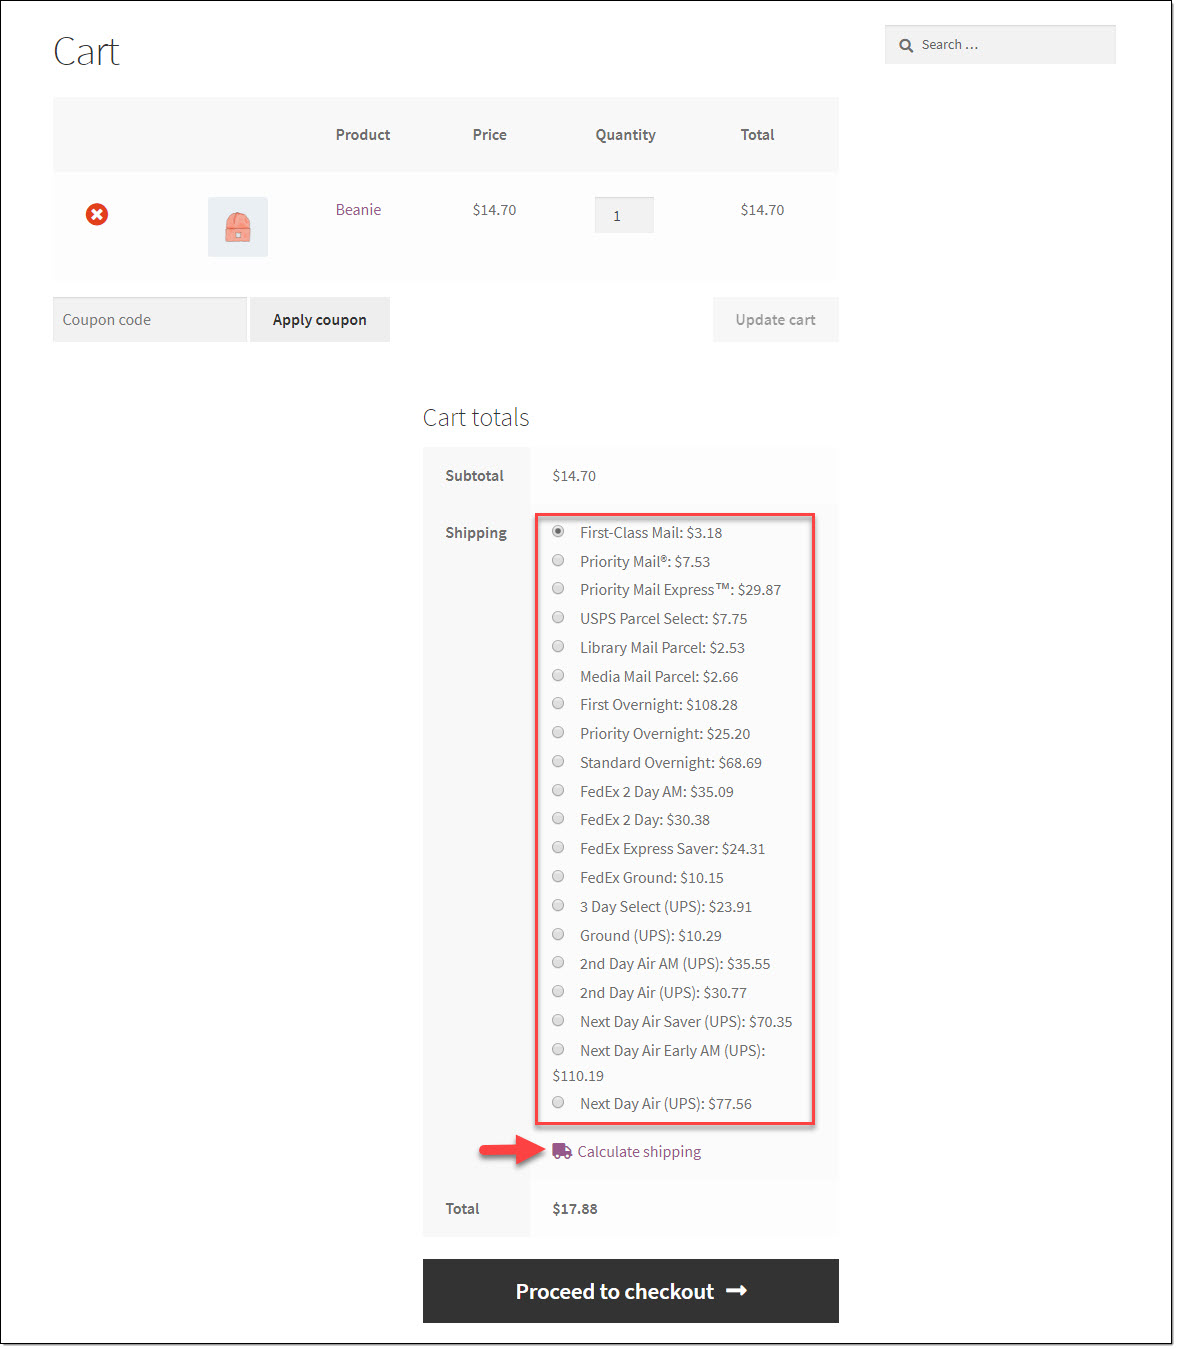
Now, when a customer adds a product to cart, they can see all the available shipping services and the real time rates based on their location. Customers can click Calculate shipping to check the rate for another zip code.
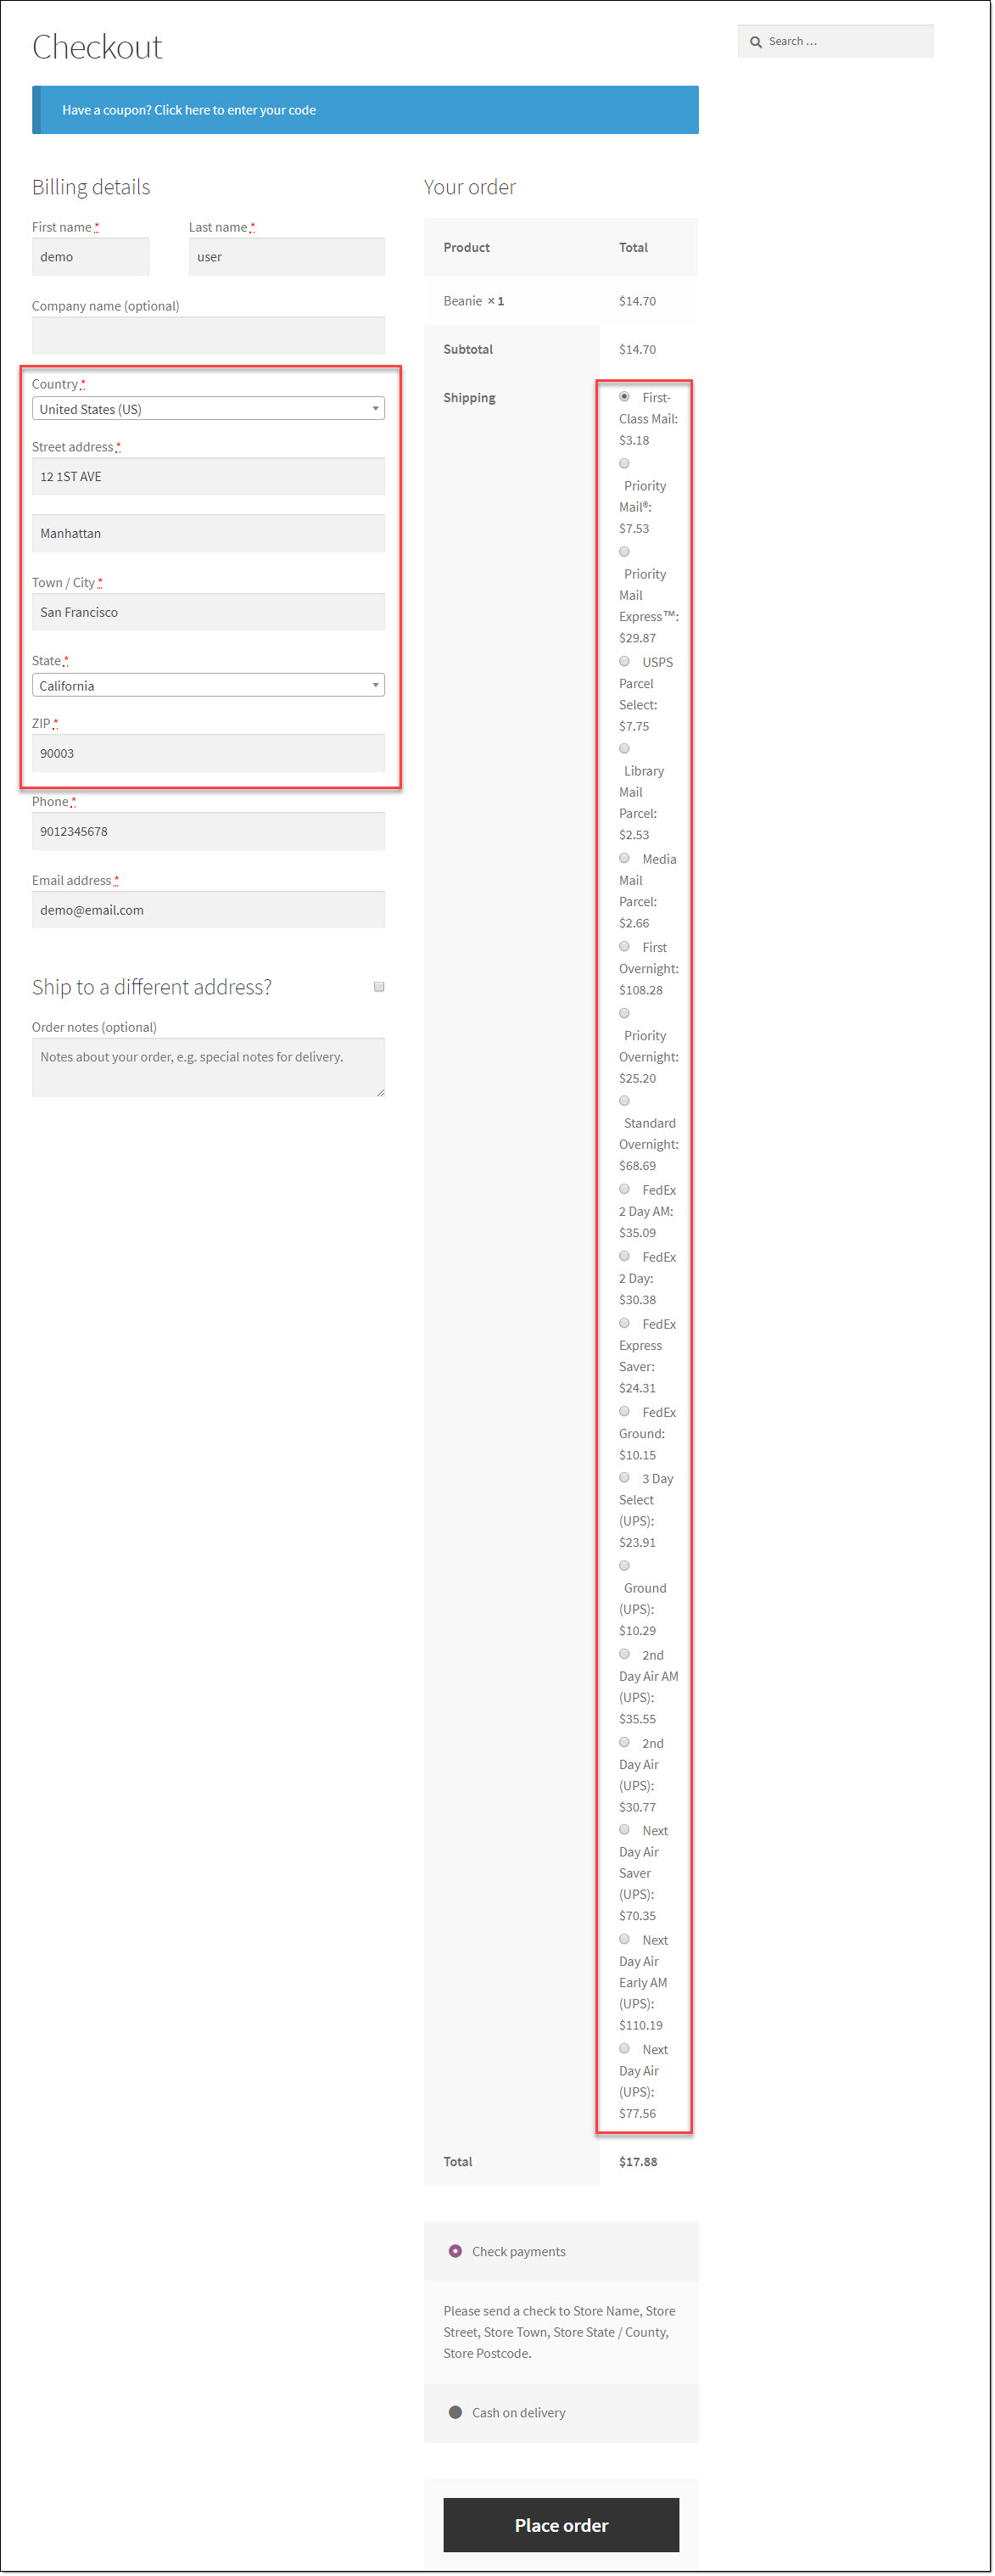
On the Checkout page, the rates will be based on the shipping and billing address that the customer enters.
How to print shipping labels for UPS, USPS and FedEx using ELEX EasyPost Plugin?
Printing shipping labels involves the same process for all three carriers while using ELEX EasyPost Plugin. When a customer places an order using one of the available shipping services (UPS, USPS or FedEx), you can generate and print shipping labels from the order detail page. Let’s quickly look at the process.
First, you have to configure the plugin settings.
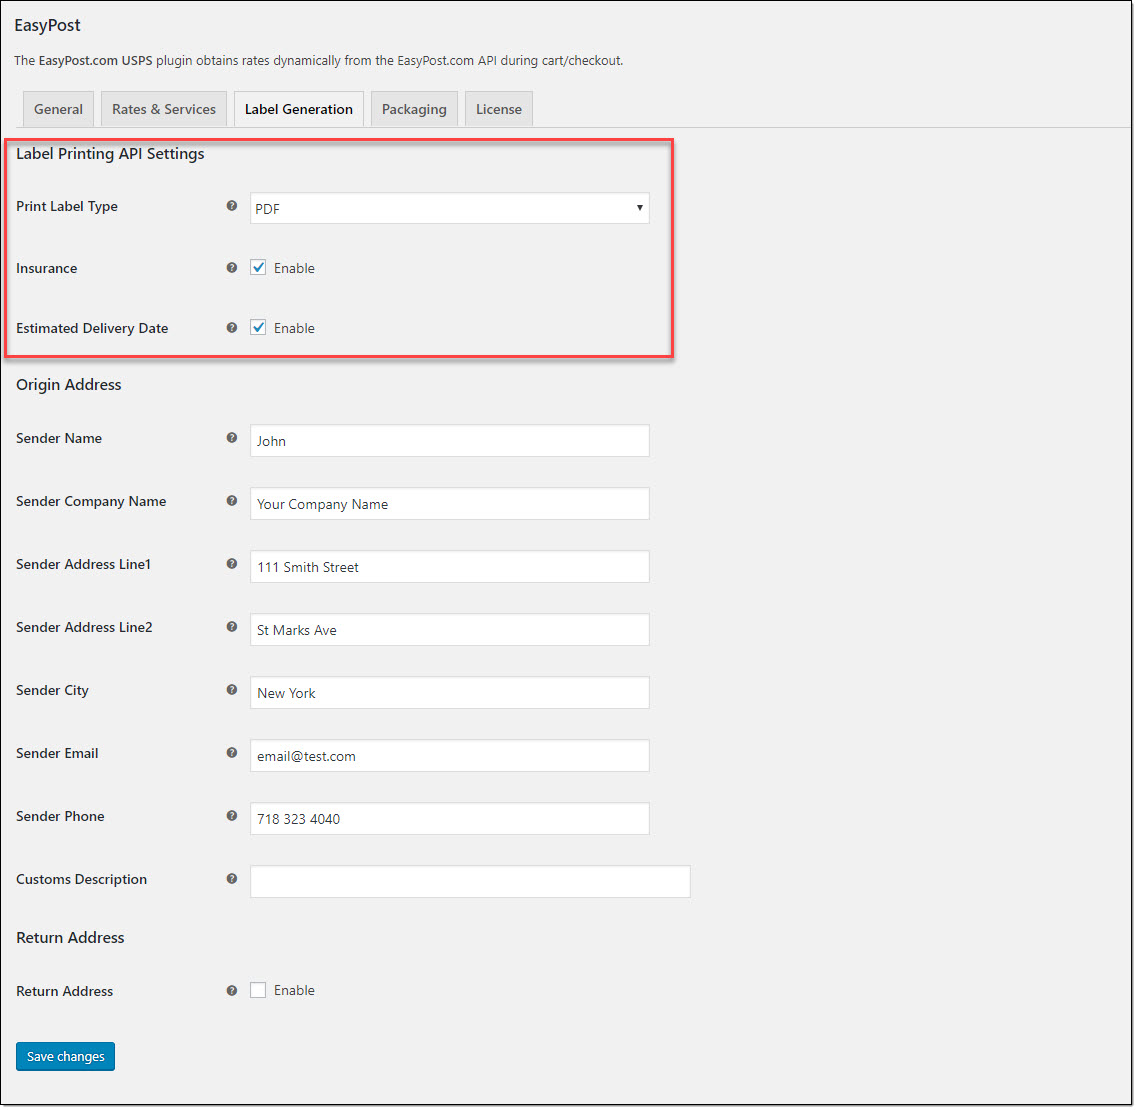
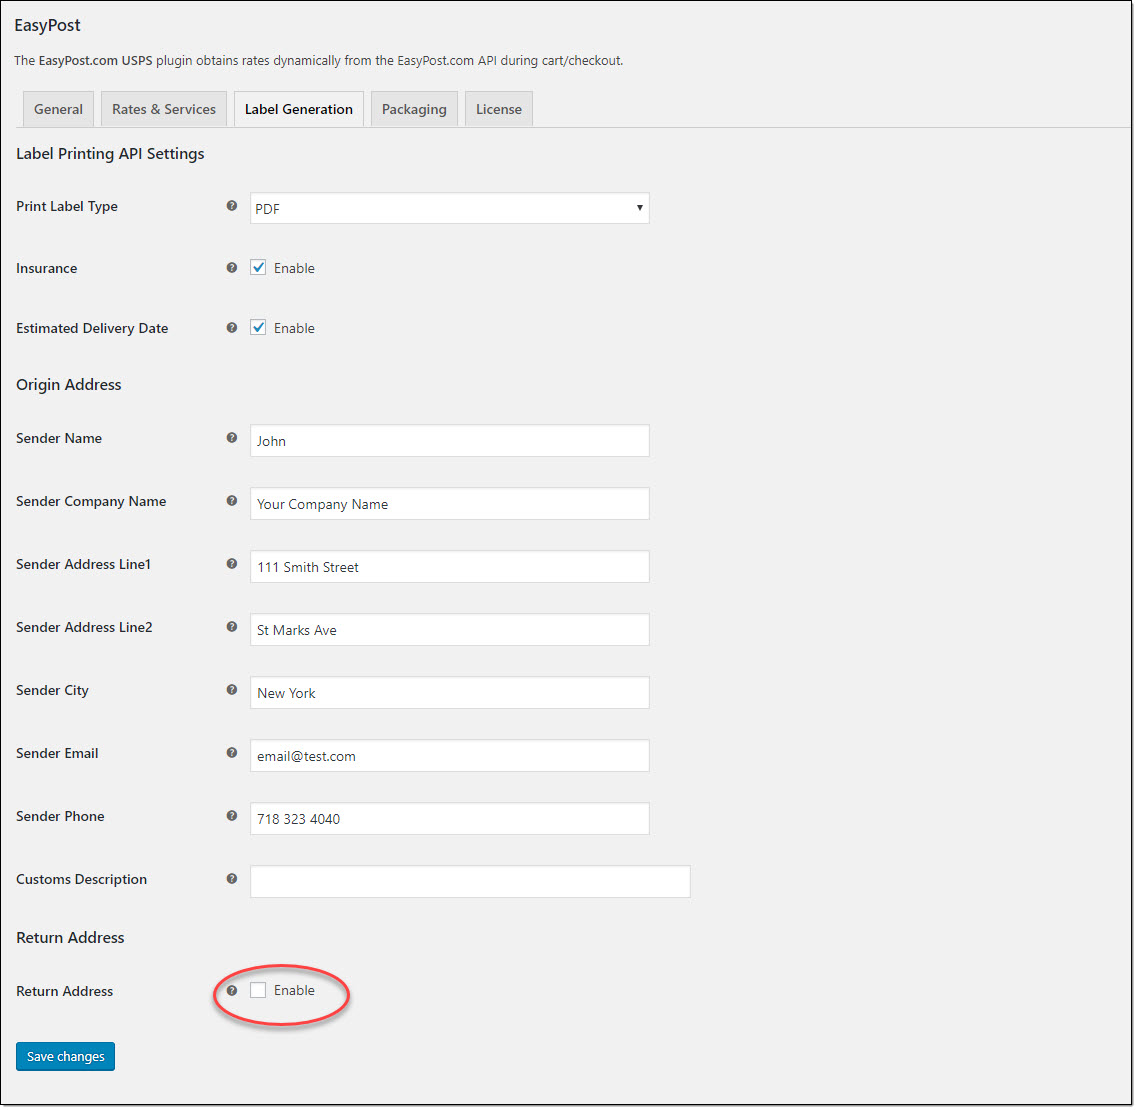
On the ‘Label Generation’ tab, first configure the Label Printing API settings.
Here, you can select the file format type for the label. Choose either PDF or PNG.
You can also enable the Insurance option here, if required. EasyPost will charge you 1% of the value of the shipment, and handles all the claims.
Enable the Estimated Delivery option, if you want to display the delivery date associated with each service.
You need to enter the full address of the sender, including email and phone number. For international shipping, there is a field to enter Customs description.
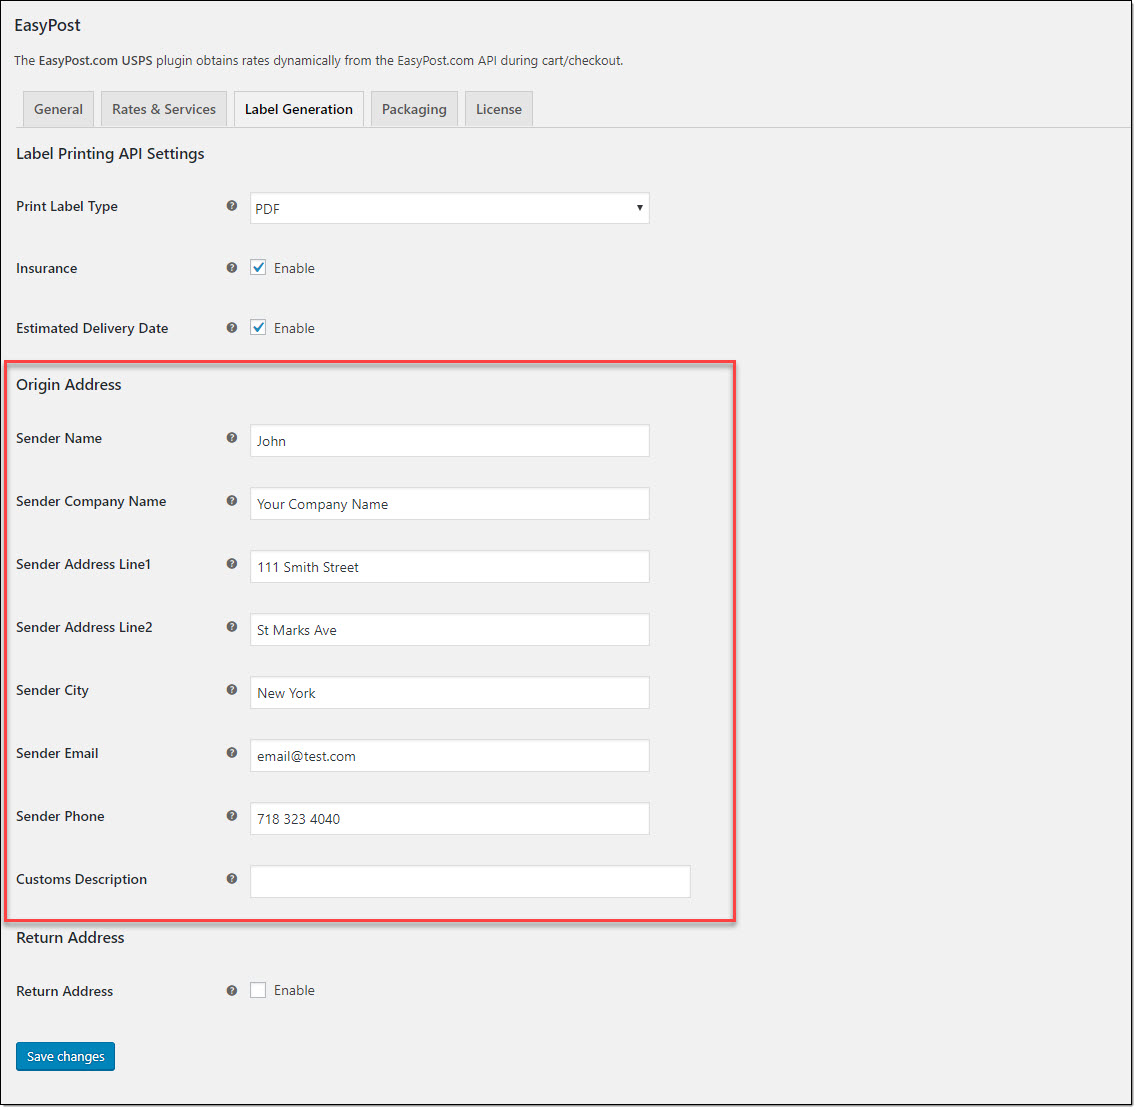
If you want to provide a different address for return address, you can enable the next field and enter the alternate address.
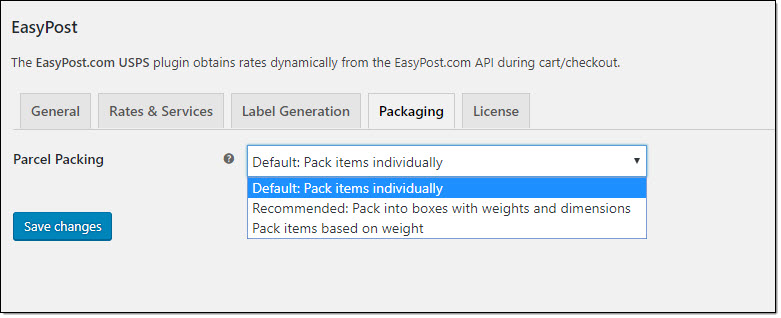
Under the Packaging tab, you need to enter a Parcel Packing option as well.
The plugin offers three parcel packing options:
- Pack items individually
- Pack into boxes with weight and dimensions
- Pack items based on weight
Choose the suitable option for your store, and click the Save changes button.
Now, when a customer places an order on your store, you can print shipping labels from the WooCommerce admin.
On the order detail page, scroll down to EasyPost Shipping Label section. Click Generate Packages button to create packages automatically.

Now, you will see the weight and dimensions of the package. Here you can choose the shipping service that you want to use. If you need to create another package, you can click the Add Package button. If all configurations are correctly done, you can click the Create Shipment button.
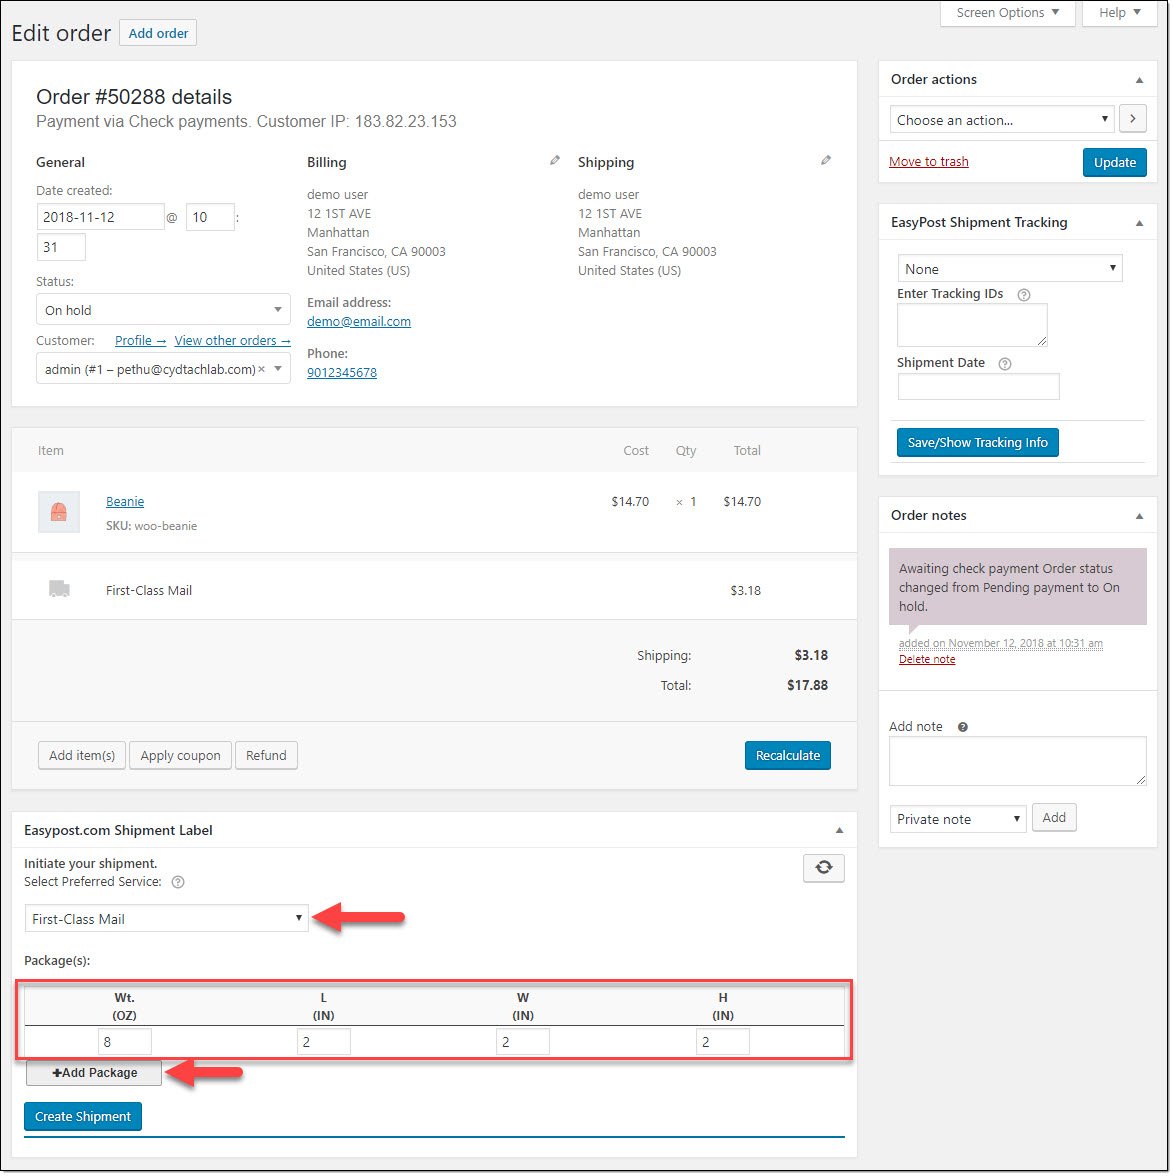
When you click the Create Shipment button, the shipment will be created, and you will get a Tracking Number as well. You can click the Print Label button to open the label in a new tab on your browser window. If you are connected to a label printer, you can print the label immediately. You can also download the label to print later.

The tracking code will be sent to the customer along with the order completion mail (when you change the order status to ‘Completed’).
Hope you got a basic idea to display shipping rates of UPS, USPS and FedEx using ELEX EasyPost Shipping Plugin.
Read the documentation to understand more about setting up the plugin.
For any clarifications, contact our support team.