What can we help you with?
How to set up ELEX WooCommerce Name Your Price Plugin?
This article intends to provide detailed, step-by-step instructions that’ll help you set up ELEX WooCommerce Name Your Price plugin. Refer to the product page to know more about the other various features of the plugin.
With this plugin, you can set up a minimum price at which the customers can buy a product from your store. That is, the price of the product will be displayed as usual on the product page and shop page. But from the product page, the customer can enter a price at which they would like to purchase the product. You also have the option to hide the product prices from the shop and product pages so that customers can enter an unbiased price.
Offering an option to specify the price from the customers’ side can potentially generate a lot of interest in your store. So you can set up a minimum feasible price in the plugin settings as well as on individual product pages. If you enter a minimum price on the product level, that price will be taken as its minimum price even though you have set a different minimum price on plugin settings. If you do not enter a price on the individual product level, it will take the price you entered on the plugin settings.
Overview
Some of the major highlights of the plugin include:
- Set a Minimum Price: Set up a minimum price for an individual product or set a global minimum price for all products in your store.
- Hide Price: Hide the price of the products from the shop page and individual product pages and provide an option to enter a price by the customers.
- Different Minimum Price for Product Variations: It has the option to set up different minimum prices for the variations of the same product.
- Product Categories: Choose which categories to use to present the lowest price based on the product category.
Getting started with ELEX WooCommerce Name Your Price plugin
Steps to Install the Plugin
- Download the ELEX WooCommerce Name Your Price plugin from its product page or WordPress.
- Log in as the WooCommerce admin of your online store.
- Go to Plugins > Add New to upload the downloaded ZIP file of the plugin.
- Activate the plugin.
Once the plugin is installed and activated, you can go to the Dashboard > Plugins > Installed Plugins > ELEX WooCommerce Name Your Price Plugin > Settings.
Now let’s get down to configuring the plugin.
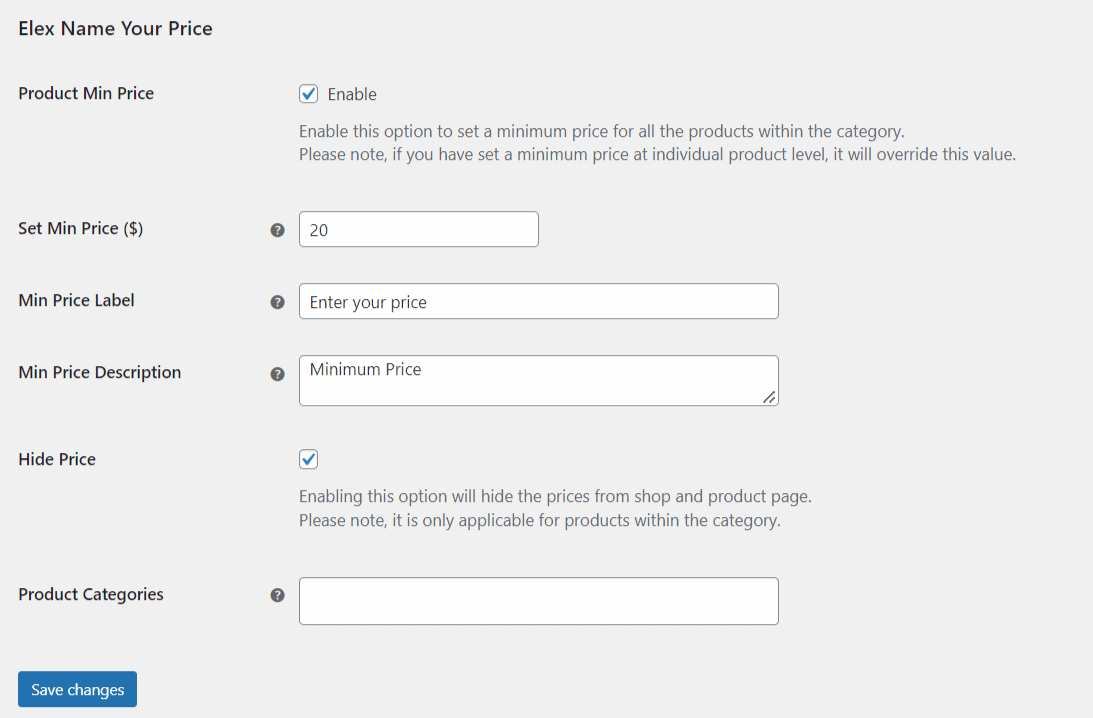
- Product Min Price: Enable this option to allow customers to enter a price at which they want to purchase the product.
- Set Min Price: Here you can enter the minimum price at which you want to allow the customers to purchase the products. You can also leave it blank.
If you do not enter any price here, customers can shop at any price they enter.
If the customer enters an amount less than the minimum price you have entered, they cannot proceed with the purchase and a message will be displayed to enter an amount greater than or equal to the minimum price you have configured to proceed with the purchase.
If the customer enters a price higher than the minimum price you have set here, the entered amount by the customer will be taken as the product price.
- Min Price Label: Enter a custom text to be displayed beside the field to enter the minimum price by the customer on both the product and shop pages.
- Min Price Description: Enter a custom description to be displayed for the customers on the product and shop pages.
- Hide Price: Enable this option to hide the price of the products from the shop page and their respective product pages. If you enable this option the customers will have only the option to enter a minimum price from their side.
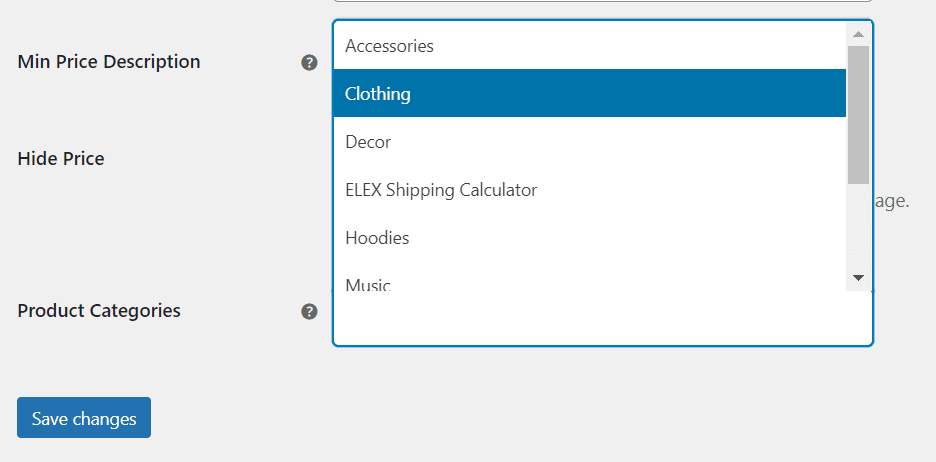
- Product Categories: Select the WooCommerce product categories you want to apply the minimum price to.
Let us check how it works with the help of examples.
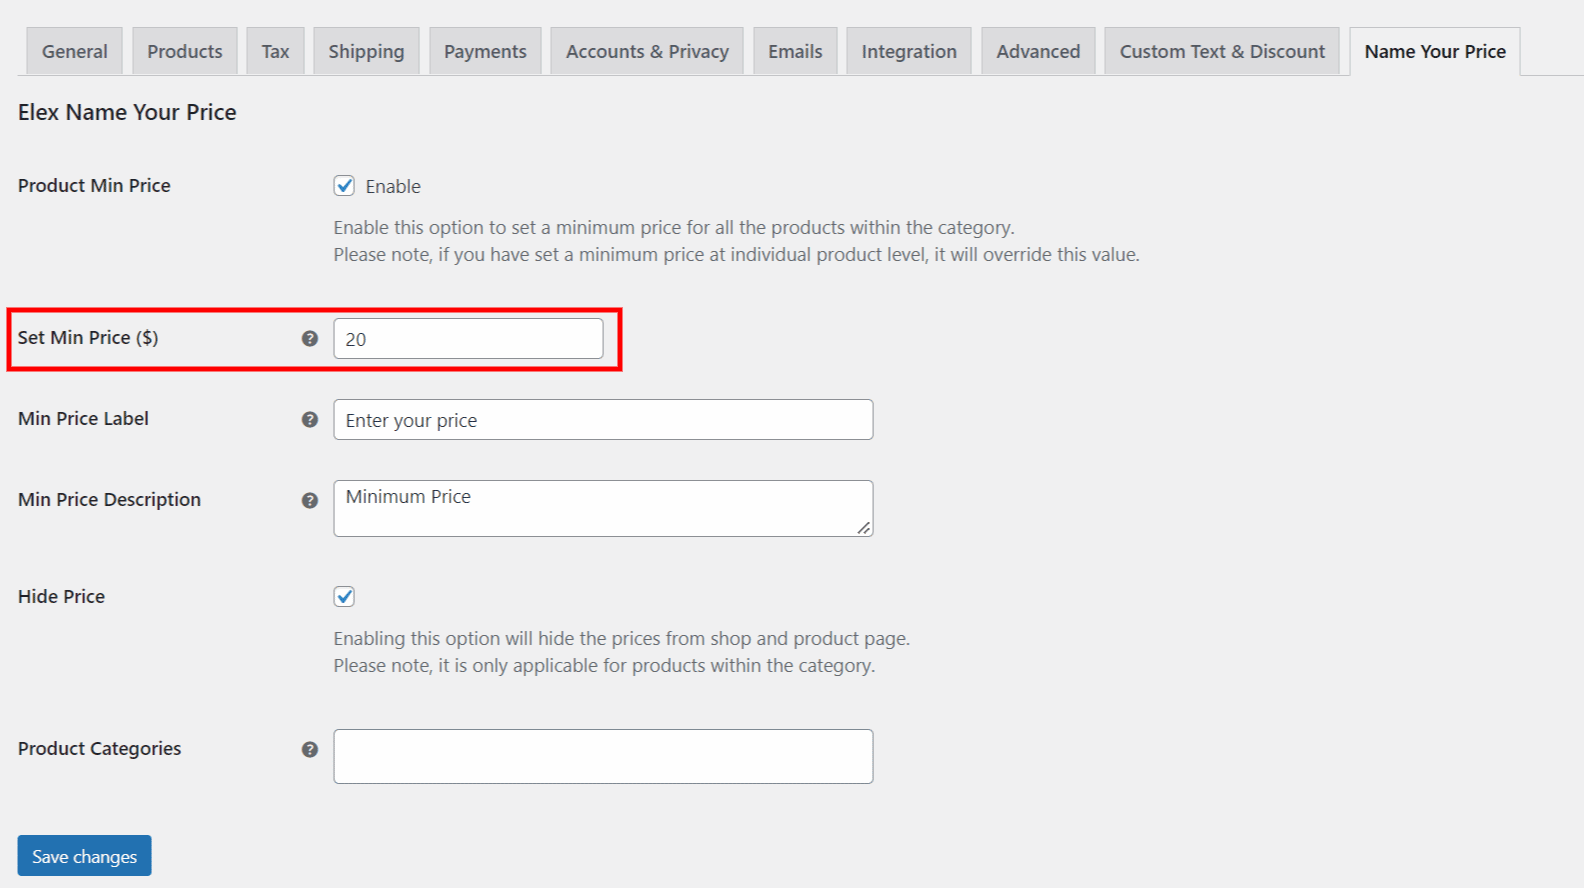
Check the below screenshot:
Here I have enabled the minimum price option, entered the minimum price as $20, the label as ‘Enter your price’, and the description as ‘Minimum price’.
After saving the settings, check the screenshot of one of the product pages below. This minimum price will be applicable for all products as we have set the price globally for all products in the store.
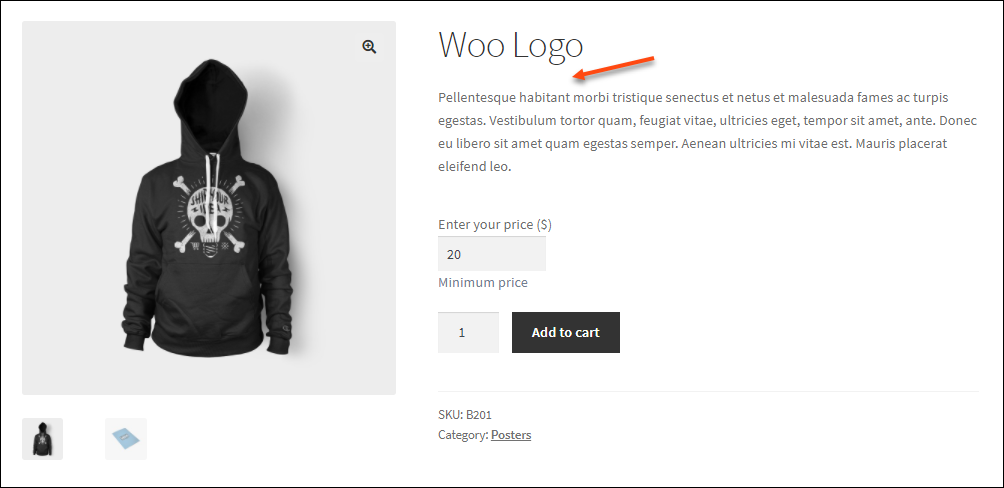
Check the example of a product page:
The minimum price we have entered has been displayed on the product page along with the label and description.
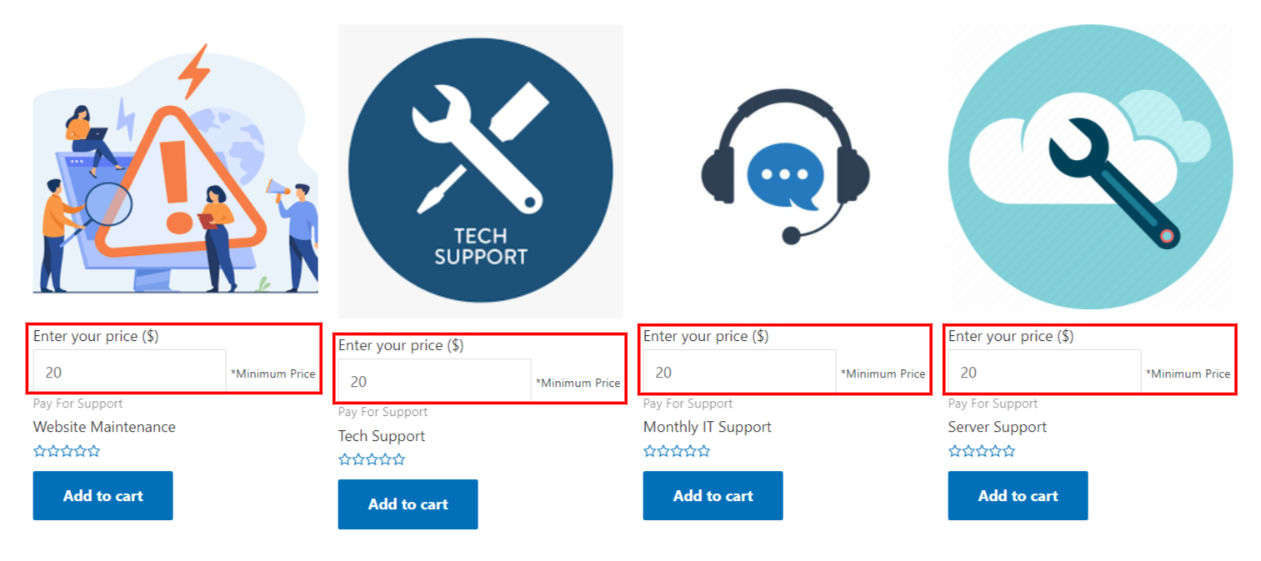
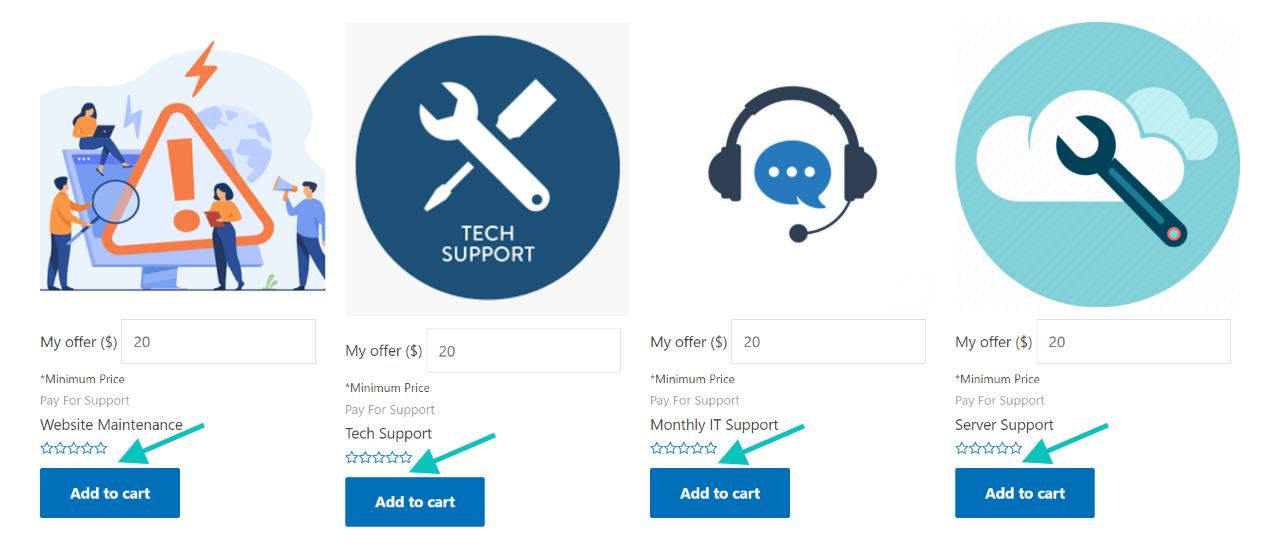
Check another example of a shop page:
The minimum price we have entered has been displayed on the shop page along with the label and description.
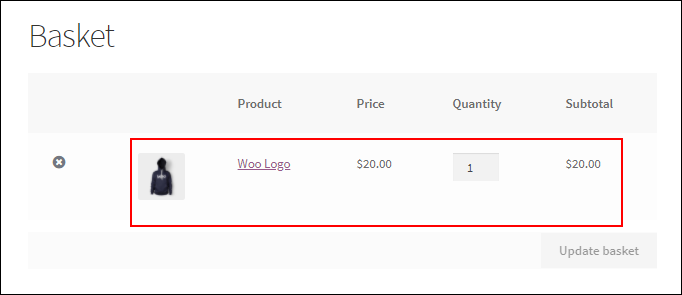
If the customer proceeds with the order without changing the amount from their side, the default price ($20 here) will be taken as its price. Check the screenshot:
If the customer enters an amount less than the minimum price you have configured, a message will be displayed to enter the minimum price to proceed with the purchase.
For example, if the customer enters $15, and clicks on the Add to basket button, a message will be displayed to enter the price, which is not lower than the minimum price (here $20) you have set.
Check the screenshot:
If the customer enters an amount greater than the minimum price you have set, the entered price will be taken to proceed with the purchase.
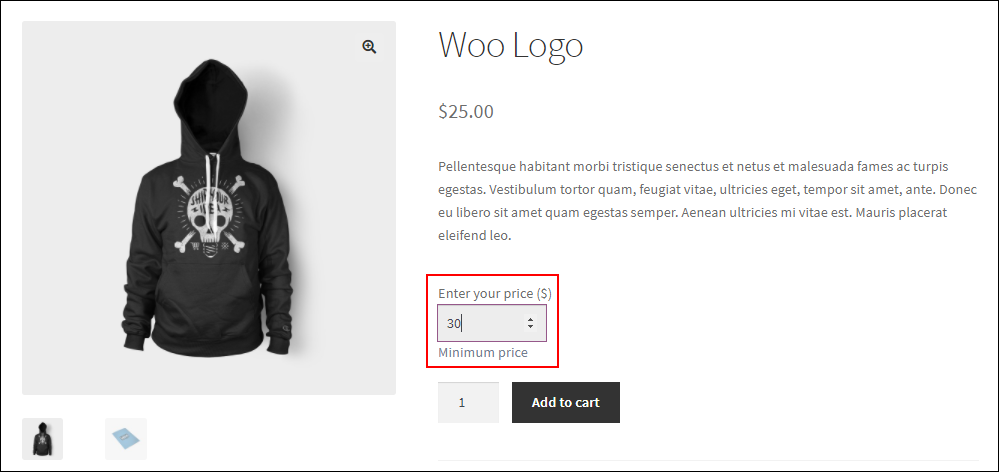
Example: If the customer enters $30, which is greater than the minimum price($20), so can proceed to pay $30.
Check the screenshot:
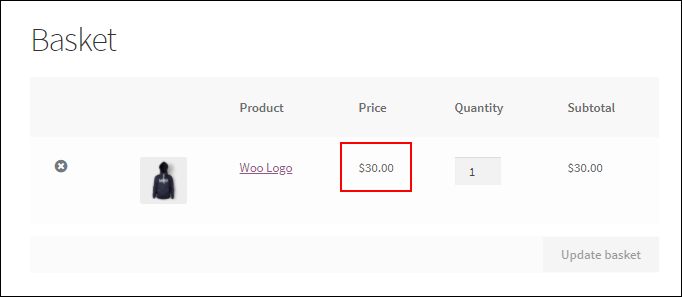
After clicking on the Add to cart button, $30 will be taken as the price to proceed the purchase. Check the screenshot:
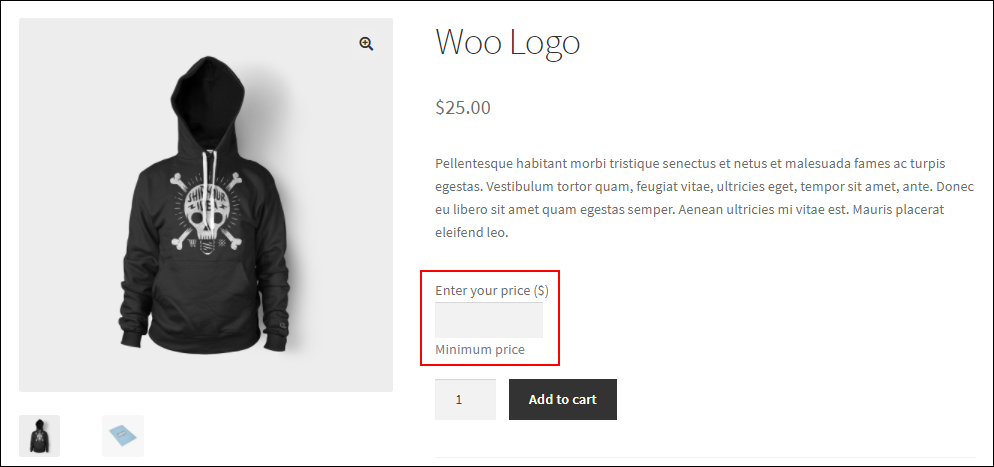
If you do not enter any minimum price on the settings and leave it as empty, customers can enter any price they wish and purchase the products in that amount.
Check the screenshot if you have not set any minimum price.
Hide Price
If you enable the hide price option in the settings, the price of the product will not be displayed on the shop and product pages.
After saving the changes, the shop and product pages will not display the product price. Check the screenshots:
Setting the Minimum Price at the Product Level
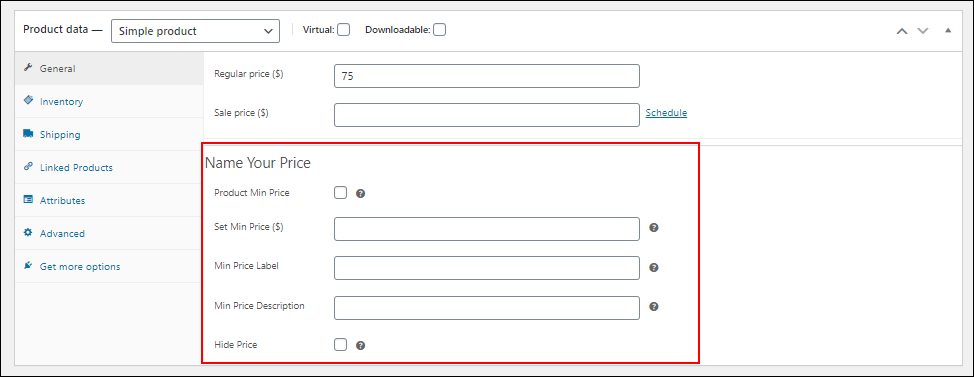
If the plugin is activated on your website, the same settings for configuring a minimum price will be available on each and every product page dashboard. You can set the minimum price and other labels, and descriptions, and hide price options exclusively for those products from their respective product pages. Other products will be eligible for the minimum price you have set globally on the plugin dashboard.
Go to the product page dashboard > General.
Check the screenshot:
Setting Minimum Price for Variable Products
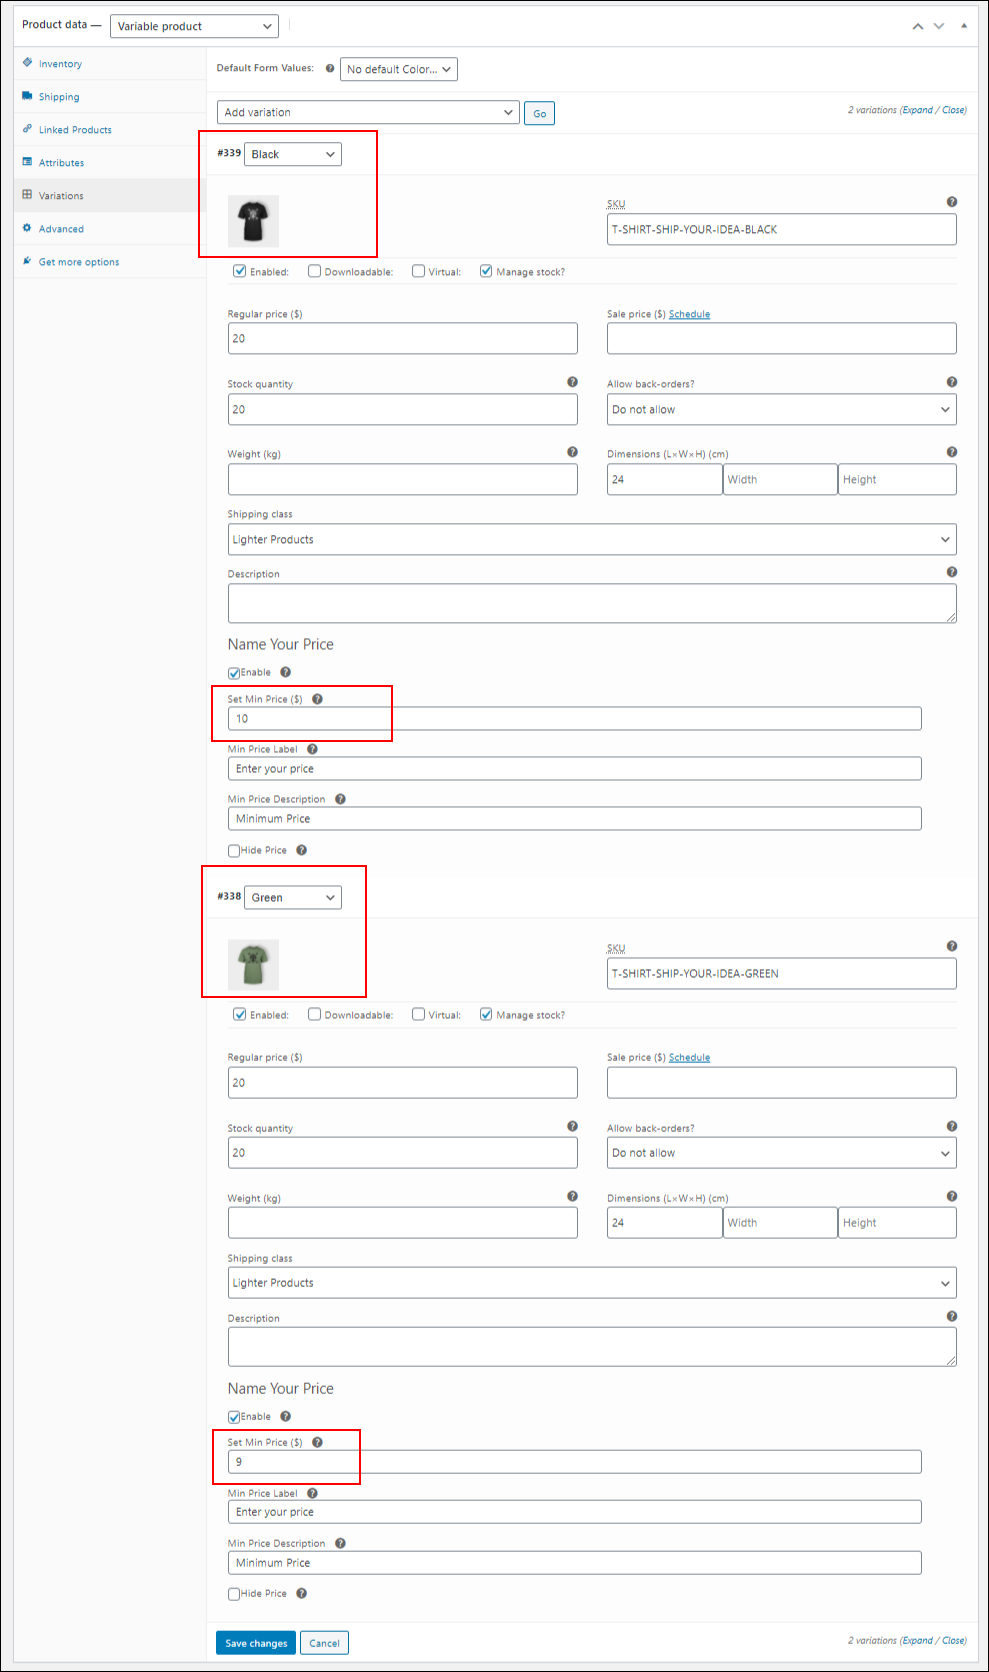
If a product has variations, you can set different minimum prices, labels, descriptions, and hide price options separately.
Go to the product page dashboard > Variations.
Check the screenshot of an example:
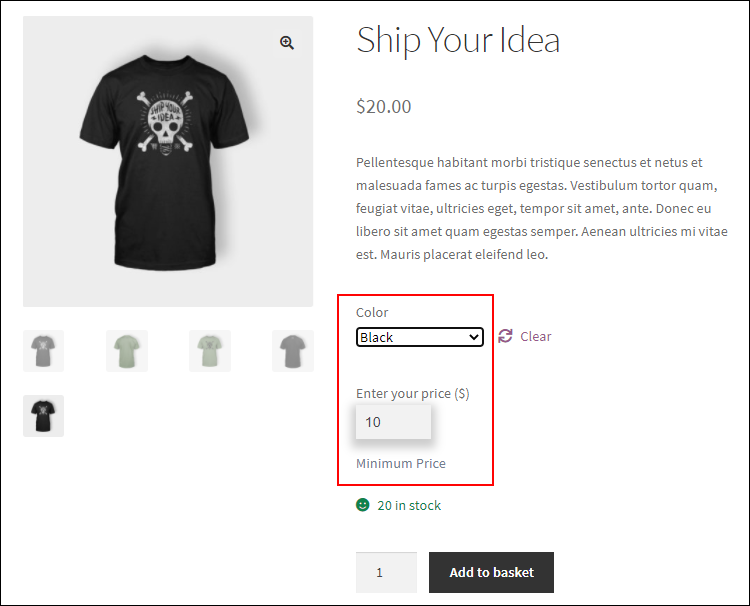
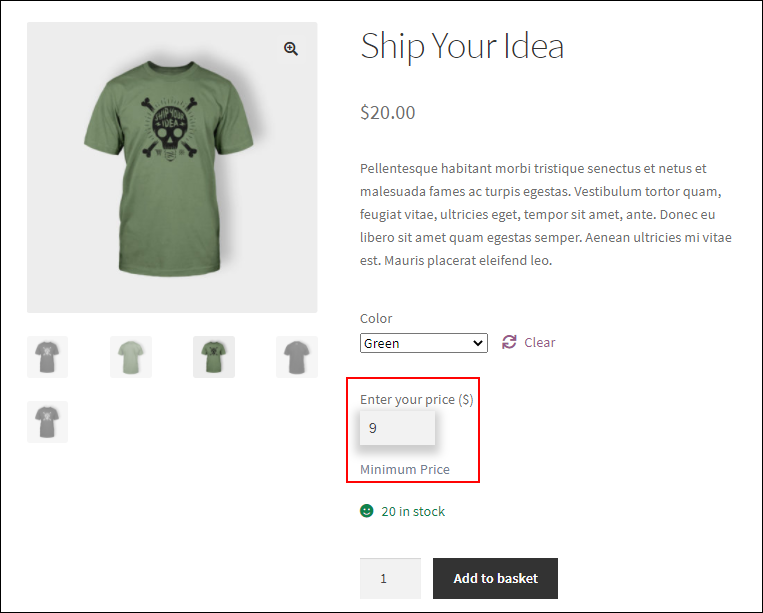
The product I have taken here has 2 variations as Black and Green. For Black, I have entered $10 and $9 for Green respectively. You can also set the label, and description, and hide price options separately. Check the screenshots after saving the settings.
If the customer chooses Black from the options, $10 will be displayed as the minimum price.
If the customer chooses Green, it will be displayed as:
The minimum price will be taken according to the price you have set on the individual variations and the entered minimum amount by the customers.
Check the below video to understand how this plugin can be configured in a donations site:
To explore more details about the plugin, check out ELEX WooCommerce Name Your Price Plugin.
You can also check out other WooCommerce and WordPress plugins in ELEX.

