What can we help you with?
How to Display FedEx Shipping Rates on your WooCommerce Store during Checkout?
As a WooCommerce store owner, you know the importance of displaying live rates of popular carriers. It helps to improve customer satisfaction, as you bring in transparency in shipping charges. Moreover, displaying additional shipping charges while checkout is one of the major reasons for cart abandonment, which you can avoid. In this article, we will describe how you can display FedEx shipping rates on your WooCommerce store during checkout.
How to display FedEx shipping rates on your WooCommerce store?
Here is a video that will help you understand the process step by step.
If you prefer read the step-by-step process with screenshots, please continue…
Let’s look into a scenario.
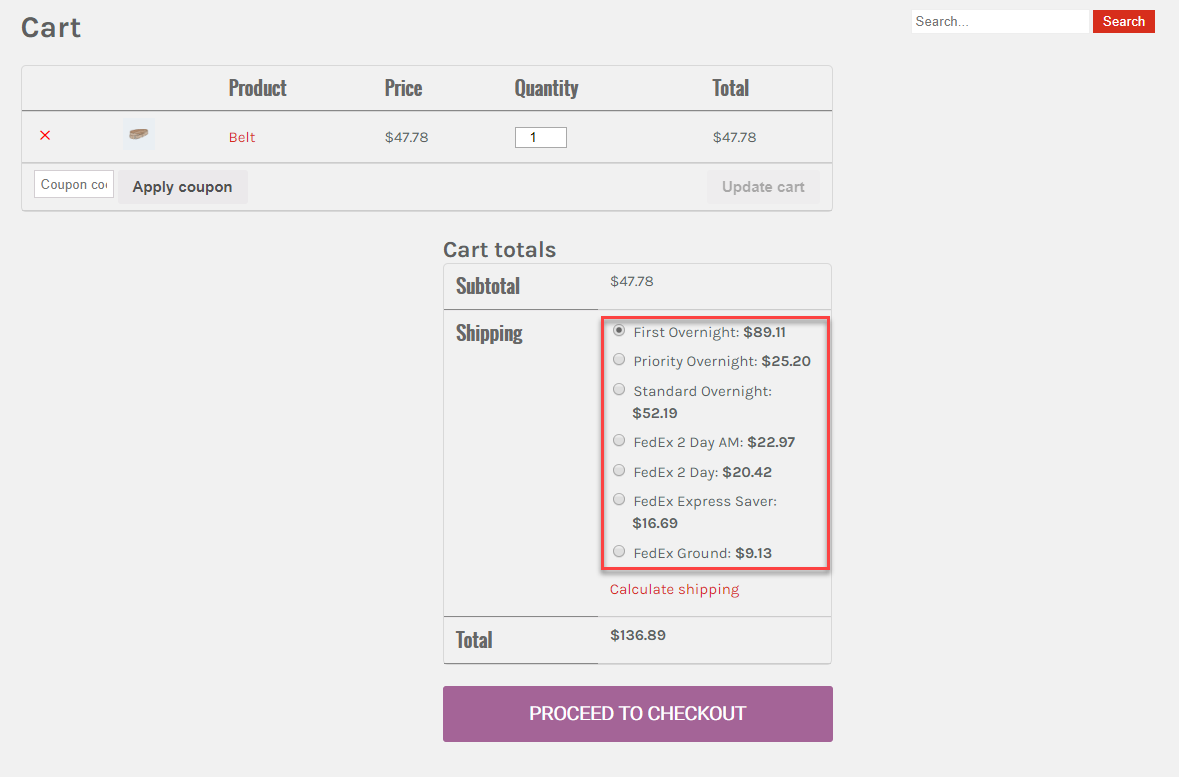
A customer adds a product to Cart. Before checkout, the customer is able to select a suitable FedEx shipping service from the available options. Please see the screenshot below.

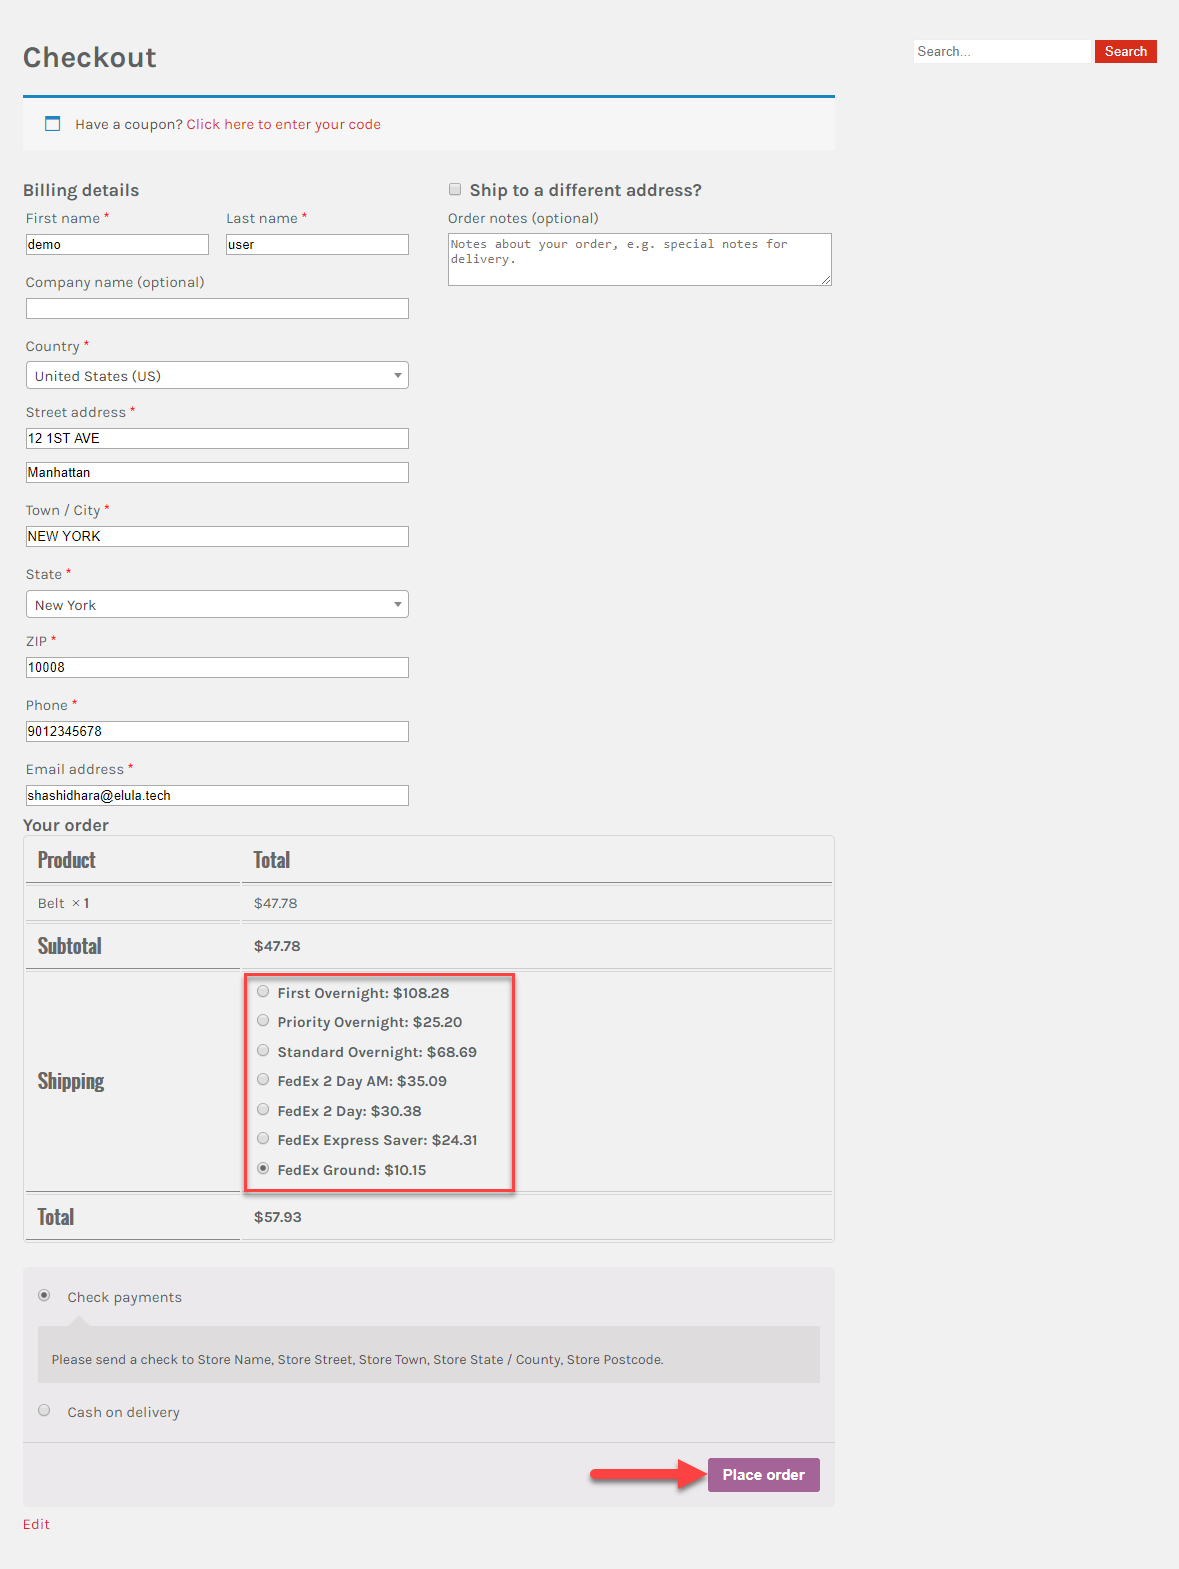
The customer will be able to see the same rates on the Checkout page as well.

How can you manage this on your WooCommerce store?
You can display live FedEx shipping rates on your WooCommerce store with the help of ELEX EasyPost Shipping plugin. For advanced features like printing shipping labels, providing tracking code, etc., opt for the premium version
Let’s look at the process of displaying live shipping rates in more detail:
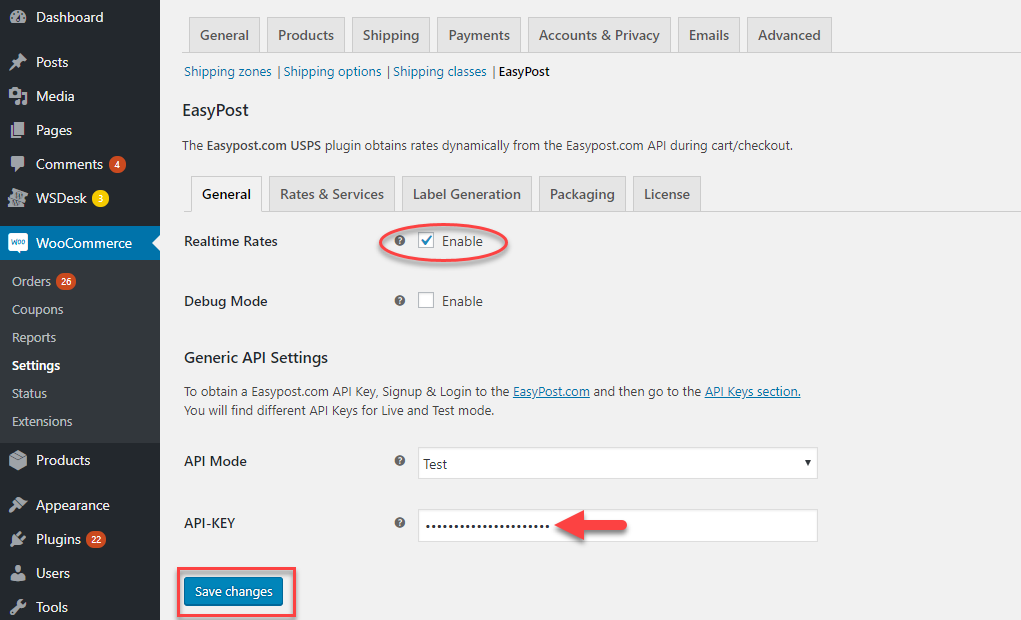
After installing and activating the plugin, you can access the plugin settings through WooCommerce > Settings > Shipping > EasyPost.
Now, on the plugin settings page, you need to enter the EasyPost API key and enable real time rates. You will be able to find the API key from your EasyPost account settings. Find more details on obtaining your EasyPost API key in the documentation.
Click the Save changes button.
Now, go to Rates & Services tab. On this tab, you can configure some of the aspects of the displayed rates. You can choose a title for the shipping method and choose the countries you want to make it available. You also need to enter your zip code and the country you are shipping from.
The Flat Rate fields are not applicable to FedEx, hence we will leave them blank in this example.
You will find a ‘Fallback’ field, where you can add a rate, in case the EasyPost API doesn’t display any rates. This will help your customers to continue with their shopping even if there is a problem in displaying live shipping rates.
Also, on the Rates Type field, you can choose whether to display Commercial or Residential rates.
As the EasyPost API supports multiple shipping carriers, you can choose the carriers you want to display here. For this example, we will choose only FedEx.
Please note: If you have any flat rate or free shipping conditions already configured on your site, those will be displayed along with the FedEx rate. Here we have disabled all the other shipping methods.

On the Services section, you can select specific FedEx services you want to display on the Cart and Checkout pages. Here, you will be also able to make price adjustments to each service. This can be done by specifying an amount or percentage. You can specify either a positive or negative amount depending on the requirement.
Do not forget to click the Save changes button after checking all the settings.

Things to remember:
For this plugin to display rates, all your products need to have weight and dimensions already set up. Remember to add the relevant details on the Product Data box for individual products. If you want to bulk update weight and dimensions fields of your products, you can try out the ELEX WooCommerce Bulk Edit plugin.
Before going live, make sure all your products have the correct weight and dimensions entered in the respective fields.

Now, when customers add products to Cart from your site’s frontend, they will be able to see the live FedEx rates based on the destination address and choose the suitable shipping option.
If they want to check the rates for a particular zip code, they can simply click Calculate shipping option below the rates. Here they can update the zip code and check for difference in rates between two shipping location.

Now, on the checkout page, customers will enter the billing and shipping address, and the rates will be displayed based on that.
Customers can choose any of the available FedEx services and place an order on your store.
Once an order is placed choosing one of the FedEx services, you can provide shipping through that specific service. You will be able to automate the entire fulfillment process through FedEx right from your WooCommerce admin. Find more details on these features here.
The rates will vary also based on the box packing algorithm that you choose. You can find out more details on box packing settings here.
On the product page, you will find more details on the features of the plugin.
For any queries, contact our support team.