What can we help you with?
How to Customize the Pricing Table in Dynamic Pricing Using the Code Snippet?
In this article, we take a look at some of the code snippets to customize the pricing table in Dynamic Pricing using the ELEX WooCommerce Dynamic Pricing and Discounts Plugin.
These are generic code snippets and will work regardless of any third-party plugins. The snippet is an easy way to override the display of the pricing table without overriding it in the plugin file (Dynamic Pricing).
Let us take a look at how to make use of the code snippets and work on the pricing table to customize the same.
Code Snippet to Customize the Background Color of the Pricing Table
Here we take a look at the code snippet to change the colours in the pricing table.
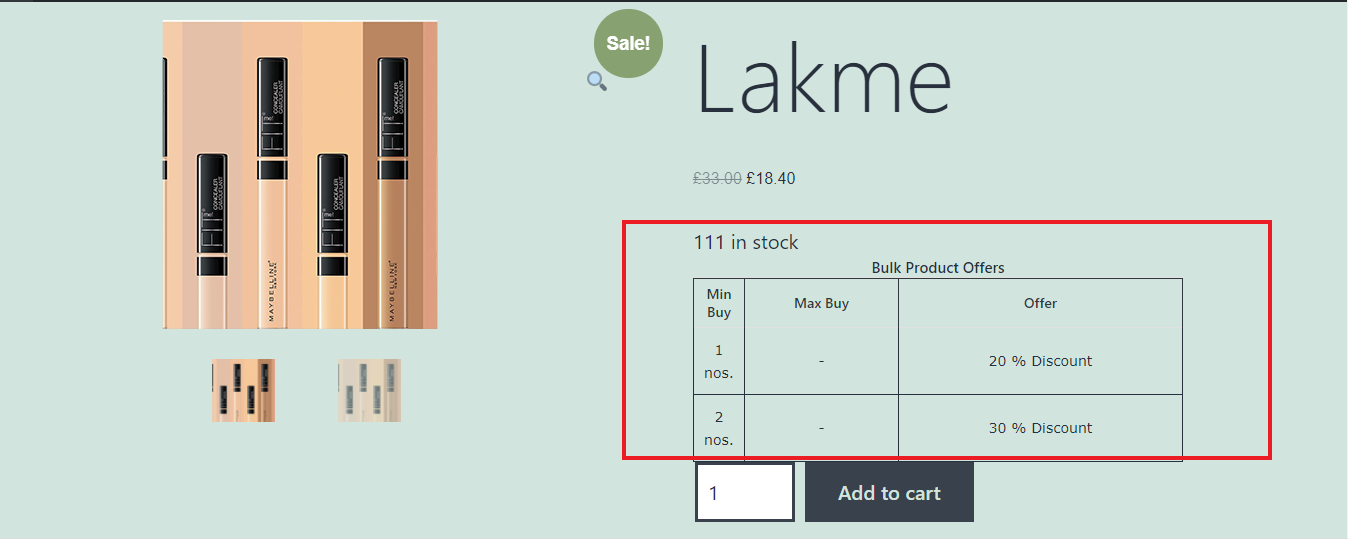
The pricing table before adding the code snippet will look like as shown in the image below:
Add the below code snippet in the CSS file (additional.css) of your activated website theme.
Just copy and paste the snippet and you are done!
Follow the below steps to input the snippet into your website.
1. Navigate to the appearance tab of the backend of your website.
2. Select the Customise option.
3. Click the additional CSS option and input the below snippet.
Code snippet to customize the pricing table is as shown below:
.xa_sp_table_body_row td {

        background-color: blue !important;

    }

.xa_sp_table_cell{

        text-align:center;

color:red;

    }

    .xa_sp_table_head2 tr td

    {

        text-align: center;

color: green;

background-color: yellow;

    }

.xa_sp_table_head1  {

color: orange;

}
Note: All the colors are changeable as per the business requirement. We can change the colors of different classes in the snippet.
Classes for different colors are listed below:
Body background color (blue) – .xa_sp_table_body_row
Body text color(red) – .xa_sp_table_cell
Heading background color(yellow) – .xa_sp_table_head2
Table heading text color(orange) – .xa_sp_table_head1
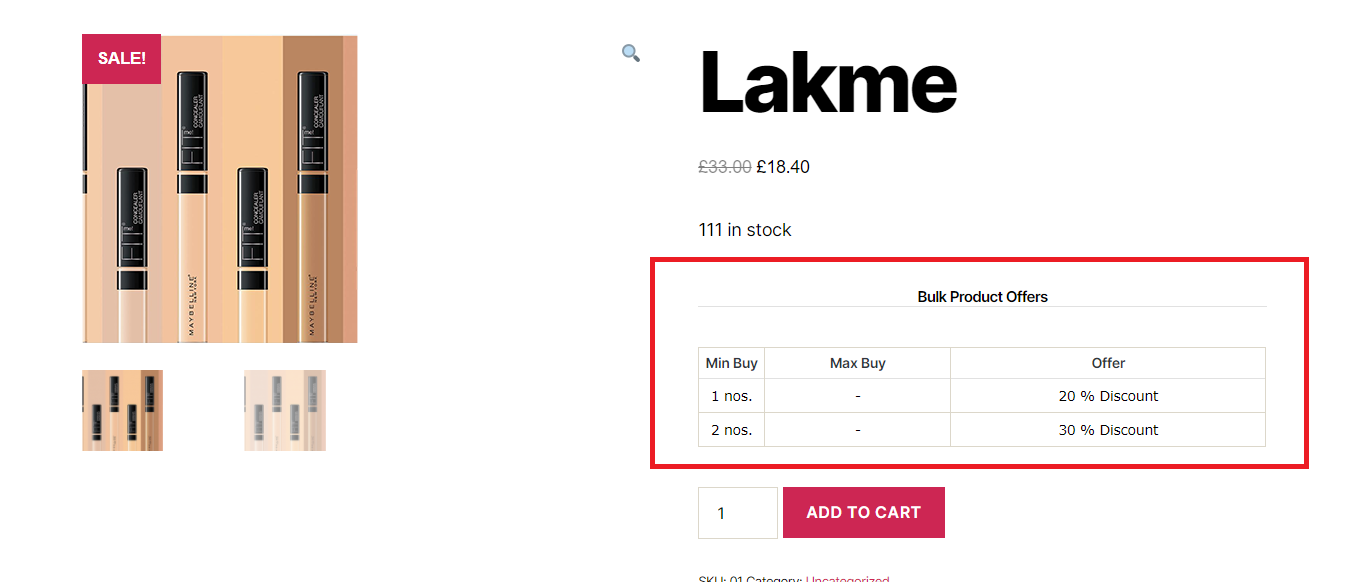
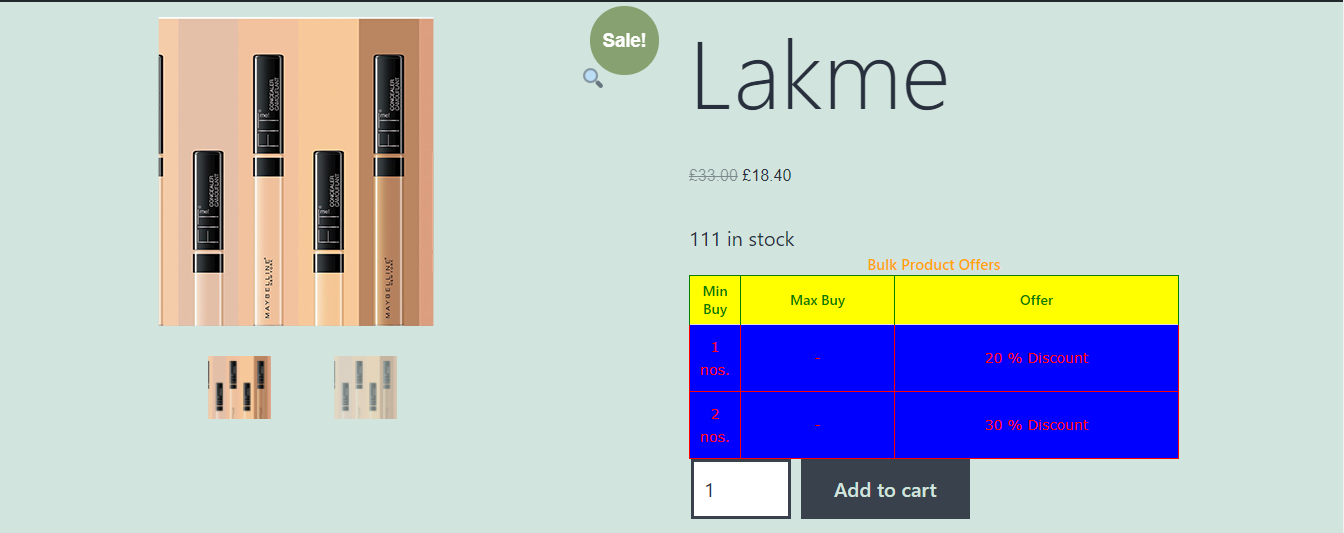
Pricing Table After Adding the Code Snippet looks like the image below.

This is how you can customize the colors on the pricing table with a code snippet.
Code Snippet to Hide the Columns of the Pricing Table
Here we take a look at a simple code snippet to hide the columns of the pricing table.
This is how a pricing table looks like before adding the code snippet.
Now add the below code snippet in the CSS file (additional.css) of your activated website theme.
Just copy and paste the snippet and you are done!
Follow the below steps to input the snippet into your website.
1. Navigate to the appearance tab of the backend of your website.
2. Select Customise option.
3. Click the additional CSS option and input the below snippet.
The code snippet to hide the columns of the pricing table is shown below:
Scenario 1: Code snippet to hide the first column in the Pricing table.
.xa_sp_table_head2 td:nth-child(1) {

display:none;

}

.xa_sp_table_body_row td:nth-child(1) {

display:none;

}
Scenario 2: Code snippet to hide the second column in the Pricing table.
.xa_sp_table_head2 td:nth-child(2) {

display:none;

}

.xa_sp_table_body_row td:nth-child(2) {

display:none;

}
Scenario 3: Code snippet to hide the third column in the Pricing table.
.xa_sp_table_head2 td:nth-child(3) {

display:none;

}

,xa_sp_table_body_row td:nth-child(3) {

display:none;

}
The pricing table after adding the code snippet from scenario 2 will look like as shown in the image below:
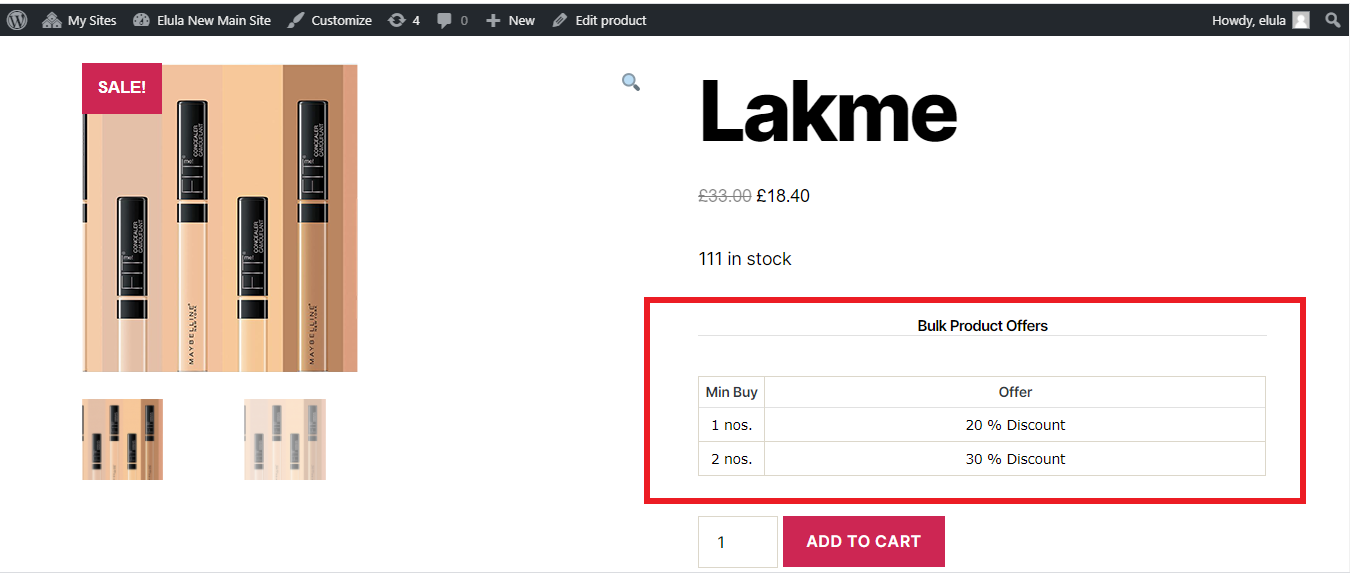
This is how you can hide the columns of your pricing table using ELEX code snippets.
Code Snippet to Adjust the Width of the Pricing Table
Here we take a look at a simple code snippet to adjust the width of the pricing table.
This is how the pricing table looks like before adding the code snippet.
 Now add the below code snippet in the CSS file (additional.css) of your activated website theme.
Just copy and paste the snippet and you are done!
Follow the below steps to input the snippet into your website.
1. Navigate to the appearance tab of the backend of your website.
2. Select Customise option.
3. Click the additional CSS option and input the below snippet.
The code snippet to hide the columns of the pricing table is shown below:
.xa_sp_table_head1 {
width: 50%;
}
.xa_sp_table {
width: 50% !important;
}
Following the addition of the code snippet, the pricing table will look like this: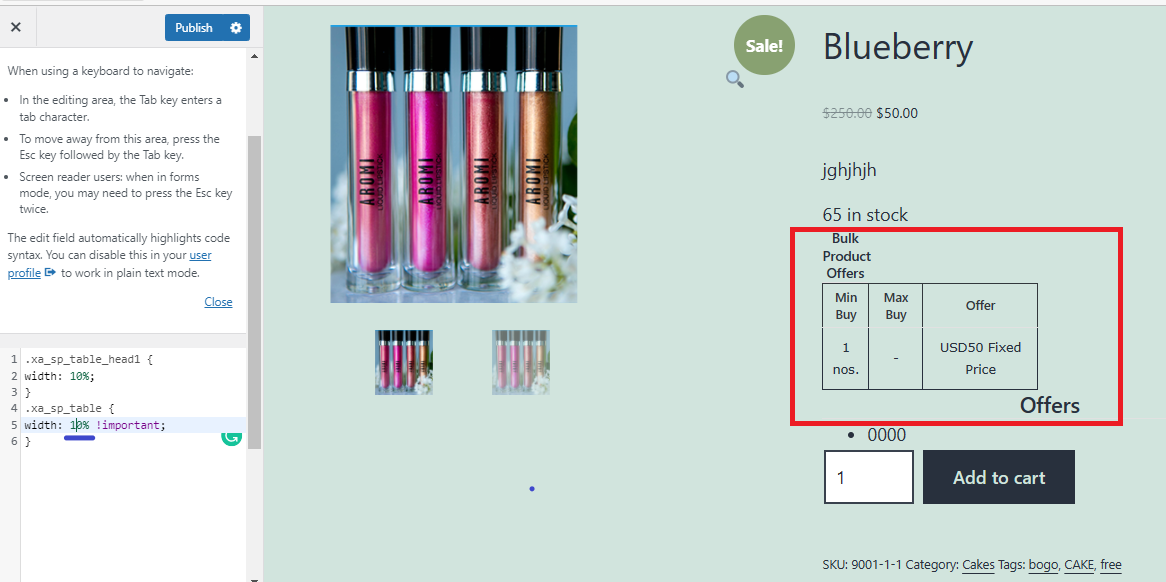
This is how you can adjust the width of the pricing table using ELEX code snippets.
Code Snippet to Change the Main Heading of the Pricing Table
Here we make use of a code snippet to change the main heading of the pricing table.
This is how the pricing table looks like before adding the code snippet.

Add the below code snippet in the CSS file (additional.css) of your activated website theme.
Just copy and paste the snippet and you are done!
Follow the below steps to input the snippet into your website.
1. Navigate to the appearance tab of the backend of your website.
2. Select Customise option.
3. Click the additional CSS option and input the below snippet.
Shown below is the code snippet to change the main heading of the pricing table.
.xa_sp_table_head1 {

visibility: hidden;

}

.xa_sp_table_head1:before {

visibility: visible;

content:'Main Heading';

border-bottom: 1px solid #e1e1e1;

font-weight: 600;

font-size: 15px;

}
Note: You can update the required content in the 6th line of the code snippet instead of ‘Main Heading’ texts corresponding to the value of the “content:”.
Once the code snippet is added the main heading will be changed to the text provided in the code:

This is how you can change the main headings of your pricing table using the code snippets.
Code Snippet to Change the Subheadings of the Pricing Table
This is a generic code snippet to change the subheadings of the pricing table.
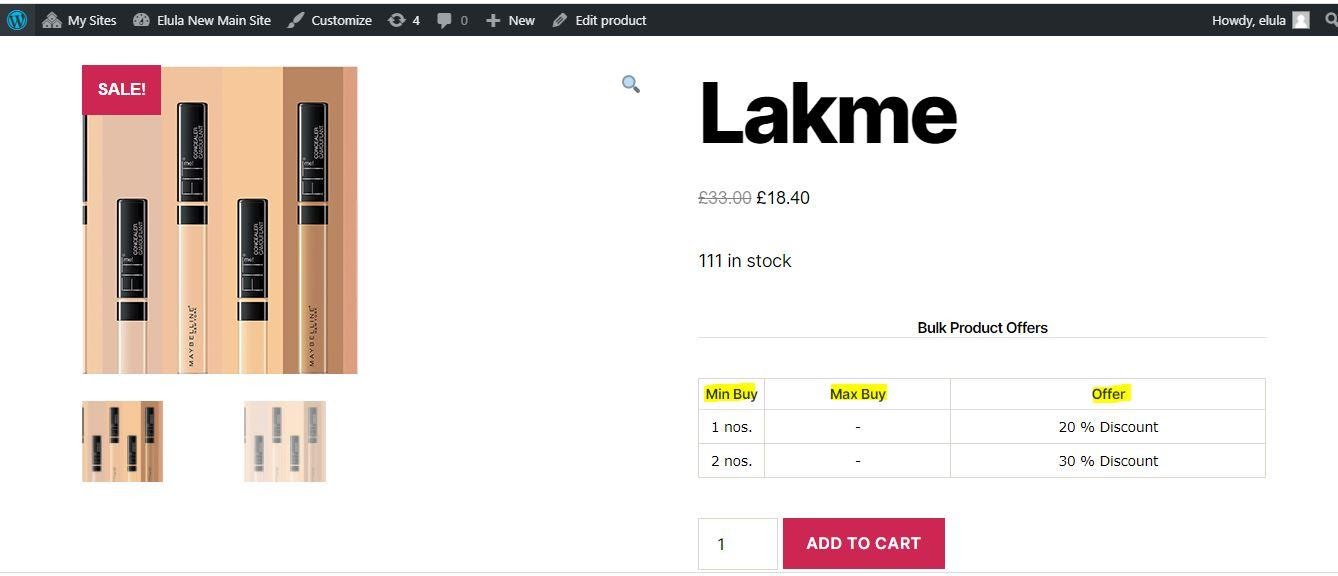
The pricing table before adding the code snippet looks like as shown in the image below:
Add the below code snippet in the CSS file (additional.css) of your activated website theme.
Just copy and paste the snippet and you are done!
Follow the below steps to input the snippet into your website.
1. Navigate to the appearance tab of the backend of your website.
2. Select Customise option.
3. Click the additional CSS option and input the below snippet.
Below is the code snippet to change the subheadings of the pricing table
Scenario 1: Code snippet to change the first column heading.
.xa_sp_table_head2 td:nth-child(1) {

visibility: hidden;

}

.xa_sp_table_head2 {

border-collapse: collapse;

}

table {

border-collapse: collapse;

}

.xa_sp_table_head2 td:nth-child(1):after {

visibility: visible;

content:'Sub heading'; // This Content signifies the text needs to be given for Heading

}
Scenario 2: Code snippet to change the second column heading.
.xa_sp_table_head2 td:nth-child(2) {

visibility: hidden;

}

.xa_sp_table_head2 {

border-collapse: collapse;

}

table {

border-collapse: collapse;

}

.xa_sp_table_head2 td:nth-child(2):after {

visibility: visible;

content:'Sub heading';    // This Content signifies the text needs to be given for Heading

}
Scenario 3: Code snippet to change the third column heading.
.xa_sp_table_head2 td:nth-child(3) {

visibility: hidden;

}

.xa_sp_table_head2 {

border-collapse: collapse;

}

table {

border-collapse: collapse;

}

.xa_sp_table_head2 td:nth-child(3):after {

visibility: visible;

content:'Sub heading';   // This Content signifies the text needs to be given for Heading

}
Note: You can update the required content as headings by editing the ‘Sub Heading’ text corresponding to the value of the “content” in the second last line of the code snippet.
After adding the code snippet the pricing table looks like this.
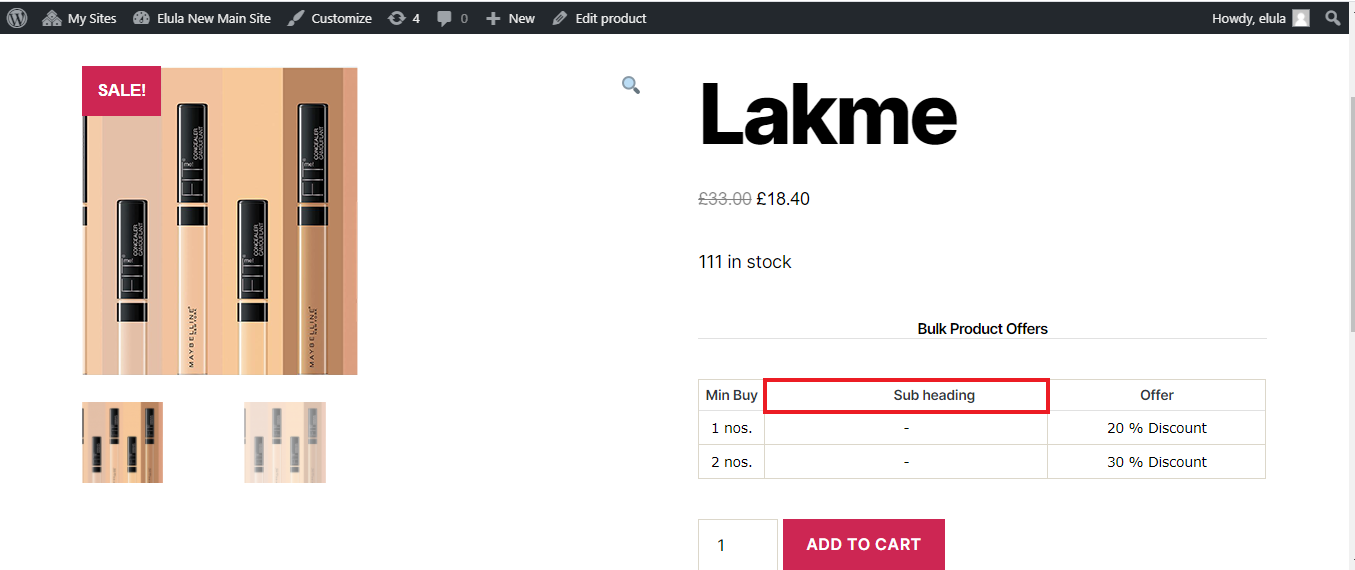
This is how you can change the subheadings of your pricing table using ELEX snippets.
Code Snippet to Customize Pricing table on the Product Page
What if you want to customize the pricing table on the product page in your way? Suppose your customers want to customize the pricing table on the product page which looks like shown in the image below:

Now, what if the customer wants to make modifications as shown in the image below?
We can do it using a simple code snippet that works excellently on the plugin.
Note – Add the below code snippet in the theme editor of your activated website theme.
Follow the below path to input the snippet into your website.
Path : theme-editor/file=functions.php&theme=storefront
Code Snippet to Customize the Pricing Table
function elex_customize_pricing_table() {

if(is_product()) {

        wc_enqueue_js("jQuery(document).ready(function(){

                jQuery('.xa_sp_table_head1').html('Quantity Discount Pricing');

                var html_content = jQuery('.xa_sp_table ').html();

                jQuery('.xa_sp_table ').html(html_content.replace('Min Buy', 'Min').replace('Max Buy', 'Max').replace(/USD/g, '$').replace(/Fixed Price/g, 'each'));

        });");

       ?>

       <style type="text/css">

        /* For rows */

        .xa_sp_table_cell {

        font-size:14px;

        font-family: Verdana;

        }

        /* Main heading */

        .xa_sp_table_head1  {

        font-size:14px;

        font-family: Verdana;

        }

 /* Sub heading */

        .xa_sp_table_head2_cell {

        font-size:14px;

        font-family: Verdana;

        }

       </style>

       <?PHP

}

    }

add_action('wp_enqueue_scripts', 'elex_customize_pricing_table');
Once the above code snippet is added to the function, you can see what the pricing table looks like as shown below
As Said above,
These are some of the code snippets that will help you customize the dynamic pricing table in such a way that it suits your business needs.
To know more about the product, check out the Dynamic Pricing and Discounts Plugin for WooCommerce.
Or check out the documentation section for more related articles.
For more creative snippets of information visit elex-snippets
2 Comments. Leave new
Quite a few of the image examples are missing from this page. Can you relink the images?
Hello, Thanks for letting us know. The images are relinked.