What can we help you with?
How to Customize USPS Shipping Labels using ELEX WooCommerce Stamps.com Shipping Plugin with USPS Postage? (with Video)
In this article, we will see how to customize USPS Shipping Labels using ELEX WooCommerce Stamps.com Shipping Plugin with USPS Postage. To explore other features of the plugin, you can check out the product page.
If you have a USPS e-VS account, you can make use of our ELEX WooCommerce USPS Shipping Plugin. If you have a regular USPS account, you can make use of ELEX WooCommerce Stamps.com Shipping Plugin. With the ELEX Stamps.com plugin, you can generate USPS domestic and international shipping labels as well as Custom Declarations Forms.
Customizing USPS Shipping Labels
With the ELEX Stamps.com plugin, you can access USPS real-time rates, create shipments, and generate USPS shipping labels with postage.
a. Enabling Real-time Rates
First and foremost, you need to enable real-time rates setting, as this will allow you to access Stamps.com service. To do this, go to WooCommerce > Settings > Shipping > Stamps.com > General.
Tick the Real-time Rates checkbox and save the settings. The sample settings are as shown in the screenshot below.
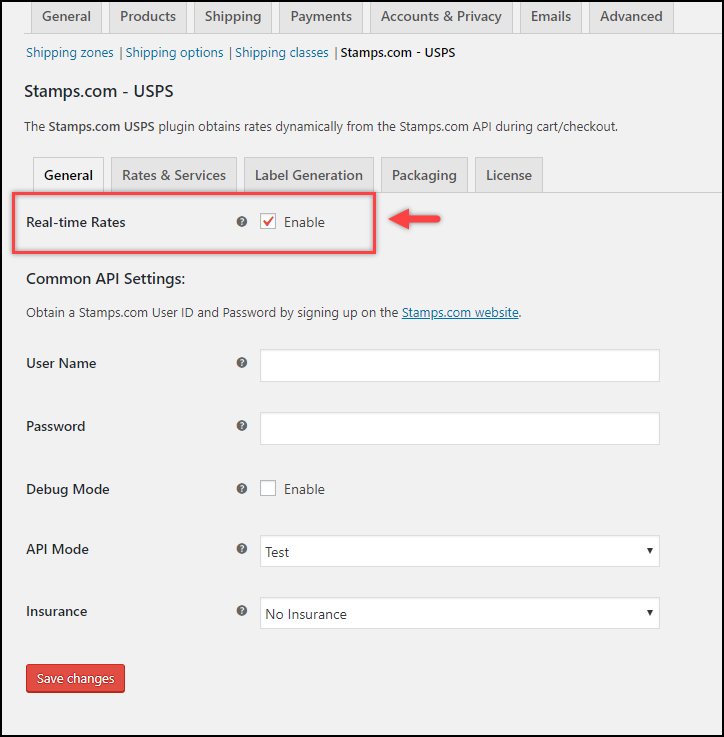
You also need to provide API credentials, select API mode and configure the Insurance settings. You can read the General settings section of the product documentation for more detail.
b. Customizing shipping labels
Among the various label generation settings, there are four settings that specifically allow you to customize the Stamps.com-USPS shipping labels.
1. Print Label Type
This setting allows you to select the desired format for printing the shipping labels. Our ELEX Stamps.com plugin provides four formats:
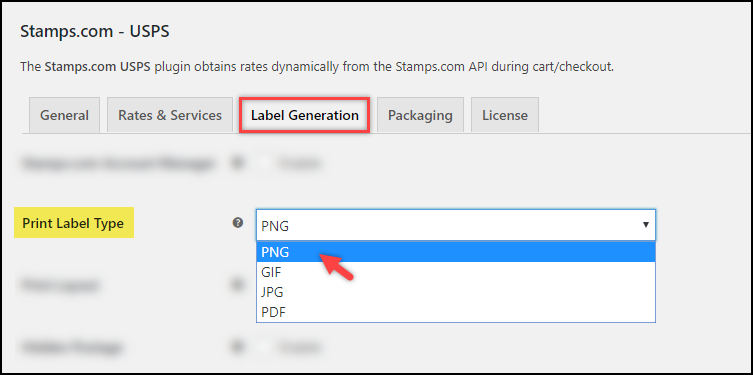
- PNG – This format is a raster graphics file format that supports lossless data compression.
- GIF – Used on the World Wide Web due to its wide support and portability.
- JPG – Most commonly used for storing and transmitting photographic images on the World Wide Web.
- PDF – Used to present document independent of the application, software, hardware, and operating system.
Paper Size for PDF: This setting appears only when PDF is selected in the previous setting. It allows you to select paper sizes. The plugin supports three paper sizes:
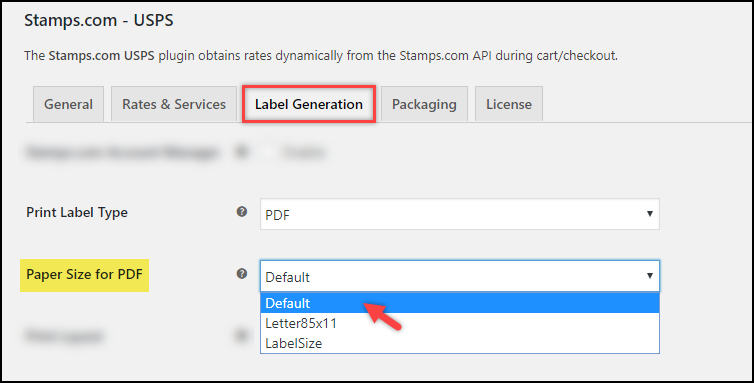
- Default – Uses default page size.
- Label 85X11 – Uses letter size paper (8.5 x 11 inches).
- Label Size – Uses label size paper (4 x 6 inches).
2. Print Layout
With the Print Layout setting, you can select the desired layout for printing. The plugin provides the following layouts:
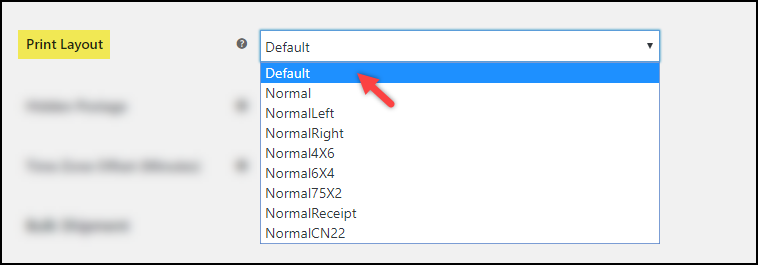
- Default – Uses the default print layout.
- Normal – Label of 4×6 inches gets generated. For Critical Mails, this option generates labels for windowed envelopes.
- NormalLeft – Label of 4×6 inches gets generated on the left side of the paper.
- NormalRight – Label of 4×6 inches gets generated on the right side of the paper.
- Normal4X6 – Label of 4×6 inches gets generated. This option only applies to Critical Mails and Library Mails.
- Normal6X4 – Label of 6×4 inches gets generated. This option only applies to Critical Mails.
- Normal75X2 – Label of 7.5×2 inches gets generated. This option only applies to domestic First Class or Priority packages.
- NormalReceipt – Label of 6×4 inches and receipt gets generated.
- NormalCN22 – A 4×6 label on an 8.5×11 sheet with Customs Form CN 22 gets generated.
You should note that the availability of the above layouts depends on the shipping services and label formats.
3. Hidden Postage
If the store owners wish to hide the actual postage charges in the shipping label, you can tick this setting to do so.

4. Time Zone Offset (Minutes)
This setting is helpful in showing the shipment creation time to the desired time. You can add time (in minutes) that will show the shipment was created to a later time than the actual time. Or you can give negative time by prefixing with a – (minus) sign to the time to show the shipment was created way before the actual shipment creation time.

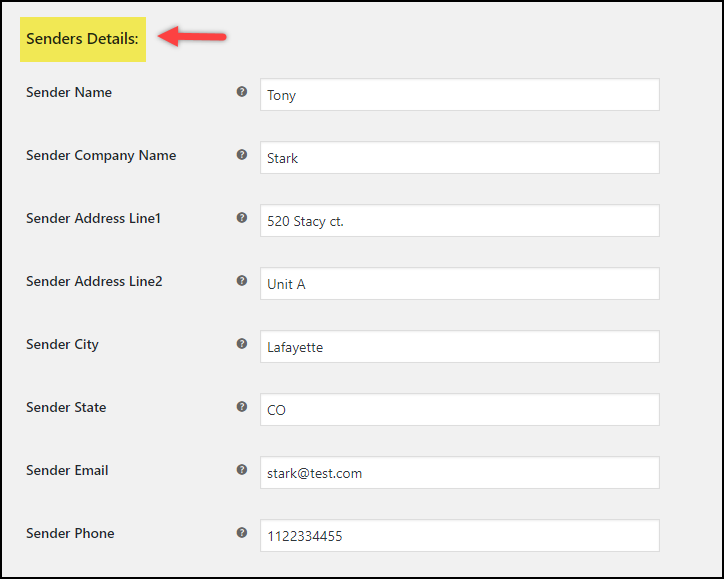
In addition to the above settings, you need to provide the sender address. This address helps in calculating the shipping rates and will also be printed on the shipping labels. Below is a screenshot showing the required sender address details.
Sample Stamps.com USPS Shipping Label
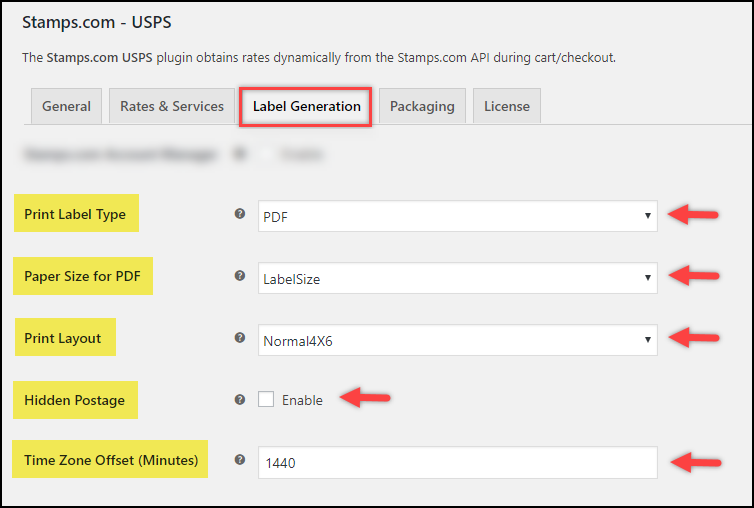
Below screenshot shows sample label settings. The shipping labels are configured to be PDF of label size 4×6 inches and print layout of Normal4X6. We have also added 1440 minutes as the timezone offset and disabled the Hidden Postage setting.
The below screenshot shows the sample Stamps.com-USPS domestic shipping label.
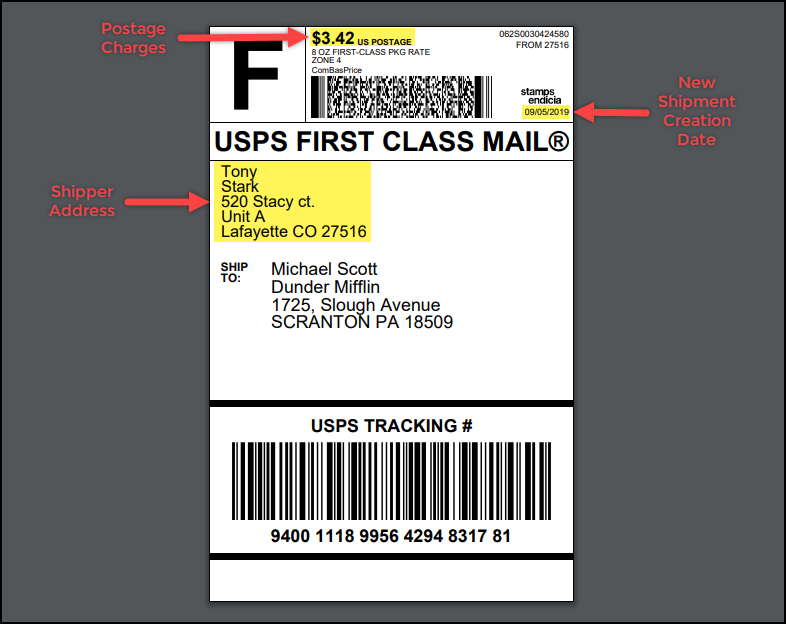
The actual shipment creation date was on 09/04/2019, but the above shipping label shows 09/05/2019 after adding the 1440 minutes of timezone offset. You can also notice the postage charge is shown, as configured, on top of the shipping label.
Therefore, in this way, you can customize USPS Shipping Labels using ELEX WooCommerce Stamps.com Shipping Plugin with USPS Postage.
You can also watch the below video tutorial.
- How to Create Bulk Shipment with Stamps.com Shipping Plugin with USPS Postage for WooCommerce?
- How to Show Free Shipping and Print Shipping Label with Stamps.com Shipping Plugin for WooCommerce?
- How to adjust Shipping prices based on desired countries using ELEX WooCommerce USPS Stamps.com Plugin? (Code Snippet)
To explore more details about the plugins, go check out ELEX Stamps.com Shipping Plugin with USPS Postage for WooCommerce.
Read the product documentation to understand the plugin, in detail. Or check out the knowledge base section for more related articles.
You can also check out other WooCommerce and WordPress plugins in ELEX.
