What can we help you with?
How to Create Multiple Support Forms using WSDesk?
When you have well-structured customer support management, you tend to have multiple support forms to make your work a lot easier. You could create separate support forms for pre-sales, post-sales, based on user roles, and so on. This will help streamline your customer support queries for specific customer support teams.
With WSDesk, you can achieve the same.
There are a few simple shortcodes that you can use to customize the customer support form interface.
Creating Multiple Support Forms using WSDesk
When you install the latest version of WSDesk, three pages are created automatically for Support Page, Existing ticket request page, and customer ticket reply page. There are various ways to customize your support page. More on this in the Support Form section of the documentation.
Let us just focus on creating multiple support form using a simple scenario.
Scenario: Creating two separate forms for pre-sale and post-sale queries. While the pre-sale form will contain fields like pre-sale query, terms & conditions, guest blogging, advertising, etc., the post-sale form will contain products and order number for reference.
Here’s how you should do it…
1. Creating a general information page for both support forms
All the support forms (or pages) need to be listed in a single page. You should notify the user to use the support form based on their purpose.
First, create two separate pages and name them Pre-sale Support Form and Post-Sale Support Form respectively.
Open the Support page created using WSDesk. You can identify the page that has the shortcode [wsdesk_support display=”form”] in it.
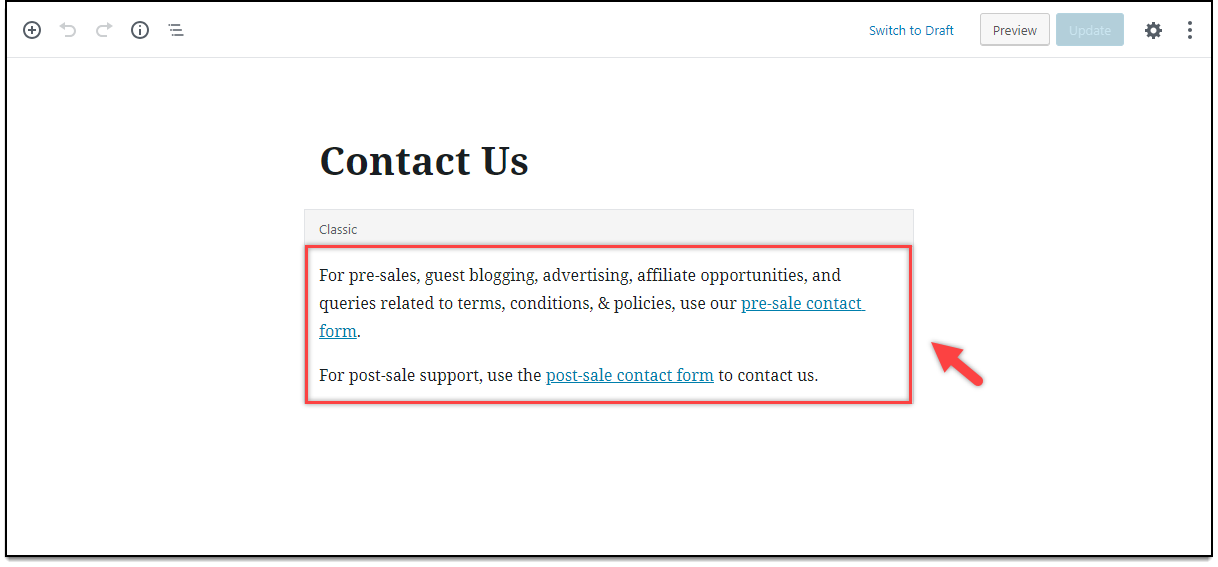
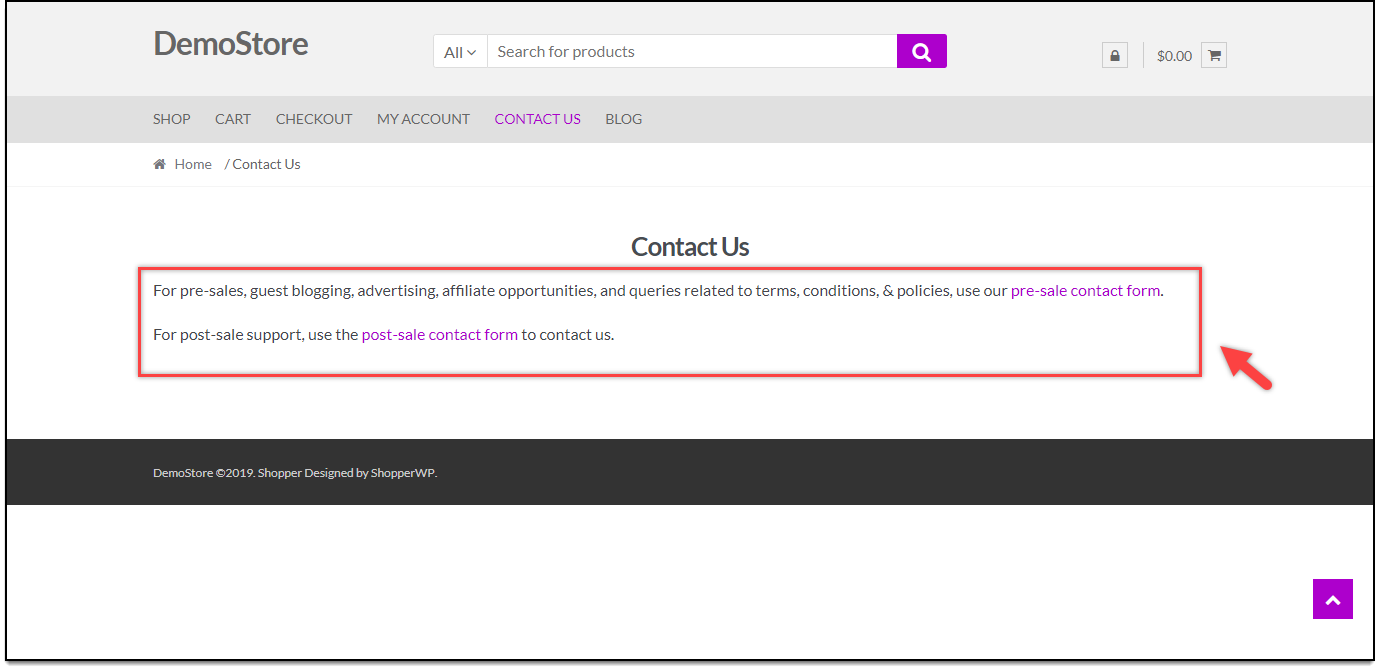
Clear the shortcode and enter a generic content consisting of links to pre-sale and post-sale pages, as shown in the screenshot below.
2. Adding ticket fields in WSDesk settings
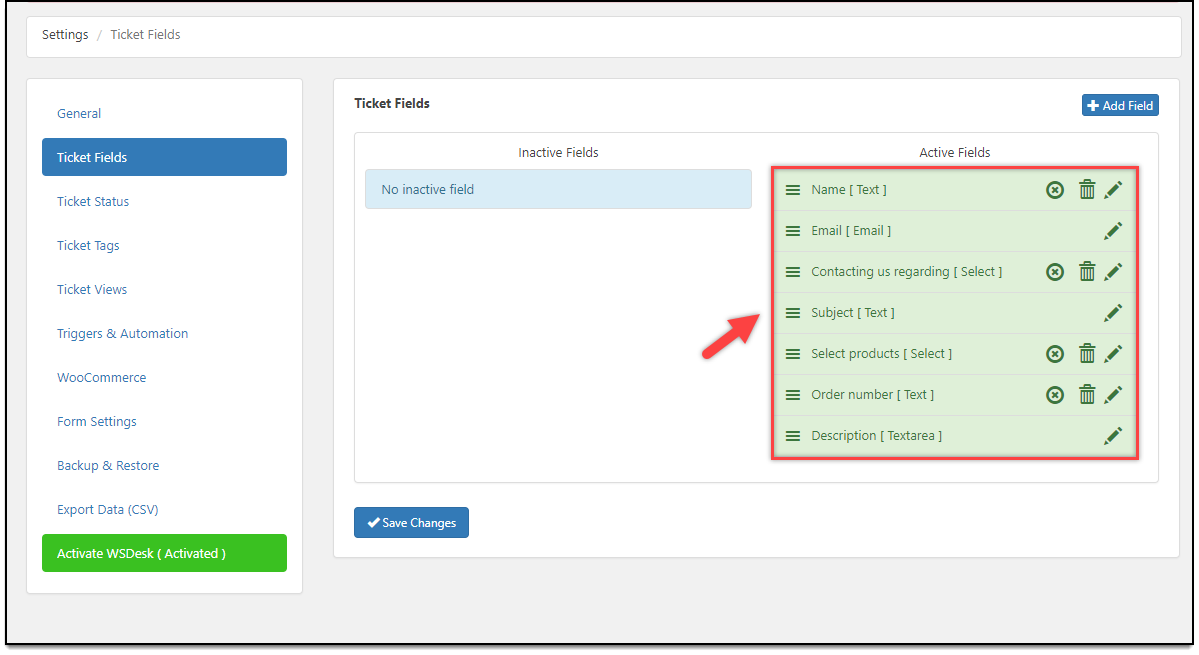
Go to WSDesk > Settings > Ticket Fields. Here, you need to create all the ticket fields that you need for both pre-sale and post-sale.
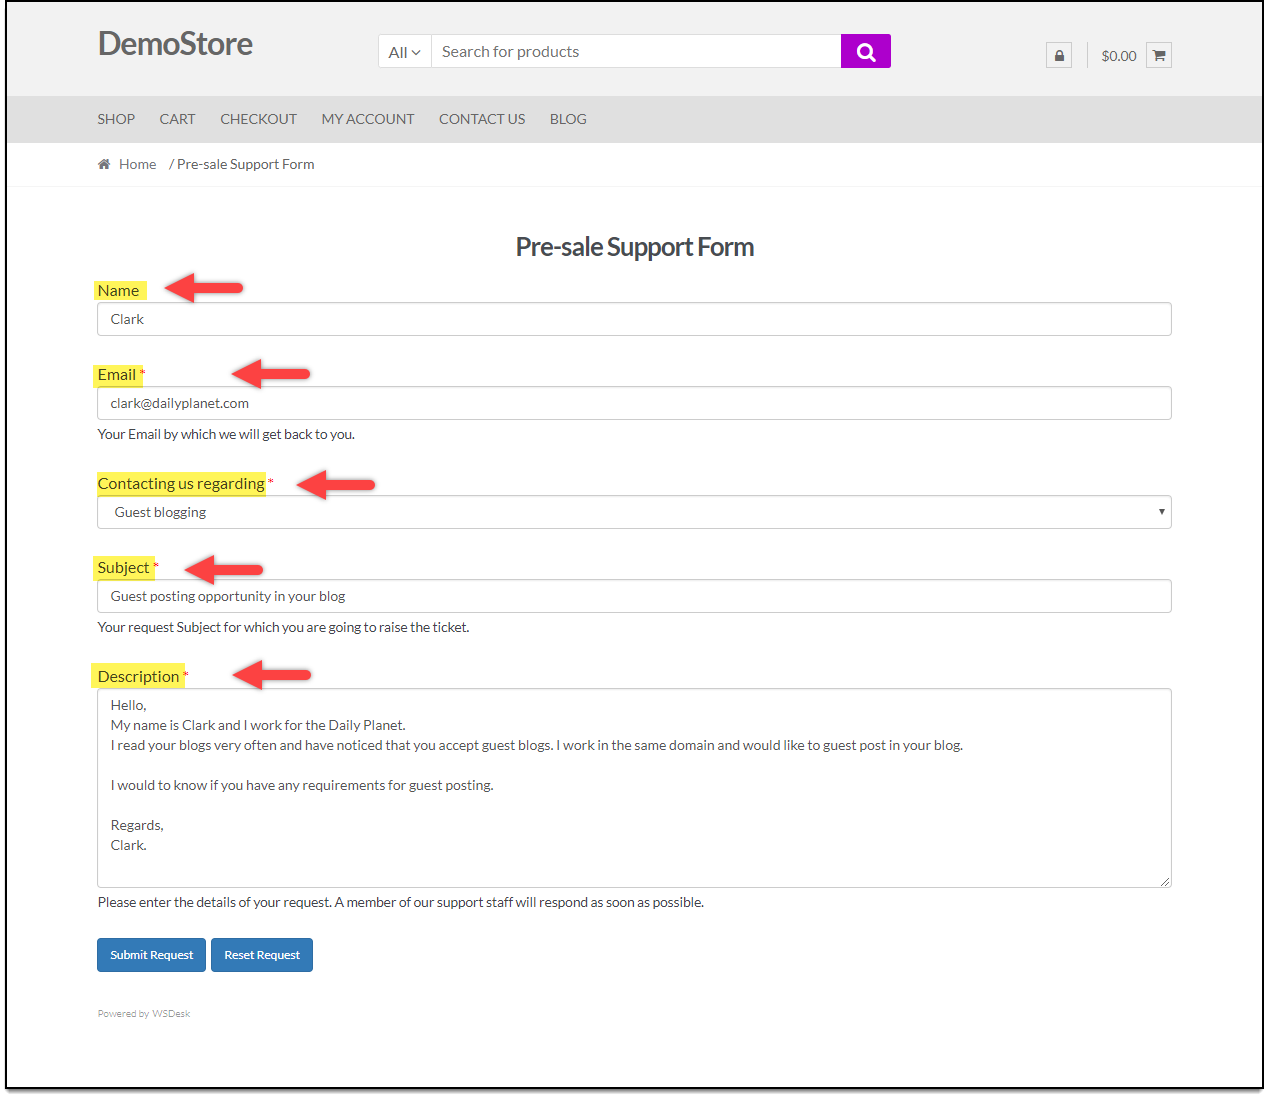
For pre-sale, we will use Name, Email, Reason for contacting, Subject, and Description fields. For post-sale, let us use Name, Email, Subject, Products (In this case, WooCommerce products), Order number, and Description fields.
A screenshot of the created ticket fields is as shown in the below screenshot.
Tip: To know how to add a new ticket field, read the Ticket Field section of the documentation.
3. Creating a Pre-sale support form
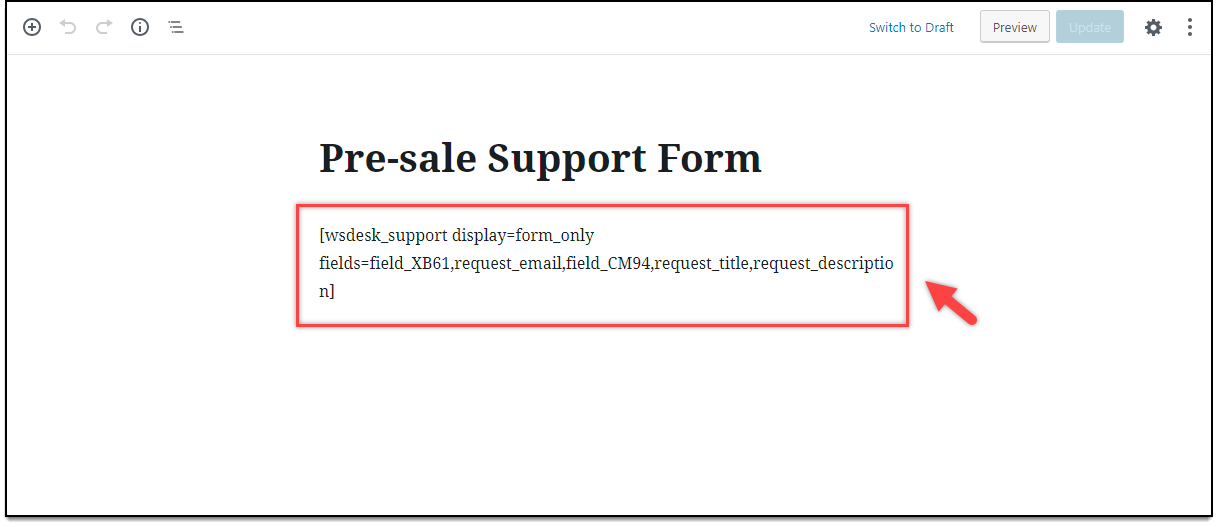
Open the pre-sale page that you had created in step 1 and enter the following shortcode –
[wsdesk_support display=form_only fields=field_XB61,request_email,field_CM94,request_title,request_description]
Where,
- wsdesk_support indicates that this is a WSDesk support form.
- display=form_only indicates that only the form will be shown excluding the existing ticket request button.
- fields=field_XB61,request_email,field_CM94,request_title,request_description indicates all the ticket fields that should be included in the pre-sale support form.
Here’s where WSDesk shines…
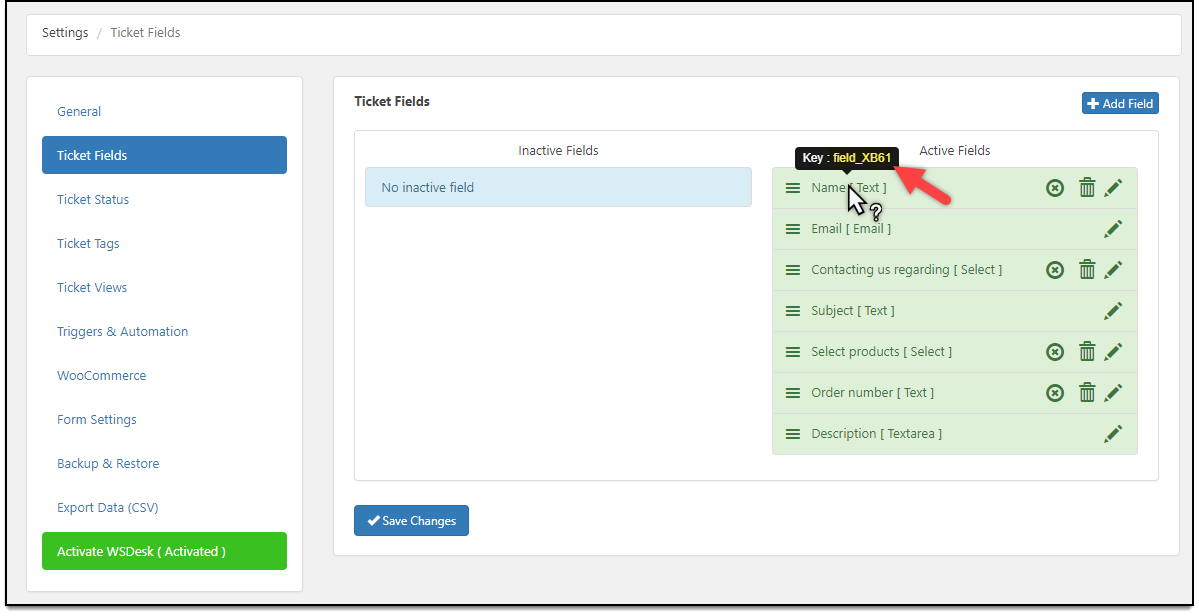
You can select only specific ticket fields to be included in the support form. To do this, you need to specify the slug of the ticket field as values for fields attribute in the shortcode.
For example, in the given shortcode above, field_XB61 is the slug for the Name field. To find the slug of a ticket field, simply hover to the ticket field, as shown in the screenshot below.
You can include desired ticket fields in the support form using the slugs.
Below is a screenshot showing the shortcode added to the pre-sale page.
4. Creating a Post-sale support form
Open the post-sale page that you had created in step 1 and enter the following shortcode –
[wsdesk_support display=form fields=field_XB61,request_email,request_title,woo_product,field_KI60,request_description]
Where,
- wsdesk_support indicates that this is a WSDesk support form.
- display=form indicates that the support page will contain form fields as well as the existing ticket request button.
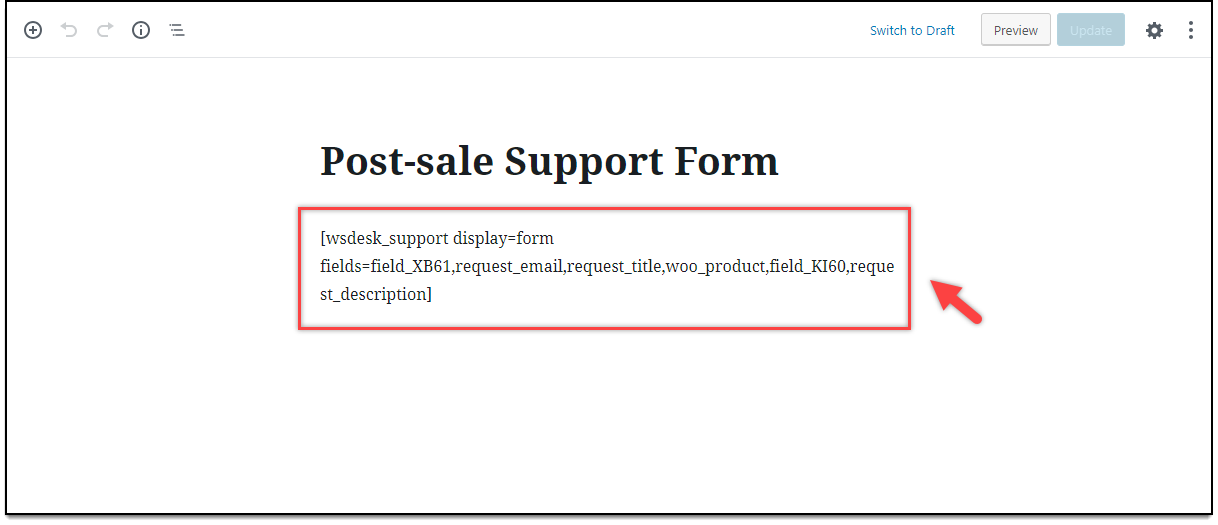
- fields=field_XB61,request_email,request_title,woo_product,field_KI60,request_description indicates all the ticket fields that should be included in the post-sale support form.
Tip: Follow the same method for finding the slug of the ticket field that I explained in step 4, for pre-sale support form.
The below screenshot shows the shortcode added in the post-sale page.
5. Raising a WSDesk Support Ticket
When users open the support page (from step 1), they can see the support page as shown in the sample screenshot below.
a. Raising a Pre-sale ticket
When users proceed with raising a pre-sale ticket, they can fill the pre-sale form related to their query. A sample support query is as shown in the screenshot below.
b. Raising a Post-sale ticket
If users have issues with their product, they can raise a post-sale query using the post-sale support form. A sample post-sale form is as shown in the below screenshot.

You can notice the difference in the ticket fields in both pre-sale and post-sale forms.
When users submit these tickets, it will be shown in the ticket dashboard. If you need to filter tickets and assign them for agents, you can use WSDesk triggers.
Read How to Automate Ticket Assigning using WSDesk Triggers?
In this way, you can create multiple support forms in WSDesk.
Conclusion
While support forms help in accepting feedbacks from your users or customers, you can decide to create multiple support forms only based on the necessity. Multiple support forms help when you want to have separate channels for handling customer support requests. This can make your job easier in assigning required tickets (or issues) to specified customer support agents.
WSDesk shortcodes can be used in many ways. You can customize the support page interface as desired. You can read the Support Form section of the documentation to see all the supported shortcodes and methods to display support form and existing tickets with WSDesk. By default, the check existing tickets shortcode will open in new page and also show the individual ticket conversation is a separate page. You can choose to display on the same page as well.
If you are using third-party forms like Contact Form 7 or Gravity Forms, read our article on how to use WSDesk Ticket API with third-party forms and plugins.
To explore more details about the plugins, go check out WSDesk – WordPress Helpdesk Plugin.
Read how to set up WSDesk to understand the plugin, in detail. Or check out the product documentation section for more knowledge base articles.
You can also check out other WordPress and WooCommerce plugins in ELEX.
