What can we help you with?
How to Configure Tax in ELEX WooCommerce Google Shopping Plugin?
This article is a step-by-step tutorial to configure tax in ELEX WooCommerce Google Shopping Plugin.
The Tax attribute helps you provide the tax rate of a product. You can use the tax attribute when you need to override the tax settings you have set on Google Merchant Center.
When do you need to configure the tax attribute?
If you need to modify or override the tax for an item that is configured in Google Merchant Center, use the tax attribute, which will always override account-level tax settings.
Check the few recommendations by Google below:
- Instead of submitting the tax attribute, Google Merchant center recommends you set up tax rates through Merchant Center settings.
- Don’t use the tax attribute when targeting countries other than the United States. Check the respective support document.
Best Practices
These best practices can help you go beyond the basic requirements to optimize your product data for better performance.
- Use tax settings in the Merchant Center. With these settings, you can create simple flat rates or let Google automatically compute tax rates for your products. Use the tax attribute as a last resort to override the settings you have created in Merchant Center.
- Use the tax attribute for products that are tax-exempt or have a unique tax rate. Using your account’s tax settings, you can’t add reduced tax rates or exemptions for individual products. Google calculates tax rates for tangible personal property and doesn’t support the reduced tax rate or tax exemptions.
- Indicate if you charge tax on shipping. Charging tax on shipping might be legally required for some tax authorities. You can add tax on shipping through the tax_ship sub-attribute or through your account settings. Learn more about tax settings.
Guidelines to use the TAX attribute
- Submit tax rates for products targeting the US. For the US, include tax through the account tax settings or through the tax attribute.
If you can’t provide accurate tax rates, give an overestimate of the average tax rate that you would charge from users visiting your site from Google Shopping. If you submit an amount lower than you actually charge from users, your products could be disapproved. To understand how much tax rate you need to charge, consult your tax advisor.
- Use the same tax rate in your product data as on your Checkout page. While the tax rate might vary depending on the product or the user’s location, use the Merchant Center tax settings to make sure that users always see the same amount you charge.
Minimum requirements to show the tax rate of your products in Google Shopping
These are the requirements to show your product on Google Shopping. If you don’t follow these requirements, Google Merchant center will disapprove your product and let you know in the Diagnostics page in your Merchant Center account. The requirements are as follows.
- Make sure to cover every location in the US (even locations where you do not charge tax) if you submit all tax settings through the tax attribute. Specify that you charge no tax for a location by setting the rate to 0.
- Submit complete and correct tax information and costs. If you can’t provide accurate tax cost, match or overestimate the tax that would be paid by your customers through Google Ads.
- Comply with local laws when submitting tax information.
Setting up the tax attribute through ELEX WooCommerce Google Shopping Plugin
You can easily map your products’ tax attribute with Google’s tax attribute using the ELEX WooCommerce Google Shopping Plugin.
To know more about the plugin, its tabs, and how to configure it on your WooCommerce store, refer to the article – How to set up ELEX WooCommerce Google Product Feed Plugin?
To configure tax attributes, check the following steps.
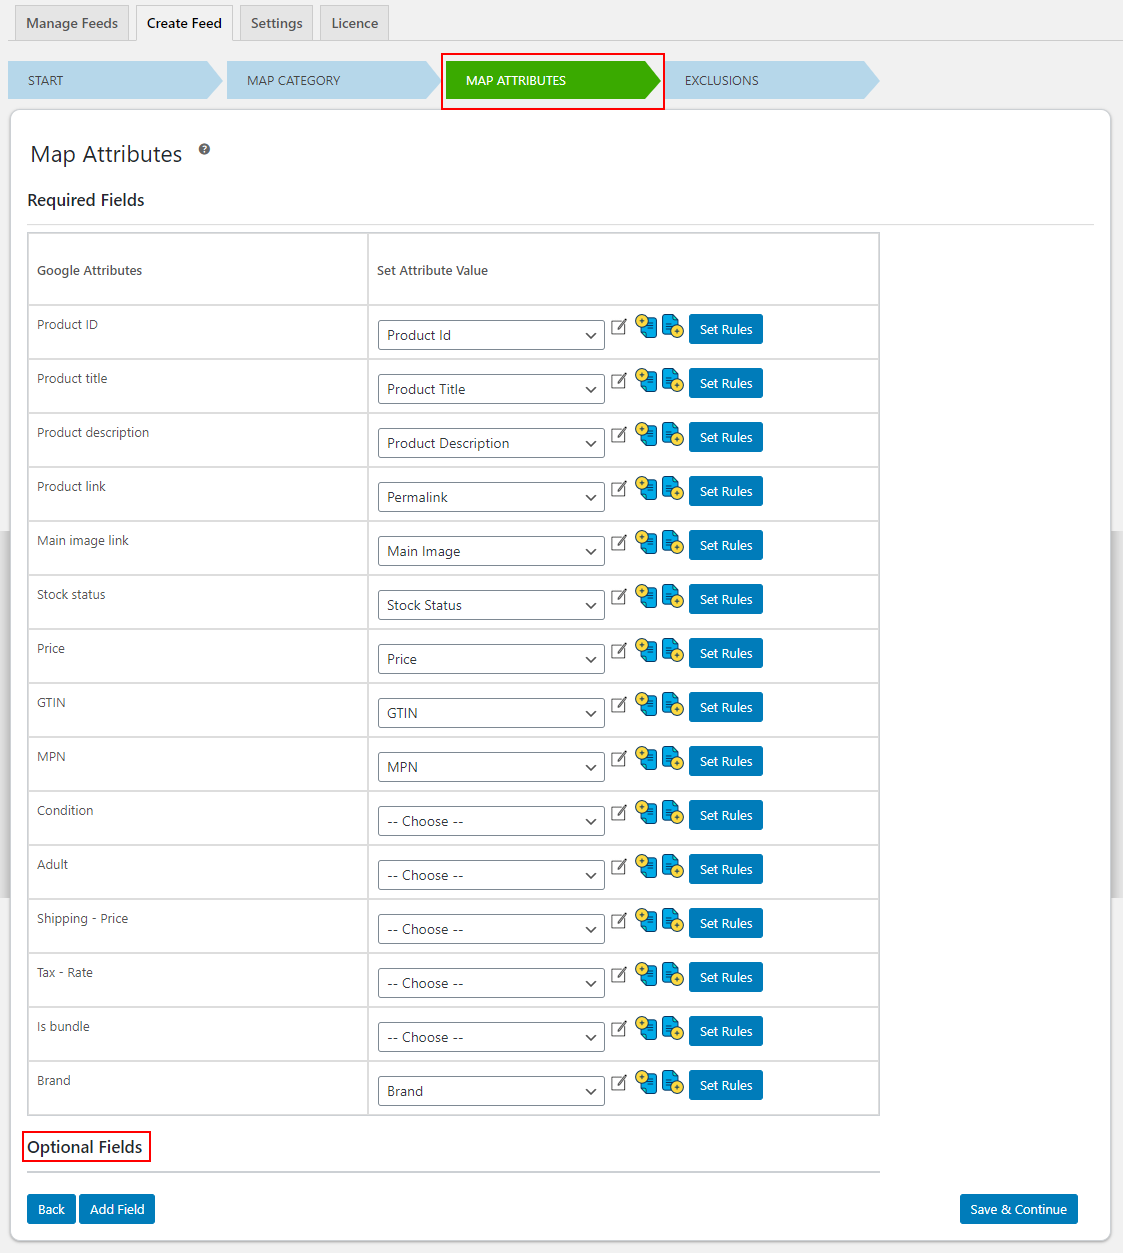
- Go to the Map Attributes tab of the plugin. There will be an Optional Fields section.
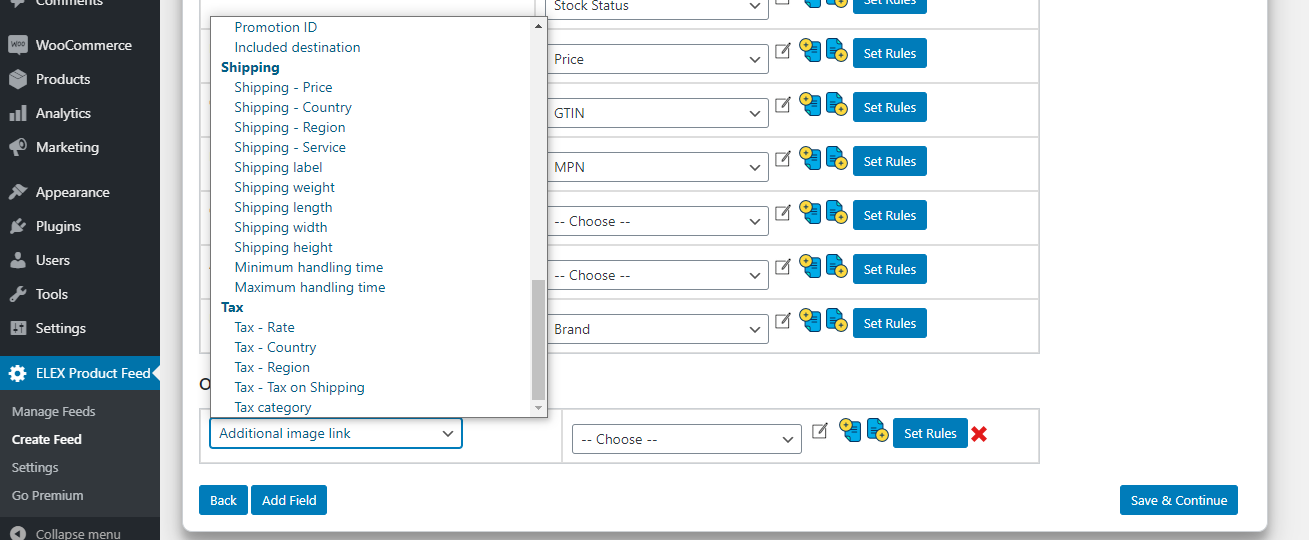
2. Click Add Field, under the Optional Fields Section.

3. A row will be added where you can select the optional attribute like Tax Rate and even add optional attributes for Tax Country, Tax Region, Tax on Shipping, Tax Category. Check the below screenshot:
4. Once you have selected these optional tax fields, you need to map it with the text by using the action as in the below screenshot.

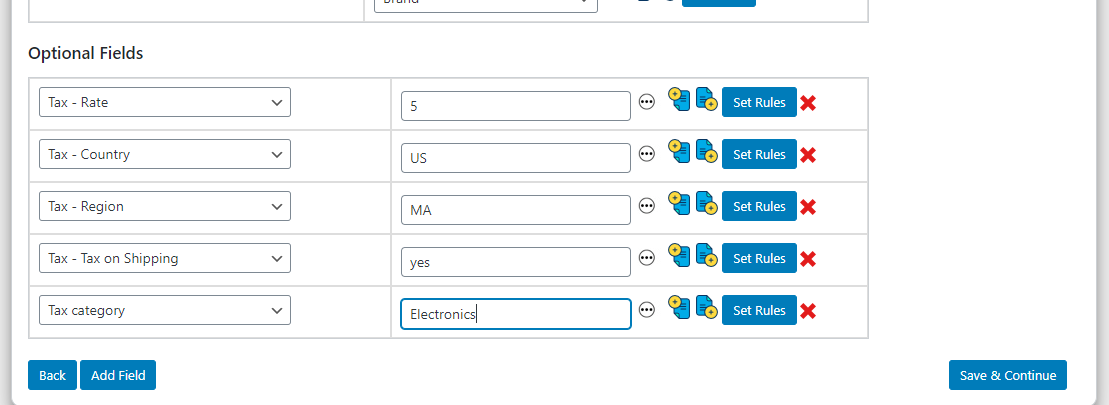
Here we have mapped all the optional Fields of Tax.
- Tax Rate: Tax rate as a percentage of the price (Number, eg: 5).
- Tax Country: The country in which the item is going to be delivered. Currently, tax settings are available only to products targeting the United States (eg: US).
- Tax Region: Submit the state. You need to submit an ISO 3166-2 code without country prefix (eg: MA).
- Tax on Shipping: If you want to add tax on Shipping set it to ‘Yes’ and ‘No’ if tax is not applied on shipping.
- Tax Category: If you want to set different tax rates for specific groups of products, use specific tags to apply a label to products, such as “perishable foods” or “clothing”.
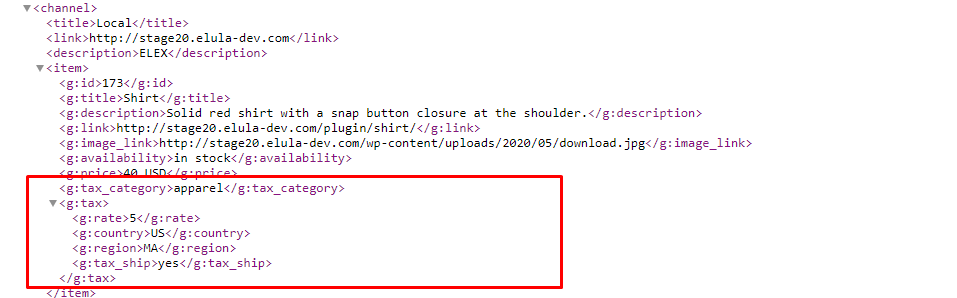
Once the feed has been generated through the plugin, it will be displayed as in the below screenshot.
To explore more details about the plugin, go check out ELEX WooCommerce Google Shopping Plugin.
Read the article for setting up the ELEX WooCommerce Google Shopping plugin to understand the plugin in detail.
You can also check out other WooCommerce and WordPress plugins in ELEX.