What can we help you with?
How to set up ELEX WooCommerce Catalog Feed for Facebook & Instagram plugin?
This article provides step-by-step instructions to help you set up the ELEX WooCommerce Catalog Feed for Facebook & Instagram plugin. For more information on the WooCommerce Catalog Feed for Facebook & Instagram plugin, refer to the product page.
Overview
Here are some of the major highlights of the WooCommerce Catalog Feed for Facebook & Instagram plugin:
- Generate Catalog feed in XML, CSV, or TSV file formats: You can generate the feeds in XML, CSV, or TSV file formats for submitting to the Facebook Catalog.
- Schedules Cron jobs: In order to feed the frequently updated product data into the feed you have already submitted to the Facebook Catalog, you can schedule to refresh the data in the feed automatically on a daily, weekly, or monthly basis.
- Include product variations: You can include product variations into the catalog feed, which will help your products to reach customers who search for the products based on color, size, etc.
- Exclude certain products: If you need to exclude specific products from adding to the catalog feed, you can exclude them individually.
- Dynamic Attribute Mapping: The WooCommerce Catalog Feed for Facebook & Instagram plugin allows you to map your product attributes with Google’s attributes based on certain rules and conditions dynamically.
- Meta Tags for attribute mapping: All the meta values will be available under the Set Attribute Value drop-down list and you can map them to your Facebook product attributes as needed.
- Manage Feeds: You can edit, copy, pause, delete, regenerate, download, view, and check the report of generated feed using quick buttons.
- WPML Compatible: This WooCommerce Catalog Feed for Facebook & Instagram plugin is compatible with WPML, in order to provide its services in countries that use different languages,
Getting started with ELEX WooCommerce Catalog Feed for Facebook & Instagram Plugin
Read an article to know how to complete the checkout process on ELEX. You can also read how to download, install, and activate ELEX plugins.
Check the video below to understand how to use the WooCommerce Catalog Feed for Facebook & Instagram plugin:
Once the WooCommerce Catalog Feed for Facebook & Instagram plugin is installed and activated, you can start creating your feed. Go to WordPress Sidebar menu > ELEX Facebook Shopping Feed > Create Feed.
Generic settings
The generic settings of the WooCommerce Catalog Feed for Facebook & Instagram plugin are as shown below.
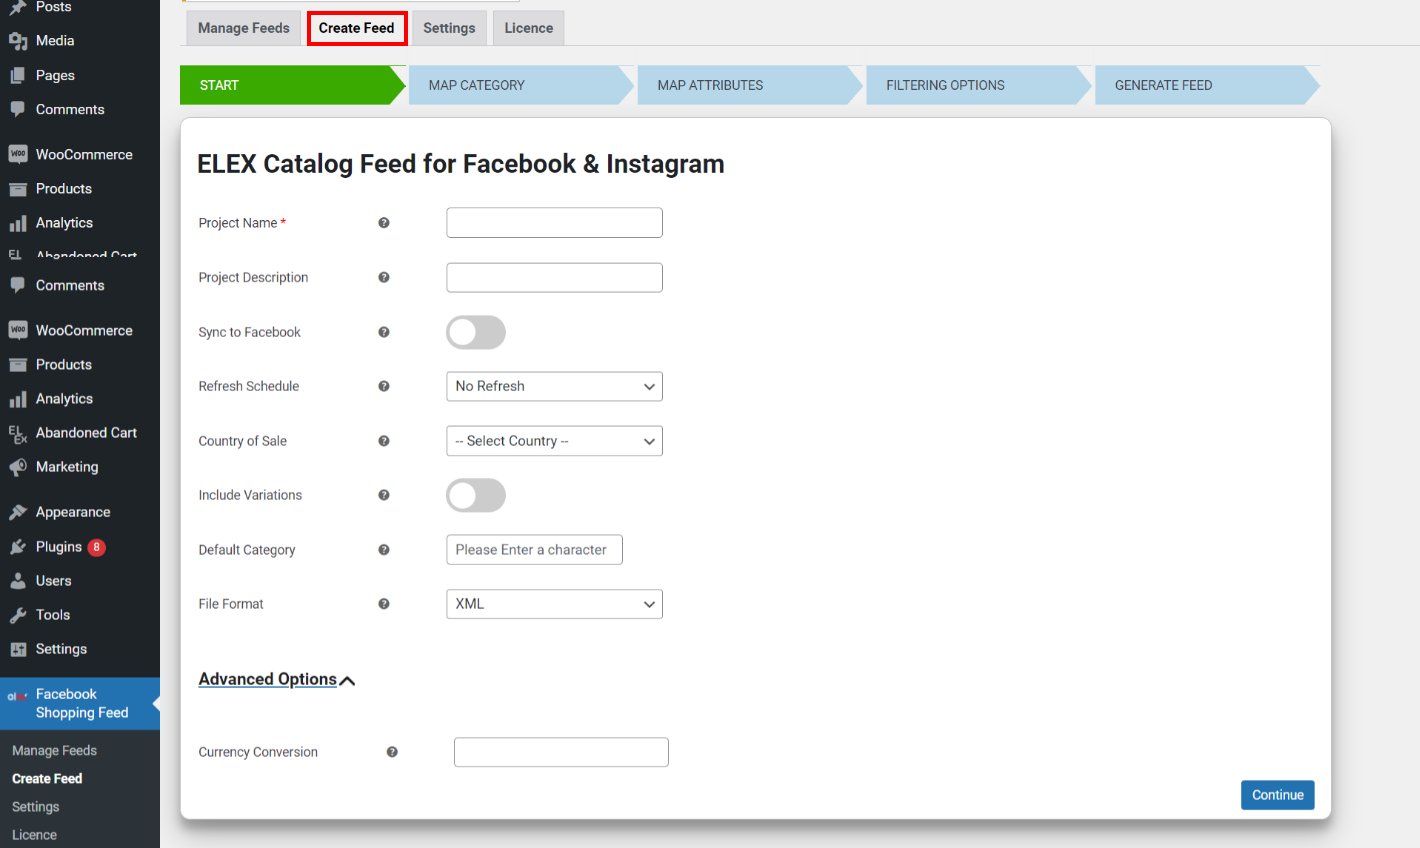
- Project Name: Enter a unique project name to easily identify a feed.
- Project Description: Enter a description to define your feed, You can also leave it blank. If it is left blank, the project name will be considered as the description.
- Sync to Facebook: Activate this option to automatically sync your WooCommerce products with the Facebook Catalog. Once the sync is activated you can select the catalog that you want to sync and schedule it as per your requirements.
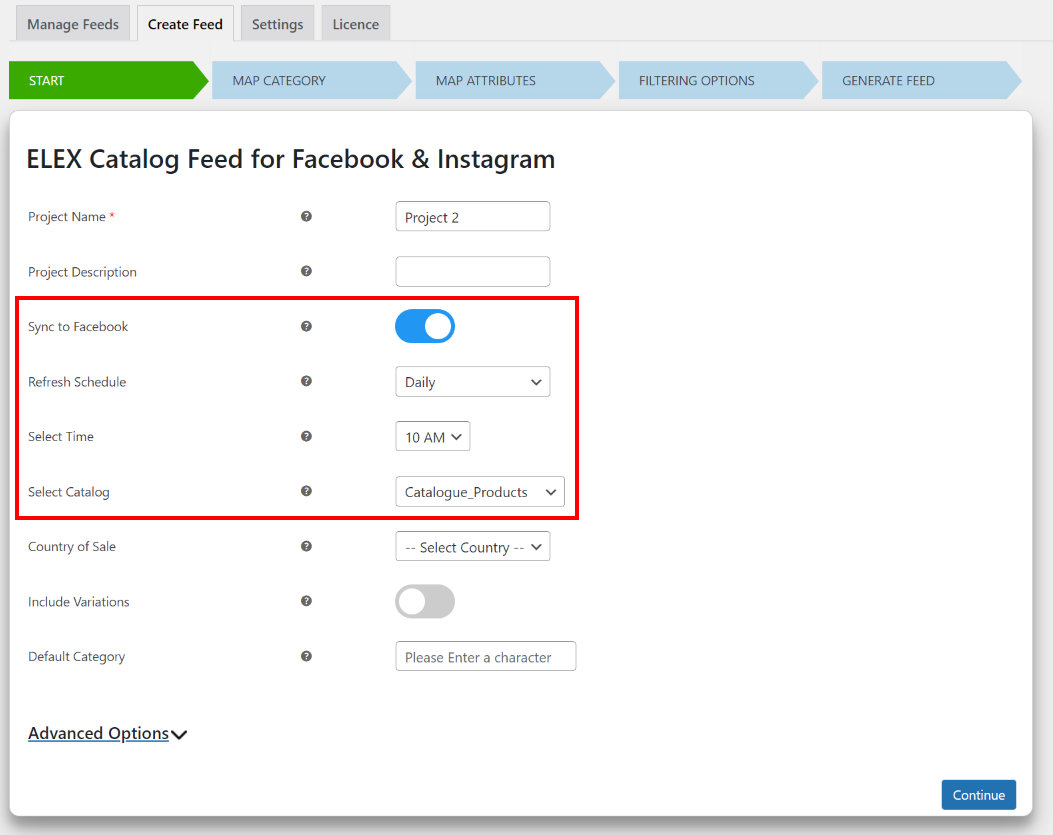
- Refresh Schedule: Schedule Cron jobs to refresh the catalog feed generated. You can choose to refresh Daily (at a specified time), Weekly (at a specified time and on a specific day of the week when the feed was created), or Monthly (at a specified time and date of creation of the feed).
- Country of Sale: Select the country in which you are focusing sales from the Facebook marketplace or Instagram shopping.
- Feed for Checkout on Facebook: Create custom feeds for checkout on Facebook and maximize your e-commerce potential. This exclusive feature is available for users in the United States, allowing you to effortlessly manage your products and enhance the purchasing experience for your customers. Connect your product catalog and start selling directly through Facebook.
- Include Variations: Enable this option to include all product variations of your products.
- Default Category: Choose a default Google category with which you want to map all your product categories by default. This default category can be changed in the next step if required.
- File Format: Choose CSV, TSV, or XML file format as per your requirements.
- Currency Code: Enter the currency code to quickly identify global currencies. Whether it’s USD for US dollars, EUR for euros, or GBP for British pounds, this feature simplifies currency recognition and facilitates seamless international transactions.
- Currency Conversion: If you are selling your products in a location where they use a different currency, you can add the conversion rate here. The value you add here will be multiplied by the existing product prices before generating the catalog feed. For example, if you add the rate as 5, and the existing product price is $10, $50 (5*10) will be added as the product price in the catalog feed.
Once the above settings are configured, click Continue.
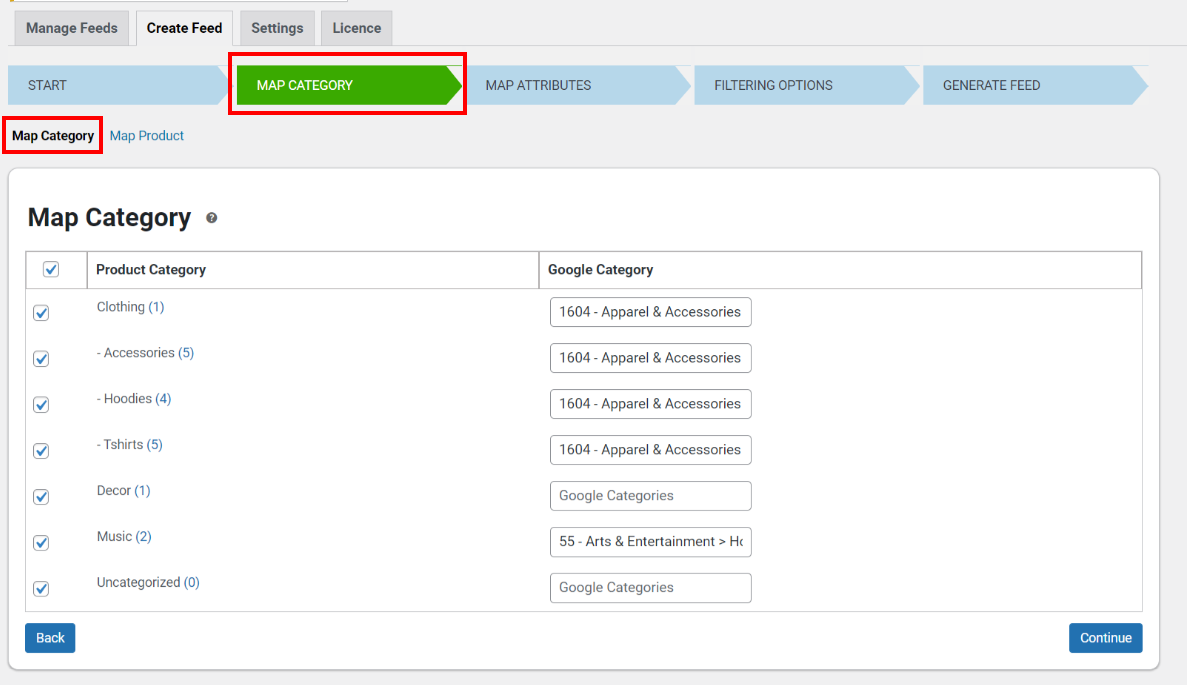
Map Category
Map product categories with Google categories
It is necessary to map your products with Google’s default category for making your products feature for the customers who search for them in the Facebook or Instagram marketplace. You can start typing the required category in the Google Categories text box and choose the right one from the auto-suggestion list.
All categories in your store will be listed in this tab by default. You only need to map them with the right Google categories. If you have set a Default Category in the previous step, all product categories will be mapped with that default category by default, But, you can change the default categories from this tab as per your requirements.
You can map the required categories from the list. Only mapped categories will be considered while generating the feed.
You can add multiple products and map them with a single Google category. Also, you can add more rows and remove the created ones using the buttons available on the tab.
Mapping with Google product categories will help to organize your items for sale into categories and subcategories. This will help to list your products on the Facebook marketplace when a customer searches for those products. For a better mapping of your categories with Google categories that match corresponding Facebook categories, refer to documentation – GPC-to-FPC Mappings.
Please note that the WooCommerce Catalog Feed for Facebook & Instagram plugin helps to map your product categories with Google categories, not Facebook categories.
Map individual products with Google categories
If you do not require to map all products in a category with a Google category using the ‘Map Category’ option, you can use this feature. Here, you can map individual products with Google categories. Enter the name of the individual products and map them with the Google categories.

After setting these you can click the Continue button.
Mapping Product Attributes
It is necessary to map your product attributes with Google attributes. By default, all required attributes demanded by the Facebook marketplace will be listed in the tab by default under the Recommended Attributes. This list of default attributes completely depends on the country of sale you have chosen in the first step.
In case you have selected the US as the country of sale on the start tab, a few additional attributes will need to be mapped to be able to sell in the USA.
If your products do not have a specific attribute value corresponding to Google attributes, you can click the edit button and enter a custom value.
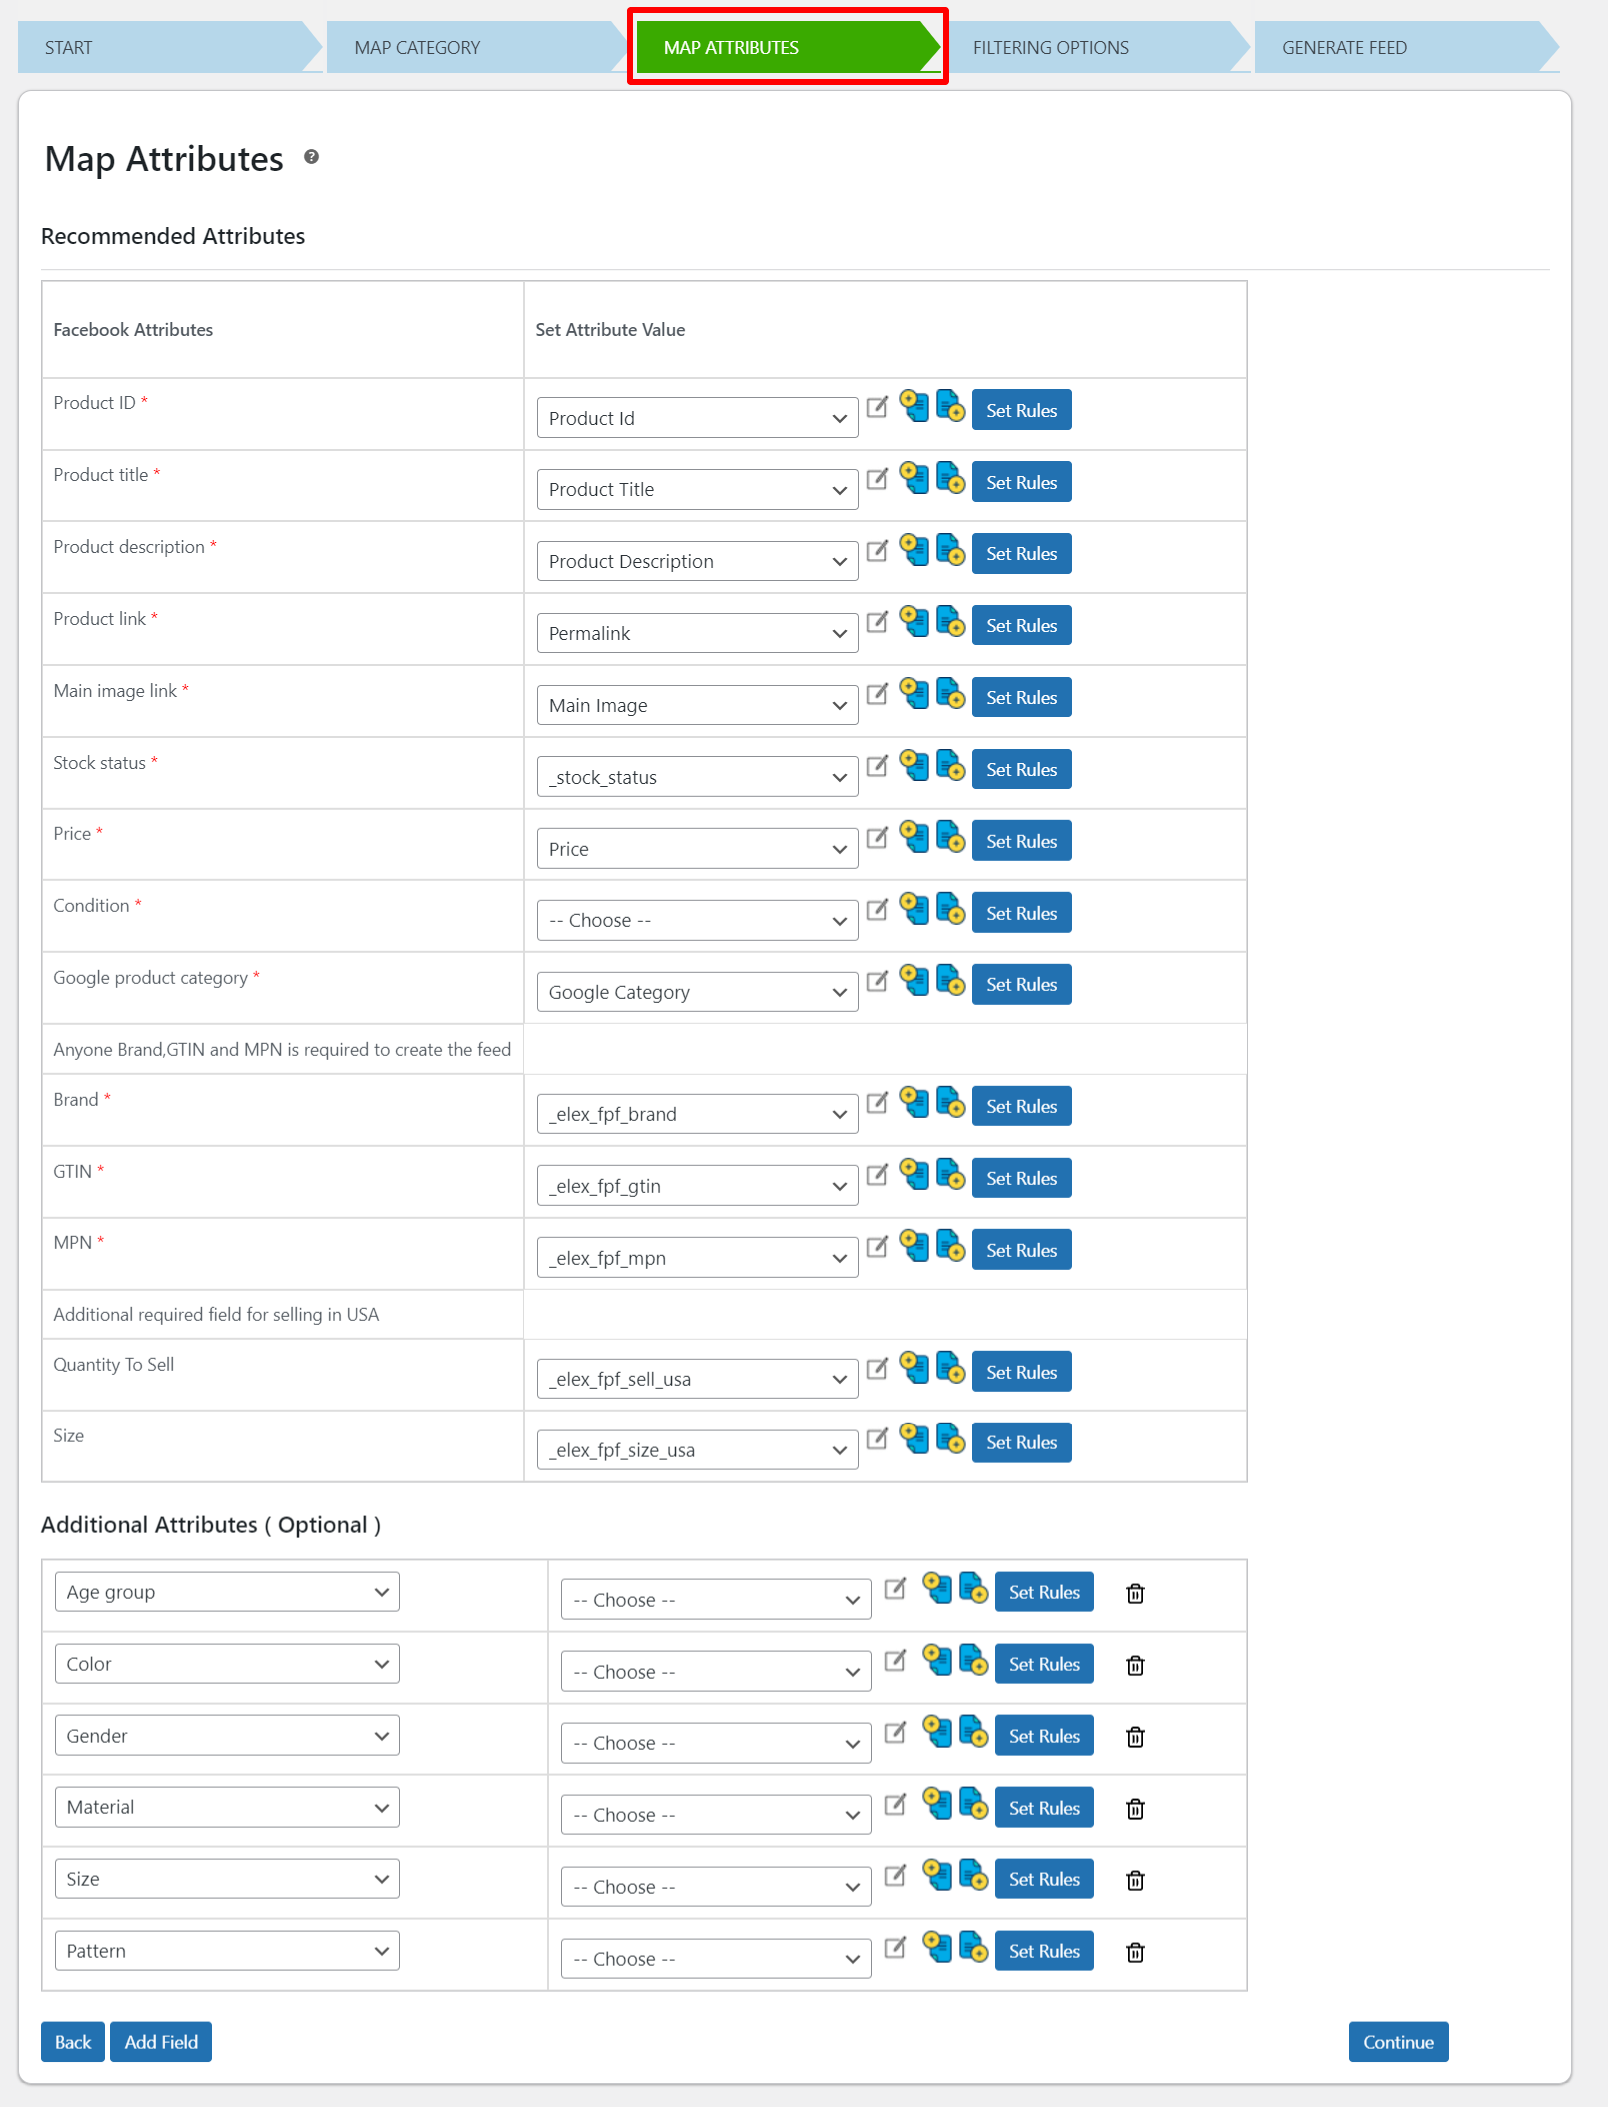
You can see the Additional Attributes section below the tab. This option is for adding other additional attributes demanded by the Facebook marketplace. But, you will be mapping with the Google attributes itself, yet they are the defined attributes by Facebook.
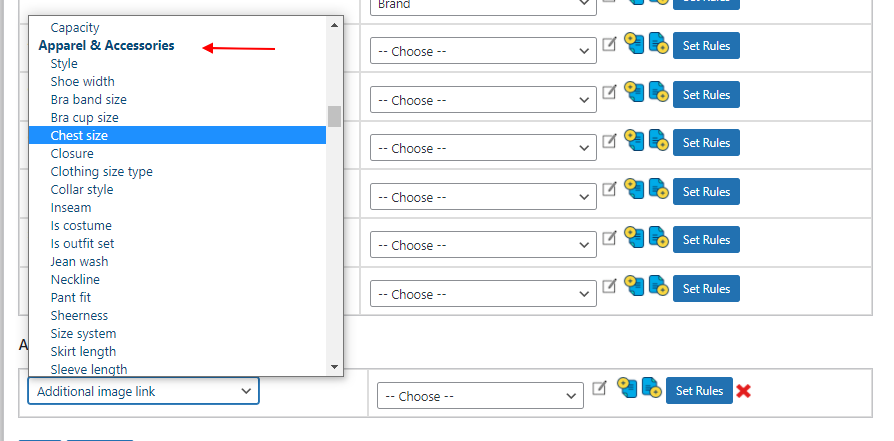
By default, there are 6 categories defined by the Facebook marketplace and a number of attributes coming under these categories. The categories are:
- Apparel & Accessories
- Home
- Jewelry & Watches
- Health & Beauty
- Electronics
- Baby Products
All attributes coming under these categories will be available under the Additional Attributes section. To add an attribute and map with your product attributes, click Add Field. You can choose the required attributes and map them with your attributes. You can add multiple additional attributes as per the requirements.
There are 2 other options available under the product attribute mapping section. They are:
- Append /prepend any product attribute with other attributes for mapping with Google attributes.
Check an example:
- You can also add conditional statements for mapping the attributes more accurately.
Check an example:
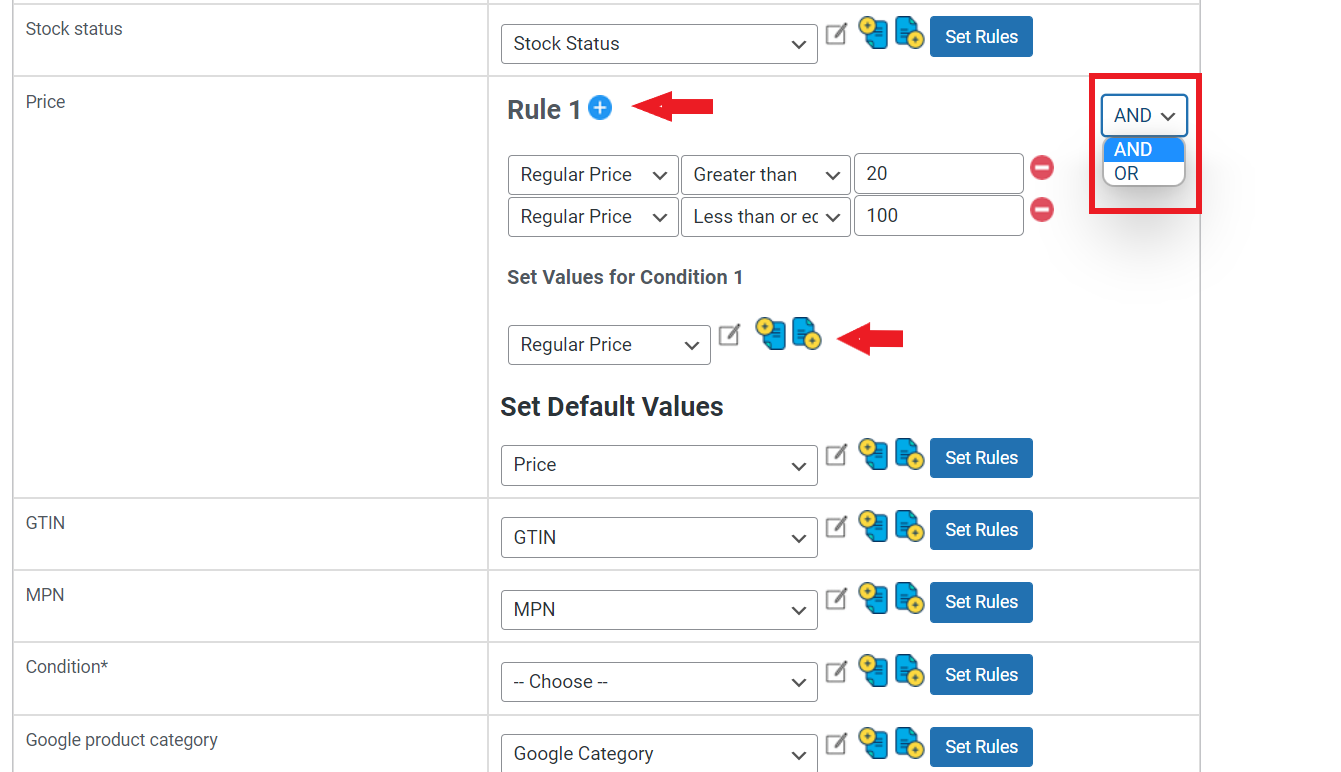
You can also add additional attributes and map them with Google’s default attributes using the Add Field button.

Click Continue to proceed to the next step.
Filtering Options
You can filter the products based on their Stock Quantity and the Sold Quantities (number of products sold) for generating feeds with selected products. Also, there is an option to generate exclusive feeds with featured products.
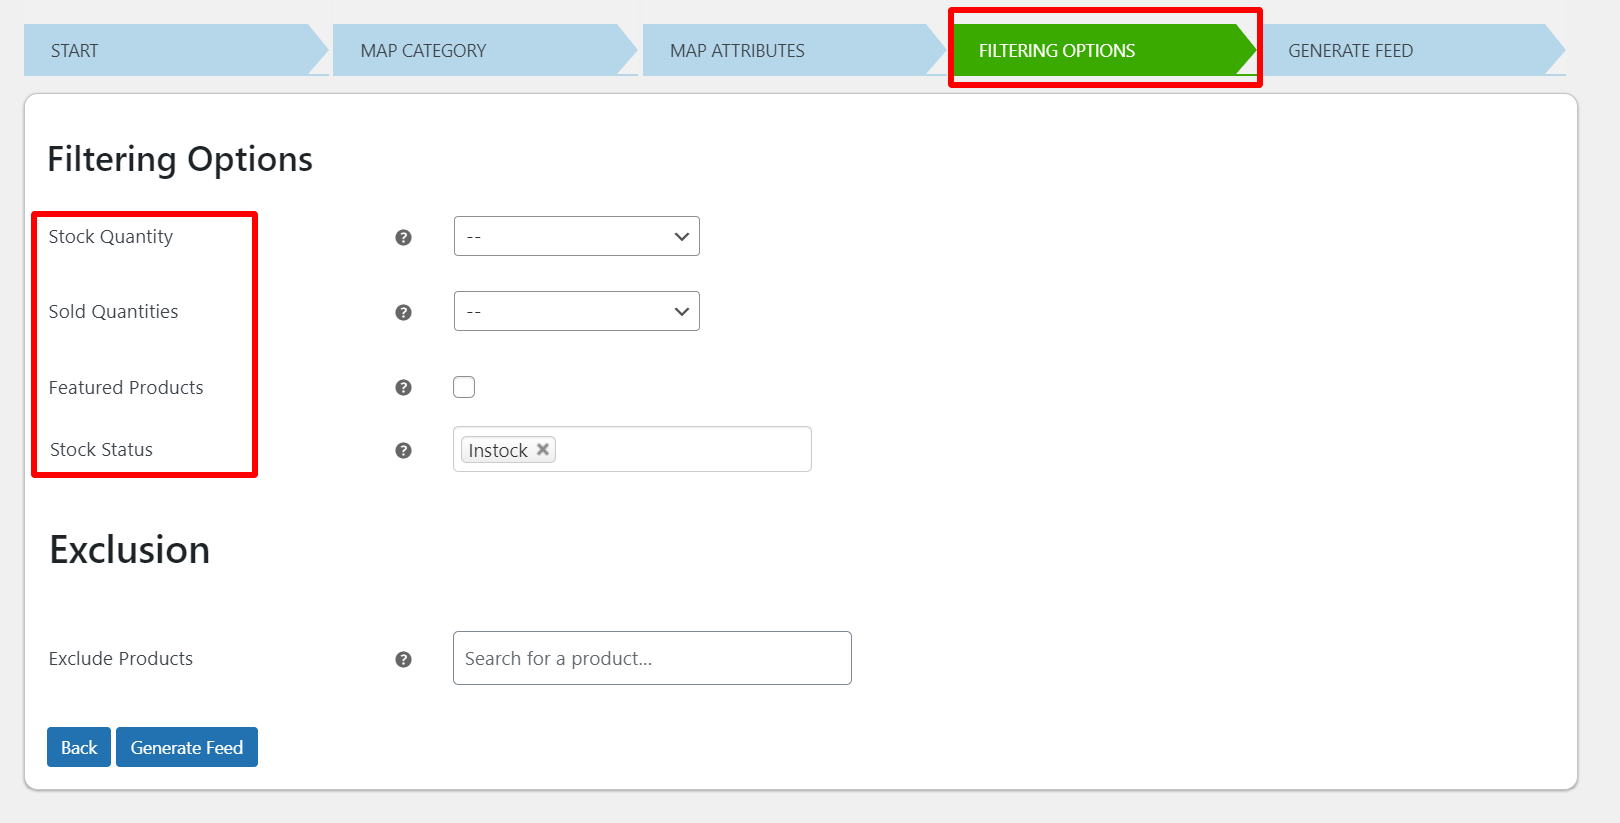
- Stock Quantity & Sold Quantity: Filter the products by selecting a condition from options such as Equal to, Greater than or Equal to, and Less than or Equal to followed by selecting a value to check with the products. The products will be added to the feed only if the conditions are satisfied.
Check an example:
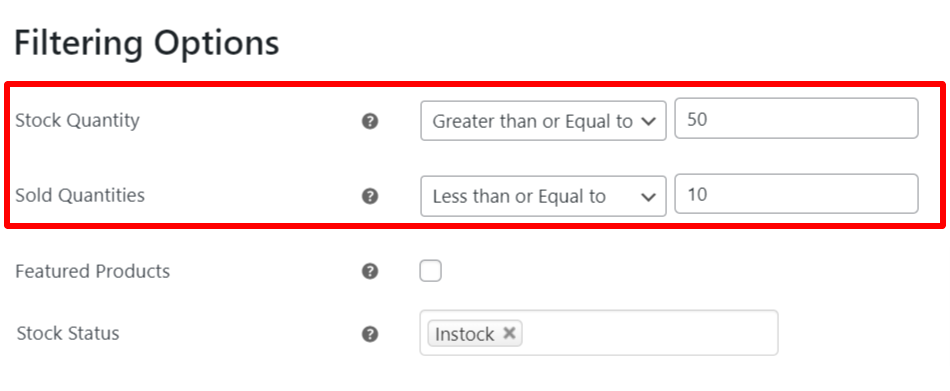
- Featured Products: Enable this option to include only products that are marked as ‘Featured’ in the product feed. If you have enabled this option, the feed will be generated for the featured products exclusively.
- Stock Status: Effortlessly manage stock status for your products within the feed. Choose the appropriate stock status for each item to determine its inclusion. Note that if a product’s stock quantity reaches zero, it will be marked as out of stock and automatically excluded from the feed.
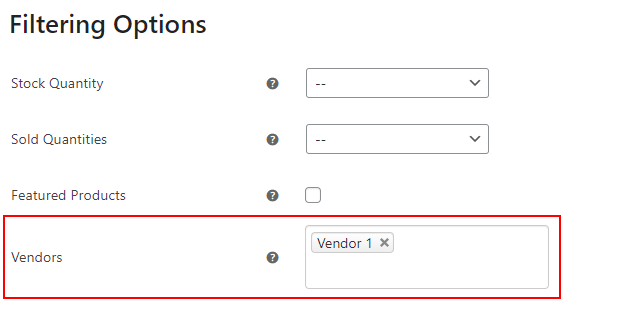
If you have integrated a multi-vendor plugin in your WooCommerce store, you can filter the products based on vendors to generate the product feed.
Exclusion
You can exclude specific products from adding to the feed by entering their names in the respective text area for excluding products.
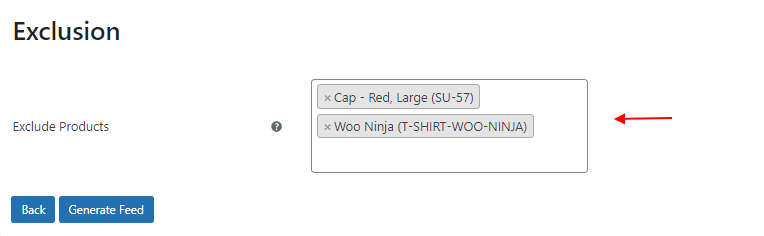
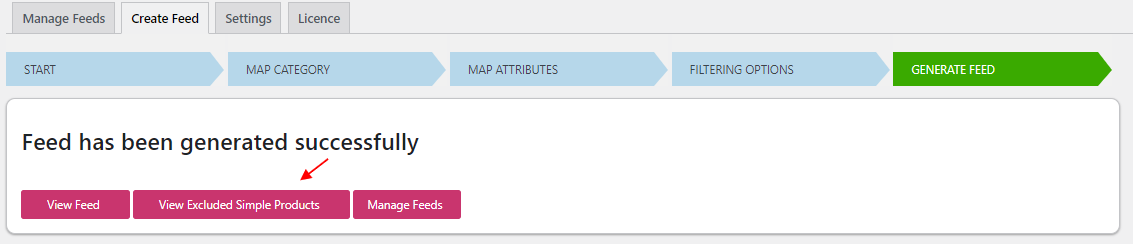
Finally, click the Generate Feed button to generate your catalog feed. You will be redirected to the Generate Feed tab, where it will show all products are updated if the feed generation is successful.
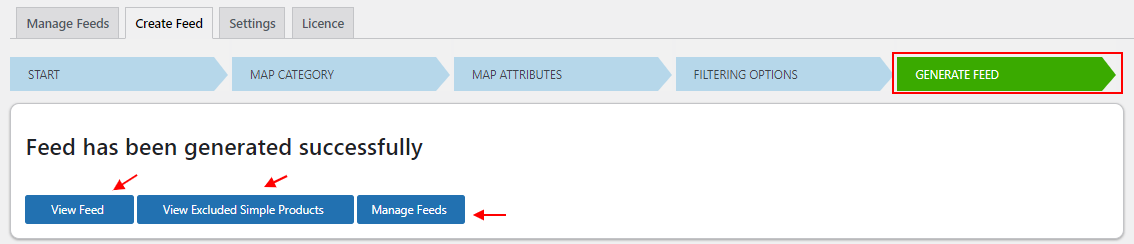
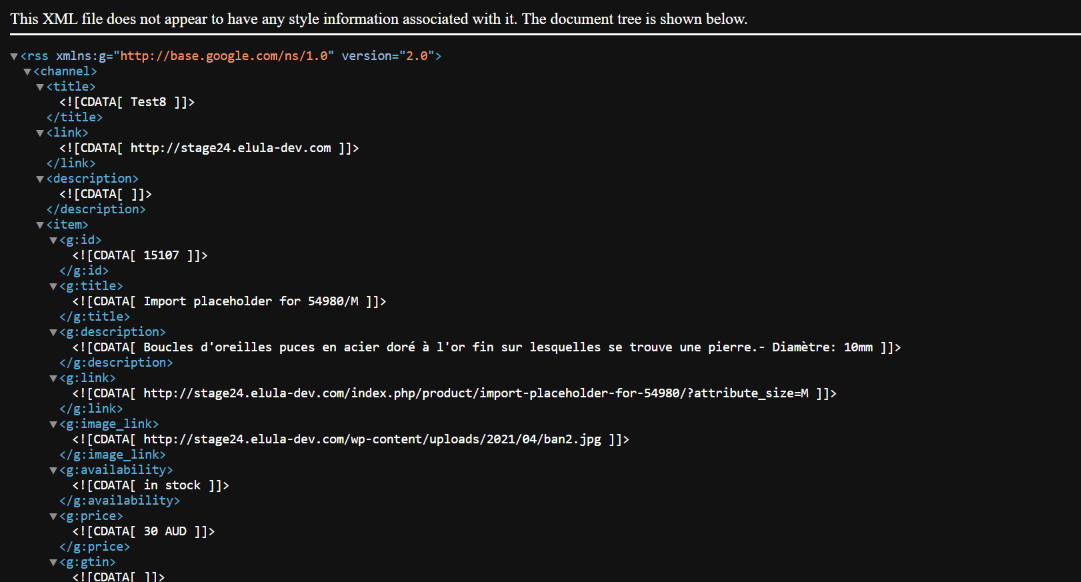
Click View Feed to view the generated feed. Check an example of an XML feed:
If any products are excluded from the feed as they miss some important attribute, you can check them by clicking the ‘View Excluded Simple Products’ or ‘Variations’. This button will be visible only if some products are excluded from the feed. You can click the button to view the excluded products and their missing attributes. Then, fix the issues and add the products back into the feed.
Click Manage Feeds to view and manage all feeds you have generated.
Manage Feeds
All generated feeds and their information can be found in the Manage Feeds tab.
There are three tabs:
- All: Contains all of the product feeds that have been created, including both manually generated and automatically synced feeds.
- Manual: Only consists of the manually generated feeds.
- Sync: Only consists of the automatically synced feeds.
You can view the feed name, URL, created and modified date, and upcoming refresh date of the feed if you have configured a scheduled refresh job.
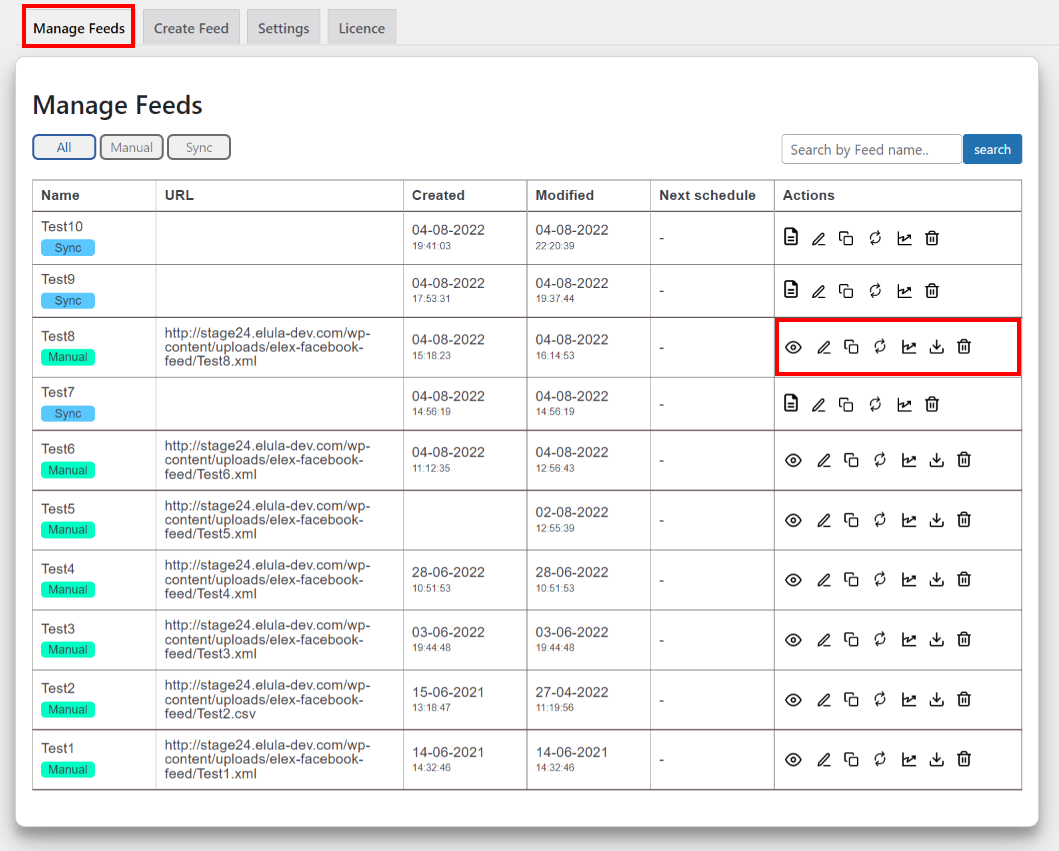
In addition to these, you can execute certain actions as follows:
- Edit: For editing the feed.
- Copy: Generating a copy of the feed.
- Pause: For pausing the refresh schedule job.
- Regenerate: For manually refreshing the feed uploaded into the Facebook Catalog.
- Download: For downloading the feed into your local system.
- View: To view the generated feed.
- Log File: View the Facebook Commerce Manager sync logs.
- Show Report: To view the overall feed performance.
- Delete: To delete the feed.
Note: View and Download actions are not available for automatically synced feeds and Log files are only available for automatically synced feeds.
Feed Performance Report
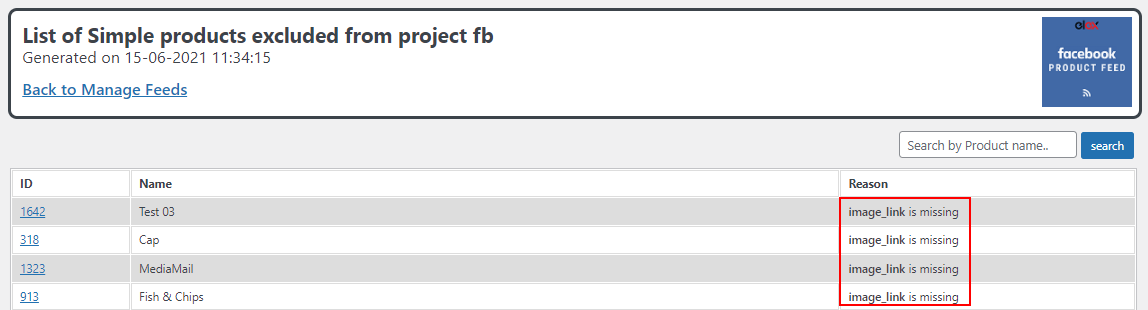
In this report, you will see included and excluded Simple and Variable products as a graph. To view the excluded simple products and variations, click on the Simple products excluded from the feed (to check the excluded simple products), or click on the Variations excluded from the feed (to check the excluded variations).
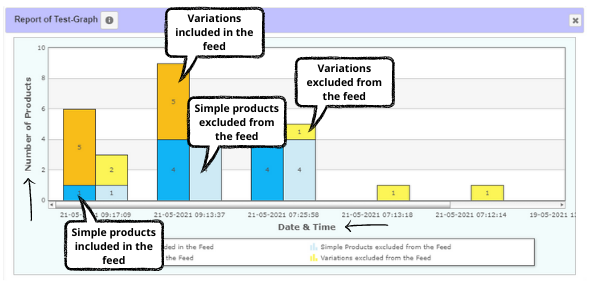
You will be redirected to a table in which the excluded products will be listed and the reason for their exclusions. A common reason for exclusion will be the absence of an important attribute of the product. You can add the attributes to the products and get the products back in the feed.
Check an example:
The mandatory attributes that must be present in each product for generating the Facebook Catalog feed are:
- ID
- Title
- Description
- Link
- Image link
- Availability
- Price
In order to reduce the feed rejection ratio, make sure that all these attributes are present in your products.
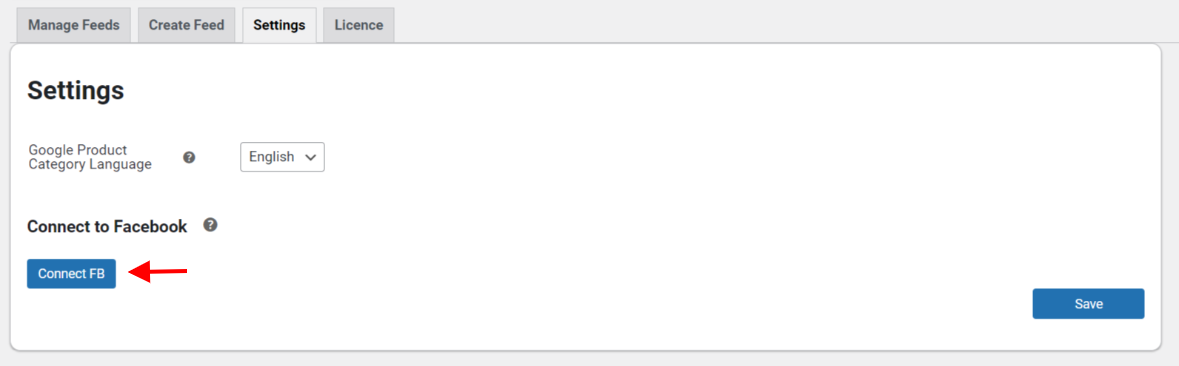
Settings
The Settings tab helps you configure the Google Product Category Language and Connect your store to Facebook Marketplace.
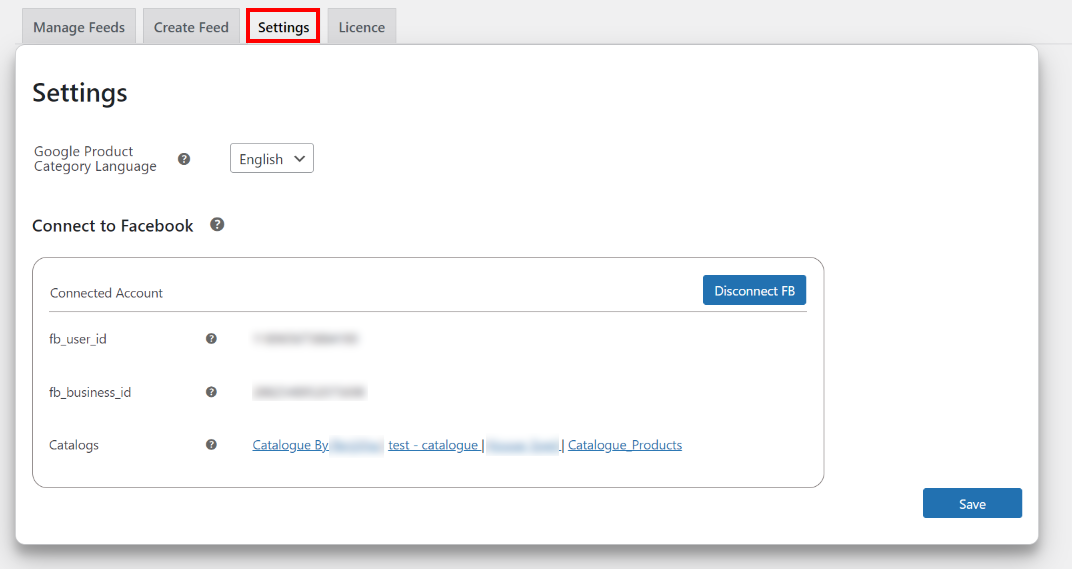
Google Product Category Language: Choose a language for Google product category taxonomy such as English, Russian, Spanish, German, and French according to the country and customers you target. By default, it will be in English.
WPML Language: With WPML Language, you can seamlessly cater to a global audience and provide a personalized browsing experience based on their preferred language. Expand your reach by selecting and configuring different languages for your product feed.
Connect to Facebook: Connect to the Commerce Manager by clicking Connect FB to sync the products to Facebook and Instagram.
Once connected, the User ID, Business ID, and generated product catalogs will be displayed along with the sync logs.
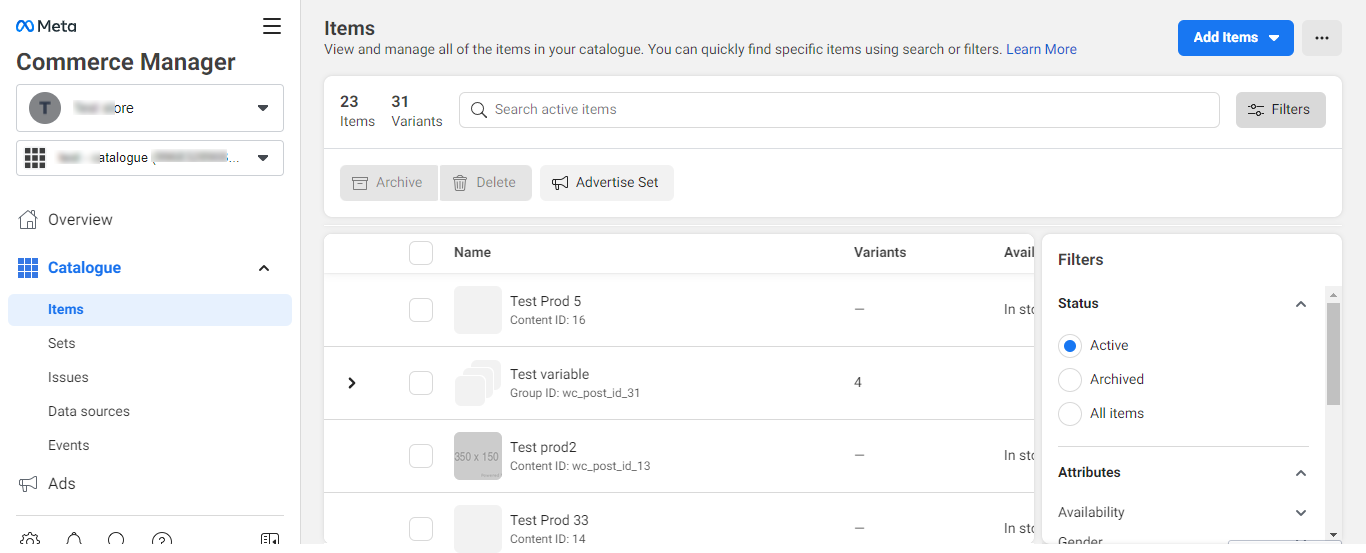
When you view catalogs, you can see the products that have been added to each catalog in the Facebook Commerce Manager.
Submitting the Catalog Feed file to Facebook
To upload the generated product feed to Facebook, visit the Facebook Commerce Manager.
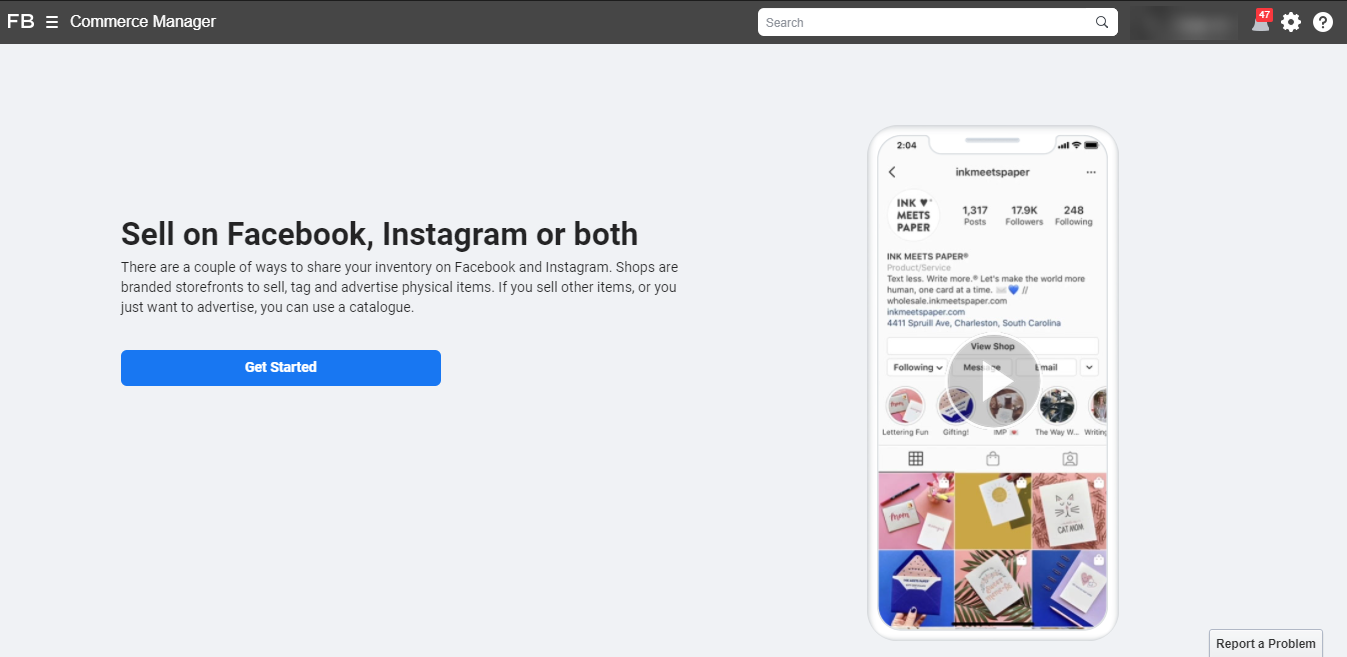
Click Get Started.
Choose the Create a Catalogue option to create your catalog.
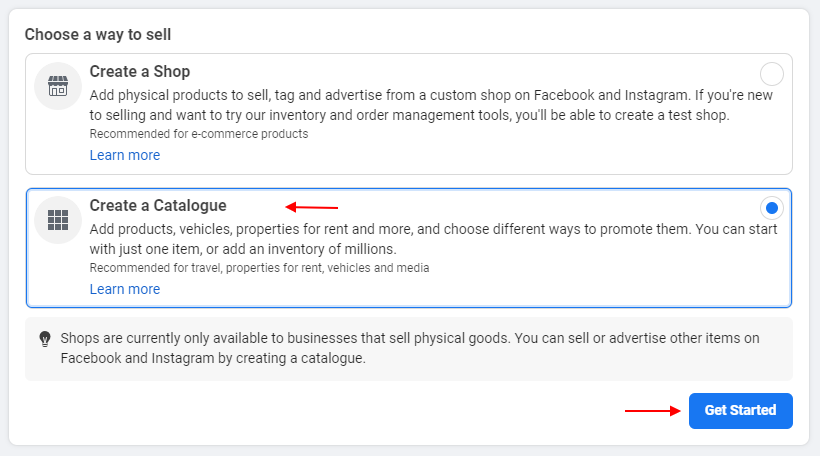
Click Get Started.
Then, choose your catalog type. Here, you can choose E-commerce.

Click Next.
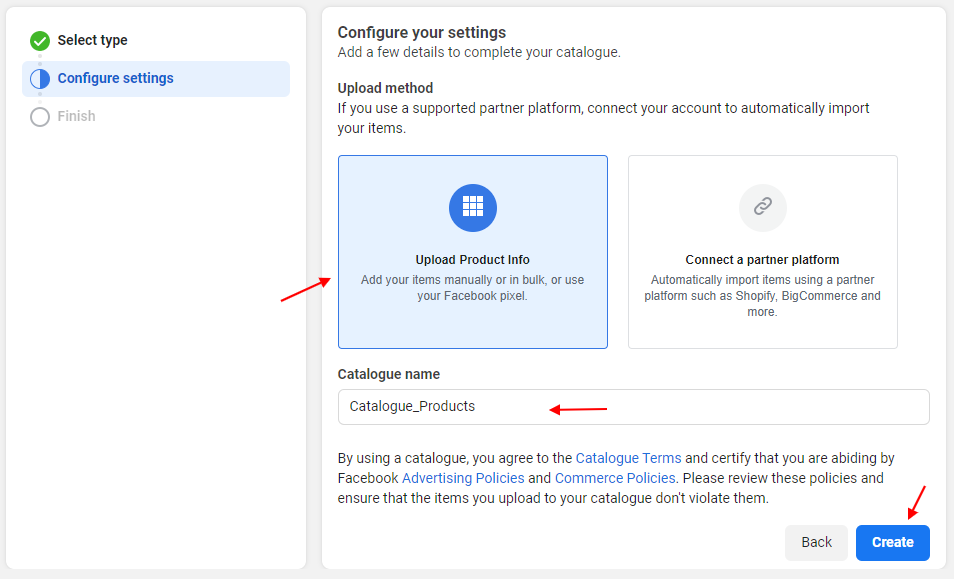
Choose Upload Product Info, enter a catalog name, and click Create.
After clicking the Create button, you will see a message regarding the catalog being created in a new tab.
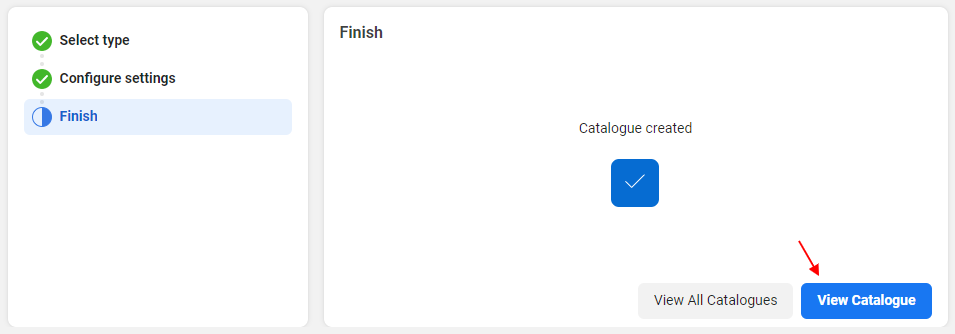
Click View Catalogue.
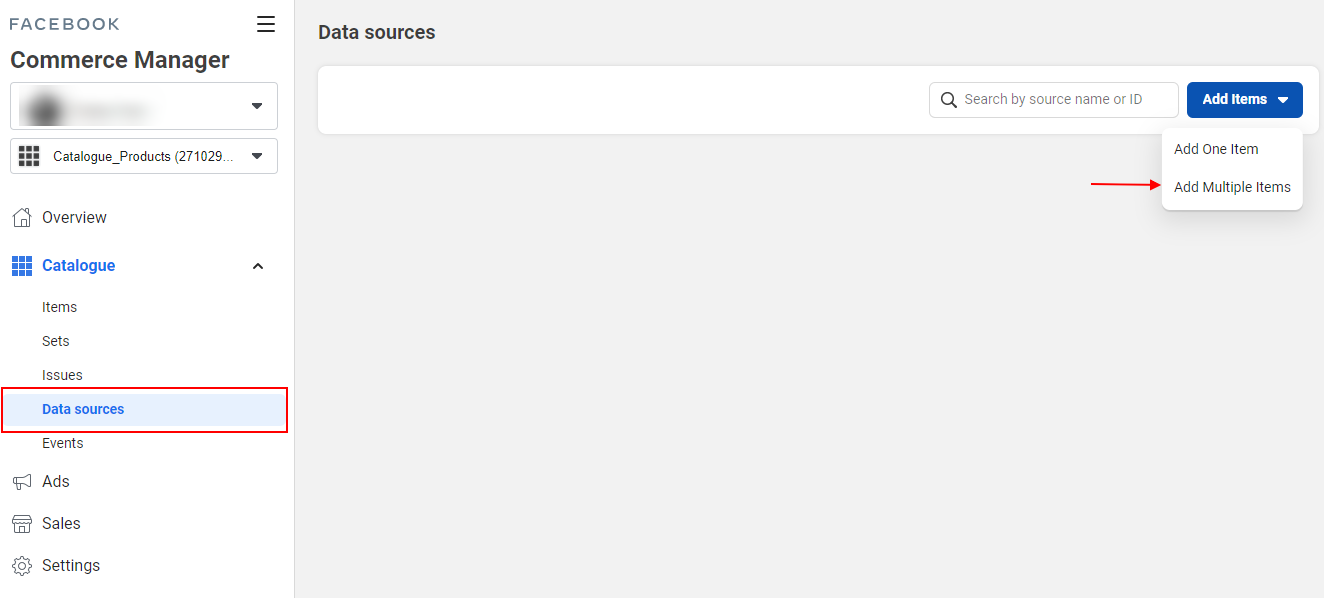
A new tab will be opened from where you can choose Data Source under the Catalogue section on the left side of the window.
Click Add Items and choose the Add Multiple Items option.
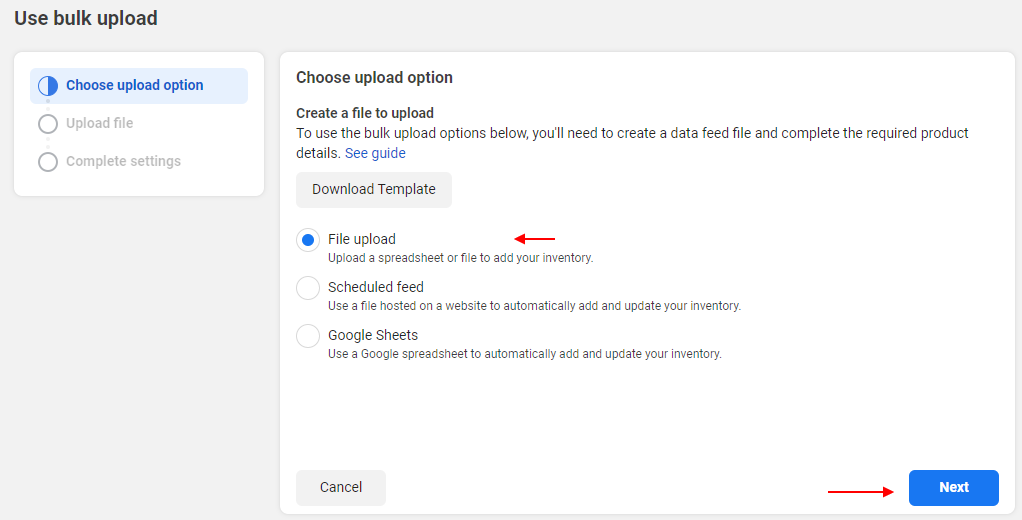
A new tab will be opened where you can find three options to feed your product details to the Facebook marketplace as File upload, Scheduled feed, and Google sheets. Choose the File upload option, and click Next.
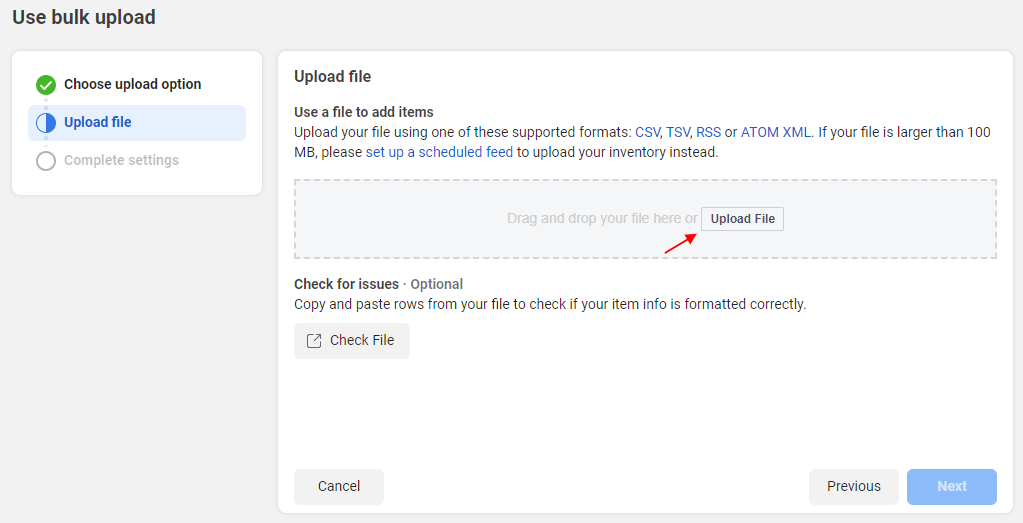
Then, click the Upload button and choose the generated feed from your system.
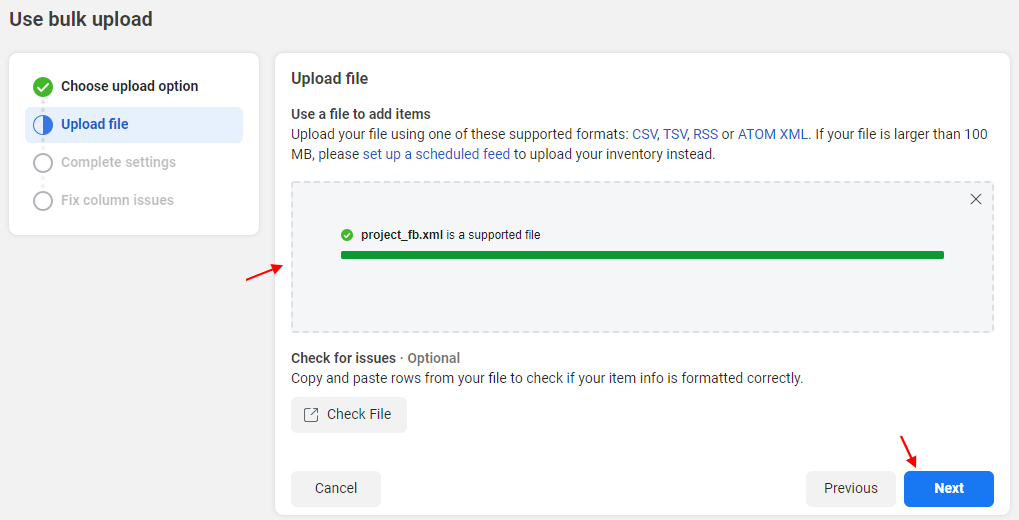
After the file gets uploaded, click Next.
You can change the name of the data source if required in this stage. Also, you can change the currency if required.
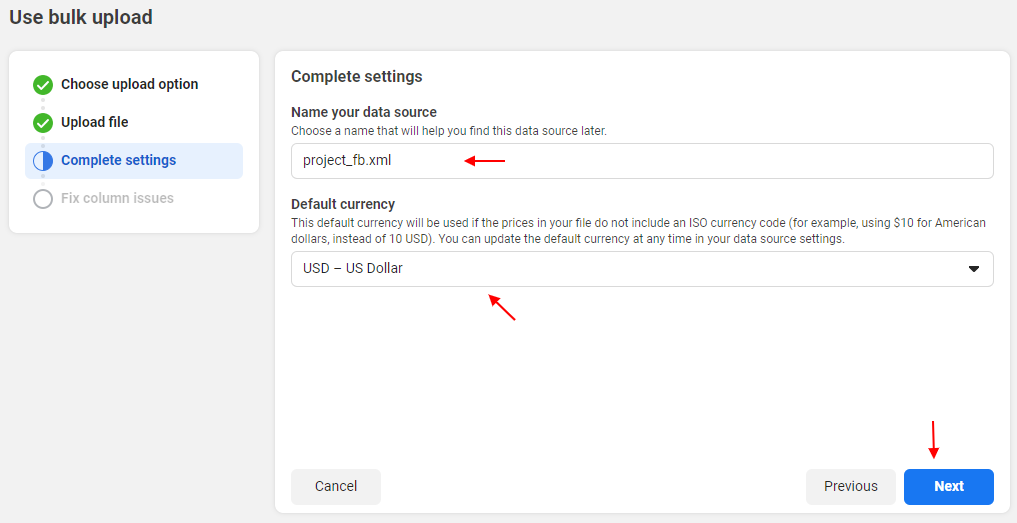
Click Next after the configuration.
In the next tab, you can fix the mapping issues if Facebook has mentioned any mapping issues. After that, you can upload the feed to Facebook Catalog.
For more information, check the documentation of Facebook Business Center.
Connect the Facebook Catalogue with your Instagram business account
It is quite easy to feature the products in Instagram Shopping if you have already set up the Facebook Catalog as mentioned in the previous section. You only need to connect the Facebook Catalogue option with your Instagram business account!
If you need to be eligible for the Instagram Shopping, your account must satisfy the following conditions:
- Your business must be located in a location that the Instagram market supports.
- Your store must sell physical goods.
- Your business must comply with Facebook commerce policies.
- Your Instagram account must be a business account.
- Your business account must be connected to your Facebook page.
To feature the products on Instagram shopping, follow the below steps:
Step 1: Create a new Facebook Catalogue as mentioned in the above section. If not, connect with the existing one you have created.
Step 2: Use a Facebook partner to connect with your Facebook Catalogue and Instagram shopping.
Step 3: After the Catalog and your Instagram get connected, log in to your business account from the Instagram app.
Go to your profile’s Settings, tap Business, then tap Instagram Shopping. Follow the steps they prompt. Your request will be sent for review.
After it gets approved by the Instagram team, you can set up further details for your Instagram shopping platform and start tagging your products through posts and stories.
This is how you can generate a feed using the ELEX WooCommerce Catalog Feed for Facebook & Instagram plugin to list your products on Facebook and Instagram Shopping.
To explore more details about the plugin, go check out ELEX WooCommerce Catalog Feed for Facebook & Instagram.
You can also check out other WooCommerce and WordPress plugins in ELEX.