India is the largest global democracy, with over 1.3 billion residents and extensive historical and economic ties to the United Kingdom. India experiences regular and significant postal traffic given its rapid expansion and economic growth and diversified population. This is why DHL is the best shipping company to use when shipping a package to India. In this article, we are going to walk you through the process of integrating DHL India Shipping with WooCommerce.
Why should you choose DHL?
DHL provides quick and secure delivery services to more than 220 nations and territories across the world, building on more than 40 years of expertise. Door-to-door courier services with the opportunity to track your package for free by SMS, call, or online are available from DHL India, which processes over 40,000 shipments every working day.
Additionally, they guarantee that your package is received and signed for upon delivery. The fact that they provide all of these services without requiring the creation of an account is the greatest feature.
Although India is half a globe away from the United States, the huge distance your shipments will travel to get there will not be an issue with DHL India integration. DHL’s global air service is reasonably priced whether you’re delivering presents to India from the UK or the US, opening up your business to ship worldwide, or merely needing to ship a package there.
What Benefits Are There to Integrating with DHL India?
Here are a few additional benefits of using DHL:
- You can send packages by sea and air.
- DHL provides easy-to-use shipping portals.
- Print stickers on the shipments so that delivery can be managed and they can be identified.
- Automatically generated tracking ID.
- Bulk downloading services.
- With DHL’s built-in tracking system, you can easily view information and keep track of packages.
- Inform customers of the progress of their orders.
- Regular Text messages with a tracking link on the progress of the delivery are sent to mobile devices.
- Deliveries are insured for a high value by DHL.
How to Integrate DHL India Shipping with WooCommerce?

By choosing a delivery option from the list, customers can place orders on your WooCommerce website. Along with other things, you can generate shipping labels, track the status of your orders, and change the rates and delivery times.
With the ELEX DHL India Add-on, you can now effortlessly use DHL’s services in your WooCommerce store for streamlined delivery to India. The plugin assists in streamlining the shipping process so that it may be done easily across all of India. The add-on only functions when the delivery and billing addresses are both located in India. When a non-Indian address is entered, the ELEX WooCommerce DHL Express / eCommerce / Paket Shipping Plugin with Print Label is used.
The following features make the ELEX DHL India Add-on the top DHL WooCommerce shipping plugin for India:
- Export your products from India to anywhere
- Handle the deliveries for Indian shipping addresses.
- Add your GST login details for Authenticated Shipments.
- WooCommerce users can generate DHL India shipping labels.
The primary configuration is determined by the WooCommerce DHL Express Plugin settings before proceeding to the add-on settings. Therefore, before setting up the add-on, you must first install, activate and configure the WooCommerce DHL Express Plugin.
To learn how to finish the checkout procedure on ELEX, read this article. ELEX plugin download, installation, and activation instructions are also available.
Let’s start configuring the add-on’s settings once it has been installed. Navigate to the Installed Plugins section of your WordPress dashboard. Next, navigate to the ELEX WooCommerce DHL India Add-On and click Settings.

DHL Account Information: Fill out your DHL Account Number, ID, and Password. The DHL account manager must be contacted to obtain the Site ID and Site Password.
Shipper ID: Type in the reference ID for the shipper here. This ID can be used to track the delivery.
Import Export Code (IEC): Enter the Import Export Code, which is required for both importing and exporting products into India. Visit the website of DGFT to obtain the import/export code. S elect Services > IEC Profile Management > Apply for IEC. Fill out the application completely, followed by submitting your bank certificate, a pre-printed canceled check, and proof of company address. As soon as possible, you will have your ten-digit IEC code.
Using E-Commerce?: Select “yes” if you are using the DHL login credentials for an online store. Choosing “not” indicates that you are not using it for an online store.
Is Under MEIS Scheme?: Select “yes” if your company is covered by the Merchandise Exports from India Scheme (MEIS) as part of the Foreign Trade Policy of India (FTP 2015-20). Choose “no” if it isn’t.
GSTIN: Type in your 15-digit GSTIN number here. To obtain your GSTIN, you must register with the GST portal.
GST Invoice Number: Enter the number from your GST invoice here. You must generate the invoice after registering for GST. This invoice will be generated with a serial number that follows, which is referred to as the GST invoice number.
Non-GST Invoice Number: If you haven’t registered for a GSTIN, provide the invoice number you issued without including the GSTIN or ARN (Application Reference Number).
Using IGST?: If you are using the Integrated Goods and Services Tax (IGST), select “yes,” otherwise, select “no.” A tax known as the Inland Goods and Services Tax (IGST) is imposed on all supplies of goods and services made between states and is applicable to all imports and exports of both goods and services.
IGST Value: If you are utilizing IGST, enter its value in this field.
Using Bond or UT?: Select “yes” if you are using bonds and a letter of undertaking (UT); otherwise, select “no.”
Bonds: A bond is a contract that guarantees proper adherence to the policies and processes outlined in the Indian Excise Code.
LUT: Exporters can export products or services without paying taxes by filing a Letter of Undertaking (LUT).
Bank Authorized Dealer Code (AD Code): Enter the 14-digit AD Code that was supplied to you by a bank when you created a current account for your company.
Click Save Changes once you’ve entered this information.
Both the Cart page and the Checkout page show all rates that are offered for the delivery address when using this add-on. Customers can select the necessary service from the list in accordance with their needs.


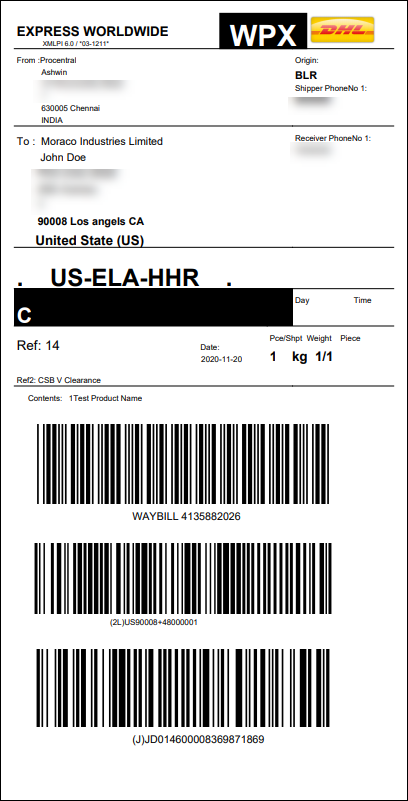
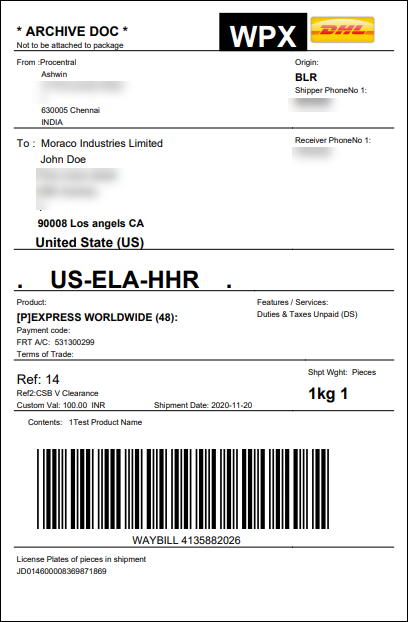
View a sample of a DHL India shipping label that was automatically generated.

 To Wrap Up
That’s how simple it is to integrate DHL India services into your eCommerce store, all you need are the right tools to streamline the entire process. We hope this article has given you a fair idea as to how to integrate DHL India Shipping with WooCommerce. If you have any questions regarding integrating DHL India Shipping with WooCommerce, please let us know in the comments section below.


