In this article, we will discuss the steps involved in the printing of USPS e-VS SCAN Forms and Shipping labels from the Order Admin page of your WooCommerce. We will be using the ELEX WooCommerce USPS Shipping Plugin with Print Label for integrating WooCommerce USPS Shipping products and services.
Introduction:
Printing shipping labels and other shipping documents like SCAN Forms for your WooCommerce orders is a crucial part of the fulfillment process. If your WooCommerce store uses third party shipping carriers like USPS, this can become tricky as you need to visit the USPS website and input the shipment details manually. It’s a repetitive task that is prone to errors and therefore best suited for automation. The ELEX WooCommerce USPS Shipping Plugin with Print Label features the ability to generate and print USPS e-VS shipping labels and SCAN Forms, for all your orders right from the Order page of WooCommerce
About USPS e-VS:
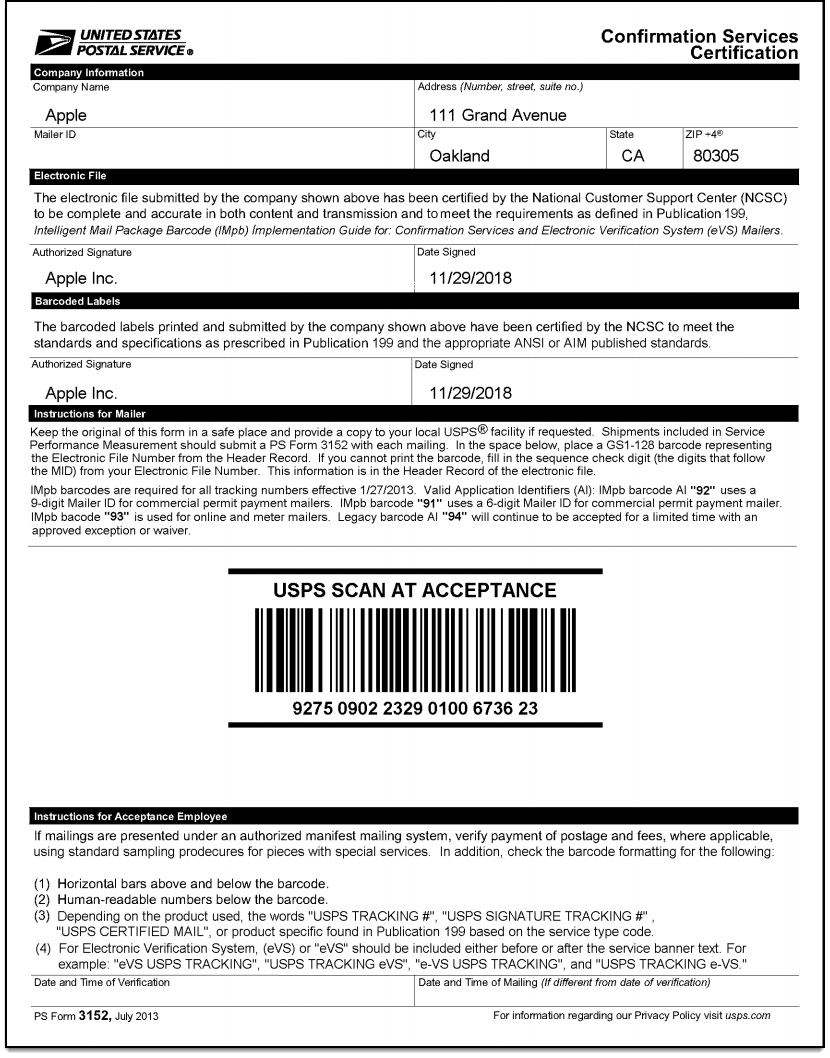
The e-VS, or Electronic Verification System, allows high-volume package consolidators and mailers to pay postage, special service fees, and documents using electronic manifest files. The files are transmitted over the Internet to a Postal Service™ database. e-VS is designed to make it easy for high-volume package mailers to take advantage of destination entry rates. e-VS mailers must consistently present sufficient volume to destination entry locations to ensure a valid sampling plan can be developed and maintained. If you are an e-VS approved vendor, version of the ELEX WooCommerce USPS Shipping Plugin with Print Label comes with seamless integration of USPS e-VS services. You can use the ELEX WooCommerce USPS Shipping Plugin with Print Label to print e-VS shipping documents like SCAN forms. Shipment Confirmation Acceptance Notice (SCAN) Form is a consolidated document that contains a master barcode which links all the shipping labels you have printed for the packages and are ready for drop off or pick up service. There are two variants of the USPS SCAN forms that the plugin can generate for your WooCommerce store: PS 3152 and PS 5630 forms.
The 3152 Form contains a master barcode, the shipper’s address, and the destination address.
The 5630 Form, on the other hand, is designed to provide customers with better tracking and visibility for package shipments. This form links all the packages in the shipment to one barcode. It also has information regarding the various shipping services used to ship the products. 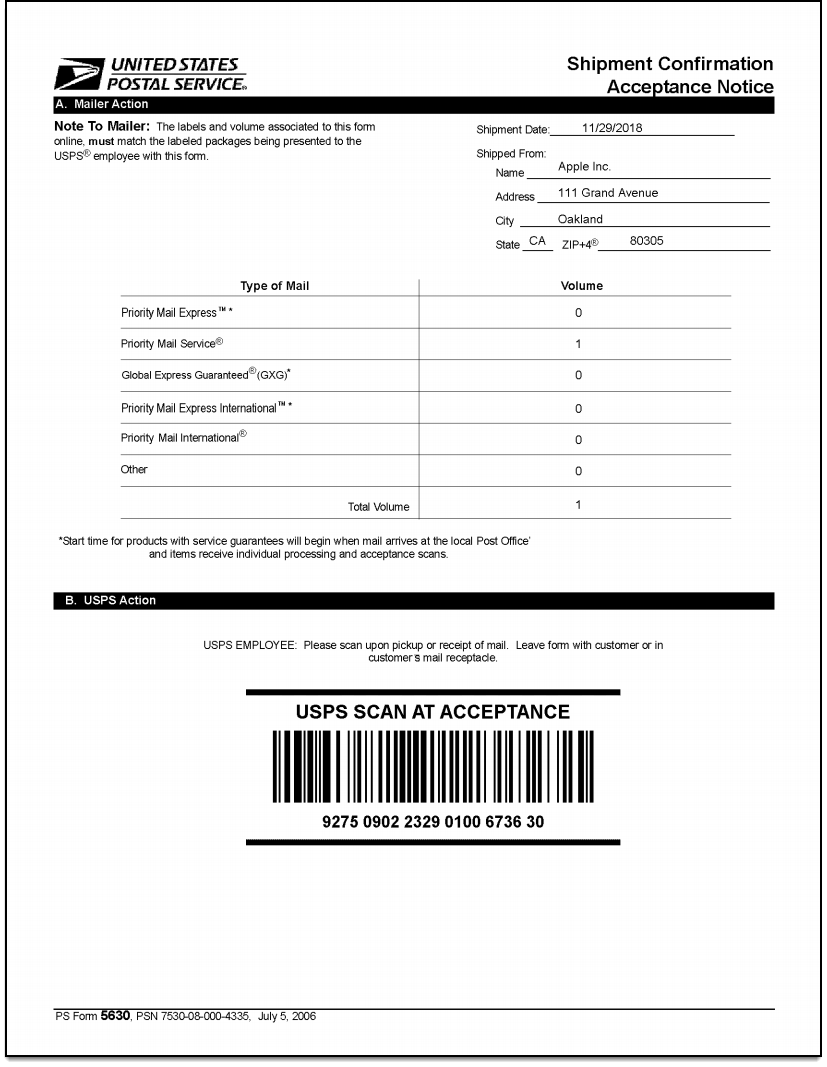
To enable printing of WooCommerce USPS Shipping labels, you will need to first integrate WooCommerce USPS Shipping by installing and activating ELEX WooCommerce USPS Shipping Plugin with Print Label.
ELEX WooCommerce USPS Shipping Plugin with Print Label:
ELEX WooCommerce USPS Shipping Plugin with Print Label supports the complete integration of WooCommerce USPS Shipping products and services. Moreover, the plugin is a USPS e-VS Electronic Verification System Pre-certified Vendor. With this plugin, you can –
- Access real-time rates from USPS (United States Postal Service).
- Print shipping labels.
- Track shipments.
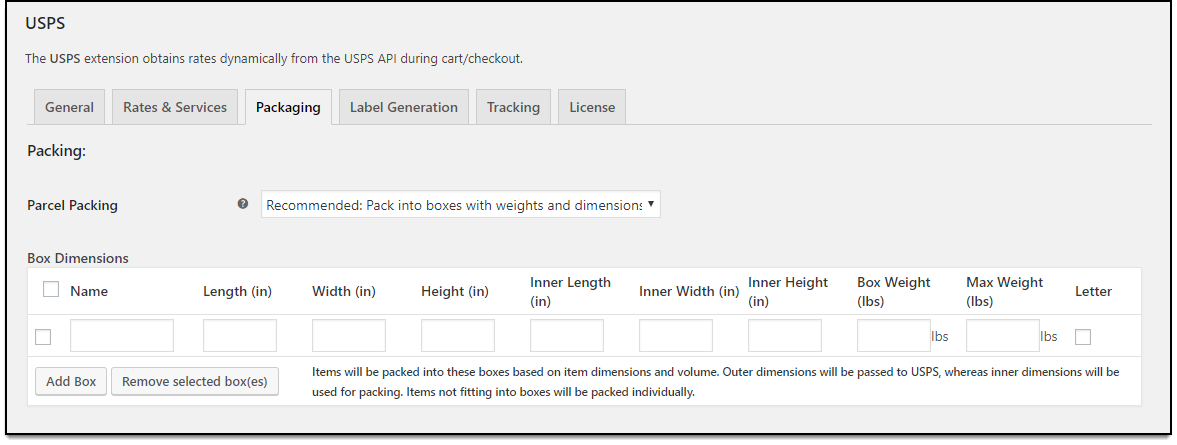
- Pack items into custom boxes.
- Offer discounts or add a markup on shipping rates, with Price adjustments.
- Ensure packages with insurance amount.
- Generate bulk shipment.
- Configure USPS Flat Rate boxes, and much more!
You will also be needed an account in USPS for using this plugin. What’s more the plugin comes with a Test Mode for you to try out the plugin and the API services. When you’re ready to print postage and labels for real orders, you can toggle the mode back to Live.
Integrating WooCommerce USPS Shipping:
Here’s a tutorial on how to get and install the plugin. Once it is installed and activated, you can find the settings to configure the plugin, under WooCommerce > Settings > Shipping > USPS
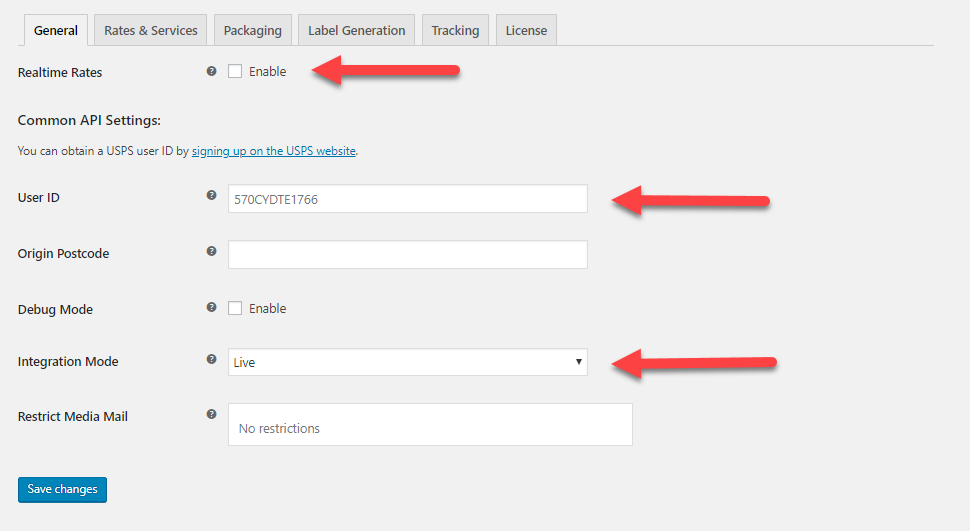
Under the plugin’s General Settings, you will need to provide your USPS User ID. Additionally, you can toggle Debug Mode and choose the Test mode from the Integration Mode dropdown for debugging and testing purposes. Ensure the Real-time Rates box is toggled. When a customer adds items to his or her cart, the ELEX WooCommerce USPS Shipping Plugin with Print Label fetches real-time shipping rates from USPS based on the origin and destination address. This is helpful for customers as they won’t have to leave your store to calculate shipping for each WooCommerce USPS Shipping option. The plugin also helps you choose products that you wish to restrict Media Mail for.
Configuring Rates and Services:
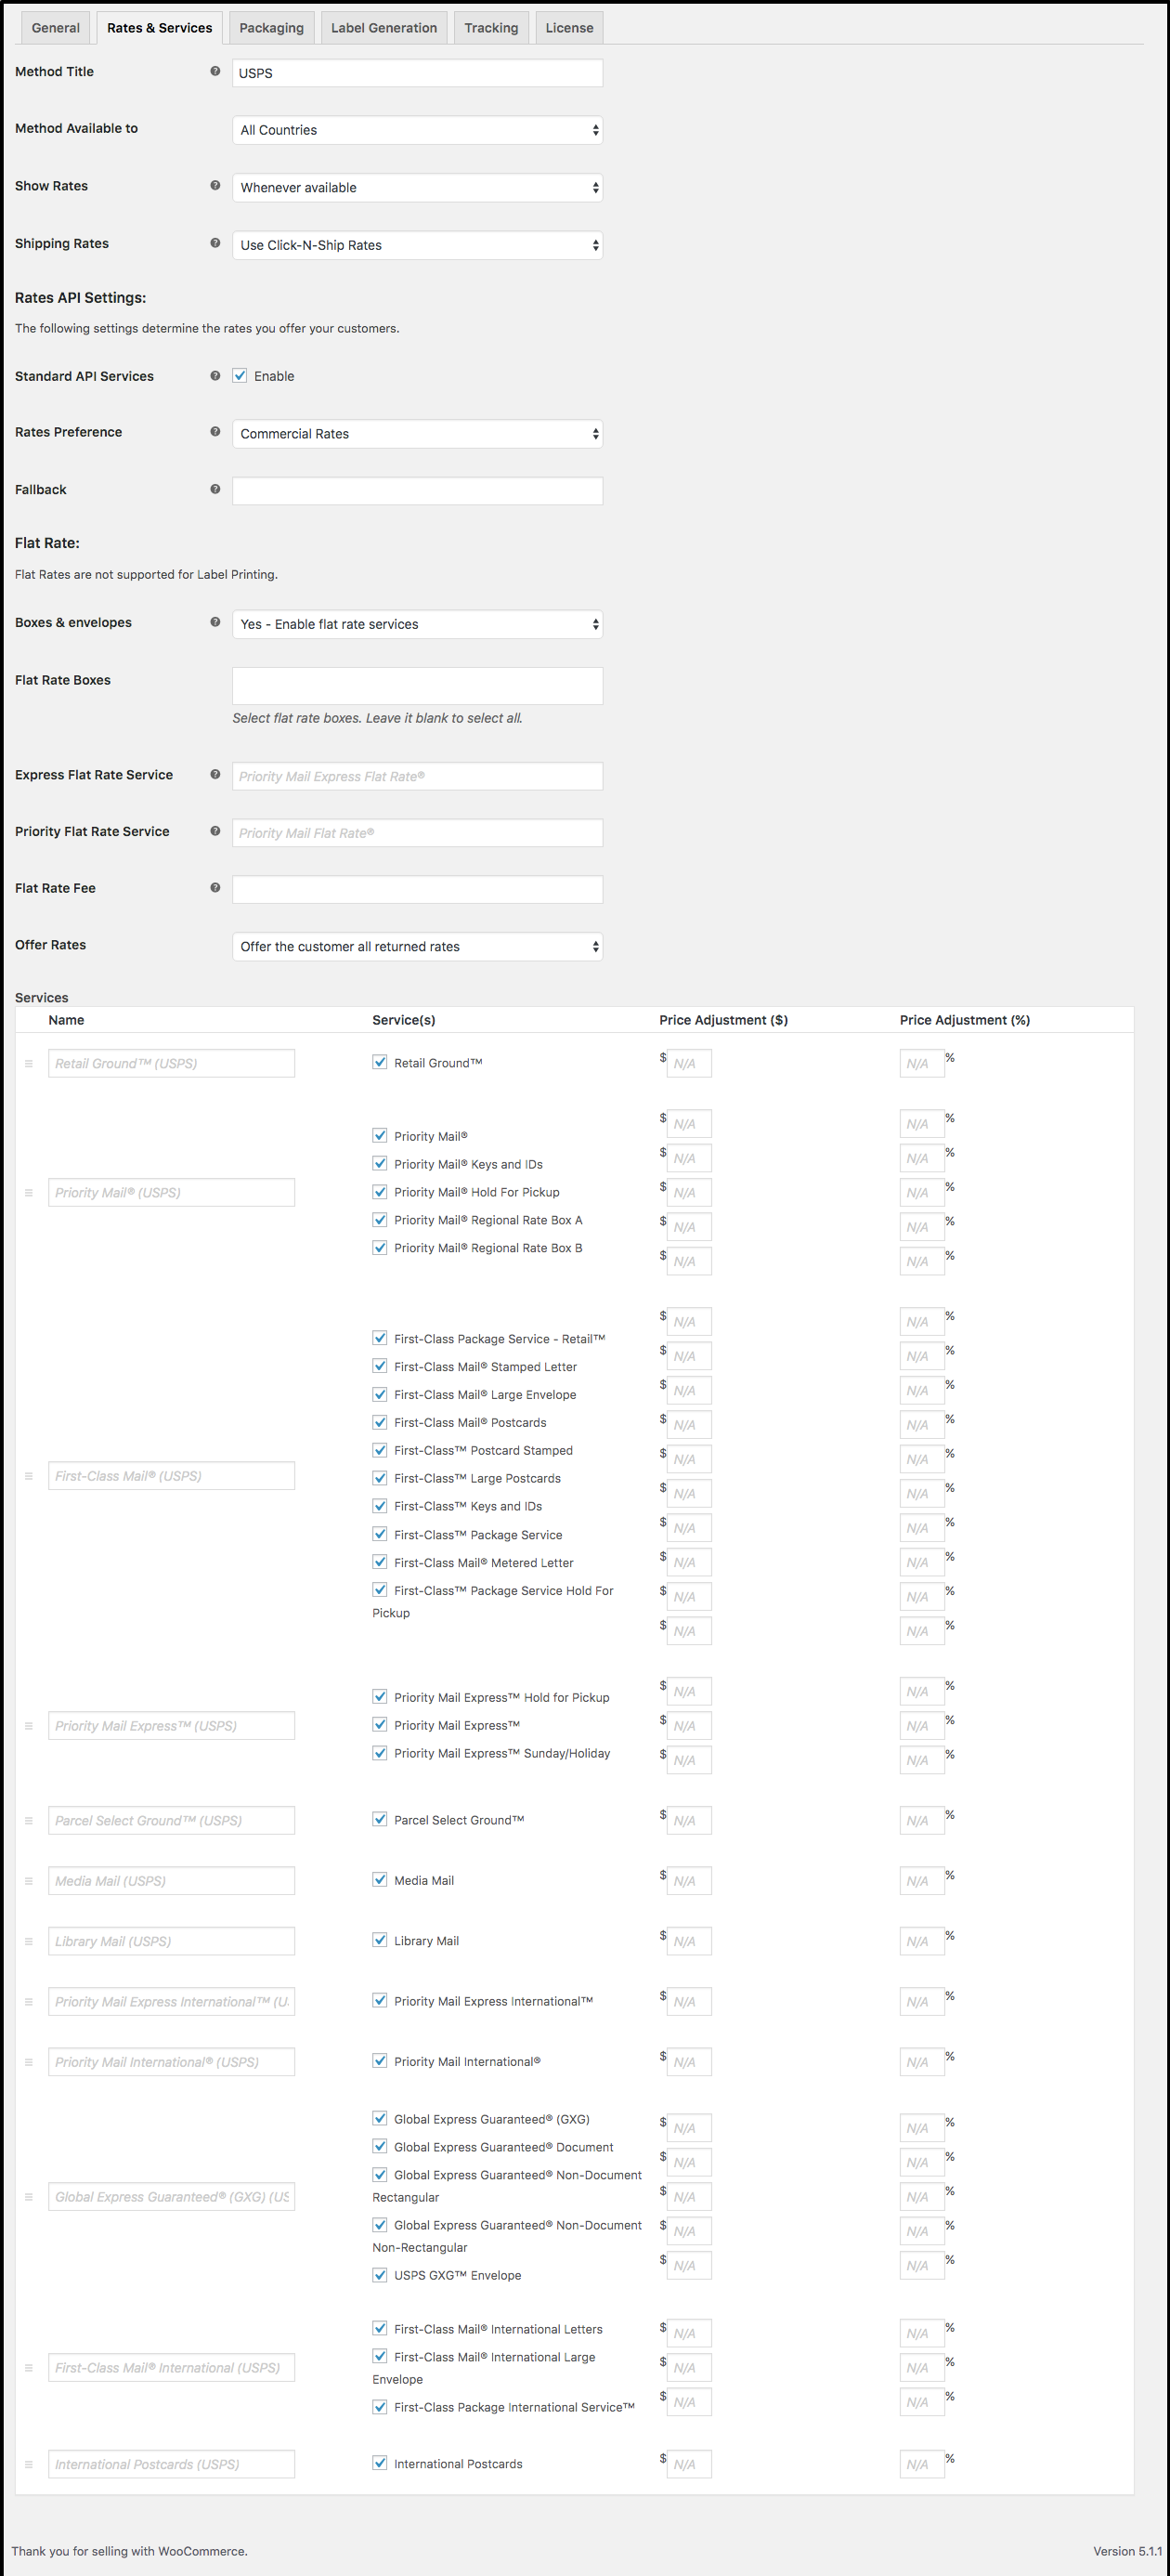
The Rates & Services tab lets you configure the USPS shipping options and rates for your WooCommerce store. In this tab, you can find the Method Available to field using which you can select the countries you wish to make the shipping options available. The plugin also offers the choice of using Click-N-Ship or Offline Post Office rates for the WooCommerce USPS Shipping options. Additionally, you can even set the rates to be Commercial or Residential (Rates Preference) and even set up Fallback rates. The Fallback rate is used in the rare event of USPS servers being unable to return rates for the services and options.

Configuring WooCommerce USPS Shipping Labels:
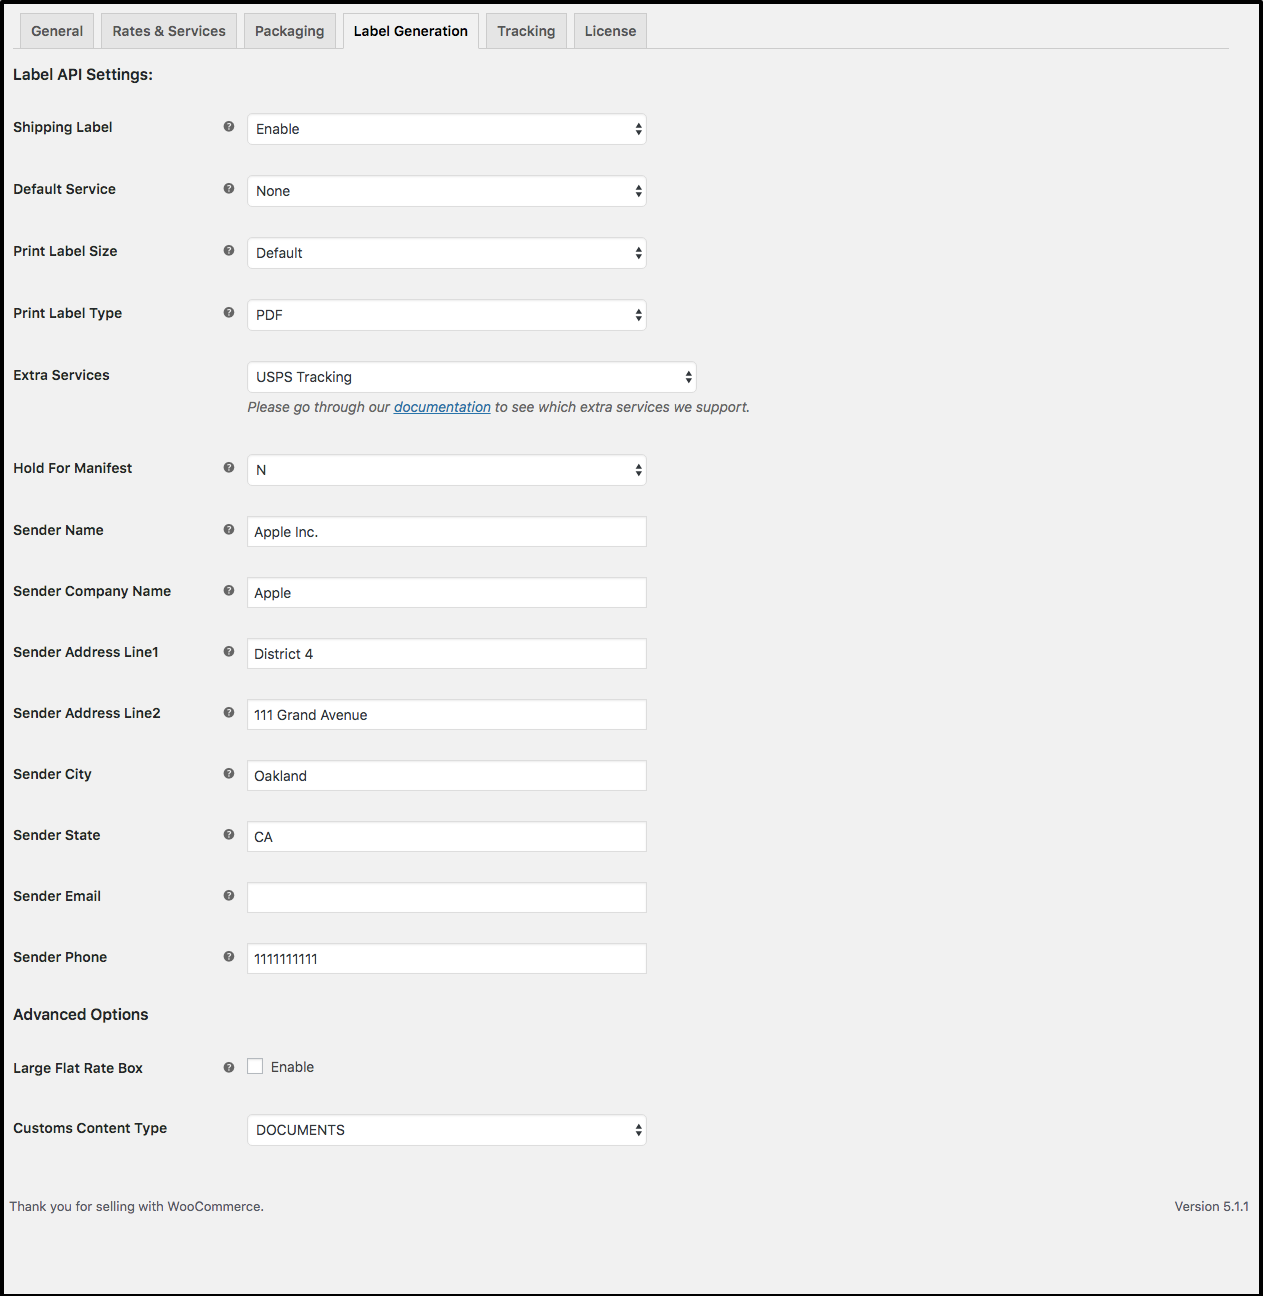
Head on over to the Label Generation tab of the plugin. Here you can find all the settings that can be used to configure printing WooCommecre USPS Shipping labels.
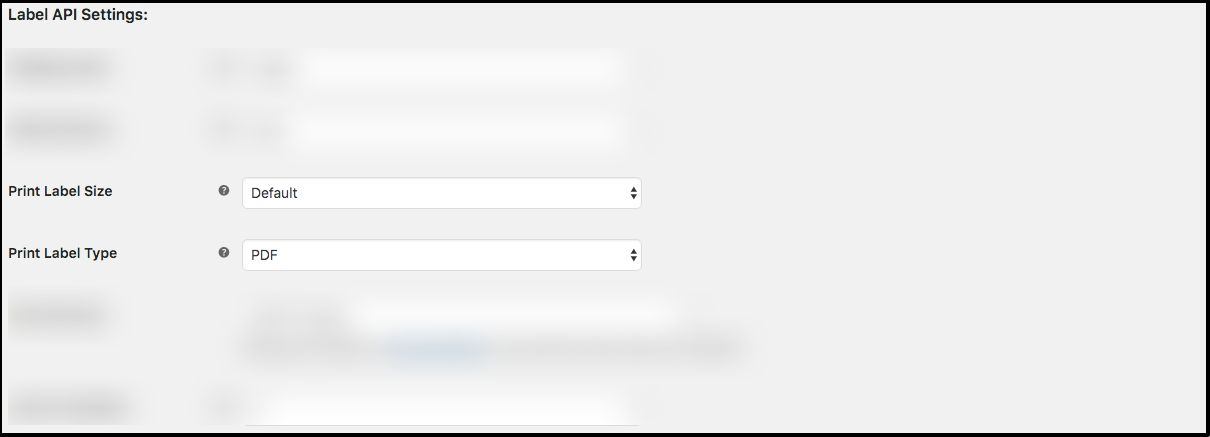
Using the Print Label Type field you can set the shipping labels format. The plugin supports various formats for this purpose. If you choose the PDF format, you can also set the paper size for the generated PDF file using the Print Label Size field. With the print layout field, you can easily set how the shipping label is oriented in the generated document.
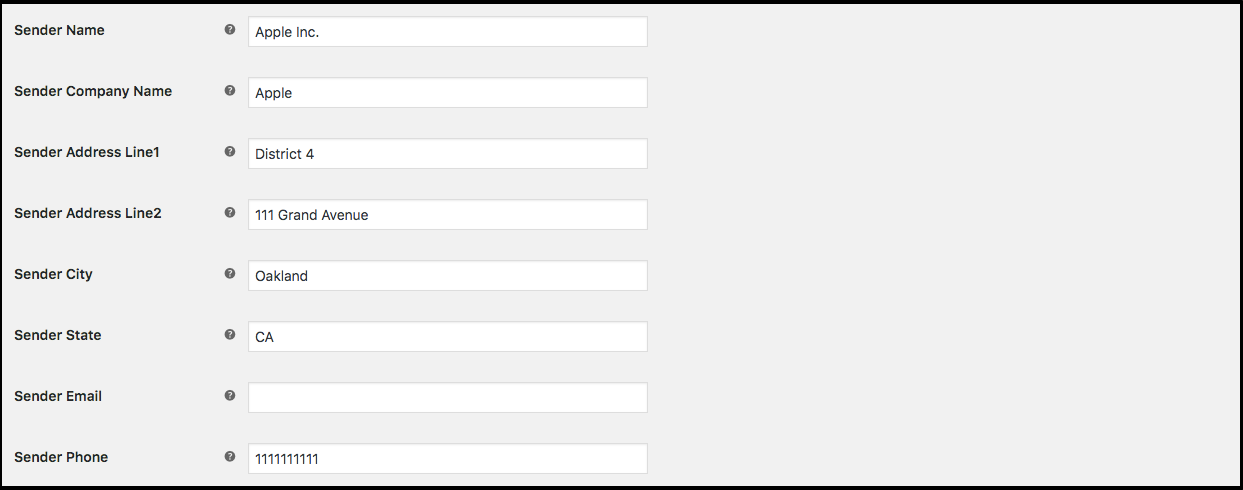
It’s important to note that the Sender Details have to be filled in. These details are used in the API requests sent by the plugin to USPS Servers.
Using the Advanced Options, you can specify the type of shipment for Customs using the Customs Content-Type field. Using the Large Flat Rate Box toggle you can enable or disable large Flat Rate box for packing.
Printing USPS e-VS Shipping Labels from Order Admin Page:
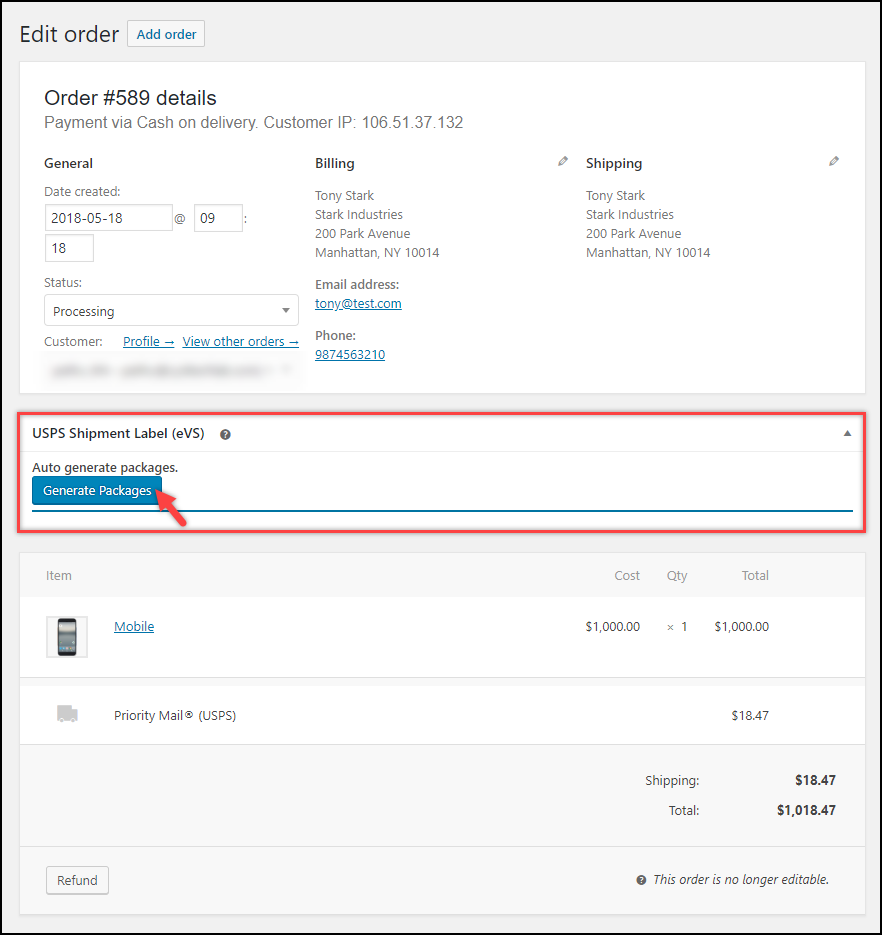
When a customer places an order on your site and pays for it, you will be able to see in your Orders page in WooCommerce. From here you can edit the Billing and Shipping Addresses, add or edit customer notes and choose from the Order actions. These include emailing an invoice to the customer, resending order notifications, and regenerating download permissions.
From the Order Admin page, navigate to the USPS Shipment Label (eVS) section. For the new order, you will see a “Generate Package” button.
Click on it to bring up the package configuration window. The plugin has multiple box packing configurations.
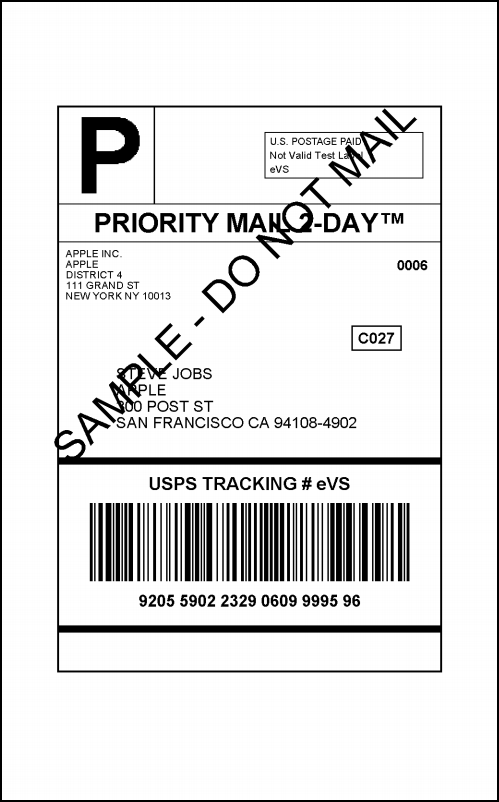
Depending on which configuration you chose, packages are generated for the items in the shipment. From the Order details page, choose the preferred service and the preferred package type. Once done, click on the Create Shipment button to initiate the shipment creation. 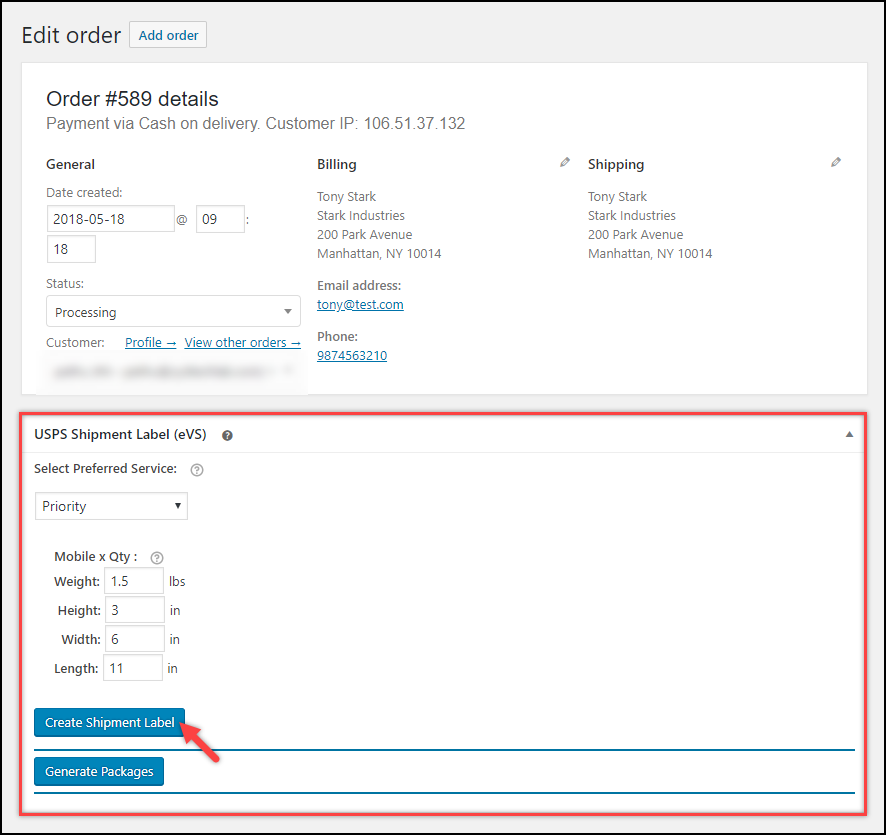
Printing USPS e-VS SCAN Forms:
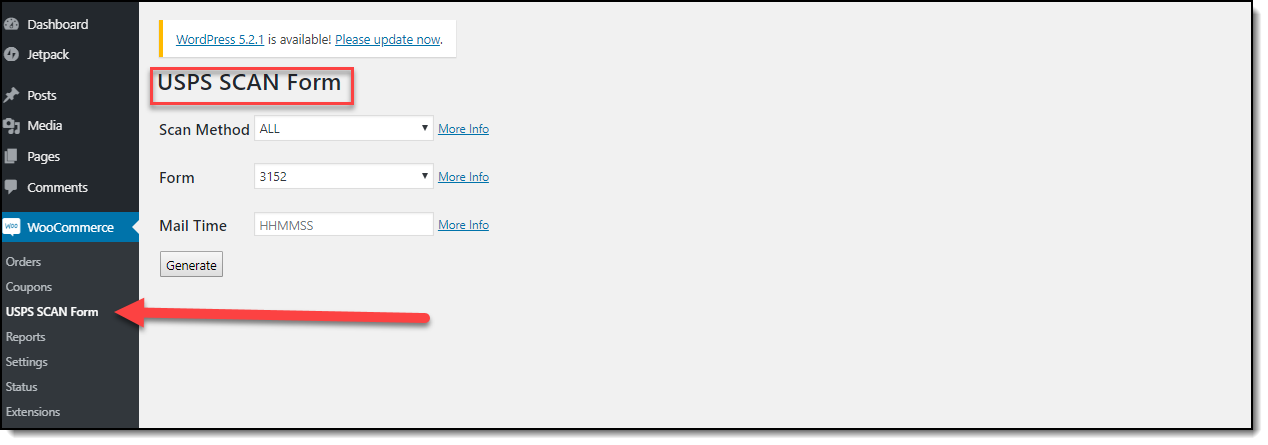
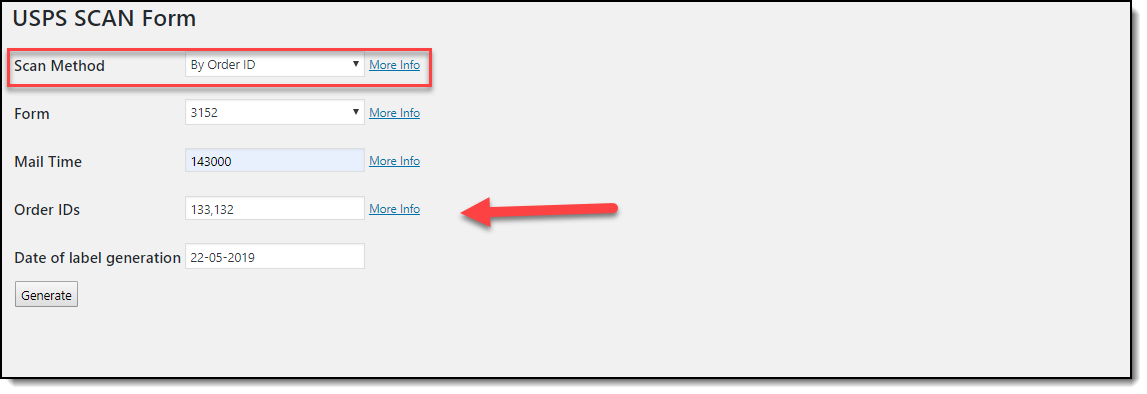
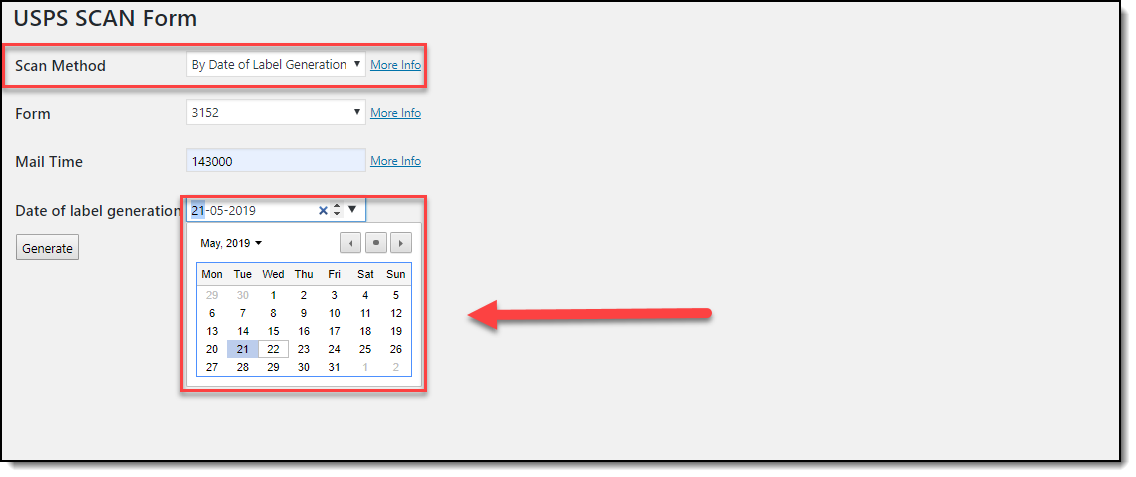
Once you’re done with the shipment creation and label generation, you can proceed to generate USPS e-VS SCAN forms. After installing and activating the plugin you will find the USPS SCAN Form generation section under WooCommerce in your WordPress dashboard.

Conclusion:
Printing e-VS SCAN Forms and e-VS shipping labels straight from WooCommerce is a great way to improve operational efficiency by saving time and effort which can be delegated elsewhere. We detailed the steps involved in configuring WooCommerce USPS Shipping Label printing using the ELEX WooCommerce USPS Shipping Plugin with Print Label. Apart from this, the plugin can also be used to
- Enable Live Shipping Rates and Delivery Tracking
- Pack items into custom boxes.
- Generate Order Summary/Manifest
- Ensure packages with insurance
- Adjust prices of WooCommerce USPS Shipping services.
- Generate bulk shipments and more.
The add on provides the functionality to automatically generate and email notifications containing shipping labels and tracking URLs. You can find more information about the plugin here. You can also try out the Live Demo of the plugin to experience what the plugin is capable of, firsthand.

