Allowing the possibility to let your customers place a custom quote request on your products is something that will ease the online negotiation process. Find out how to set up WooCommerce Request a Quote in easy steps.
WooCommerce Request a Quote
Allow your customers to negotiate on your product quantity and price using a simple plugin on your WooCommerce store. Using the WooCommerce Request a Quote plugin, you can simply sell the products to retailers by letting them place quote requests on products on your store. Here we take a look at the steps to get the WooCommerce Request a Quote plugin activated and put to use on your WooCommerce store.
Here we take the example of ELEX WooCommerce Request a Quote plugin.
Steps to Set up WooCommerce Request a Quote
Let’s walk through the steps to get the plugin working on your WooCommerce store.
Step 1: Install the plugin
Firstly, download and install the plugin on your WordPress WooCommerce store.
Step 2: Configure the plugin
Once the plugin is installed, you can see the plugin settings in Dashboard > Plugins > Installed Plugins > ELEX WooCommerce Request a Quote Plugin> Settings.
The settings will look like this :
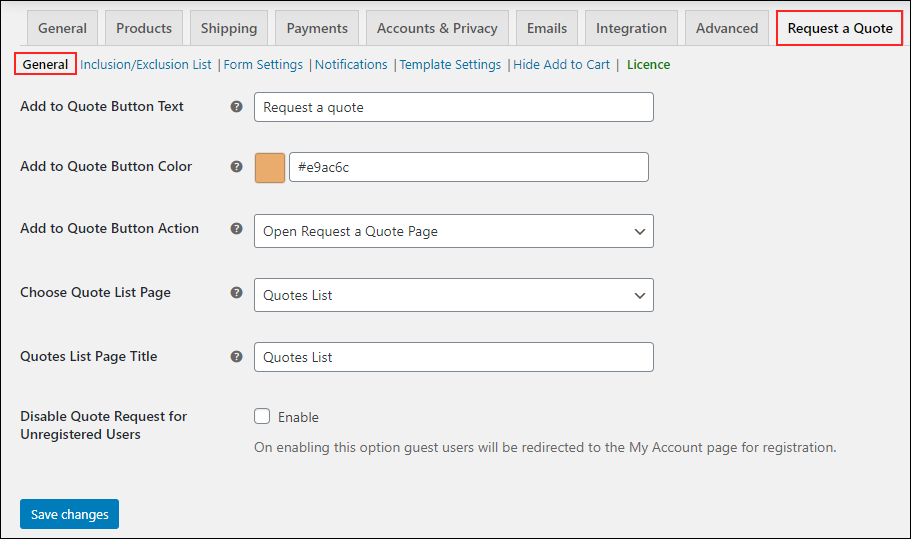
- Add to Quote Button Text: Here add a placeholder text to be displayed on the button to place the quote for the products. By default, it is better to keep it as ‘Add to Quote’.-
- Add to Quote Button Color: Choose any colour of your choice for the ‘Add to Quote’ Button.
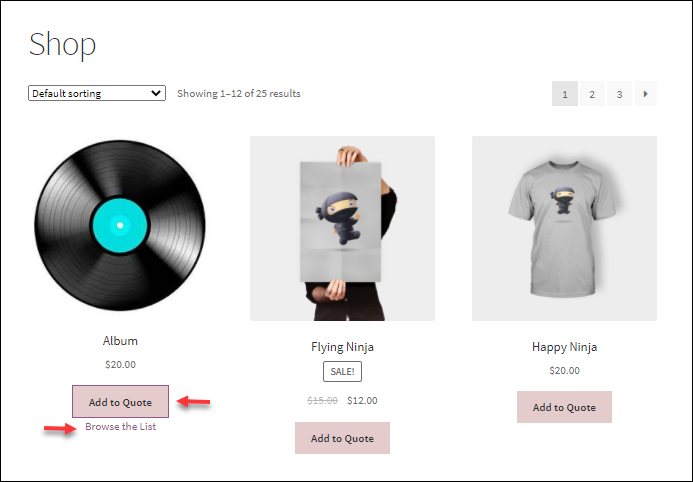
- Add to Quote Button Action: Here you can choose the action to be performed when the customers click the Add to Quote button. Here you have two choices, as shown in the image below:
Open Request a Quote Page: When a customer clicks the button, they will be redirected to a Quote page, where they can add several products and also fill in their details. The hypertext will show “Browse the list” on the button as shown in the image below :
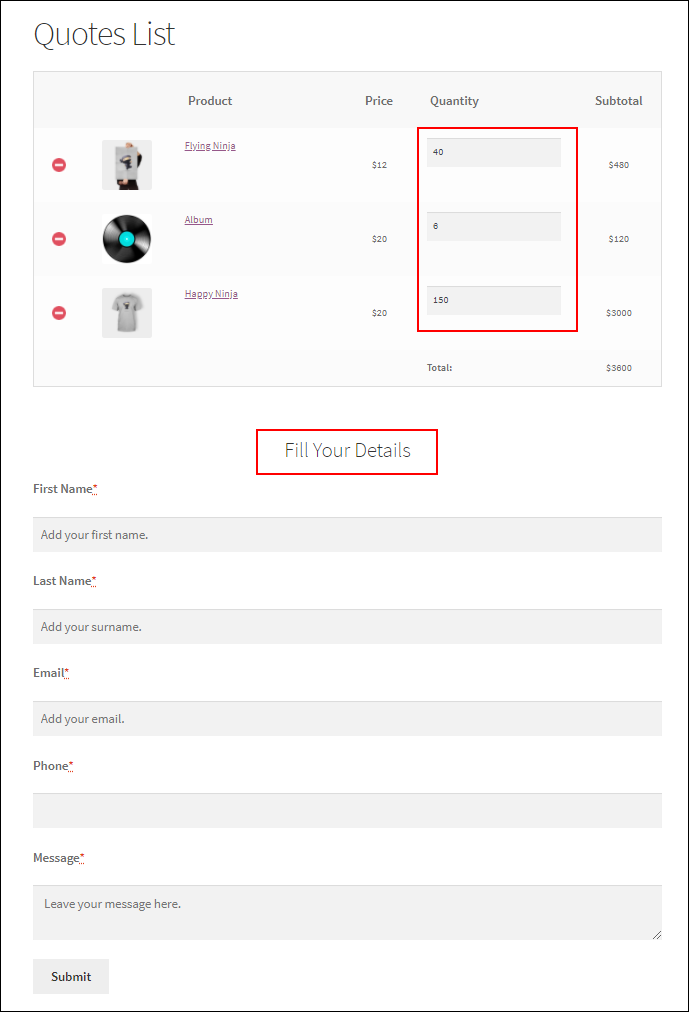
Upon clicking, they will be redirected to the Quote list page as shown in the image below :
Here they can enter the quantity they want to order.
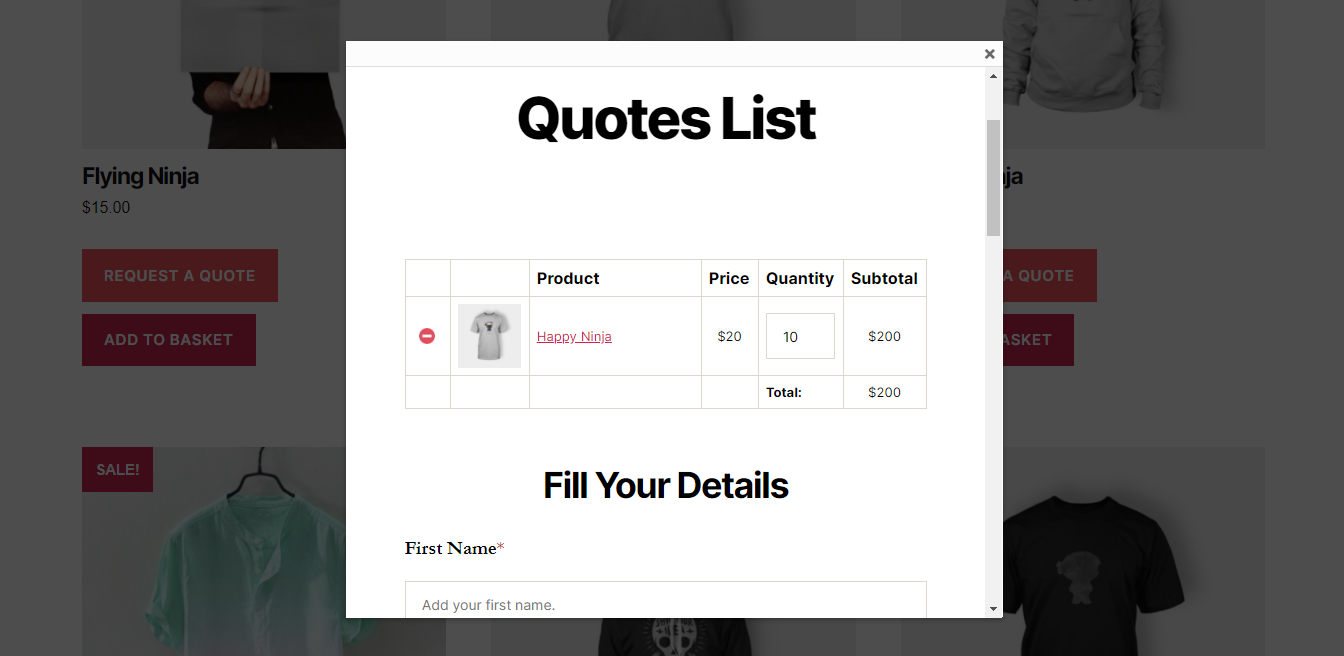
Open in a Lightbox: When you choose this option, the products the customer selected, as well as the form to place the order, will be opening up as a pop-up window. You can easily decide upon the dimensions of the pop-up window in the settings.
Once saved, the pop-up window will look like this as shown in the image below :
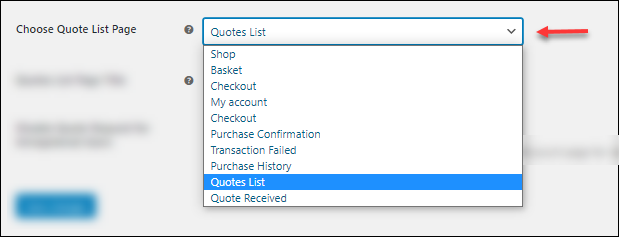
- Choose Quote List Page: Here you can choose the page on which the quotes appear. For better clarity, you can always keep it as the default page “Quote List”. To set the page, you can use the shortcode – [elex_quote_request_list]
- Quotes List Page Title: Here you can provide a title for the page where the quote lists are displayed. By default, it is used as ‘Quotes List’.
- Disable Quote Request for Unregistered Users: On enabling this, the unregistered/guest users cannot place the quote of the products. The unregistered users will be redirected to the page to register their account.
Once done, save the changes.
Step 3: Include and Exclude the products
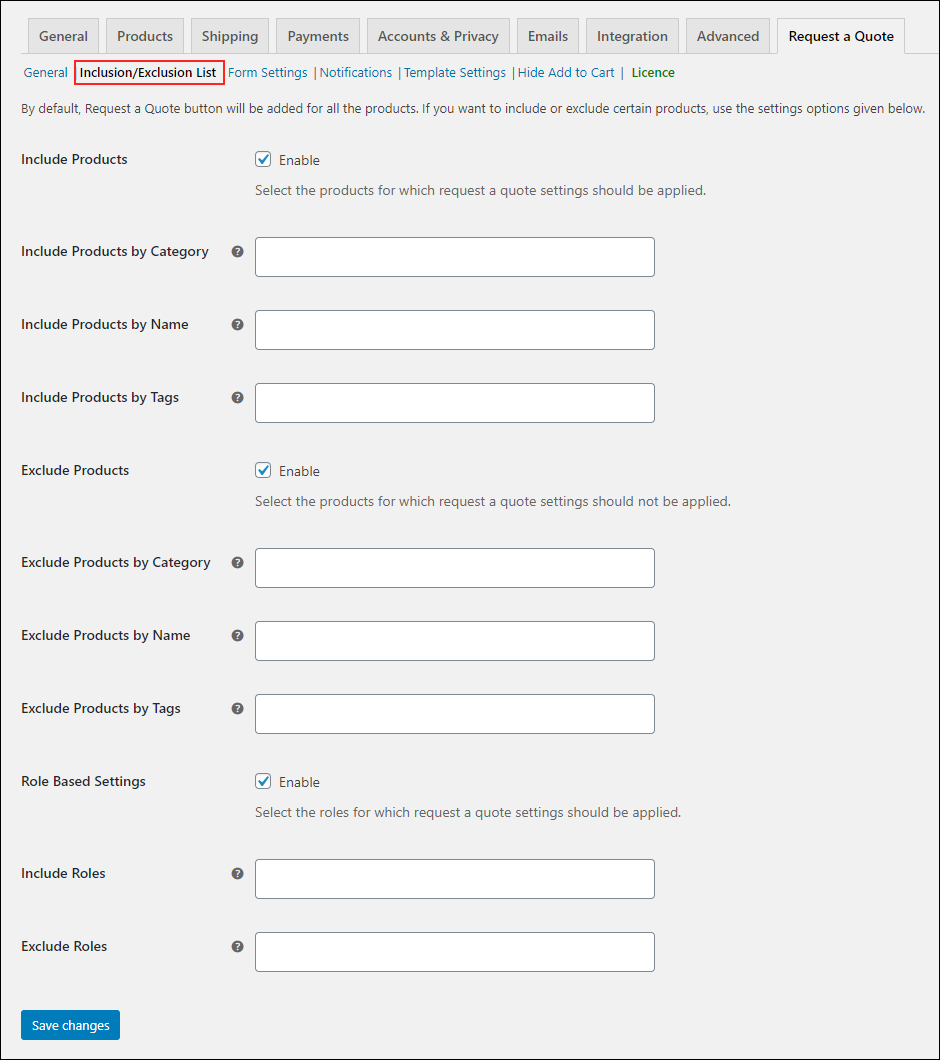
In this tab, you can include or exclude some products by their name, or any products under specific categories or tags to make it available for a quote request. Here you can even add user roles for the selective availability of the “Request a Quote” option.
The settings will be as shown in the image below :
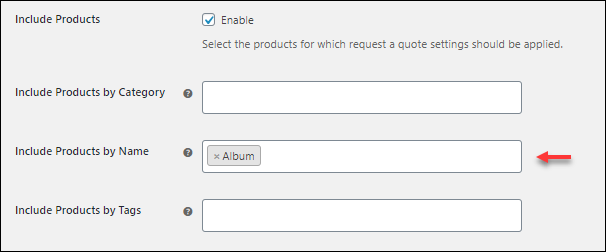
For example, if you want to include products with name as “Album”, then in the Include Products by Name option, you can provide “Album” as shown in the settings here :
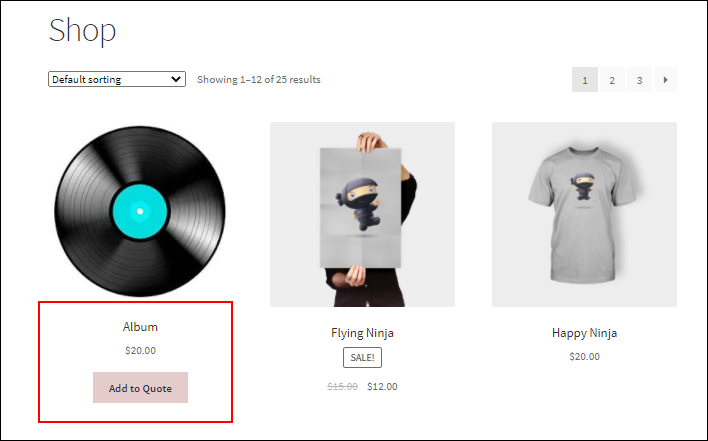
Once you save the settings, you can see that the “Request a Quote” option only appears for the products with the name “Album”, as shown in the image below :
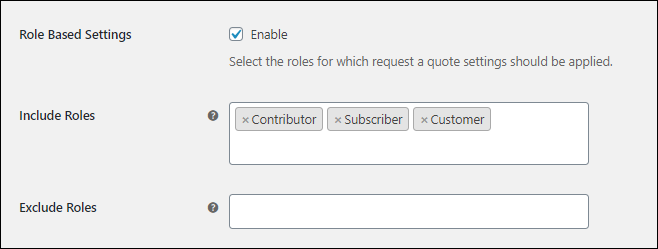
The same can be done for user roles. You can either include or exclude users in the option provided to include or exclude them for quote request as shown in the image below :
Step 4: Set up Form for requesting quotes.
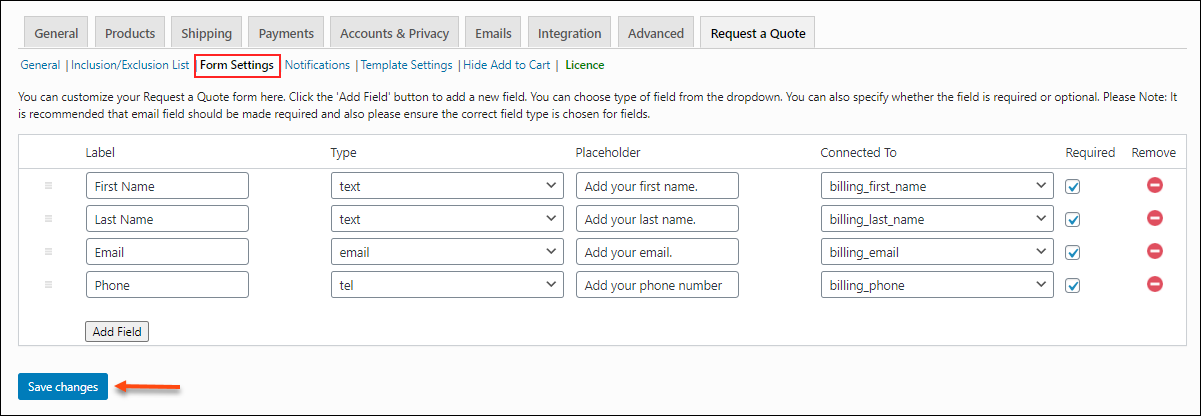
To let your customers place a quote request, you need to set up a form which contains relevant fields. You can easily design the form page to accept quote requests from your customers, using these settings as shown below. Here you can add or remove the fields as per your form design.
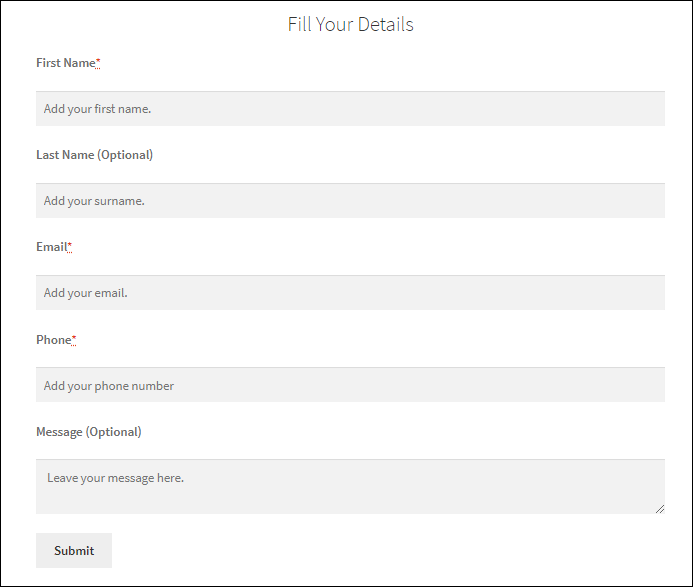
Remember to include the important fields here like the name, email address and phone number. Once done, a simple form will look like the image given below :
Step 5: Set up notifications.
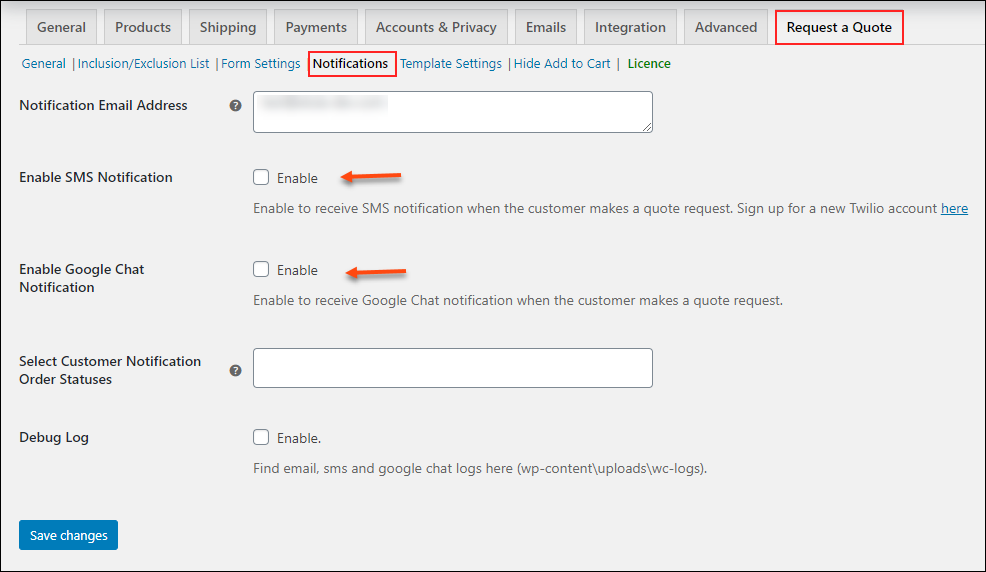
Whenever a quote request arrives, it is important to notify the store admin on the same. The plugin lets you set three kinds of notifications – email, Google Chat and SMS.
Here in the Notification Email Address field, you can provide multiple or single email IDs to which the notification email should be sent to. By default, the email used is the store admin’s email ID. To enable the SMS notification, you need to sign up to Twilio using your phone number and email ID. Once you register, you get details such as Twilio SID, Token and the Twilio Mobile Number. And you can enter the mobile number to which the notification has to be sent when a customer places a request for a quote on your store. To enable Google Chat notifications, you need to use the Webhook URL. Once you are done setting up the Webhook URL, you can easily get the Google Chat notification upon a quote request arrival.
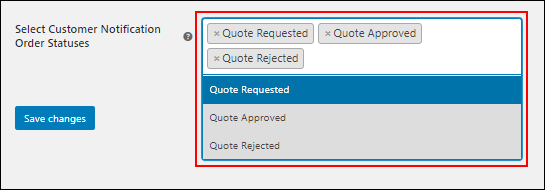
Once you are done processing the request, it is important to notify your customers also on the same. To do this, you can also set up customer notification upon the status update on the quote request. You can set in the plugin when to notify your customers as shown in the given screenshot.
Debug Log: You can enable this option to check the SMS and email notifications details that are triggered such as the subject, address, and mail/message body etc. You can find the details in WooCommerce > Status > Logs.
Step 6: Set up template settings.
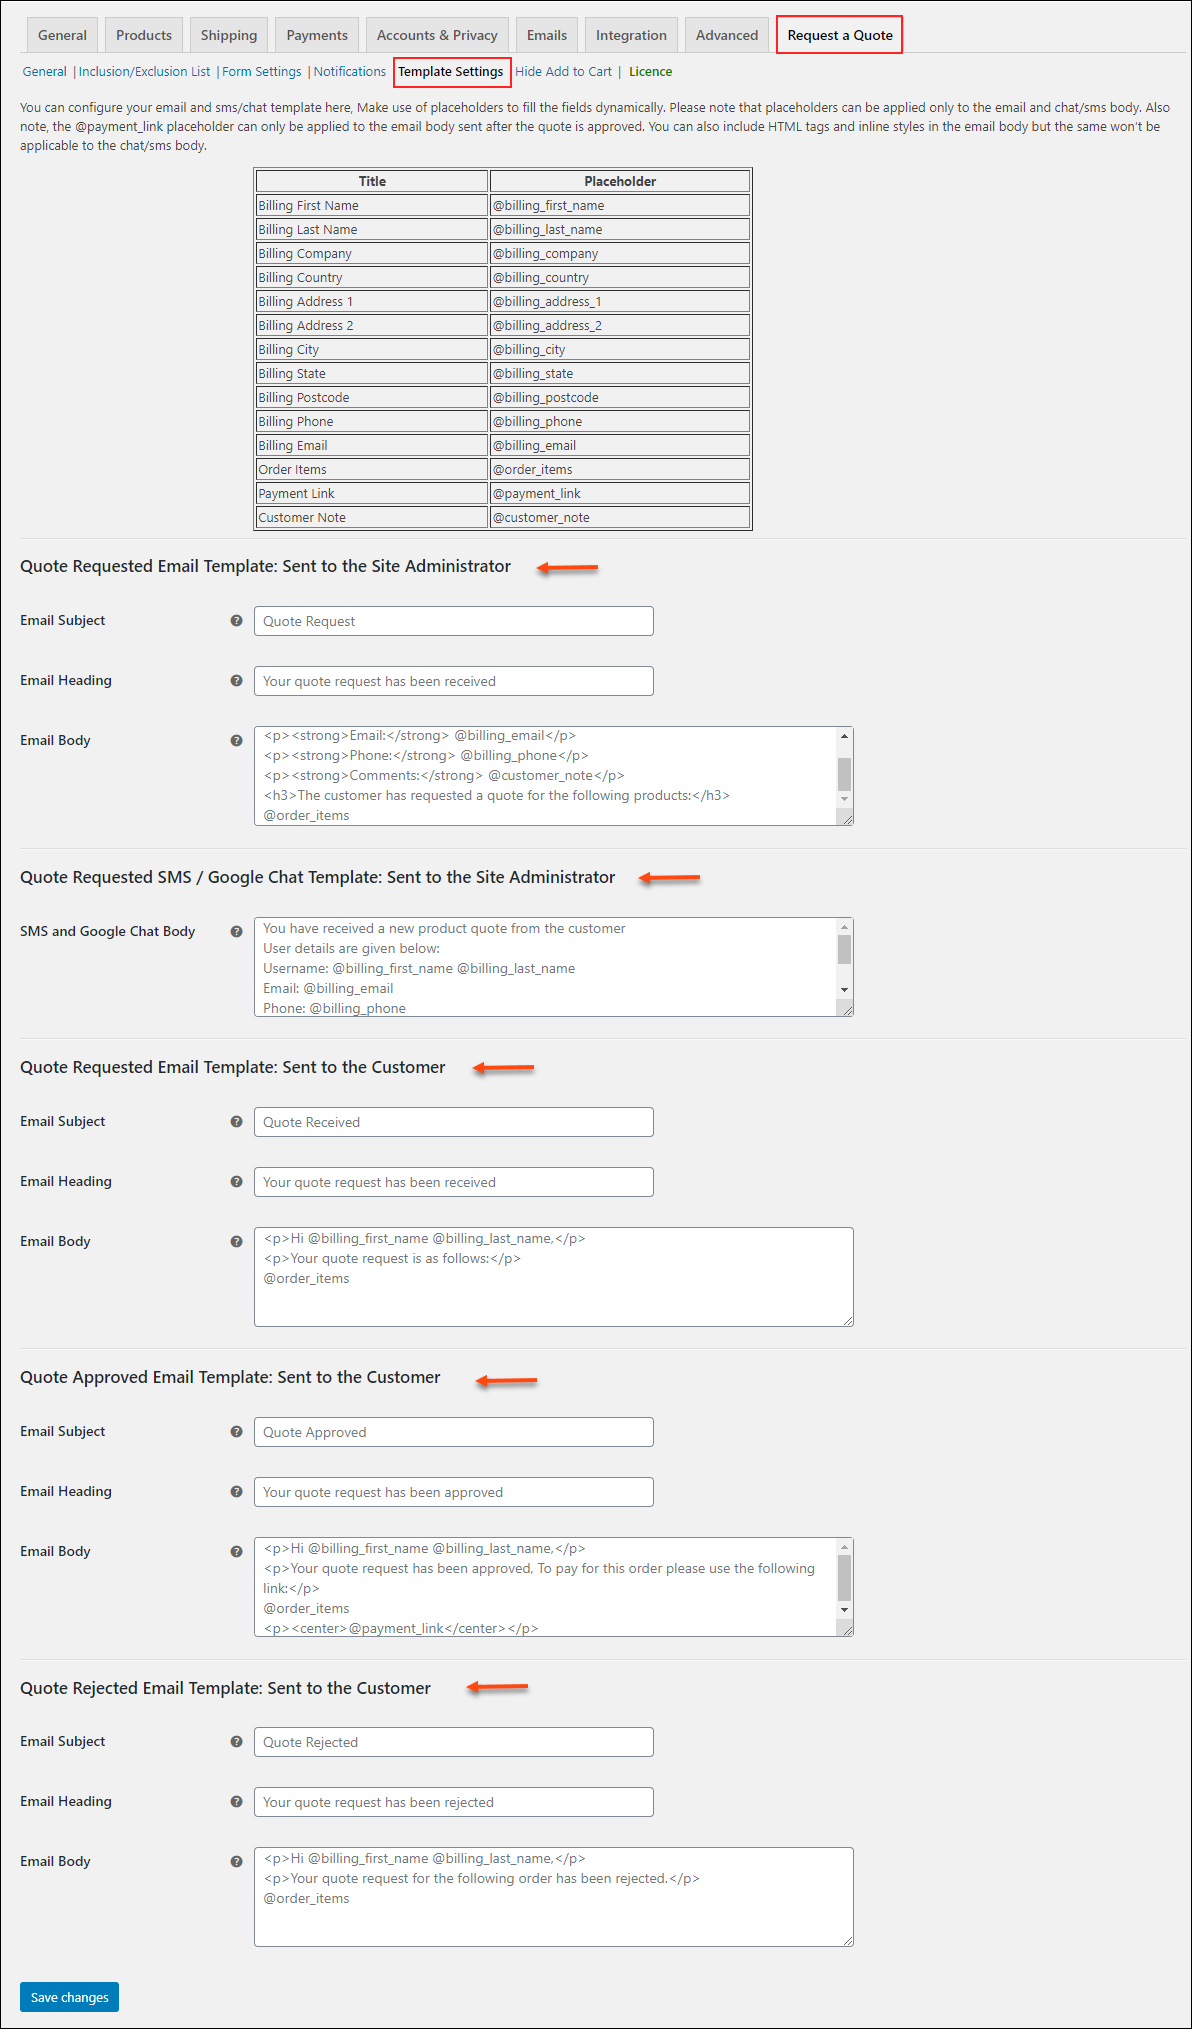
Here you can configure the template for email, chat, SMS notifications, which are sent to admin as well as to the customers. The settings will look like the image given below :
Read more about the Template settings here to get a better understanding.
Step 7: Hide Add to Cart Settings
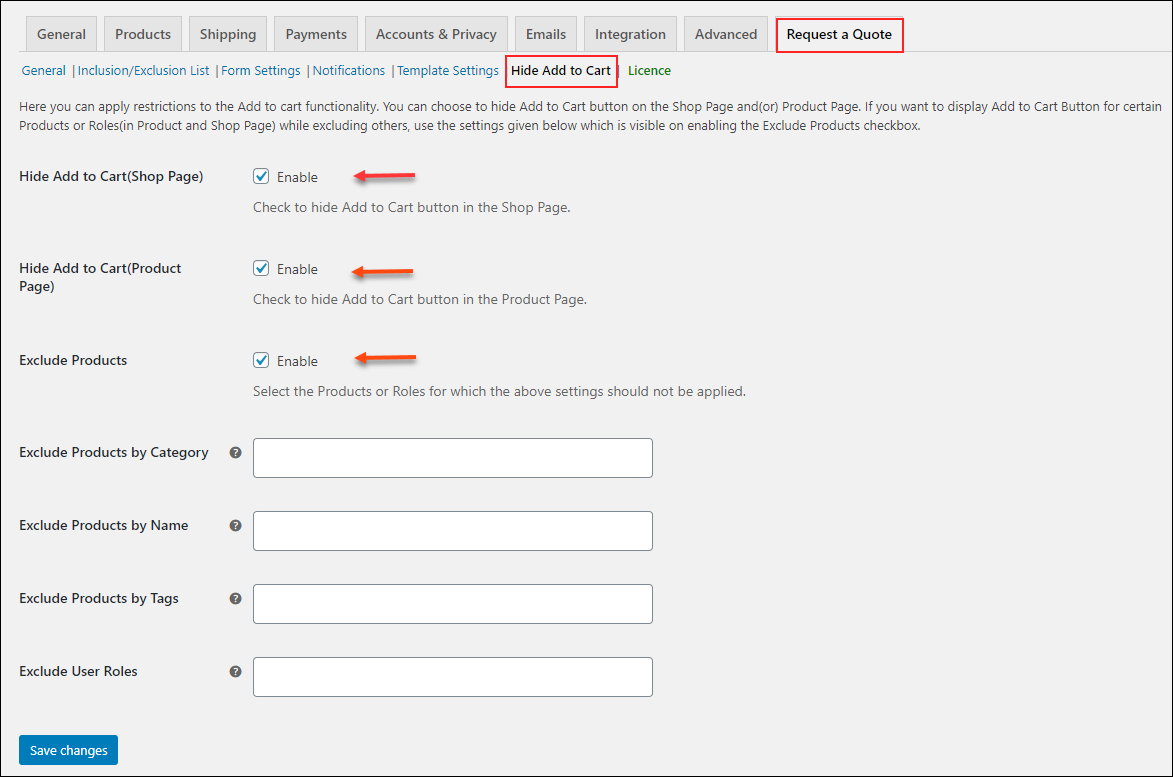
Using the settings provided here, you can hide “Add to Cart ” from the product page as well as shop page whenever “Request a Quote” option is available. Here again, you can exclude the same settings for certain products based on category, name and tags as well as for user roles as shown in the image below :
If you do not enable the option to hide the “Add to Cart” option, then you can see that “Request a Quote” option appears alongside the “Add to Cart” button.
As said above,
The above steps explain how to set up WooCommerce Request a quote plugin on your store for enhancing the shopping experience for your customers. Giving them the opportunity to negotiate the price of your products will build trust and improve the customer experience exponentially.
Further Reading


